Advertisement
Customers operating & assembly instructions
FOR YOUR SAFETY.
IF YOU SMELL GAS:
1. Shut off gas to the appliance.
2. Extinguish any open flame.
3. Open lid or hood.
4. If odour continues,
immediately call your gas
supplier or fire department.
P
N
. 8417100
ART
O
FOR YOUR SAFETY.
1. Do not store or use
gasoline or other flammable
vapours and liquids in the
vicinity of this or any other
appliance.
2. An LP-gas cylinder not
connected for use shall not
be stored in the vicinity of
this or any other appliance.
These instructions are a guide
to assembling and using
the propane and natural gas
versions of the Rinnai Outdoor
Kitchen range: Galley, Buffet,
Grand Café, Grand Gourmet
& Grand Monaco models.
Please read carefully, and
retain for future reference.
All reference to propane applies to LPG
in New Zealand.
Only to be used outdoors.
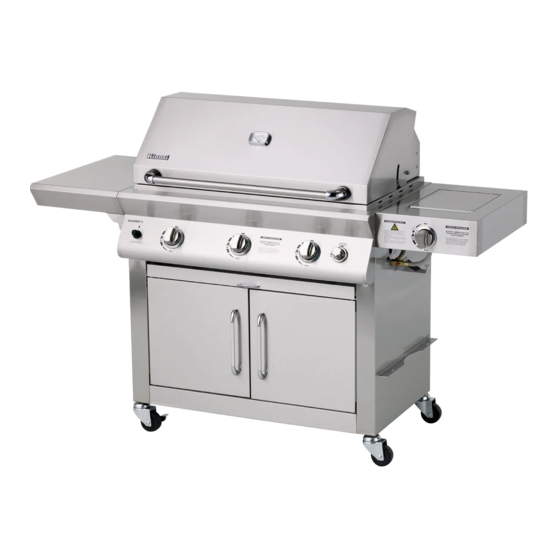
Illustration may vary from barbecue
contained in carton.
Advertisement

Subscribe to Our Youtube Channel
Related Manuals for Rinnai Galley series


Summary of Contents for Rinnai Galley series
- Page 1 Customers operating & assembly instructions These instructions are a guide to assembling and using the propane and natural gas versions of the Rinnai Outdoor Kitchen range: Galley, Buffet, Grand Café, Grand Gourmet FOR YOUR SAFETY. & Grand Monaco models. FOR YOUR SAFETY.
-
Page 2: Table Of Contents
You have just purchased a state of the art Rinnai Outdoor Kitchen Cooking System. At Rinnai, we understand your desire to protect an investment of this nature. As such this booklet has been designed to assist you in the assembling, testing and operating your new barbecue, along with important safety We thank you for choosing Rinnai and trust that you enjoy years of outdoor entertainment information, helpful maintenance tips and troubleshooting. -
Page 3: Hose And Regulator Safety
OPEN FLAME (Match, lighter etc). ACCESSIBLE PARTS MAY BE If you are unable to correct the leak by tightening VERY HOT. the connections, turn off the gas and contact the Rinnai KEEP YOUNG CHILDREN AWAY. immediately. ANY MODIFICATION OF THIS Always ensure the appliance is kept away from APPLIANCE MAY BE DANGEROUS. -
Page 4: Checking For Gas Leaks
If you have a gas leak you cannot repair, turn off the DO NOT STORE OR USE PETROL OR gas at the source, disconnect hose from barbecue OTHER FLAMMABLE VAPOURS AND and immediately call Rinnai/Rinnai supplier for LIQUIDS IN THE VICINITY OF THIS OR professional assistance. ANY OTHER APPLIANCE. - Page 5 Do not throw the shipping carton away; unfold flat and use as a protec- tive work surface. Contact Rinnai dealer for replacement parts if necessary. PARTS SUPPLIED SEALED IN THE CARTON OR BY YOUR DEALER MUST NOT BE ALTERED IN ANY WAY.
- Page 6 200 mm hose to connect side burner to 200 mm hose to connect side burner to manifold. manifold. Wok. Vinyl cover (Rinnai Aust). 2 Long legs. 2 Trolley legsets with storage cabinet end panels. 2 Short legs (with axle holes).
- Page 7 OUTDOOR KITCHEN OUTDOOR KITCHEN OUTDOOR KITCHEN GRAND CAFE GRAND GOURMET MONACO 5 packs 4 packs 5 packs Barbecue body with hood and 6 burners Barbecue body with hood and 6 burners Barbecue body with hood and 6 burners attached. attached. attached.
- Page 8 Diagram 1. TROLLEY ASSEMBLY This section applies to the Grand Monaco/Grand Gourmet/Grand Café/Buffet models. (Refer page 11 for Galley model ) NOTE: Study the assembly diagram and check the parts as listed. Identify and separate into groups. Castor Do not tighten bolts until all fittings are in position. Before attaching the trolley legs to bottom shelf Castor (broader fold), ensure the two (2) holes for magnetic...
- Page 9 Ignore this step for Buffet model. Diagram 4. Attach drawer track panels to both sides of top Drawer back panel panel refer diagram 4. Insert the bracket between the securing screw and fold of top panel. Secure firmly using the "...
- Page 10 21. Tighten and secure all screws, bolts and nuts used throughout this assembly procedure. Diagrams shown without barbecue body for simplicity. Diagram 9. Side shelf Side shelf Side burner Side burner Grand Monaco Grand Café (Rinnai Aust) Grand Gourmet Grand Buffet Grand Monaco...
- Page 11 Diagram 10. TROLLEY ASSEMBLY Right-angled (Galley model trolley assembly only) brace Do not tighten bolts until all fittings are in position. Support Place the legs with axle holes together on a clean Castor brace surface on their narrow sides. Position a right- legs angled brace between the legs as shown in diagram 10 and connect each leg to the brace using four (4)
- Page 12 Diagram 1. STORAGE CABINET ASSEMBLY (Built-in model) CONTENTS OF KIT 2 Legsets with storage cabinet end panels. 1 Back panel (storage cabinet) 900 x 245 mm. 1 Top panel (storage cabinet) 900 x 415 mm. 1 Bottom panel (storage cabinet) 900 x 415 mm. 2 Door assemblies.
- Page 13 Install magnetic door stoppers to bottom shelf and top panel. See diagram 4. Fix firmly using the Diagram 4. four (4) " x " phillips-head screws and nuts. Remove protective coating on the doors. Install door handle to front door by using two (2) M4 x6 mm phillips-head screws provided.
- Page 14 Before attaching the bowl support bracket to BUILT-IN SUPPORT BRACKET frame A ensure that the two holes for the trim plate are facing outward. See diagram, right. NOTE: Study the assembly diagram and check the Secure the bowl support bracket to Frame A parts listed.
- Page 15 INSTALLATION OF SIDE BURNER CONNECTING AND DISCONNECTING GAS PIPING CONNECTION TO GAS SOURCE 1. A 300 mm hose is factory IMPORTANT: Before connecting and disconnecting fitted to the dual outlet barbecue to gas source, make sure burner controls are adaptor of the side in ‘OFF’...
-
Page 16: Burner Operation And Ignition System Check
This barbecue is also certified for use on natural ALL GAS FITTINGS. gas. It must be converted by an authorised person. Contact Rinnai or the supplier for advice in relation CHECK PERFORMANCE OF to using your barbecue on natural gas. -
Page 17: Temperature Gauge
Diagram 13. COOKING COMPONENT INSTALLATION (Grand Monaco/Grand Gourmet) Check and ensure each burner is properly located over orifice prior to installing the plates. IMPORTANT: Before first use, wash the grillplates and warming rack with warm, soapy water. Rinse and dry thoroughly. Season with cooking oil regularly. Swing-away After cooking is completed, turn barbecue to high warming rack... - Page 18 LIGHTING. Burn-off: Before cooking on your BBQ for the first time, burn-off The Rinnai Outdoor Kitchen 6 Burner is fitted with any residual oils or foreign matter by igniting the burners. electronic multi-spark ignition to each burner. ENSURE THE LID IS REMOVED OR THE HOOD OPEN, and operate at ‘HIGH’...
- Page 19 LIGHTING THE SIDE BURNER COOKING WITH THE HOOD DOWN (ROTARY PIEZO IGNITION) (Grand Gourmet/Grand Café/Buffet/Galley Cooking with the hood in the closed position models only) helps to cook food more quickly than in conventional barbecues with a simple lid. The hood (when closed) Lid must be open before lighting.
-
Page 20: Rotisserie Cooking
When rotisserie cooking, place a drip pan of some IMPORTANT SAFETY POINTS sort under the food to be cooked. This will capture the drippings and keep barbecue clean of excess grease The Grand Monaco model comes with a unique which could cause a fire. Water may be added to drip 240 Volt driven rotisserie motor. - Page 21 CAUTION: IF BURNERS GO OUT IF BARBECUE FAILS TO OPERATE PROPERLY DURING OPERATION, CLOSE GAS SUPPLY AT SOURCE, AND TURN ALL Turn off gas at source, turn burner control to GAS VALVES OFF. ‘OFF’. OPEN HOOD AND WAIT 5 MINUTES Wait five minutes before trying again.
- Page 22 CARE AND MAINTENANCE CLEANING THE BURNER TUBES AND BURNER PORTS (TO PREVENT FLASH-BACK) As with all appliances, proper care and mainte- nance will keep them in top operating condition and To reduce the chance of flash-back, the procedure below should be followed at least once a month in late prolong their life.
- Page 23 (Optional questions to assist our continuous improvement program) any scratches in the paint which may occur with use. Before this purchase, were you aware of Rinnai Aust? These scratches may expose bare metal and leave the unit If yes, were you aware that Rinnai produced susceptible to material breakdown.
-
Page 24: Guarantee
GUARANTEE OUR BRANCHES As the purchaser of a high quality Rinnai barbecue, we Rinnai Australia has a service network in most states. provide you with the following guarantee. Our service network personnel are fully trained and equipped to give the best service on your Rinnai appliance.
Need help?
Do you have a question about the Galley series and is the answer not in the manual?
Questions and answers