
Related Manuals for Snap-On EEWB330A


Summary of Contents for Snap-On EEWB330A
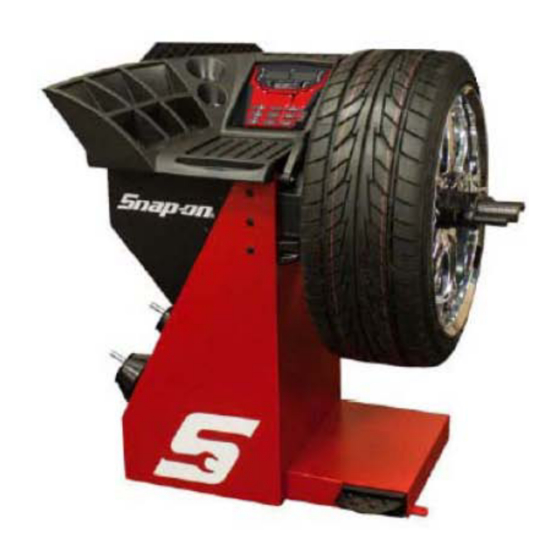
- Page 1 EEWB330A HANDSPIN WHEEL BALANCER For: PASSENGER CARS AND LIGHT TRUCK WHEELS Operating Instructions Form ZEE330A Rev C ...
- Page 3 For your safety, read this manual thoroughly before operating the Model EEWB330A Wheel Balancer The Model EEWB330A Wheel Balancer is intended for use by properly trained auto- motive technicians. The safety messages presented in this section and throughout the manual are reminders to the operator to exercise extreme caution when servicing tires with these products.
- Page 4 IMPORTANT SAFETY INSTRUCTIONS When using this equipment, basic safety precautions should always be followed, including the following: Read all instructions. Do not operate equipment with a damaged power cord or if the equipment has been damaged - until it has been examined by a qualified authorized service technician. If an extension cord is used, a cord with a current rating equal to or more than that of the machine should be used.
- Page 5 Read carefully all warnings and instructions of this manual since they provide important information concerning safety and maintenance. 1.2 BALANCER APPLICATION The Snap-on wheel balancer model EEWB330A is intended to be used as equipment to balance car, and light truck wheels within the following range: Maximum wheel diameter : 42”...
- Page 6 Snap‐on EEWH330A Handspin Wheel Balancer 1.3 EEWB330A SPECIFICATIONS 1.4 FEATURES Computerized digital wheel balancer for car, light ACCURACY truck wheels. • Weight placement accuracy i s ± .7° • Weight imbalance accuracy to 2 grams. Weight Imbalance Accuracy .10 oz / 2 grams • Self test check with every power up cycle. Weight Placement Resolution ± .7 degrees • Fast operator calibration. Weight Imbalance Resolution: • Pre‐programmed Error Codes indicate procedural Roundoff Mode .25 oz / 5 grams errors or safety concerns. Non‐Roundoff Mode .05 oz / 1 gram Max. Shaft Weight Capacity 120 lbs / 54 kg SPEED and DURABILITY Max.Tire Diameter 42" / 1067 mm • Automatic distance and diameter entry. Simply touch the SAPE arm to the wheel, the distance and diameter Rim Width Capacity 3"‐20" / 76 mm ‐ 508 mm Rim Diameter Capacity 8"‐30" / 203 mm‐762 mm parameter is automatically entered. Balancing Cycle Time. 6 to 8 seconds or less • Quick clamp speed nut reduces wheel mounting time. Shaft Speed at calculation < 100 RPM • Captured back spring eliminates having to handle the backing spring. Electrical 115 1ph, 60Hz, 2A ...
- Page 7 Model EEWB330A Handspin Wheel Balancer____________________________________________________ 1.5 STANDARD ACCESSORIES Standard accessories ( Figures 1, 2, and 3,) included with the EEWB331A are: 1 EAM0003J69A Cone, 87‐137 mm / 3.4”‐5.4” 2 EAM0005D25A Cone, 96‐114 mm / 3.8”‐4.5” 3 EAM0005D24A Cone, 71‐99mm /2.8”‐3.9” 4 Figure 2 EAM0003D23A Cone, 40‐76mm / 1.6” ‐3.0” 5 EAC0058D07A Cup ‐Pressure 6 EAC0058D08A Weight Pliers (Figure3). Disk ‐Pressure 7 EAA0263G66A Quick Nut 8 Versatile weight hammer/plier. In addition to EAM0005D40A Weight ‐Calibration 9 hammering on weight and used weight removal, the EAM0021D90A Standard 40mm Stub Shaft hammer/ plier can be used to reshape worn weight clips and trim weight to size. 10 EAA0247G21A Caliper ‐Rim Width 11 EAC0060G02A Flange ‐Cover, Hook 12 EAM0006G01A Pin ‐Accessory 13 58839 Weight Pliers 14 EAM0005D34A Fastening Rod 15 EAC0058D15A Soft Protector ring 1.6 OPTIONAL ACCESSORIES Snap‐on Deluxe Wheel Weight Plier – WWPR13A ...
- Page 8 Snap‐on EEWH330A Handspin Wheel Balancer PRE‐INSTALLATION CONSIDERATIONS 1.7 DIMENSIONS OF THE MACHINE Figure 5 ‐ Recommended Work Area 1.9 INSTALLATION INSTRUCTIONS Figure 4 ‐Actual Footprint Dimensions. CAUTION! CAREFULLY REMOVE THE BALANCER FROM 1.8 REQUIRED INSTALLATION AREA THE PALLET. Remove the hardware that secures the machine to the Make sure that from the operating position the pallet and slide the balancer onto the floor where it is to user can see all of the machine and the be installed. surrounding area. THE UNIT IS HEAVY AND THE WEIGHT IS NOT EVENLY ...
- Page 9 Snap‐on EEW B330A Handspin Wheel Balancer_________________________________________ Before using the wheel balancer it is suggested that you become familiar with the terminology and features of the machine’s components. Refer to Figures 9 and 10 for identification and location. 1. Parameters‐ Rim Offset ‐Key is used to enter the rim offset position using numbers from the distance gauge. Rim Width ‐Press this key to enter the rim width. Use the rim width calipers for measurement. Rim Diameter‐Enter the rim diameter .Read the size stated on the tire sidewall. 2. Inside Weight Amount and Function Display Window‐Shows inside or left weight amount and various operation messages. 3. Position Indicator LEDs ‐Displays the location for wheel weight placement. 4. Outside Weight Amount and Function Display Window Shows outside or right weight amount and various operation messages. 5. Enter Key –Stores the data. Figure 9 ...
- Page 10 Snap‐on EEWB330A Handspin Wheel Balancer B. Install the accessory pins (Figure 7). Tighten firmly. NOTE: Any electrical outlet installation must be verified by a licensed electrician before connecting the balancer. NOTE: This machine performs a self‐test routine on start‐up. There will be a delay of several seconds before the display is activated. CABINET ‐ Figure 10 Figure 7 12. Display ‐ Easy to read, user friendly display featuring large LEDs and one button functions. C. Place cones and other accessories onto the 13.Weight Storage Tray ‐ Generous storage for a variety accessory pins. of weight profiles and sizes as well as built in storage pockets for the standard centering cones. 2.1 ELECTRIC INSTALLATION 14. Accessory Storage ‐ Four sturdy side mounted pegs are supplied for storage of additional accessories. ANY ELECTRICAL WIRING MUST BE PER‐FORMED 15. Semi‐Automatic Parameter Arm ‐ Rim distance and BY LICENSED PERSONNEL. ...
- Page 11 Model EEWB330A Handspin Wheel Balancer_ ____ _ ___ _ __ ____ _ ___ ___ _ ___ ____ ___ _ ___ _ ___ _ __ ____ ___ 4.0 OPERATION OF THE BALANCER 4.2 WHEEL MOUNTING WARNING: For operator safety, please read and Nearly all standard wheels and many alloy wheels have follow the precautions outlined on pages 1 and 2 of accurately machined center holes, and they should be this manual. mounted with center cones. Accurate balancing ...
- Page 12 Model EEWB330A Handspin Wheel Balancer_ ____ _ ___ _ __ ____ _ ___ ___ _ ___ ____ ___ _ ___ _ ___ _ __ ____ ____ _ 4.2.3 WHEEL MOUNTING REQU IRING SPEC IAL TOOLING Clad wheels: A Clad Wheel is a wheel casting ...
- Page 13 4.3 MODE SELECTION Use the gauge arm to touch the inside rim edge position (B) for the tape weight placement. The LED The majority of balancing tak es place in the default will flash and tone when the value is stored in m 2‐plane dynamic mode. Green LED’s A and E (See emory. The inner LED (C) will flash. Continue to figure 15) Hammer‐on clip weights will be placed on extend the gauge are to the (C) weight placement both inside and outside of the rim edge. If required, position. When the balancer tones, the position is select an optional weight placement mode by accepted. Store the gauge arm in the complete pressing the Mode button until the appropriate home position. placement mode is displayed. ...
- Page 14 Snap‐on EEWB330A Handspin Wheel Balancer 5.5.1 Selecting the Alu types Images shows the corrected weight application positions for adhesive weights and clip‐on weights. Note: The Alu1P mode is included in the Easyalu function, but must be recalled after the gauge have been positioned on the rim. * Select the menu key (Fig. 5‐12) to recall the required ALU P weight positions. Fig. 5‐13 Given weight position normal. Normal weight and clip‐on weight positions on the rim flange ‐ this mode is presented immediately by the Easyalu function. Alu 1 Adhesive weights applied symmetrically to the rim fl anges with NOMINAL weight positioning. Function not included in Easyalu mode. Alu 1P Adhesive weights applied symmetrically to the rim flanges; the compensation planes for the adhesive weights are read precisely using the internal and external gauge arm. Alu 2 Adhesive weights ‐ Adhesive weight on rim flange, adhesive weight hidden in rim disc with NOMINAL positioning. Function not included in Easyalu mode. Alu 2P Adhesive weights ‐ Adhesive weight on rim flange, adhesive weight hidden in rim disc; the compensation planes for the adhesive weights are read precisely using internal calibration. Alu 3 Clip‐on weight on left rim flange, adhesive weight hidden in rim disc. Function not included in Easyalu mode. Weight positioning is NOMINAL. Alu 3P Clip‐on weight on left rim flange, adhesive weight hidden in rim disc; the compensation planes for the adhesive weight is read precisely using internal calibration. ...
- Page 15 Snap‐on EEWB330A Handspin Wheel Balancer 5.6 Dimensional detections The dimensions of the balance weights are detected, on the basis of real data, or rather on measurements taken directly by the Gauges if the automatic Easy Alu function is used. If the data is entered manually these figures are calculated on the basis of nominal values by adding or subtracting the average correction values. 5.6.1 Calibration Gauge The internal Calibration Gauge for distance and diameter is used to enter the distance between the machine and the left correction plane, as well as the nominal rim diameter/correction diameter. The internal Calibration Gauge allows the effective correction planes and diameters of the adhesive weights fixed to the bead seats and hidden weights to be calculated exactly. Fig. 5‐14 Internal Calibration Gauge for rim distance and diameter. 1 Internal Calibration with gauge head 2 Gauge head 3 Reference edge for distance reading X– Using the distance and diameter measurement Internal Gauge (1, Figure 5‐14) the distance between the machine and the left correction plane is detected and obtained automatically as well as the diameter of the rim. Application: Extract and rest the Gauge Head on the rim and keep it in position until an audible signal is heard. Move the Gauge to the idle position. When the measurements have been completed and the idle position is reached, the rim dimensions are shown on the Display. A selection of weight positions (Alu type) is also shown. If the Gauge doesn’t function correctly or if the correction positions on the wheel on the machine are outside the calibration reading field, it is still ...
- Page 16 Snap‐on EEWB330A Handspin Wheel Balancer 5.6.2 Gauge head application on various Wheel types In order to be able to determine unbalance in a single measuring run, the rim dimensions have to be entered correctly. Therefore proceed with utmost care and as is shown in the Figures when applying the gauge head on the rim in the desired weight fitting position. Incorrect application will result in deviations of measured values and consequently inaccurate results of the measuring run. Fig. 5‐15 a to 5‐15 f show correct application (with and without adhesive weight) of the gauge head on various rims and for various weight fitting positions. Fig. 5‐15 a Standard wheel – Steel rim1 Gauge head 2 Rim Fig. 5‐15 b Standard wheel – Alloy rim Fig. 5‐15 c Light‐truck wheel – Steel rim Fig. 5‐15 d Light‐truck wheel – 15° taper steel rim Fig. 5‐15 e Alloy wheel ‐ Rim without a housing for clip‐ on weights Fig. 5‐15 f Alloy wheel – Adhesive weights ALU Left correction plane, first application position 2 Right correction plane, second application position. ...
- Page 17 Snap‐on EEWB330A Handspin Wheel Balancer 5.6.3 MANUAL Data Entry Manual data entry is required in case of gauge arm malfunctions. Proceed as follows: 5.6.3.1 Manual entering of the rim Width. Rim width can be entered via the menu keys, in this case the rim diameter has to be determined manually. If rim width is not given on the rim, it can be measured on standard rims using the optional Rim Width Caliper (Fig.5‐16). Access the function ENTERING RIM WIDTH selecting the key W (Fig. 5‐17). Press the key ‐or+ (1, 2, Fig.5‐17) until the required value is reached. 5.6.3.2 Manual entering of the Offset. Position the gauge arm correctly (1,Fig.5‐18). Access the ENTERING RIM OFSET selecting the key O (Fig.5‐17). Read the arm extract the value on the gauging rod. Enter the value read previously using the appropriate keys ‐or+ (1, 2,Fig. 5‐17). 5.6.3.3 Manual entering of the rim Diameter. Read the nominal rim diameter directly on the rim or tire itself. Select the DIAMETER; key D on the control panel (Fig.5‐17). Enter the value read previously using the appropriate keys ‐or+ (1, 2,Fig.5‐17). Select another measurement to edit (if necessary) or spin the wheel. ...
- Page 18 Snap‐on EEWB330A Handspin Wheel Balancer 5.7 Easy Alu function The Easy Alu function automatically recognizes the Alu required by the operator and the rim dimension parameters, once the gauge has been positioned on the rim. The machine presents only the possible Alus in relation to the contact points selected by the operator. Note: Alu 4 and Alu 5 are not included in the Easy Alu function. They require manual setting by the operator. At this point you can change the Alu mode suggested by the machine, using the “Easy Alu Toggle” function (Fig. 5‐19). 5.7.1 Automatic rim dimension reading and setting and Alu Mode Preparations:‐ Compensation run carried out, if necessary (C4 7.1.1). Wheel correctly clamped ( 5.1). Important: Calculation and recommendation for optimization, as well as the optimization procedure itself, will only be accurate if the rim width has been correctly entered. Automatic rim distance and diameter reading with an internal gauge arm. Move the internal gauge arm gauge into position on the rim to select the initial weight application position (internal rim side). Keep it in this position until an audible signal is heard. For Alu2P and Alu3P (Fig. 5‐20): Position and hold the internal gauge in the second position on the rim to select the application position on the right side of the rim. Shortly afterwards the machine emits an audible signal to indicate that the machine automatically saves the weight application coordinates. Move the gauge to the idle position. For Alu2P and Alu3P you can proceed with a measuring run. ...
- Page 19 Snap‐on EEWB330A Handspin Wheel Balancer 5.8 Balancing Preliminary operations:– If necessary, perform a compensation run (C4 7.1.1).– Check the wheel is clamped correctly ( 5.1).– Read the rim dimension parameters ( 5.6). If more than one wheel of the same type needs to be balanced (the same nominal dimensions) the data need only be set for the first wheel. The selections stay set until other new data is set or the machine is switched off. 5.8.1 Measuring imbalance Having completed the preliminary operations, a Measuring run can be launched: Wheel measuring run PROFILING mode. After measurement the balance weights can be fitted, or a weight minimization or optimization run ( 5.11) can be carried out. After measurement the machine stops automatically and the wheel is braked. The screen shows the unbalance measured for each correction plane and the direction towards correction. ...
- Page 20 Snap‐on EEWB330A Handspin Wheel Balancer 5.9 Weight application The following weight types and application methods are available: ‐ clip‐on weights: Always apply by hand (Fig. 5‐ 17).‐ stick‐on weights: Must be applied by hand (Fig. 5‐ 18), or using the gauge head, for the Alu 2P, Alu 3P or easy weight mode. Note: Hand applied weights must be applied exactly perpendicular to the shaft (12 o’clock position). After spinning the wheel look at the rotation indicators for the left plane of the wheel (1, Fig. 5‐19): As the correct wheel angle position gets closer a further indicator lights up. When all the indicators are ON (2, Fig. 5‐20), the WAP indicator will also light up (3‐Figura 5‐20). Note: When the correct angle is reached all the rotation indicators should be ON. If the wheel has been pushed too far, only the indicators of the other half will come ON (Figure 5‐21). If this happens, the wheel must be delicately turned in the opposite direction until the WAP position is reached. The weight to be applied in that plane is shown on the display. Attaching a clip‐on weight. Refer to Figure 5‐17. Clip‐on weights must always be applied in the 12 o’clock position. The lip should rest on the rim edge. Use the weight pliers to position it. In STATIC mode only the left hand display is used. Attaching a stick‐on weight. ALU or STATIC weight modes only: Refer to Figure 5‐18. Apply the weight on the rim in the 12 o’clock position, always by hand. Note: With STATIC weight modes, always apply the weight at the rim centre line. If not possible, split the ...
- Page 21 Snap‐on EEWB330A Handspin Wheel Balancer 5.9.1 Alu 2P and Alu 3P (HWM) weight modes: Refer to Figure 5.22.The gauge arm must be used to apply the stick‐on weight(s). Index the wheel to the exact position for correction in the right correction plane. Once the correct weight application position is reached, only the central LED is on (1, Figure 5.23). Press the pedal of the main shaft lock to hold the wheel in this position. Decide to use Split Weight Mode «SWM» now (5.10). Clean the fitting position before attaching the adhesive weights. Insert at the centre of the gauge arm an adhesive weight that complies with the imbalance measured and remove the protective tape from the adhesive strip (a, Figure 5‐24). Note: While moving the arm, a beep indicates that the correct application position has been reached. Apply the weight to the correct point on the rim. Apply the weight to the correct point on the rim. Rotate the wheel to the next WAP position (2, Fig. 5.23), put the stick‐on weight on the gauge arm and apply the weight at the left plane reference point. After applying the balance weights perform a Test Run. 5.9.2 Check spin It is good practice to perform a check spin after applying the weights. Spin the wheel. Having finished the Test Run, if the wheel is balanced correctly, both the numerical indicators should indicate 000.To check how much imbalance is left: Select the FINE key (Fig. 5‐25). Note: The operator should decide if applying the stated weight. 5.9.3 Results recalculation. After spinning a wheel it is possible to enter new rim data or select another weight mode. The results are recalculated automatically, if possible. Selecting another weight mode ‐ Between NORMAL, ALU and STATIC: No additional steps required. ...
- Page 22 Snap‐on EEWB330A Handspin Wheel Balancer 5.10 Behind–the–spokes placement (SWM) When spoke wheels are balanced, the behind–the– spokes placement mode (also called split weight mode) allows balance weights which would have to be fitted between two spokes according to the measured unbalance (hence would be visible from outside) to be placed in hidden position behind two spokes adjacent to the unbalance location (see example, Fig. 5‐26). After a measuring run the electronic unit calculates the behind– the–spokes placement automatically and reads the relative balance weight locations on the screen. The operating steps for the behind–the–spokes placement mode are described and illustrated below. 5.10.1 Split Weight Mode (SWM) Selecting is possible only after balancing a HWM wheel that has an imbalance 10 gram in the right plane. Note: The “fine” read‐out accuracy is not available with this mode. Select this mode to “hide” the right plane weight behind the two spokes that are nearest to the calculated weight application position. That way, the weights are not visible from “outside”. Take into account the following limitations (Fig. 5‐27):‐ the whole enclosed angle is limited to 120°.‐ both angles (from “visible weight position” to either “hidden weight position”) must be bigger than 0°. Apply the weight in the left plane of an HWM wheel. DO NOT apply the weight in the right side plane, but select the MODE‐key. The display now equals (Fig. 5‐28) (the weight position and HWM indicators depend on the HWM mode selected). Note: The MODE indicator will be on and the SWM indicator will blink. If the SWM indicator does not ...
- Page 23 Snap‐on EEWB330A Handspin Wheel Balancer Note: The offset and diameter dimensions were already entered during the HWM rim dimension input. During data entry and weight application, the right hand display shows “S1” (Spoke 1, weight position 1) or “S2” (Spoke 2, weight position 2) as long as S1 or S2 are within the specified rotational angles. Else “S ‐ ‐“ will be shown. S1 will appear on the display, (Fig. 5‐29a). Rotate the wheel until a spoke is at 12 o’clock position and select Enter. If the position is legal (within the specified angle) a short beep will be heard. If an illegal position of the wheel is created and Enter is selected, a long beep will be heard. Check the rotational position of the wheel. S2 will appear on the display, (Fig. 5‐29b). Repeat previous step for S2.If the position is legal, a short beep will be heard. The unit will calculate the weights that must be applied to position S1 and S2. Slowly rotate the wheel by hand to a weight application position, (Fig. 5‐ 30). Apply the weight with the gauge arm. Slowly rotate the wheel by hand again until the WAP indicator goes off and on again. Apply the weight with the gauge arm. Select Enter to exit this mode. Selecting Enter several times (depending on the stage of the program) forces the program to quit. The original right plane weight value will be shown again. The SWM indicator will go off, a short beep will be heard. The program returns to the main menu. Note: Applying split weights does not involve priorities. The operator can choose which to apply first. Note: The unbalance reading is only subdivided on two fitting positions when the spoke position is stored. When balancing with counterweights positioned behind the spokes if you also need to perform an Optimization/Minimization run, do it before applying the weights. ...
- Page 24 Snap‐on EEWB330A Handspin Wheel Balancer 5.11 Optimization / Weight Minimization 5.11.1 General Optimization is a finer form of matching. During the opto–ride procedures the rim and tyre are adjusted relative to each other on the basis of different unbalance measurements. This generally means that, where present, lateral and radial run–out and radial and lateral force variations are reduced and thus wheel running conditions optimized. In addition, the mass (balance weight) necessary for balancing can be reduced. If optimization is not desired, it is possible to achieve weight minimization (so–called matching).This is e. g. possible if the rim does not exhibit geometric deformations, in other words when unsmooth wheel running conditions are a result of a non–uniform tyre. In this case the unbalance of the rim can be readjusted relative to the unbalance of the tyre such that the unbalances compensate each other and the smallest possible weight for unbalance correction is determined. 5.11.2 Instructions for the optimization / weight minimization programs Compensation of unbalance of the clamping device is cancelled by starting an optimization or minimization run (C4 7.1.1).Preparation: Make sure the tyre is correctly mounted on rim and inflated to specified inflation pressure (mounting guide rib of the tyre must be correctly seated).Clamp the wheel. Enter correct rim dimensions, or check existing inputs for correctness. Select the MODE‐key until the Minimization indicator blinks. The “M” indicator will start blinking. The display now equals Figure 5‐31.Note: The MODE‐indicator will be ...
- Page 25 Snap‐on EEWB330A Handspin Wheel Balancer 5.11.3 Start optimization/weight minimization. Balancing optimization program cycle The following is a description of the balancing optimization program cycle (code OP)and weight minimization (code UN). Balancing optimization Figure 5‐32. If after the measuring run the imbalance in the left or right correction plane and/or the static imbalance is more than 30grams, perform automatic optimization by activating the FINE+ENTER key (3+1). Before optimization check that the rim dimensions have been set correctly. You cannot correct the data later. Demount the tire and clamp only the rim for the compensation run. Press the ENTER key (1). The OP.1 reading appears (Fig.5‐33).In all figures in which the valve symbol appears on the edge of the rim, shift the tire on the rim then press the ENTER key (1) to set the valve position (exactly perpendicular to and above the main shaft). Read just the rim so that the valve is exactly perpendicular to and above the main shaft. Press the ENTER key (1) to acquire the valve position. The OP.2 reading appears. An incorrect valve position entry can be corrected afterwards. Weight minimization ‐If no optimization, but only weight minimization (i.e. without compensation run for the rim without tire), proceed as follows: Clamp the complete wheel (rim and tire). Press FINE (3)+ENTER key (1) if minimization is started separately from optimization. The OP.1 reading appears. Press the FINE key (3) to activate the weight minimization program. The Un.3 reading appears; run the minimization program. With program ...
- Page 26 Snap‐on EEWB330A Handspin Wheel Balancer After the measuring run the OP.3 reading appears. Mount the tire and inflate correctly (see note below). Note: For mounting and demounting (tire changer) and tire turning or read adjustment on the rim, always apply a sufficient amount of tire lubricant on the tire beads and the rim edges and shoulders .Each time the position of the tire is changed on the rim ,inflate the tire to over pressure (approx.3.0bar/43 psi) then deflate to correct tire pressure. Make sure the centering line is positioned on the tire bead. Clamp the wheel. Position the valve exactly perpendicular to and above the main shaft. Press the ENTER key (1) to acquire the valve position. OP.4 appears (Fig. 5‐34). Spin the wheel (START).The measuring run is carried out. After the measuring run two readings are possible: OP.5 ‐H1 Further optimization is not recommended, but possible.OP.5 –I (1Reference markFig.5‐35). Continue with the OP program. Reading OP.5 ‐H1IfOP.5‐H1 appears, further optimization is not recommended, since the measurement values which activated the optimization recommendation are below the limit value. However, it is possible to continue optimization for the most silent possible wheel running, reducing imbalances below the limit value (critical vehicle). To continue optimization. To continue with the OP program proceed as specified for OP.5 –I(given below). To abort optimization ‐Press the STOP key to return to the balancing program and balance the wheel according to the readings(5.9). ReadingOP.5–I (1Reference mark Fig.5‐35). After the measuring run read just the wheel following the direction indicator and make a chalk mark on the right side of the tire exactly perpendicular to and above the main shaft. Read just the tire on the rim so that the reference mark made is aligned with the valve (use tire changer). Clamp the wheel on the balancer and readjust ...
- Page 27 Snap‐on EEWB330A Handspin Wheel Balancer After the measuring run four readings are possible : II ‐OP.7 Proceed with the OP program. It is recommended that the tire be turned over on the rim .OP.7‐II Proceed with the OP program. It is recommended to shift the tire on the rim (manual rotation). H0 Optimum condition has been achieved and cannot be improved. H2 Silent running cannot be improved. Press STOP (5) to exit. However, it is possible to readjust the tire relative to the rim to achieve significant weight minimization (i.e.: smaller balance weights) without having an adverse effect on silent running. Depending on the readings, there are several possibilities for proceeding with the program. These possibilities are described below. Reading II ‐OP.7(Fig. 5‐37).Turn the tire over on the rim (the left display bars are rotating).Option1:Turn the tire over on the rim (normal program) .Read just the wheel according to the left direction indicator and make a double mark on the left side of the tire exactly perpendicular to and above the main shaft. Remove the wheel from the machine. Turn the tire over on the rim and readjust until the double mark coincides with the valve. Clamp the wheel on the balancer and read just it so that the valve is exactly perpendicular to and above the main shaft. Press the ENTER key (1) to acquire the valve position. Reading OP.8 appears (Fig.5‐34).Spin the wheel (START). If balancing optimization (silent running) has been carried out correctly (according to the program cycle), after the check run the machine automatically returns to the type of weight positioning previously selected and indicates the residual dynamic imbalance on the wheel. Balance the wheel according to the readings. Both optimization and balancing are accomplished. Message E9 means that at least on error occurred during the optimization cycle. Press the STOP key (5) to exit the optimization program and repeat optimization if necessary. ...
- Page 28 Snap‐on EEWB330A Handspin Wheel Balancer Option2: Do not turn the tire over on the rim. Press the FINE key (3). The result is recalculated. Reading OP.7 ‐II or H0 or H2 appears. To go to II ‐OP.7 (turning over the tire) press the FINE key (3) again. Option3: Abort optimization. Press the STOP key (5) to exit the OP program and return to the balancing program .The imbalance on the wheel is shown on the readout. Balance the wheel according to the readings. Reading OP.7 ‐II (Fig.5‐37). Read just the tire on the rim (the right display bars light upper manently).Option1: Read just the tire on the rim (normal program).Read just the wheel following the right direction indicator and make a double mark on the right side of the tire exactly perpendicular to and above the main shaft (Fig.5‐38). Remove the wheel from the machine. Read just the tire on the rim until the double mark coincides with the valve(Fig.5‐39). Clamp the wheel on the balancer and readjust so that the valve is exactly perpendicular to and above the main shaft. Press the ENTER key (1) to acquire the valve position. Reading OP.8 appears (Fig.5‐34). Spin the wheel (START) (check run). If balancing optimization (silent running) has been carried out correctly according to the program cycle, after the check run the machine automatically returns to the type of weight positioning previously selected and indicates the residual dynamic imbalance on the wheel. Balance the wheel according to the readings. Both optimization and balancing are accomplished. MessageE9 means that at least one error occurred during the optimization cycle. Press the STOP key (5) to exit the optimization program and repeat optimization if necessary. Option2: Do not adjust the tire on the rim Press the STOP key (5) to exit the OP program and return to the balancing program. The imbalance on the wheel is shown on the readout. Balance the wheel according to the readings. Reading H0. Press the STOP key (5) to exit the OP program and return to the balancing program. The ...
- Page 29 Snap‐on EEWH330A Computer Wheel Balancer The optimum balancing optimization condition has been achieved and cannot be improved. Reading H2 Silent wheel running cannot be improved. However, it is possible to achieve weight minimization (readings with code UN.). Option1: Weight minimization. Press the FINE key (3) to continue the program. As a result reading is II‐Un.7 or Un.7–II Option2: Abort optimization. Press the STOP key (5) to exit the OP program and return to the balancing program. The imbalance on the wheel is shown on the readout. Balance the wheel according to the readings. Weight minimization program cycle. If the rim compensation run was omitted and the FINE key (3) was pressed to go directly into the minimization program (reading Un.), proceed as follows. Clamp the wheel. Position the valve exactly perpendicular to and above the main shaft. Press the ENTER key (1) to acquire the valve position. Reading Un.4 appears (Fig.5‐34).Spin the wheel (START).The measuring run is carried out. After the measuring run two readings are possible: Un.5 H1. Further minimization is not recommended, but is possible. Un.5–I (1Reference mark Fig.5‐35). Continue with the UN program. Reading Un.5 ‐H1 I fUn.5 ‐H1 appears, further minimization is not recommended since the measurement values do not exceed the limit values. However, it is possible to continue minimization so as to achieve an improvement, if only slight (e.g.: for critical vehicles). To continue minimization: Proceed as indicated for ...
- Page 30 Snap‐onEEWB330A Handspin Wheel Balancer Clamp the wheel on the balancer and read just it so that the valve is exactly perpendicular to and above the main shaft. Press the ENTER key (1) to acquire the valve position. Reading Un.6 appears (Fig.5‐34). Spin the wheel (START).The machine performs the second measuring run with the tire. After the measuring run three readings are possible: II ‐Un.7 Proceed with the UN program. It is recommended that the tire be turned over on the rim.Un.7 ‐II Proceed with the UN program. It is recommended that the tire be readjusted on the rim. H0 The optimum minimization condition has been achieved and cannot be improved. Depending on the readings, there are several possibilities for proceeding with the program. These possibilities are described below. Reading II ‐Un.7 Turn the tire over on the rim (the left display bars are rotating). Option1:Turn the tire over on the rim (normal program. Read just the wheel according to the left direction indicator and make a double mark on the left side of the tire exactly perpendicular to and above the main shaft (Fig.5‐36). Remove the wheel from the machine. Turn the tire over on the rim and read just until the double mark coincides with the valve (Fig.5‐37).Clamp the wheel on the balancer and read just it so that the valve is exactly perpendicular to and above the main shaft. Press the ENTER key (1) to acquire the valve position. Reading Un.8 appears (Fig.5‐34). Spin the wheel (START) (check run). If weight minimization was carried out correctly (according to the program cycle) ,after the check run the machine automatically returns to the type of weight positioning previously selected and indicates the residual dynamic imbalance on the wheel. Balance the wheel according to the readings. Both weight minimization and balancing are accomplished. MessageE9 means that at least one error occurred during the minimization ...
- Page 31 Snap‐on EEWB330A Handspin Wheel Balancer Option2: Do not turn the tire over on the rim. Press the FINE key (3).The result is recalculated. ReadingUn.7 ‐II or H0 appears Option3: Press the STOP key (5) to exit the minimization program and return to the balancing program. The imbalance on the wheel is shown on the readout. Balance the wheel according to the readings. (Reading up permanently). Option1: Read just the tire on the rim (normal program). Read just the wheel according to the right direction indicator and make a double mark on the right side of the tire exactly perpendicular to and above the main shaft. Un.7 ‐II(Fig.5‐37). Read just tire on the rim (the right display bars light main shaft Fig.5‐38). Remove the wheel from the machine. Read just the tire on the rim until the double mark coincides with the valve (Fig.539). Clamp the wheel on the balancer and re‐adjust it so that the valve is exactly perpendicular to and above the main shaft. Press the ENTER key (1) to acquire the valve position. Reading Un.8 appears (Fig. 5‐34). Spin the wheel (START) (check run). If weight minimization was carried out correctly (according to the program cycle), the machine automatically returns to the type of weight positioning previously selected and indicates the residual dynamic imbalance on the wheel. Balance the wheel according to the readings. Both weight minimization and balancing are accomplished. Message E9 means that at least one error occurred during the minimization cycle. Press the STOP key (5) to exit the minimization program and repeat minimization if necessary. Option2:Do not re‐adjust the tire on the rim. Press the STOP key(5)to exit the minimization program and return to the balancing program. The imbalance on the wheel is shown on the readout. Balance the wheel according to the readings. ReadingH0. The optimum minimization condition has been achieved and cannot be improved. Press the STOP ...
- Page 32 Snap‐on EEWB330A Handspin Wheel Balancer 5.12 Special functions. In this chapter all functions that may be accessed by the operator are described. A function is a “mode” that is not required to balance a wheel properly.5.12.1 User function. Use this function to store or recall rim data (wheel type, diameter, width, Offset, fine mode, oz mode and mm mode) in or from the memory. 4 sets of wheel data (the so‐called user data) can be stored. When it is turned ON the balancer sets the wheel data regarding user A to the system default values and sets the current user to user A. To activate: Press the “MODE” and the weight keys simultaneously for 3 seconds. See Figure 5.40. The function starts with the SAVE option. The data an be saved to the user displayed on the right. Refer to Figure 5‐40 for the default setting. To clear the data (without saving): Select Enter when user “‐ ‐” is displayed. To save data: Select + or – to scroll along User A, B, C or D. Select Enter to save to the selected user. The function proceeds with the RECALL option. The data can be recalled from memory by selecting the appropriate user. The selected user will be the new current user, e.g. User b. Refer to Figure 5‐41. No recall required (no change in user required): Select Enter when user “‐ ‐” is displayed. To recall data: Select + or – to scroll along User A, B, C or D. Select Enter to recall the selected user. The current available wheel data will be replaced by the recalled data (e.g.: “B” Figure 5‐42). ...
- Page 33 Snap‐on EEWB330A Handspin Wheel Balancer 5.12.3 Weight Unit Toggle Mode Setting the basic weight unit: grams. Select this mode to change the unit of measure of the weight before or after carrying out a balancing operation. Select the “MODE” key until the weight units indicator flashes. The “oz” indicator will start flashing. The display now equals Figure 5‐43. Select Return. The weight setting status now calculates weights using a different unit of measure (from grams to ounces or from ounces to grams).The program returns to the main menu. 5.12.4 Dimension Unit Toggle Mode Setting the basic unit of measure for diameter and width: inches. Select this mode to change the unit of measure of the diameter and width before or after carrying out a balancing operation. Select the “MODE” key until the dimensional units indicator blinks. The “mm” indicator will start flashing. The display should now appear as shown in Figure 5‐44. Note: Make sure that all the preset PAX units have been removed. The operator can now select the units in steps of 1 mm if the mm mode has been selected. Select return. The state of the diameter and width dimension units will toggle (inch to mm, or mm to inch).Offset is always measured and shown in millimeters. The program returns to the main menu. ...
- Page 34 Snap‐on EEWB330A Handspin Wheel Balancer 6.0 Maintenance This unit is designed to operate for a long time. If the operator shuts down correctly (5.4.4) at the end of each shift, no further maintenance is required. This unit must not be opened by the operator, except in accordance with explicit instructions. 6.1 Storage When the unit will be stored for a several weeks or longer, prepare the unit correctly: Shut down the unit properly (5.4.4). Remove the stub shaft from the flange. Apply a light, non‐corrosive oil onto all threads and cones. Wrap oiled items in paper to keep the parts dust free. When the unit will be put into use again, clean all oiled parts. 6.2 Changing the main fuse Refer to Figure 6‐1. Switch off the unit. Unplug the power cord from the power outlet. Remove the power cord from the mains cable inlet. Pull out the fuse holder (1). Replace the fuse by an identical rated one. Bring unit back to its original state. ...
- Page 35 Snap‐on EEWB330A Handspin Wheel Balancer 6.3 User Calibration If several measuring runs are necessary to balance a wheel because balance weight size and position have to be adjusted repeatedly, this is often due to insufficient measurement accuracy. If this is the case the operator can electronically calibrate the rotating masses on the machine; which is called User Calibration. A calibration run takes longer than a regular measuring readjustment. Balance a wheel, as a NORMAL weight mode, to less than 5 grams per plane. Check in Fine mode. Select the “MODE” key and the “precision” key together for 5 seconds. The display shows “CAL 1” and the unit beeps. Spin the wheel. When done, the display shows “CAL 2”. Mount the User Calibration Weight, refer to Figure 6‐2. Spin the wheel. The wheel will be braked. After a few seconds the display equals Figure 6‐ 3. The UC was performed correctly.‐ Any (operator) error causes the program to exit ( 7.1.2). Unscrew the Calibration weight from the flange and put it back in its designated place in the calibration storage holder. ...
- Page 36 Snap‐on EEWB330A Handspin Wheel Balancer 7.0 Trouble shooting If a problem arises with the wheel balancer, proceed in the following order to solve the problem: 1. Rethink the last steps taken. Did you work according to the manual? Did the unit work as described and expected? 2. Check the unit according to the points listed in this chapter. 3. Call your Tech Support at 800-225-5876. The set up of this chapter is: Problem1. Possible cause #1Possible solution(s) 2. Possible cause #2Possible solution(s) When switched on, nothing lights up. 1. Power switch in OFF position. When switched on, nothing lights up. 1. Power switch in OFF position. Set power switch in ON position. 2. No power cable connected. Connect power cable to power outlet. 3. No mains power. Check power supply, power system fuses. 4. Unit fuse(s) blown. Replace unit fuse(s) (6.2). If the fuse(s) has (have) recently been replaced, call service to check the unit. When switched on, a beep is heard for 1 second. ...
- Page 37 Snap‐on EEWB330A Handspin Wheel Balancer 5. Gauge arm inputs differ from wheel dimensions stated on rim or tire. 1. Did you position the gauge arm correctly? Refer to Chapter 5.6.1.2. Check the offset input of the gauge arm by entering manually. 2. Refer to the scale on the gauge. If not identical, proceed with step 4.3. 3. Check the diameter of the spot on the rim where the diameter has been measured. If not identical, proceed with step 4.4. 4. Calibration is required. Have the gauge arm calibrated. Balancing results are unreliable. 1. The balancer may not be installed properly. Make sure the unit rests on its 3 feet only. Make sure the floor is not relaying shocks or vibrations, for example from trucks passing close to the unit. 2. The wheel may be mounted incorrectly. Check the hub, cones and adapters for play. Use appropriate spacers to eliminate play. Perform measuring unit calibration.3. The electronics are faulty. 3. Call service team. A mode or indicator is continuously shown on the screen. 1. A power dip may have occurred. Switch off the ...
- Page 38 Snap‐onEEWB330A Handspin Wheel Balancer 7.1 System messages The wheel balancer can show messages to the operator. These may be error related (E‐codes) or warnings (H‐ codes). The codes will be described in the following chapters. Whenever a code appears: Make a note of it; Look up the code in the list. If the code is not described, call Tech Support; perform the steps described. In special cases, or if the need arises, some operating modes or states can be changed by entering the appropriate codes (C Codes). 7.1.1CCodes Selecting and changing a code. Example for code C0 (Fig. 7‐1). Press and hold down together the “MODE”(7 )and “FINE”(8) keys for 7 seconds. The C codes selection condition appears(Fig. 7‐2). Press one of the“+”(4)or “‐”(6) keys until the readout shows the desired code number(e.g.:C0). Press the ENTER key (5) to acquire the selection. The right number readout shows the current state, e.g.:“0”which in this case means switched off. If the desired state is already on the readout: Press the STOP key (10,Fig.7‐1) once to return to C codes selection (Fig.7‐2),and a second time to definitively exit and return to the operating mode. If the desired state is not that shown by the readout, but needs selecting, proceed as follows: Press one of the“+” or“‐”keys until the right readout shows the desired condition (e.g.:“0”).Now two options are possible: Option1 Press the ENTER key to acquire the selection. Press the STOP key to return to the operating mode. The operating mode change is complete and is saved until a new setting is entered. When the machine is switched off the settings are not deleted, and at each subsequent start up they appear as previously set up until changed again. ...
- Page 39 Snap‐on EEWB330A Handspin Wheel Balancer Option 2 Cancel selection of code C just set and return directly to the operating mode: Press the STOP key twice consecutively. Note: Code C4, Compensation of the clamping means, cannot be transferred to the permanent memory. Below are the change codes available and the relative selections possible. Code C0 Setting operating modes preset by the factory: Select Code C0 Select one of the following options:0* = No action1 = Set the default values (state 1 appears briefly). Note: The selection is permanently acquired. Code C4 Compensation of residual unbalance, if any, in the clamping means. High precision measurement. Every time the clamping means are substituted, compensation must be deleted or carried out again with the new means fitted. Resetting the operating state to 0 cancels the clamping means compensation. The compensation is also cancelled following:‐ balancer calibration or recalibration, ‐ unbalance optimization, ‐ balancer switch off. Select Code C4. Select one of the following options: 0 = Carry out compensation 1 = Compensation completed 0 = Switch off compensation again after the measuring run. Note: The present operating mode cannot be transferred to the permanent memory. ...
- Page 40 Snap‐on EEWB330A Handspin Wheel Balancer Code C7 Volume of audible signal Scale of volume 0 to 100 (low – high), Normally set to 50* Example: Adjusting the volume to 60. Select Code C7. Set the desired value. Press ENTER Note: The selection is permanently acquired. Code C8 Selecting the limit (threshold) value for suppression of minor unbalance readings in grams, or ounces. The unit of measurement (grams or oz) depends on the setting. 5.4.3).Grams: Range 3.50 to 20.0 grams. Factory‐adjusted to 5.0* grams. Select another limit, e. g.: 5.50 grams. Select Code C8. Set the value 5.50. Press ENTER. Ounces: Range 0.12 to 0.71 oz Factory‐adjusted to 0.18* oz. Select another limit, e. g.: 0.50 oz Select Code C8. Set the value 0.50. Press ENTER Note: The selection is permanently acquired. * = Factory adjusted mode ...
- Page 41 Snap‐on EEWB330A Handspin Wheel Balancer Code C11 Main shaft stop position. The positioning brake stops the main shaft close to the correction position by initiating pulsing braking. The positioning brake is activated after switch on and after a measuring run has been carried out and found an unbalance greater than the limit value. Select Code C11. Select one of the following options: 0 = No positioning brake after measuring run. 1*= Positioning brake after measuring run for left plane. = Position brake after measuring run for right plane. Note: The selection is permanently acquired. Code C11 Main shaft stop position. The positioning brake stops the main shaft close to the correction position by initiating pulsing braking. The positioning brake is activated after switch on and after a measuring run has been carried out and found an unbalance greater than the limit value. Select Code C11. Select one of the following options: 0 = No positioning brake after measuring run. 1*= Positioning brake after measuring run for left plane. = Position brake after measuring run for right plane. Note: The selection is permanently acquired. ...
- Page 42 Snap‐on EEWB330A Handspin Wheel Balancer Code C12 Measuring runs counter. Example: 222,123 measuring runs completed: Select Code C12. Select one of the following options: 1 = Total number of measuring runs completed2 = Total number of measuring runs where balancing was successfully completed, indicated by OK3 = Total number of optimizations or minimizations4 = Total number of measuring runs in Service mode5 = Total number measuring runs since last calibration. Every measuring run completed is saved. Maximum count is 999,999 measuring runs. Once this number is reached, the counter is reset to zero. The information is primarily useful for statistical purposes, for example, to monitor the endurance of faulty parts, or monthly (yearly) use of the machine, etc. The measuring runs performed while the machine is switched on are transferred to the permanent memory and added when it is switched off. Note: The total counter (option 1) cannot be deleted. * = Factory adjusted mode ...
- Page 43 Snap‐on EEWB330A Handspin Wheel Balancer Code C14 Balancer recalibration by the user. If several measuring runs are necessary to balance a wheel because balance weight size and position have to be readjusted repeatedly, this is often due to insufficient measurement accuracy. Balance a wheel, setting the type as NORMAL, with less than 5 grams per plane. Check in “fine” mode. Go into code C14. “CAL 1” appears and the machine beeps. Perform the wheel measuring run. At the end the display shows “CAL 2”. Screw on the User Calibration Weight, as shown in Figure 6‐2. Perform the wheel measuring run. At the end the display appears as shown in Figure 7‐3 to indicate that calibration was performed correctly. Note: Any error (by the operator) closes the program. Error codes are listed in Section 7.1.2. * = Factory adjusted mode ...
- Page 44 Snap‐on EEWB330A Handspin Wheel Balancer Code C21 This code provides information about the program version and the balancer model name. Go into code C21. Information about the software version appears. Press the “‐” key to view the Kernel version. The information is visible for as long as the key is pressed. Press the “+” key or the “FINE” key to view the balancer model. Note: The information is visible for as long as the key is pressed. Code C28 Displays the error codes saved by the balancer, (a maximum of 10) and clears the error memory. The last 10 different error codes are saved in the error memory so that they can be called up and consulted by the wheel balancer operator for remote diagnosis of malfunctions. The most recent error code is saved in memory location 1. Previous error codes are gradually shifted down the memory list. Go into code C28.CONSULTING THE ERROR COUNTERS Press and release the “+” or “‐” key to scroll through the list of errors. Note: When the key is pressed the number of the error in the list is shown, whilst when the key is released the corresponding code appears. Press the STAR key to make the error number appear again (on the left) and the total number of times that error was repeated since the last time the memory was cleared (on the right). ZEROING THE ERROR COUNTERS Press ENTER. Make the selection. 0* = Do not clear the error memory 1 = Clear the error memory ...
- Page 45 Snap‐on EEWB330A Handspin Wheel Balancer 7.1.2 E‐codes When the E‐code is displayed, a low beep is generated. Whenever a code appears: Note it down look up the code in the list. If the code is not described, call service. Perform the steps described. The setup of this chapter is: Code Description: Step(s) to be performed. Some error messages are displayed for approx. 3 seconds on the display of the right side. To clear the error code immediately press the STOP key. E 9 (7.1.3) E10 Gauge arm removed from idle position during wheel spin. Bring gauge arm to the idle position (fully in and down). Re‐spin the wheel without touching the gauge arm. If the error appears again, have the gauge arm calibrated (by the service department). Display clears after several seconds. E11 During ignition the gauge arm is not in the idle position. Move the gauge arm back carefully to the idle position. The error should disappear within a few seconds. If the error appears again, contact the service department. Note: By pressing STOP you can continue to use the machine but all the wheel data must be inserted manually (5.6.3). E 14 (7.1.3) E 21 (7.1.3) ...
- Page 46 Snap‐on EEWB330A Handspin Wheel Balancer E22 Speed low The rotation speed of the wheel has not reached the minimum limit needed to enable balancing. Check that the brake (pedal) or wheel is not accidentally blocked. Check that something is not braking or obstructing the wheel. Check the power supply. Fit the wheel correctly. Contact the service department. E 23 (7.1.3) E24 Velocity fluctuations If the speed of the wheel to keep to required speed the needs to be fixed. • Check that the wheel is not obstructed or impeded by something. • Check the power supply. • Fit the wheel properly. • Call for service. E25 Reverse error. The shaft is rotating at a certain speed but in the wrong direction. Apply the brake. Contact the service department. The display clears when rotation stops. E26 No acceleration. No shaft acceleration has been registered. Contact the service department. E27 Slipping registered. The wheel slips on the shaft. Fit the wheel correctly. E28 ...
- Page 47 Snap‐on EEWB330A Handspin Wheel Balancer E51 Calibration failed. Switch unit off, wait for 20 seconds. Switch unit on. Retry calibration, or: Contact the service department. E52 The calibration weight is on the opposite side to the calibration carried out by the manufacturer. Fit the User Calibration Weight correctly on the left side of the flange. Repeat Calibration. Contact the service department. E82 Fault during self‐test at start‐up. Switch unit off, wait for 20 seconds. Switch unit on. E92 During the second attempt the gauge arm for distance and rim diameter was still not in the home position. The gauge arm is rendered inoperative. Wait 5 seconds, or press the STOP key to continue. ...
- Page 48 Snap‐on EEWB330A Handspin Wheel Balancer 7.1.4 H Codes – Warning H0 Wheel silent running cannot be improved with balancing optimization. H1 Further optimization is not recommended but is possible. H2 Weight minimization is recommended, further optimization does not bring improvements. H80 Recalibration was not set up. As a result, it cannot be performed by the operator. Press the STOP key to clear the message. Call the service team for machine calibration. H82 The self‐test was disturbed (e.g.: by turning the wheel).The message is displayed for 3 seconds, then the measurement is repeated (max. 10 times) or aborted by pressing the STOP key. H90 Wheel acceleration was too slow, or braking was too weak after a measuring run. If the main shaft does not reach the required speed, check that the brake is not activated or the weight of the wheel is too great. In this case: Release the brake. Make sure that the shaft with the wheel clamped on it can rotate freely. Turn the wheel by hand, then run the START. If the error cannot be eliminated, call the service team. H91 ...
- Page 49 NOTES:...
- Page 51 ® Snap-on Equipment Services 2801 80th Street Kenosha, WI 53141 - 1410 For Service Call: 1-800-225-5786 is a registered trademark of Snap-on Inc. ZEEWB330A... 07/01/2014...wdc © copyright Equipment Services 2010 All rights reserved...
Need help?
Do you have a question about the EEWB330A and is the answer not in the manual?
Questions and answers