
Related Manuals for Zephyr ALU-E43ASX


Summary of Contents for Zephyr ALU-E43ASX
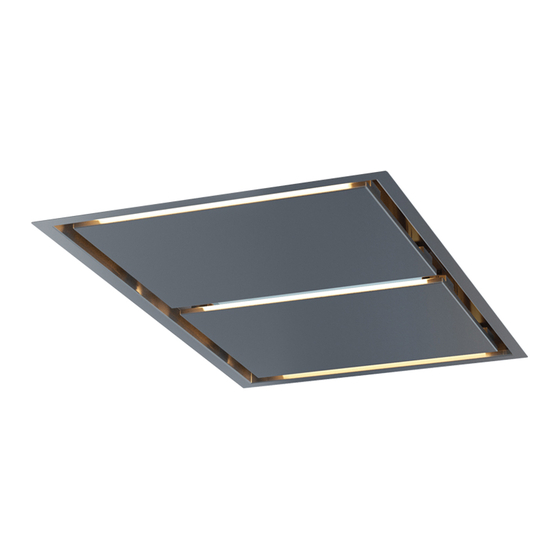
- Page 1 ALU-E43ASX RANGE HOOD - Installation and use instructions ENGLISH........3 FRANÇAIS........31...
- Page 2 REMOTE BLOWERS (EXTERNAL AND IN-LINE) CAUTION: To reduce risk of fire and electric shock, install this range hood only with External Blower Model CBE-1000, and In-Line Blower Model PBN-1000A. Other blowers cannot be substituited. INSTALLING THE DUCTWORK: REMOTE BLOWER NOTE: To reduce the risk of fire, use only metal ductwork. 1.
- Page 3 INSTALLING THE DUCTWORK: INTERNAL BLOWER ROOF CAP NOTE: To reduce the risk of fire, use only 6” or 10” metal ductwork. round duct 1. Decide where the ductwork will run between the hood and the outside. 2. A straight, short duct run using a minimum 6”...
- Page 4 PREPARE THE CEILING PREPARE THE HOOD OPENING SUPPORT The hood should always be centered over the Construct a wood framing system as shown cooktop. Make sure there is adequate space in Fig. 9. in the ceiling structure to install the hood and ductwork.
-
Page 5: Prepare The Hood
PREPARE THE HOOD 1. Open the perimeter panels and remove the grease filters. See Fig.10. 2. Remove the control panel unscrewing the (4) screws 3,9x6 mm. See Fig.11. 3. Remove the (2) interiors panels unscrewing the (8+8) screws. See Fig.12. FIG.10 (4) MOUNTING SCREWS (3.9 x 6 mm Flat Head) - Page 6 INSTALLATION INTERNAL BLOWER AIR OUTLET “B” AIR OUTLET “A” NOTE: The following instructions are for installing the internal blower only. Install this range hood only with internal blower model CBI-290A, CBI-600A or PBI-1100A Hood with 1 internal blower (only ducting version) If you choose “A”...
- Page 7 Hood with 1 internal blower (ducting and non-ducting version) If you choose “B” air outlet (Fig.13): 1.Remove the knockout (Fig.17). 2.Install internal blower into blower plate and secure using (4) screws supplied with the motor (Fig.18). 3.Install assembly blower by means (2) M4 x 15 mm screws (Fig.19).
- Page 8 Hood with 2 internal blowers The hood with 2 motors can be installed ONLY in ducting version. 1.Remove the (2) knockouts (Fig.21). 2.Install assembly blowers by means (2) M4 x 15 mm screws (Fig.22). 3.Install 10” round collar to the plate by means (2) mounting screws 3.9x6mm (Fig.
- Page 9 CONNECT THE WIRES (1 INTERNAL MOTOR) Note: This range hood must be properly grounded. The unit should be installed by a qualified electrician in accordance with all applicable national and local electrical codes. 1. Make connections (A, B,C, D) (Fig.24). 2.
- Page 10 INSTALLATION EXTERNAL AND IN-LINE BLOWER AIR OUTLET “B” AIR OUTLET “A” NOTE: The following instructions are for preparing the hood for use with external or in-line blower models CBE-1000 or PBN- 1000A. For blower installation details refer to manual included with the blower. If you choose “A”...
- Page 11 If you choose “B” air outlet (Fig.26): 1.Remove the (2) knockouts (Fig.29). 2.Install 10” round collar to the plate by means (2) mounting screws 3.9x6mm (Fig. 30). Fix the assembly round collar/plate to the hood by means (4) 3.9x6 mm screws (Fig.30). FIG.29 (4) MOUNTING SCREWS (3.9 x 6 mm Flat Head)
-
Page 12: Install The Hood
INSTALL THE HOOD 2x4 WOOD CAUTION: At least two installers are FRAME recommended because of the large size and weight of this range hood. 1. Re-install the grease filters and control panel (Fig. 10/11). 2. Lift range hood into the ceiling opening. 3. - Page 13 WIRING (EXTERNAL AND IN-LINE BLOWER) 1. Run 4-wire plus ground power cable from the remote blower to the remote blower wiring box marked “motor connection” (Fig.34). 2. Feed 6” of cable through the knockout opening and secure the cable to the wiring box with an appropriate connector.
- Page 14 COMPLETE THE INSTALLATION 1. Reassemble the (2) interiors panels by means the (8+8) 3,9x6mm screws. See Fig. 35. 2. Insert the (8) plugs round. See Fig. 36. (16) MOUNTING SCREWS (3.9 x 6 mm Flat Head) FIG.35 INSTALL THE AIR RETURN VENT (NON-DUCTED VERSION)
- Page 15 MESH FILTERS NOTE: prior to use, remove protective film from the filter frame. NON-DUCTED HOODS ONLY 1. To remove the CHARCOAL filter, grip and push filter tab toward rear of hood. Pull the filter down to disengage the rear filter tabs. 2.
Need help?
Do you have a question about the ALU-E43ASX and is the answer not in the manual?
Questions and answers