Table of Contents
Advertisement
DASH CAMERA
ND-DVR100
Owner's Manual
Thank you for buying this Pioneer product. Please read through these instructions so
you will know how to operate your model properly. After you have finished reading the
instructions, keep this document in a safe place for future reference.
Always read and follow the "Safety Precautions" described in this manual when in-
stalling this product in a vehicle. There is a risk of accident and injury if this product is
installed using methods other than those described in this manual, or if parts are used
other than those described in this manual. Pioneer Corporation accepts no responsibility
whatsoever in these cases.
Advertisement
Table of Contents

Related Manuals for Pioneer ND-DVR100


Summary of Contents for Pioneer ND-DVR100
- Page 1 ND-DVR100 Owner’s Manual Thank you for buying this Pioneer product. Please read through these instructions so you will know how to operate your model properly. After you have finished reading the instructions, keep this document in a safe place for future reference.
-
Page 2: Safety Precautions
Pioneer Service Station. Do not use this prod- rights, and not to use the device in any location where uct in this condition because doing so may result in a its installation or use is prohibited. - Page 3 Be sure to consult your dealer or Precautions before installation the nearest authorized Pioneer Service Station for internal inspection, adjustments or repairs. CAUTION Never install this product in places where, or in a...
-
Page 4: How To Read This Manual
LED traffic signals may appear as flashing or flicker- ⨋ ⨋ that can be involved in an accident, Pioneer cannot ing when recorded with this product. The color may guarantee that every accident or occurrence will also not be correctly identifiable. Pioneer Corpora- trigger the recording feature in this device. - Page 5 The storage areas on the microSD card are split data. Pioneer accepts no liability for damages, costs ⨋ into the four areas shown in the following diagram or expenses arising from data loss or corruption. according to the type of recording.
-
Page 6: Check The Accessories
Depending on the vehicle, it may not be possible to install this product to the specified position and within the ⨋ specified dimensions. Consult with your dealer or the nearest authorized Pioneer Service Station for details. Do not cover this product or get the lens dirty. -
Page 7: Installation
Installation Specified Installation Position Install this product in a vehicle and at a position that satisfies all of the following conditions. ⨋ A position where the lens of this product is in the area swept by the windshield wipers. — A position where the lens of this product is not affected by the sun visor and frit band. - Page 8 IMPORTANT Always install this product in the specified installation position to ensure a safe field of view while driving and to achieve full performance from the product. 1 Clean the installation area of 3 Route the cable. dirt and oils using the included Route the Cigarette Lighter Power Cable to the cleaning cloth.
- Page 9 Removing this product The Installation Bracket is attached to this product when the product is purchased. After this product is installed in the vehicle, remove this product from the Installation Bracket with the following steps. 1 Slide this product to the left as viewed from the LCD of this product. Slide this product in the opposite direction of the "LOCK "...
-
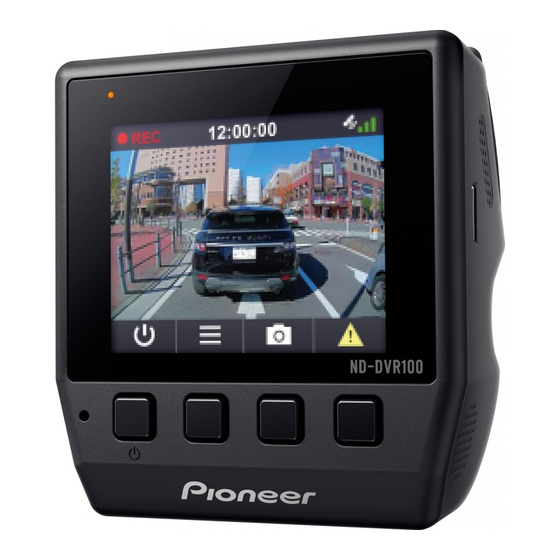
Page 10: Part Names
Part Names (Front) (Back) ① System Indicator ⑧ Reset Button ② Mini USB Terminal (mini-B type) Press this button with the tip of a ballpoint pen to reset this product. (When the product is reset, The Cigarette Lighter Power Cable is connected the power turns off. -
Page 11: Inserting The Microsd Card
Inserting and Ejecting the microSD Card Turn off the power to this product when inserting and removing the microSD card. microSD Card Slot Inserting the microSD Card Hold the top edge of the microSD card, position the microSD card so that the label is facing the backside of this product, and slowly insert it into the microSD card slot until it clicks. -
Page 12: Using This Product
Using this product Before using this product, first stop the vehicle in a safe location and apply the parking brake. This product Power This product starts when the vehicle’s engine is turned on (ACC ON), and it automatically starts recording. (Contin- uous recording) The recorded video is saved to the microSD card as one file of the set increment of time, and when the microSD card runs out of free space, the files are overwritten starting from the oldest file. -
Page 13: Function Buttons
Function Buttons The functions of the function buttons are indicated by the icons displayed at the bottom of the screen. The functions of the buttons will depend on the displayed screen. Notes The following restrictions will occur when the product detects that the vehicle is moving faster than approx. - Page 14 ■ Manual Recording (Manual Event Event Recording Recording) ■ Automatic Recording by Detecting Switch to event recording by pressing the button Impacts (Event Recording) during continuous recording. The recorded video is The continuous video file when an impact was detected saved to the “Event”...
-
Page 15: Taking Photos
Using this product Before using this product, first stop the vehicle in a safe location and apply the parking brake. Taking Photos Playing Recorded Files You can play recorded video files and view photo files. You can take a photo by pressing the button during continuous recording. - Page 16 Video ▼ The selected file will play. Note You can perform the following operations by pressing the function buttons during playback. Press to return to the thumbnails. ⨋ Press during video playback to ⨋ play the previous/next movie. Press and hold the buttons to rewind or fast forward the video.
- Page 17 This product Settings Before using this product, first stop the vehicle in a safe location and apply the parking brake. These settings configure this product. You can reset the settings to the default when the product is purchased. You can also format the microSD card and check this product version information. Note that continuous recording will stop while the setting screens are displayed.
- Page 18 Setting Details Values Sets the recording time per file when Video Clip Length recording video files with continuous [20 sec]/[1 min]/[3 min] * 3 recording.* 1 Sets use of the feature that automatically WDR(Wide adjusts the image in situations where [ON]/[OFF] Dynamic Range) there is a large difference between light...
-
Page 19: Trademarks And Copyrights
Guide to Recording Time and No. of Photos This section provides a guide to the recording times of videos and the number of photos saved to the microSD card with the “SD card partition” setting. The “SD card partition” setting is expressed as follows. Example: [79% 10% 10% 1%] As a percentage of memory card capacity, the continuous recording time will be 79%, the event recording time will be 10%, the parking mode time will be 10%, and the number of photos will be 1%. -
Page 20: Troubleshooting
This may be due to the service Please consult with the nearest authorized but a video file wasn’t made. life of the battery. Pioneer Service Station. An accident occurred during The sensitivity of impact Adjust the sensitivity of vibration detection. - Page 21 1 Remove the two screws on the 4 Disconnect the speaker connector, bottom of this product. and remove the four screws holding the board. Note Remove the screws with a commercially available #0 Phillips screwdriver. 5 Lift up the board, disconnect the 2 Release the four hooks that hold connector, and remove the battery.
-
Page 22: Specifications
Specifications Recording Medium microSDHC card, Class 10 (8 GB to 32 GB) Imaging Element CMOS sensor, 2.07 million pixels Recording Angles 95° horizontal, 52° vertical, 111° diagonal F-Number F2.0 Recording Resolution Full HD (1 920 × 1 080 pixels) Built-in 3-axis G-sensor (During event recording: level can be set in 6 steps/ G-Sensor during parking mode: level can be set in 3 steps)
Need help?
Do you have a question about the ND-DVR100 and is the answer not in the manual?
Questions and answers