Table of Contents
Advertisement
Advertisement
Table of Contents

Summary of Contents for Max ER-2700
-
Page 2: Table Of Contents
CONTENTS BEFORE USE ........................2 SAFETY INSTRUCTIONS ..................2 ACCESSORIES ......................3 MAIN FEATURES ...................... 4 PARTS DESCRIPTIONS ..................... 5 HOW TO OPEN AND CLOSE FRONT COVER ..............5 DISPLAY AND KEYBOARD ....................5 DISPLAY LAYOUT..................... 5 KEYBOARD LAYOUT ....................6 HOW TO OPERATE ...................... -
Page 3: Before Use
BEFORE USE SAFETY INSTRUCTIONS ■INDICATIONS This instruction manual and the product use various indications to help you use this instrument safely and properly. The following describes those indications. WARNING: Negligence could lead to serious injury or death. Negligence could lead to an injury, damage of your property, or CAUTION: cause loss of created data. -
Page 4: Accessories
Never disassemble or modify this instrument. It could cause a fire, electric shock, or other problems. ● Do not insert foreign substances such as fingers, pens, wire, or paper into this in- strument. It could damage the instrument or cause a fire. ●... -
Page 5: Main Features
MAIN FEATURES 1. Up to 6 columns (Up to 4 columns when using the Daily Total Hours function). 2. Two-color printing (Black/Red). 3. Printing Daily Total Hours calculation and Accumulation of Daily Total Hours. 4. Can select regular working time or overtime as Daily Total Hours. 5. -
Page 6: Parts Descriptions
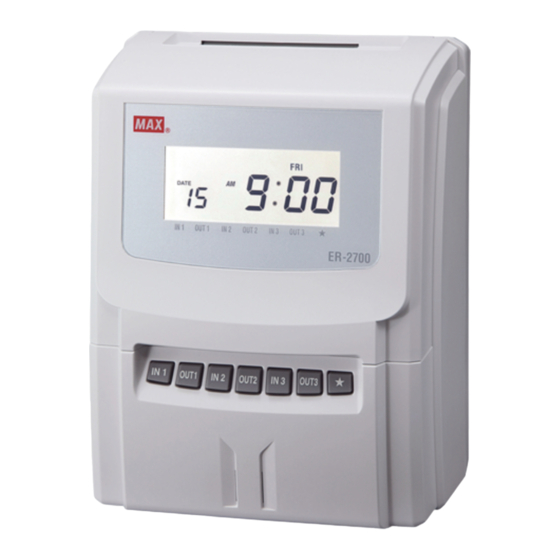
PARTS DESCRIPTIONS Time card insertion slot Front cover Display External key Wall mounting plate HOW TO OPEN AND CLOSE FRONT COVER Pull as illustrated above. Remove a front cover. Push as illustrated above. DISPLAY AND KEYBOARD DISPLAY LAYOUT symbol appears Daylight Saving Time activates. symbol appears Daylight Saving Time activates. -
Page 7: Keyboard Layout
KEYBOARD LAYOUT [External Keys] Functions of keys Description Functions INCREASE To increase number. DECREASE To decrease number. BACKWARD To back setting item (Code No.). FORWARD To forward setting item (Code No.). To set Machine Mode1, Machine Mode2, Pay Closing Date, 60 MODE1 or 100 scale and Daily Total Hours. -
Page 8: How To Operate
2. Time card will be ejected automatically after printing the time. MANUAL OPERATION ER-2700 allows manual operation to select a desired column to be printed on. 1. Select a desired column to print by pressing “IN1,” “OUT1,” “IN2,” “OUT2,” “IN3” or “OUT3” key. -
Page 9: How To Set Up
HOW TO SET UP SETTING OR CHANGING DATA Operation Press “CANCEL” key for 3 sec. or more. The symbol appears on the display. After all changed data in each mode are registered, press the “CANCEL” key again. symbol disappears. Password protection for settings Password is able to set up to protect settings. - Page 10 The Contents of Setting Item [Machine Mode1] [Year] [Holiday] [Password] [Machine Mode2] [Month, Date] [Special Day] [Time Length] [Pay Closing Date] [Hour, Minute] [LST] [Time Signal 1] [60 or 100 scale] [IN1] [Daily Total Hours] [Time Signal 22] [OUT3] Code No. Setting data [OST] [LCD Display]...
-
Page 11: Setting Mode 1
SETTING MODE 1 Press “MODE 1” key after pressing the “CANCEL” key for 3sec. or more. If password has been set up, enter the password before into the setting mode. MACHINE MODE 1 (CODE 01) Press to select a desired number from the following table and set “Capacity of Employees.” According to the number, each function will be activated. -
Page 12: Pay Closing Date (Code 03)
1/100 of an hour 1. When using as “Time Printing Style”, ER-2700 prints the ad- 1/100 of an hour justed time as shown on the “Equivalent Time Chart.” And Accumulation of Daily Total Hours is adjusted after calculating in Regular minutes (1/60). -
Page 13: Daily Total Hours (Code 05)
Overtime 1. If “2(Overtime work)” is set but Starting time of Overtime Work is not set in “MODE 3,” ER-2700 prints “0:00” or”0.00” in the 5 column. 2. If “3(No use the Daily Total Hours function)” is selected in “Machine Mode1 (CODE 01)”, this setting item (CODE 05) does not appear. - Page 14 Hours and Accumulation of Daily Total Hours. If you cannot print the time in the 4 column by using automatic operation, use manual operation by pressing “OUT2.” 2. When IN and OUT have not been printed in pairs, ER-2700 cannot output Daily Total Hours and Accumulation of Daily Total Hours. - 13 -...
-
Page 15: Setting Mode 2 (Year, Month, Date, Hour, And Minute)
SETTING MODE 2 (YEAR, MONTH, DATE, HOUR, AND MINUTE) Press “MODE 2” key after pressing the “CANCEL” key for 3sec. or more. If password has been set up, enter the password before into the setting mode. [Example] 1:35 (PM), 21st May, 2013 Procedure [MODE 2] Display Press “MODE2”... -
Page 16: Special Day (Code 02)
SPECIAL DAY (CODE 02) Set a day of the week as “Special day.” Press the following keys to light on/off the day of the week. The days of the week that are lit up mean “Special day.” ◆ Initial data=Nothing (All days are lit off.) Day of ALL days are ALL days are... -
Page 17: Daylight Saving Time (Code 18 To 19)
Example Line Shift Time (Day change time) 4 : 00 Starting time of work 9 : 00 Starting time of lunch : 12 : 00 Ending time of lunch : 13 : 00 Ending time of work : 17 : 00 Starting time of Overtime work : 17 : 30 Special day... - Page 18 Example Starting Date of Daylight Saving Time : Sunday of the last week in March. Ending Date of Daylight Saving Time : Sunday of the last week in October. Procedure Display Press to display CODE 18. Starting Date of Daylight Saving Time is shown on the display.
-
Page 19: Setting Option
SETTING OPTION Press “OPTION” key after pressing the “CANCEL” key for 3sec. or more. If password has been set up, enter the password before into the setting mode. PASSWORD (CODE 01) A 4-digit password can be set to prevent someone other than the administrator from modifying the time or changing the settings. - Page 20 CONNECTING TIME LENGTH (CODE 02) Set “CONNECTING TIME LENGTH” for external output. ER-2700 can control connecting time length to external bell, buzzer or chime. (Connecting Time Length to the External Bell) Press to select the desired connecting time length up to 60sec.
- Page 21 LCD BACKLIGHT (CODE 25) “LCD Backlight” is shown on the display after setting “EXTERNAL TIME SINGNAL.” Select the Backlight mode for your style. Press to select the desired number from the following table. Number LCD Backlight Illuminated only when operation - 20 -...
-
Page 22: Connection To External Time Signal
CONNECTION TO EXTERNAL TIME SIGNAL WARNING Disconnect a power plug before connecting to an external time signal. ER-2700 has a relay contact output. An external bell, buzzer or chime, which are operated in the following methods, is useable. (Contact capacity: 5A 30V DC) Procedure 1. -
Page 23: Replacing Ink Ribbon Cassette
REPLACING INK RIBBON CASSETTE Use only ER-IR102E ink ribbon cassette. Replace an ink ribbon cassette as below, if the printing is too light. CAUTION Never touch a printer head. It is very hot just after printing and you could get burned. -
Page 24: Wall Mounting And Laid-Down Position Installation
Do not use other materials. Disconnect a power cord before installing on wall. Wall Mounting If hanging ER-2700 on a wall, use the following procedure. 1. Remove a screw and an attached wall mounting plate as illustrated. 2. Fix the wall mounting plate to a wall with the included 4 screws (accessories). -
Page 25: Error Codes
● Improper print was made by manual operation. ER-2700 can handle up to 150, 130 or 60 150, 130 or 60 time cards have been al- time cards a day/month according to set- ready inserted in a day/month. -
Page 26: Trouble Shooting
Is the card damp? Faint printout Is the ink ribbon being used too long? Is the ink ribbon cassette inserted correctly? SPECIFICATIONS Product description Max Electronic Time Recorder ER-2700 Power supply Europe AC230V 50/60Hz 0.2A Other countries AC220/230V 50/60Hz 0.2A Outside dimensions... - Page 27 - 26 -...
- Page 28 • This instruction manual is subject to change without notice due to functional enhancement 6-6, NIHONBASHI HAKOZAKI-CHO, CHUO-KU, TOKYO, JAPAN POST CODE: #103-8502 TELEPHONE: 81-3-3669-8131 FAX: 81-3-3669-7104 URL: http://wis.max-ltd.co.jp/int/ N12ASZ Vol.2 - 27 -...
Need help?
Do you have a question about the ER-2700 and is the answer not in the manual?
Questions and answers