ARRI ALEXA Mini Quick Manual
Hide thumbs
Also See for ALEXA Mini:
- User manual (162 pages) ,
- Quick manual (76 pages) ,
- Release notes (11 pages)

Related Manuals for ARRI ALEXA Mini


Summary of Contents for ARRI ALEXA Mini
- Page 1 ALEXA Mini ALEXA Mini Q U I C K Q U I C K G U I D E G U I D E 30 May 2018 30 May 2018...
- Page 2 Arnold & Richter Cine Technik GmbH & Co. Betriebs KG. Specifications are subject to change without notice. Errors, omissions, and modifications excepted. AMIRA, ALEXA, ALEXA XT, ALEXA SXT, ALEXA LF and ALEXA Mini are trademarks or registered trademarks of Arnold & Richter Cine Technik GmbH & Co. Betriebs KG.
-
Page 3: Table Of Contents
Contents Contents For Your Safety / 为了您的安全 ............. 5 Risk Levels and Alert Symbols / 危险级别和警示标志 ......5 Vital Precautions / 重要安全措施 ............6 General Precautions / 般安全措施 ............8 Audience and Intended Use..............9 Scope of Delivery and Warranty............10 Camera Layout..................11 Front Connectors.................13 I/O Panel....................13... - Page 4 Contents Technical Data..................36 Declarations of Conformity..............38 Dimensional Drawings.................40...
-
Page 5: For Your Safety / 为了您的安全
For Your Safety / 为了您的安全 For Your Safety / 为了您的安全 Before use, please ensure that all users read, understand and follow the instructions in this document fully. 使用前,请确保所有的用户都已经阅读、理解,并遵循本文档内 的操作说明。 Risk Levels and Alert Symbols / 危险级别和警示标 志 Safety warnings, safety alert symbols, and signal words in these instructions indicate different risk levels: DANGER! DANGER indicates an imminent hazardous situation which, if not avoided, will... -
Page 6: Vital Precautions / 重要安全措施
For operation, always use a power source as indicated in the instructions. Always unplug the power cable by gripping the power plug, not the cable. Never try to repair. All repair work should be done by a qualified ARRI Service Center. - Page 7 For Your Safety / 为了您的安全 CAUTION! Condensation! Risk of electric shock and fire! Condensation may form on the sensor and electrical connections when exposing the camera to sudden changes of temperature or humidity! To avoid injury and damage, never operate the camera when condensation occurs. 小心...
-
Page 8: General Precautions / 般安全措施
Change lenses in dry, dust-free environments only. Always clean the sensor cover glass according to ARRI instructions. Instructions can be downloaded from the ARRI website in the ALEXA download section. Only use the tools, materials and procedures recommended in this document. For the correct use of other equipment, see the manufacturer's instructions. -
Page 9: Audience And Intended Use
Use the product only for the purpose described in this document. Always follow the valid instructions and system requirements for all equipment involved. The ALEXA Mini is a 35mm digital camera solely and exclusively for recording images at various resolutions suitable for a variety of distribution formats:... -
Page 10: Scope Of Delivery And Warranty
ARRI offers an increasing variety of product bundles and additional accessories. For details, please consult our website or your local ARRI Service Partner. Warranty For scope of warranty, please ask your local ARRI Service Partner. ARRI is not liable for consequences from inadequate shipment, improper use or third-party products. -
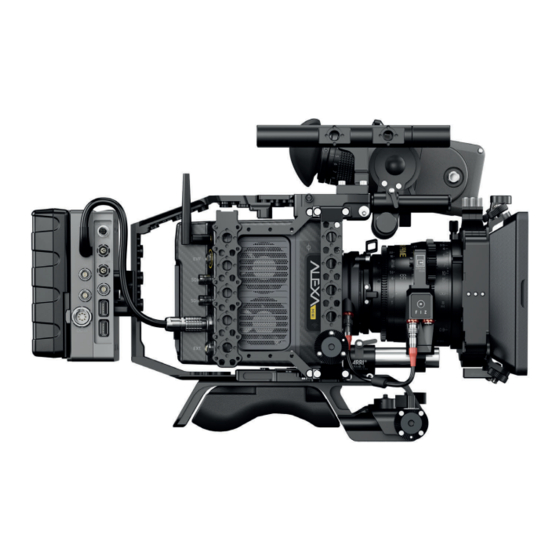
Page 11: Camera Layout
Camera Layout Camera Layout Camera Right Fan Intake LBUS Connector Integrated WiFi Antenna I/O Panel Camera Left FN Function Button Camera Buttons 1-3 Record Button Camera Status LED Camera Top MAP-1 (K2.0006334) MVB-1 (K2.0006140) MVF-1 Buttons Record Button MVF-1 Tally Light... -
Page 12: Camera Front
Camera Layout Camera Bottom MVF-1 Type Label MVF-1 PLAY Button Camera Type Labels LBUS Connector Camera Front RMB-3 (K2.0006186) Lens Mount LBUS Connector Audio Connector Camera Back Fold-away monitor EVF OLED Eyepiece Timecode Connector White Radio Antenna I/O Panel Media Panel Ethernet Connector Boot Status LED Power Button... -
Page 13: Front Connectors
Front Connectors Audio Connector LBUS Connector Audio (5-pin LEMO) 2-channel +24dBu line level audio input. Use the ALEXA Mini Au- dio connector with cable (K2.0006171) to connect audio sources. LBUS (4-pin LEMO) LBUS connector for daisy-chainable LBUS devices such as cforce mini lens motors, cforce plus lens motors, ARRI Master Grips and ARRI LCUBE CUB-1. - Page 14 Please contact an ARRI camera service center for more information. BAT (8-pin LEMO) The BAT connector is the main power input of the ALEXA Mini and accepts an input voltage range from 10.5 to 34 V DC. EXT (7-pin LEMO)
-
Page 15: Media Panel
Camera Layout ETH (10-pin LEMO) ALEXA Mini uses a 10-pin LEMO connector. Use the ALEXA Ethernet Cable KC 153-S (K2.72021.0) to connect the Ethernet connector to a standard RJ-45 Ethernet port. Note: The ALEXA Remote Control Unit RCU-4 cannot be used with the ALEXA Mini. -
Page 16: Product Identification
Camera Layout Product Identification The FCC conformity label and the CE type label with serial number (1) are located on the bottom of the camera. The serial num- ber consists of the last 5 digits of the equip- ment number K1.0003873-XXXXX. -
Page 17: Basic Camera Operation
(2) is flashing blue. As soon as the camera has finished the boot process, the boot status LED turns to solid blue. During the boot process, the ARRI logo is shown in the monitor of the MVF-1 and the CCP-1 (if connected). -
Page 18: Inserting And Removing A Cfast 2.0 Card
Never change memory cards when recording - this may damage the recorded clip. Inserting and Removing USB Medium The ALEXA Mini saves data such as user setups, frame grabs and system logs to a USB memory stick. Firmware, additional frame lines and ARRI Look File 2 files can be loaded onto the camera from the USB memory stick. -
Page 19: Starting Recording Via Rec Button
Basic Camera Operation The USB icon in the status section on the HOME screen of the user interface reflects the USB medium status (useable, read/write, write-protected, invalid). 1. Open the media lid (1). 2. Connect a FAT-formatted USB stick (3) to the camera's USB slot (2). -
Page 20: Multi Viewfinder Mvf-1
Basic Camera Operation Camera Status LED Camera State state Flashing red/green Camera is in an error state. NOTICE Pressing the record button returns the MVF-1 user interface to the home screen and disables the menu access. Recording disables the home screen buttons for FPS, TC, Shutter, and Look settings. -
Page 21: Diopter Adjustment
The sensor is placed either on the bottom left-hand side of the viewfinder (generation 1), or it is integrated into the eye cup (generation 2). The ALEXA Mini MVF-1 contains the generation 2 proximity sensor. Diopter Adjustment With the camera switched on and looking into the viewfinder, twist the ring (9) left or right to adapt the viewfinder image to your visual acuity. -
Page 22: User Monitor
Basic Camera Operation NOTICE Heated Eyecup HE-6 is not compatible with the MVF-1 viewfinder. When using the heated eyecup HE-6, the proximity sensor that activates the OLED display will always be covered. In this state, the OLED display will not switch off when not in use, this can cause an irreversible burn-in on the OLED display. -
Page 23: Home Screen
Activate the CCP-1 by pressing any button except the REC button on the CCP-1. Home Screen The HOME screen is the ALEXA Mini's default screen. It shows the most important camera parameters and gives quick access to changing them through the screen... -
Page 24: Camera Menu
EI Exposure Index Settings Shows the current EI rating and ND filter value. Base sensitivity for the ALEXA Mini is 800 ASA. The EI rating can be adjusted from 160 to 3200 ASA and via a submenu in the EI screen the internal ND filters can be operated. -
Page 25: Operation Without Mvf-1 Or Ccp-1
Basic Camera Operation Basic Menu Operation 1. Rotate the jogwheel (1) to scroll up or down to select the desired entry. 2. Entries with an arrow navigate to a lower menu level: To navigate to the submenu: press the jogwheel (1). To return to a higher menu level: press BACK (4). -
Page 26: 5.11.2 Web Remote
It requires a connection to the camera via WiFi or Ethernet (with ALEXA Ethernet/RJ-45 Cable KC-153-S, K2.72021.0). By default, WiFi is enabled on the ALEXA Mini. If WiFi is inactive, the web remote must first be used via a cabled ethernet connection in order to enable WiFi. -
Page 27: Licensing
Visit the ARRI License Shop and follow the instructions for purchasing and downloading license keys. Following license keys are available for the ALEXA Mini: ALEXA Mini 4:3 License Key ALEXA Mini ARRIRAW License Key ARRI Look Library License Key License keys are linked to the camera's serial number and cannot be transferred from one camera to another. -
Page 28: Camera Preparation
Camera Preparation Camera Preparation The following chapters provide information on how to attach commonly used accessories to the camera. ARRI offers a wide range of electronic and mechanical accessories, please see our Camera and Accessories Configuration Overviews. NOTICE To avoid damage while assembling and retrofitting, always place the camera on a padded, firm, flat and level surface. -
Page 29: Changing The Lens Mount
Heavy lenses (above 3kg/6.6lbs) require additional lens support. Using a lens support guarantees that the weight of the lens will not influence the flange focal depth and reduces stress on the lens mount. ARRI offers a wide range of lens supports for 15mm and 19mm studio rods. - Page 30 Camera Preparation Deinstalling the Lens Mount (here: PL Mount) 1. Switch off the camera. 2. Crosswise, loosen all four screws (2) with a 3.0mm Allen key. 3. Carefully remove the lens mount (1). 4. Store the mount in a case for dust protection. Installing the Lens Mount (here: PL mount) 1.
-
Page 31: Mounting The Camera To A Bridge Plate
After each lens mount change, always check the back focus of the camera. Have the back focus always corrected by properly skilled personnel. Back focus correction requires special tools and training that meet ARRI guidelines. For all back focus issues, contact a qualified ARRI Service Center. -
Page 32: Mounting And Unmounting The White Radio Antenna
Camera Preparation Step 2: Mounting BPA-4 to MAP-2 1. Place the BAP-4 (2) exactly above the mounting points (3) of the MAP-2 (2). 2. With a flat screwdriver, attach the screws (1) to the MAP-2 and tighten. Step 3: Mounting BP-8 to BPA-4 1. -
Page 33: Connecting The Mvf-1
(4) to the MVF-1's Mini HDMI port. 3. Reattach the lid. NOTICE Only use original ALEXA Mini MVF-1 cables. Never try to connect the cable to any other connector on the camera than the EVF connector. This may cause permanent damage to both cable and camera... -
Page 34: Adjusting The Mvf-1
Camera Preparation Adjusting the MVF-1 1. Place the camera bottom-down. 2. Slightly loosen the clamp (1) to move the MVF-1 (2) left/right and up/down. 3. Unclamp the hinge (3) to swivel the MVF-1 horizontally. 4. Close all clamps (1, 3) when the MVF-1 is in the desired position (2). -
Page 35: Appendix
Lexar Professional 3600x CFast 2.0 256GB 256 GB 20150507 (LC256Cxxxx3600) Lexar Professional 3600x CFast 2.0 256GB 256 GB 20150507 (LC256Cxxxx3600G2) 20160507 1 GB = 10 Byte SanDisk Extreme Pro CFast 2.0 512GB card with custom ARRI firmware CF1502AR will be available in 2018... -
Page 36: Technical Data
Height: 140 mm Width: 125mm Weight 2.3 kg / 5 lbs (camera body with titanium PL mount) Sensor 35 mm format ARRI ALEV III CMOS with Bayer pattern color filter ar- Active Photo Sites (with ProRes S16 HD 1760x980 surround view) - Page 37 HD5-ARRI touch interface, WCU-4 hand-unit with control over opera- tional parameters. Lens Motor Control Built-in white coded radio interface for ARRI lens and camera remote control, LBUS motor output for daisy-chainable cforce lens control mo- tors, Lens Data Archive WiFi Remote Control...
-
Page 38: Declarations Of Conformity
OpenGate 3.4K ARRIRAW Declarations of Conformity EU Declaration of Conformity The product ALEXA Mini conforms to the specifications of the following European directives: For cameras delivered before 13 June 2016: DIRECTIVE 1999/5/EC OF THE EUROPEAN PARLIAMENT AND OF THE COUNCIL of 9 March 1999 on radio equipment and telecommunications terminal... - Page 39 Appendix DIRECTIVE 2011/65/EU OF THE EUROPEAN PARLIAMENT AND OF THE COUNCIL of 8 June 2011 on the restriction of the use of certain hazardous substances in electrical and electronic equipment (recast) For cameras delivered from 13 June 2016: DIRECTIVE 2014/53/EU OF THE EUROPEAN PARLIAMENT AND OF THE COUNCIL of 16 April 2014 on the harmonisation of the laws of the Member States relating to the making available on the market of radio equipment DIRECTIVE 2011/65/EU OF THE EUROPEAN PARLIAMENT AND OF THE...
-
Page 40: Dimensional Drawings
WiFi Module: 2A 0219 ALEXA Mini: South Korea ECS Transceiver Module: Certification No: MSIP-CRM-ARg-EMIP300 WiFi Module: Certification No: KCC-CRM-ATH-AR5B22 Dimensional Drawings Dimensional drawings are attached at the end of this document. They can also be downloaded from the ARRI website: https://www.arri.com/alexamini... - Page 41 2.45” Optical Center 42.16 mm 124.83 mm 1.66” 4.91” ALEXA Mini Length Width Height Weight ALEXA Mini (camera body with titanium PL lens mount) 184.75 mm - 7.27” 124.83 mm - 4.91” 140 mm - 5.5” ~ 2.3 kg/5 lbs...
- Page 42 4 mm 2.38” 0.63” 0.16” M4 (8x) 4.4 mm deep ALEXA Mini Length Width Height Weight ALEXA Mini (camera body with titanium PL lens mount) 184.75 mm - 7.27” 124.83 mm - 4.91” 140 mm - 5.5” ~ 2.3 kg/5 lbs...
Need help?
Do you have a question about the ALEXA Mini and is the answer not in the manual?
Questions and answers