ARRI ALEXA Mini User Manual
Hide thumbs
Also See for ALEXA Mini:
- User manual (162 pages) ,
- Quick manual (76 pages) ,
- Release notes (11 pages)

Subscribe to Our Youtube Channel
Related Manuals for ARRI ALEXA Mini


Summary of Contents for ARRI ALEXA Mini
- Page 1 ALEXA Mini ALEXA Mini Software Update Packet 5.2 Software Update Packet 5.2 U S E R U S E R M A N U A L M A N U A L 08 Dec 2017 08 Dec 2017...
- Page 2 Arnold & Richter Cine Technik GmbH & Co. Betriebs KG. Specifications are subject to change without notice. Errors, omissions, and modifications excepted. AMIRA, ALEXA, ALEXA XT, and ALEXA Mini are trademarks or registered trademarks of Arnold & Richter Cine Technik GmbH & Co. Betriebs KG. All other brands or products are trademarks or registered trademarks of their respective holders and should be treated as such.
-
Page 3: Table Of Contents
Contents Contents For your safety / 为了您的安全 ..............8 Risk levels and alert symbols / 危险级别和警示标志 ......8 Vital precautions / 重要安全措施 ............9 General precautions / 般安全措施 ............10 Audience and intended use............... 12 Scope of delivery and warranty............13 Camera parts and controls..............14 Camera layout.................. - Page 4 Contents 5.1.7 Changing a lens................44 Switching on and off................45 Media usage..................47 Inserting and removing a CFast 2.0 card..........47 Inserting and removing USB medium..........49 Supported CFast 2.0 cards..............50 Home screen and camera menu............51 Using the on-screen keyboard............51 Working with lists.................51 Home screen..................
- Page 5 Contents 7.5.9.5 Editing Looks....................78 7.5.9.6 Use of the ARRI Look Library..............79 Recording.....................80 7.6.1 ARRIRAW..................80 7.6.2 4:3 Recording..................81 7.6.3 Record mode..................81 7.6.3.1 Normal mode....................82 7.6.3.2 Interval recording..................82 7.6.3.3 Stop motion....................83 7.6.4 Prerecording..................83 7.6.4.1 Activating prerecording................83 7.6.4.2 Setting the prerecording maximum duration..........
- Page 6 Contents 7.8.11 Defining EVF/Monitor settings............104 7.8.12 Activating color bars................ 104 Playback.................... 105 7.9.1 Starting playback via the PLAY button..........105 7.9.2 Playback screen controls..............106 7.10 System....................107 7.10.1 Sensor....................107 7.10.1.1 Adjusting the image sharpness..............107 7.10.1.2 Adjusting the image detail set/active............108 7.10.1.3 Setting image denoising................108 7.10.1.4...
- Page 7 Choosing a lens from the favorites list............. 136 7.14.2.3 Viewing lens data and info................137 7.14.3 Calibrating all lens motors...............137 7.14.4 Setting the LBUS lens motor configuration........137 Web remote..................138 Transvideo StarliteHD5-ARRI Monitor..........141 Appendix.....................145 10.1 Technical data..................145 10.2 Dimensional drawings............... 149 10.3 Pin-outs....................149 10.4...
-
Page 8: For Your Safety / 为了您的安全
For your safety / 为了您的安全 For your safety / 为了您的安全 Before use, please ensure that all users read, understand, and follow the instructions in this document fully. 使用前,请确保所有的用户都已经阅读、理解,并遵循本文档内 的操作说明。 Risk levels and alert symbols / 危险级别和警示标志 Safety warnings, safety alert symbols, and signal words in these instructions indicate different risk levels: DANGER! DANGER indicates an imminent hazardous situation which, if not avoided, will... -
Page 9: Vital Precautions / 重要安全措施
For operation, always use a power source as indicated in the instructions. Always unplug the power cable by gripping the power plug, not the cable. Never try to repair. All repair work should be done by a qualified ARRI Service Center. -
Page 10: General Precautions / 般安全措施
Change lenses in dry, dust-free environments only. Always clean the sensor cover glass according to ARRI instructions. Instructions can be downloaded from the ARRI website in the ALEXA download section. Only use the tools, materials and procedures recommended in this document. For... - Page 11 For your safety / 为了您的安全 提示 即使本摄影机非常坚固,也是由敏感的组件所组成的,请谨慎使用。 当改变摄影机安装支撑设备或系统时(特别是更换电缆),请务必断开摄影机电源。 注意保护光学系统和影像传感器:切勿将摄影机或取景器直接面朝直射阳光。 避免对影像传感器造成永久性伤害:切勿让任何来自高能量光源(例如激光)的直射 光或反 射光进入摄影机的光路系统。 注意保护影像影像传感器:空镜头卡口上务必安装镜头或保护盖。更换镜头时,务必 在干燥、 无尘的环境中进行。 请完全并仅按照用户手册中所描述的方法来清洁影像传感器保护玻璃。若清洁不成 功,请咨 询 ARRI 维修中心。切勿尝试打开保护玻璃。 清洁影像传感器保护玻璃时,务必遵守 ARRI 说明书中描述的方法。 仅使用本文档中建议使用的工具、材料和操作方法。若要正确地使用其他设备,请参 阅其制 造商的说明书。...
-
Page 12: Audience And Intended Use
Use the product only for the purpose described in this document. Always follow the valid instructions and system requirements for all equipment involved. The ALEXA Mini is a 35 mm digital camera solely and exclusively for recording images at various resolutions suitable for a variety of distribution formats: ProRes 422 LT, ProRes 422, ProRes 422 HQ, ProRes 4444, ProRes 4444 XQ, •... -
Page 13: Scope Of Delivery And Warranty
ARRI offers an increasing variety of product bundles and additional accessories. For details, please consult our website or your local ARRI Service Partner. Warranty For scope of warranty, please ask your local ARRI Service Partner. ARRI is not liable for consequences from inadequate shipment, improper use, or third-party products. -
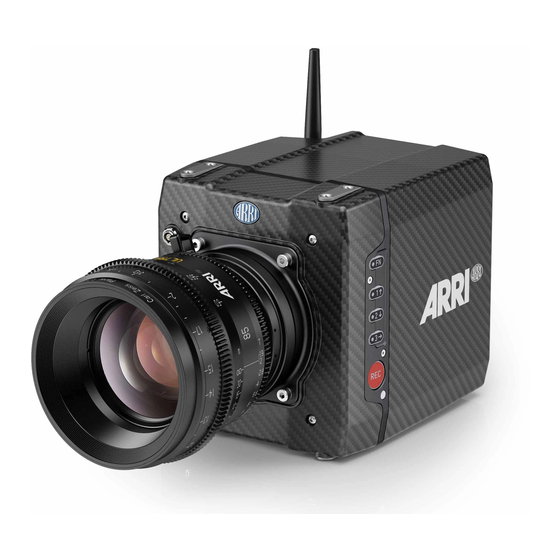
Page 14: Camera Parts And Controls
Camera parts and controls Camera parts and controls The next section gives you an overview of the parts of the camera and the controls available for operating the camera. Camera layout Right Fan intake LBUS connector integrated WiFi antenna I/O panel... - Page 15 Camera parts and controls Left Function button Camera buttons 1-3 Recording button Status LED MAP-1 MVB-1 MVF-1 buttons Record button Tally light...
- Page 16 Camera parts and controls Bottom MVF-1 type label PLAY button Camera type labels LBUS connector Front RMB-3 Lens mount (here: titanium PL) LBUS connector Audio connector...
- Page 17 Camera parts and controls Back Fold-away monitor (MVF-1) EVF OLED eyepiece Timecode connector White radio antenna I/O panel Media panel (CFast 2.0 card slot, USB) Ethernet connector Boot status LED Power button Recording status LED Fan outlet CAUTION! Hot surfaces! Risk of injury and damage! During extended operation or operation in high ambient temperatures, the fan outlet at the camera rear, the CFast drive and the CFast card can get hot.
-
Page 18: Product Identification
Camera parts and controls Product identification The FCC conformity label and the CE type label with serial number (1) are on the bottom of the camera. The serial number consists of the last 5 digits of the equipment number K1.0003873-XXXXX. Connectors NOTICE Connecting or disconnecting devices or cables while recording can disturb the... -
Page 19: Front Connectors
Camera parts and controls 4.3.1 Front connectors Audio in L-Bus Audio in (5-pin LEMO) 2-channel +24dBu line level audio input. LBUS (4-pin LEMO) LBUS connector for daisy-chainable LBUS devices such as cforce mini motors, cforce plus motors, ARRI Master Grips and LCUBE CUB-1. -
Page 20: I/O Panel
Camera parts and controls 4.3.2 I/O panel NOTICE If the power supply is interrupted with the camera switched on, the camera will automatically repower and boot-up on reconnection. Timecode connector White radio antenna MVF-1 or CCP-1 HD-SDI image out 1 & 2 BAT main power in EXT connector Ethernet connector... - Page 21 NOTICE Do not leave the antenna connector open during operation or transport. The radio module inside could be damaged by electrostatic discharge on the open connector. ARRI recommends using the originally supplied antenna only (order number: K2.0001996). EVF (16-Pin ODU) Hot swappable interface for MVF-1 or CCP-1.
-
Page 22: Media Panel
ETH (10-pin LEMO) Standard Ethernet connectors don't deliver the durability and re- liability required by ARRI, so ALEXA Mini uses a 10-pin LEMO connector. A special cable, available from ARRI (model KC-153- S), is required to connect the Ethernet connector to a standard RJ-45 Ethernet connector. -
Page 23: Power Supply
Camera parts and controls Power supply The camera power is supplied by external power sources only. It accepts an input voltage range from 10.5 to 34 V DC. Do not supply power outside the specified voltage range. NOTICE If the power supply is interrupted with the camera switched on, the camera will automatically repower and boot-up on reconnection. -
Page 24: Starting Recording Via Rec Button
Camera parts and controls Camera buttons to control common camera functions: ► Press and hold the function button (1), then press a camera button (2). You can also press the FN button twice within 0.5 seconds to bring the camera buttons into function selection mode for 2 seconds. - Page 25 Camera parts and controls The REC button is located on the left side of the camera. An additional REC button is located on the viewfinder and the Camera Control Panel CCP-1, if mounted. The run LED next to the REC button on the camera body reflects the camera's status. Run LED (2) is...
-
Page 26: Controls And Proximity Sensor
The sensor is placed either on the bottom left-hand side of the viewfinder (generation 1), or it is integrated into the eye cup (generation 2). The Alexa Mini MVF-1 contains the generation 2 proximity sensor. WARNING! Constantly covering the proximity sensor of the MVF-1 can cause an irreversible burn-in on the viewfinder OLED display. -
Page 27: Evf And Monitor
Camera parts and controls 4.6.3.1 EVF and Monitor When you put your eye against the eyepiece, the proximity sensor (3) activates the EVF (2). You can configure the camera to show status information on the EVF (2). When activated, the camera shows essential camera, audio, and recording parameters next to the image. -
Page 28: Adjusting The Diopter
Camera parts and controls 4.6.3.3 Adjusting the diopter ► Twist the ring left or right for diopter adjustment (1). 4.6.3.4 Adjusting the monitor ► Fold out (1), swivel (2) and fold in (3) the monitor to put the display visible in the folded-in position. -
Page 29: Changing The Monitor Mode
Camera parts and controls 4.6.3.5 Changing the monitor mode ► Press the M button (1) to change the monitor mode between live view and user interface. ► In live mode, press the lower screen buttons (1) to toggle the status bar content. You can disable the location sensor that automatically flips the user interface to match a left or right-side monitor position (3). -
Page 30: User Monitor
Camera parts and controls 4.6.3.6 User monitor Screen buttons and jogwheel There are eight screen buttons, four above (2) and four below (3) the display (4). Their function depends on the screen content (4) and is labeled directly above or below each button. -
Page 31: Assigning A Function To Vf1 & Vf2 User Buttons
Camera parts and controls 4.6.3.8 Assigning a function to VF1 & VF2 user buttons The MVF-1 has two user buttons, VF1 and VF2 (1). You can assign frequently-needed functions to each button. ► For more information, see "Button VF1 and VF2", page 133 . CCP-1 The Camera Control Panel-1 (CCP-1) is a standalone control panel, containing the display and a subset of the buttons of the MVF-1. -
Page 32: Lens Mount/Filters
PL LDS mount with L-Bus connector) The camera supports the ARRI Lens Data System (LDS). Lenses with built-in LDS functionality communicate their focus, iris, and zoom values to the camera where the data is stored as metadata in the recorded files. The lens data can also be displayed as part of the status information. -
Page 33: Ef Lens Support
The lens image stabilizer for EF lenses is supported. Iris and focus control • If you are using the Wireless Compact Unit WCU-4 or Master Grips from the ARRI Electronic Control System (ECS) range, you can control EF lenses as follows: Axis... -
Page 34: Getting Started
Getting started Getting started The next section gives you information on the basics of how to prepare the camera for use. Camera preparation The following chapters provide information on how to attach commonly used accessories to the camera. NOTICE To avoid damage while assembling and retrofitting, always place the camera on a padded, firm, flat and level surface. - Page 35 Getting started Step 1: Mounting the MAP-2 to the camera 1. Place the camera bottom-up. 2. Place the MAP-2 (2) exactly above the mounting points (3) of the camera. 3. With the Allen key, attach the screws (1) to the camera and tighten. NOTICE Always ensure a proper lock.
- Page 36 Getting started Step 2: Mounting the BAP-4 to the MAP-2 1. Place the BAP-4 (2) exactly above the mounting points (3) of the MAP-2 (2). 2. With a flat screwdriver, attach the screws (1) to the MAP-2 and tighten. NOTICE Always use a flat screwdriver to connect the BAP-4 to the MAP-2.
- Page 37 Getting started Step 3: Mounting the BP-8 to the BAP-4 1. Place the BP-8 (2) exactly above the mounting points (3) of the BAP-4 (2). 2. With a flat screwdriver, attach the screws (1) to the BAP-4 and tighten. NOTICE Always use a flat screwdriver to connect the BP-8 to the BAP-4.
-
Page 38: Connecting The Mvf-1 And Evf Cables
Getting started 5.1.2 Connecting the MVF-1 and EVF cables Connecting the EVF cable to the camera Note: Use original ALEXA Mini-EVF cables only. ► Connect the EVF cable (1) to the camera (16-pin ODU connector (2) on the I/O panel). CAUTION! Never try to connect the cable to any other connector on the camera than the EVF connector. -
Page 39: Connecting The Ccp-1
Getting started Connecting the EVF cable to the MVF-1 Note: Use original ALEXA Mini-EVF cables only. 1. Switch off; interrupt the power supply. 2. With your fingers, unscrew and remove the MVF-1’s lid (1). 3. Connect the cable (2) to the EVF port. -
Page 40: Mounting The Camera Center Handle Cch-2
Getting started When it is used alone with the camera, it always shows an image. When a MVF-1 is daisy-chained to the CCP-1, the MVF-1 will show an image in the EVF, but only one of the two monitors, either of the MVF-1 or the CCP-1 is active. If the monitor of the MVF-1 is closed, the CCP-1 is activated. -
Page 41: Mounting And Unmounting The Antenna
High voltage! Risk of electric shock and fire! Short circuits may entail lethal injury and damage! Use original AMIRA or ALEXA Mini lens mounts only. Before each lens mount change, always switch the camera off and disconnect all power sources. - Page 42 After each lens mount change, always check the back focus of the camera. Have the back focus always corrected by properly skilled personnel. Back focus correction requires special tools and training that meet ARRI guidelines. For all back focus issues, contact a qualified ARRI Service Center.
- Page 43 Getting started Installing a lens mount (here: PL mount) WARNING! Condensation! Risk of electric shock and damage! Humidity may ingress due to misinstalled lens mounts! When installing a lens mount, always align and attach properly; never apply force. Hand-tighten all screws crosswise before final tightening. Always tighten crosswise with the prescribed tool.
-
Page 44: Changing A Lens
Getting started NOTICE The titanium PL LDS mount with LBUS connector (K2.0003216) does not supply LBUS functionality nor lens data via the LDS contacts when attached to the AMIRA. 5.1.7 Changing a lens NOTICE Protect the sensor: Always keep a lens or protective cap on the empty lens mount. Change lenses in dry, dust-free environments only. -
Page 45: Switching On And Off
Getting started EF mount Note: Please use a lens support system for EF lenses above 3 kg/6.6 lbs. 1. Observe maximum lens dimensions. 2. Turn the lever counter-clockwise (1) to unlock the mount. 3. You have the following options: Remove the cap. °... - Page 46 For mounted MVF-1 (or CCP-1) only: During the boot process, the ARRI logo appears in the monitor of the MVF-1 (4). Switching the camera off ► Press and hold the power button (1) until the camera has switched off and the boot status LED (2) turns off.
-
Page 47: Media Usage
NOTICE ALEXA Mini does not accept ALEXA-formatted CFast 2.0 cards, and vice versa. Before using a CFast 2.0 card with ALEXA Mini, you must erase it in-camera to create the required file system. Avoid damage to the contacts of both camera and card. Always insert cards as described in this document. - Page 48 Media usage 5. To remove the card, open the lid (1). 6. Insert the card until it unlocks audibly (2). 7. Remove the card.
-
Page 49: Inserting And Removing Usb Medium
Media usage Inserting and removing USB medium 1. Open the media lid (1). 2. Connect a FAT-formatted USB stick (3) to the camera (2). The USB memory stick is now ready for use with the camera. You can remove the stick from the camera without unmounting it. For information on preparing the USB memory stick for use with the camera, see "Preparing USB medium", page 86. -
Page 50: Supported Cfast 2.0 Cards
Lexar Professional 3600x CFast 2.0 256GB 256 GB 20150507 (LC256Cxxxx3600) Lexar Professional 3600x CFast 2.0 256GB 256 GB 20150507 (LC256Cxxxx3600G2) 20160507 1 GB = 10 Byte SanDisk Extreme Pro CFast 2.0 512GB card with custom ARRI firmware CF1502AR will be available in 2018... -
Page 51: Home Screen And Camera Menu
Home screen and camera menu Home screen and camera menu The ALEXA Mini provides many parameters to customize the camera to suit your shooting needs. The most important parameters are shown and can be modified using the home screen. All other parameters can be modified using the menu. - Page 52 USB medium. Lists showing values or files installed on the camera have a blue background, lists showing ARRI default files or files on the USB medium are shown with a gray background.
-
Page 53: Home Screen
Home screen and camera menu Deleting entries 1. Select one of the parameters listed above. 2. Press DELETE. The list turns red. 3. Select the entry you want to delete with the jogwheel. 4. Press the jogwheel. The camera asks if you want to delete the selected entry. 5. -
Page 54: Status Section
Shows the current EI rating and active ND filter value. Allows you to set the exposure index in ASA. Base sensitivity for the ALEXA Mini is 800 ASA. The EI rating can be adjusted from 160 to 3200 ASA. Note: ASA and ISO ratings are identical. - Page 55 Home screen and camera menu Status icons Card status Audio meters Recording status Codec, resolution, aspect ratio Battery voltage Camera status (1) Status icons Icon Description If WiFi mode is Host, depicts a small camera. If WiFi mode is Client, shows the signal strength of the WiFi connection. Info on lens motor calibration: Orange: lens motor calibration required •...
- Page 56 Home screen and camera menu Icon Description Shows that genlock is activated. Shows that EXT sync is activated. Shows that the white radio module is activated. (2) Audio meters Shows current level of camera audio channel signals. If audio is disabled, the speaker icon is crossed out.
-
Page 57: Info Screens
Home screen and camera menu (5) Card status Remaining capacity of CFast 2.0 card, at current FPS and codec combination, in real time. When card capacity is less than 2 minutes, capacity values start flashing. (6) Current clip information REEL: Current reel (camera index letter and reel number) of active recording medium. CLIP: Current clip of current reel. - Page 58 Home screen and camera menu Version info Software • Shows the camera software version. The first two parts identify the SUP version. Revision • Detailed information on software version. FPGA • Firmware version of currently active FPGA (indicated by number in brackets). MVF-1 software •...
- Page 59 Home screen and camera menu CARD size • Total storage size of card. CARD clip count • Amount of clips on card. USB info USB Status • Status of USB medium. Storage free/total • Free and total available storage on USB medium in megabyte. Frame line files •...
-
Page 60: Alert Messages Screen
Export HW info file HW info files are required to order licenses in the ARRI License Shop or may be requested by camera service to get detailed information on the camera's hardware and components. -
Page 61: Camera Menu
Home screen and camera menu A red exclamation mark, visible on the home screen, the monitor, EVF and SDI overlays (if active) indicates active alert messages. 1. On the home screen, press the button showing the exclamation mark (1) to access the alert messages. -
Page 62: Camera's Main Settings
Home screen and camera menu 1. Via the jogwheel (1), scroll up or down to select the desired entry (3). 2. Entries with an arrow navigate to a lower menu level: To navigate to the submenu: press the jogwheel (1). °... -
Page 63: Setting The Recording Resolution
This resolution records 1920x1080 image from a 1600x900 sensor pixel count, which allows for using S16 PL mount lenses on the camera such as the ARRI Ultra 16 series. The image circle of the S16 HD mode is 15.1 mm, which is slightly larger than the usual Super 16 image circle of 14.5 mm. -
Page 64: Project Settings
Home screen and camera menu and collide with the cover glass in front of the internal ND filter system. The available depth is 39.5mm. This does cover lenses that fitted into a standard S16 Film camera. When used with lenses intended for S35 sensors, the S16 HD resolution can be used as a digital extender. -
Page 65: Setting The Next Reel Count
Sets the reel number assigned to the next new medium used for internal recording. A new medium is either a blank card or a card with reels of other ALEXA Mini cameras. The camera automatically advances the reel number every time new media is formatted on the camera. -
Page 66: Sensor Frame Rate
Home screen and camera menu Note: With recording resolutions HD Ana. and 2.39:1 Ana., the lens squeeze factor is fixed to 2.0. ► Choose MENU > Recording > Project settings > Lens squeeze factor. 7.5.4 Sensor frame rate NOTICE Always use CFast 2.0 cards with maximum write rates. The maximum possible frame rate may be limited by the set recording codec, recording resolution and CFast 2.0 card model. -
Page 67: Setting A Shutter Value
Due to its high dynamic range, the ALEXA Mini's sensitivity can be set from 160 to 3200 ASA in steps of 1/3 stops while maintaining high image quality: Applying the exposure indexes at the extremes of the range will nonetheless have an influence on the images. -
Page 68: Setting Ei
7.5.6.2 Selecting the ND filter NOTICE ALEXA Mini uses FSND (Full Spectrum Neutral Density) filters, which are linear across the full spectrum of the camera sensor. This prevents artifacts from infrared wavelengths and the need for additional IR filters. The camera contains an internal ND filter module, consisting of ND 0 (Clear), 0.6, 1.2 and 2.1 filters. -
Page 69: Adjusting The Iris (Ef Lenses) Manually
Home screen and camera menu 7.5.6.3 Adjusting the iris (EF lenses) manually 1. Choose HOME > EI > IRIS. A screen showing the current iris value is displayed. 2. Turn the jogwheel up or down to open or close the iris. Press the jogwheel to toggle between full stops and substops. -
Page 70: Setting A Wb Value
Home screen and camera menu 7.5.7.1 Setting a WB value 1. Choose HOME > WB. The WB list is displayed. 2. Via jogwheel, scroll to the desired value. 3. Press the jogwheel to activate the value. 7.5.7.2 WB Options 1. Choose HOME > WB > OPTIONS. You have the following options: Auto WB mode °... -
Page 71: Editing The Timecode Value
Home screen and camera menu Variations: If shooting starts close to midnight, the timecode may be started with • an offset time of day to prevent a rollover at midnight. Restrictions: Free run timecode is only possible, if the camera is running at sync- •... - Page 72 Home screen and camera menu Setting timecode run mode 1. Choose HOME SCREEN > TC > Options > Run mode. You have the following options: Rec run ° Timecode increases during recording only. The timecode value increases with every frame generated by the sensor while recording. Free run °...
-
Page 73: Look Settings
ALEXA Classic 709: Matches the color reproduction of ALEXA Mini to the ARRI ALEXA. ARRI 2100 PQ 1K 200: HDR look file. Renders an image for a PQ (SMPTE 2084, ITU-R BT.2100) monitor. The maximum luminance is 1000 cd/m , which is a PQ level of 75%. -
Page 74: Selecting A Look File
Vibrant: Boosts color saturation except for red and yellow (skintone protection). For information on the ARRI Look Library, see "Use of the ARRI Look Library", page 79. To create look files for the camera, download the free Mac OS utility ARRI Color Tool from the ARRI website: https://www.arri.com/camera/amira/tools/arri_color_tool/... - Page 75 (LUT). Create preview LUTs with the ARRI LUT Generator at www.arridigital.com. LOOK Applies a video display processing to camera images. The default ARRI 709 look complies with the ITU.R-BT709 standard for display on standard broadcast monitors. ALEXA Classic 709 Creates a Rec 709 equivalent image in the same way that it is processed in the ALEXA Classic product line.
-
Page 76: Duplicating A Look File
Affect ASC CDL images under Log C. Black Gamma, Gamma, Knee, Saturation, Saturation by Hue ° Affect VIDEO images. ASC CDL parameters ° Are applied to the image before VIDEO parameters. Please refer to the ARRI white paper on color parameters (for download at www.arri.com). - Page 77 CDL), they offer an exchange format for basic look transformations between color correction systems and editing tools by different manufacturers. The ALEXA Mini image processing applies ASC CDL transforms to the Log C encoded image. This allows manipulations such as exposure correction or bringing down highlights, before the picture is converted to the display color space with its steeper contrast curve.
-
Page 78: Editing Looks
Editing will overwrite an existing look file and it's values. To prevent this, duplicate the look first, and then edit the duplicate. Some looks like ARRI 709 as well as all ARRI Look Library looks are read-only and cannot be edited directly, please create a duplicate and edit the duplicate if you want to edit read-only looks. -
Page 79: Use Of The Arri Look Library
7.5.9.6 Use of the ARRI Look Library The ARRI Look Library is a comprehensive set of predefined looks with an advanced look management. It provides a set of high quality looks and offers a basic repertoire of color responses like film stocks and filters did for film cameras. -
Page 80: Recording
For information on how to duplicate a Look file, see "Duplicating a Look file", page 76. Note: If you duplicate or rename a Look file based on the ARRI Look Library, the ARRI Look Library identifier is set as prefix of the new file name and cannot be deleted. -
Page 81: 4:3 Recording
Note: While the image resolution for 4:3 2.8K is 2880 x 2160 the recorded resolution is 2944 x 2160. The additional border is due to the ALEXA Mini's ProRes encoder that handles multiples of 128 more efficiently. The remaining 32-pixel boundary left and right to the image is filled with black pixels. -
Page 82: Normal Mode
Home screen and camera menu Interval recording ° For more information, see "Interval recording", page 82. Stop motion ° For more information, see "Stop motion", page 83. 7.6.3.1 Normal mode The camera records all consecutive images with the configured sensor frame rate for the duration of the recording. -
Page 83: Stop Motion
Home screen and camera menu Setting the resulting clip length NOTE: Only available in duration mode Preset. For more information, see "Setting the duration mode", page 82. NOTE: When changing the resulting clip length, the camera automatically updates the recording duration. ►... -
Page 84: Setting The Prerecording Maximum Duration
Home screen and camera menu 5. To end buffering: Press the assigned user button again. Note: When ending prerecording, the image buffer is cleared and all remaining images in the buffer are discarded. 7.6.4.2 Setting the prerecording maximum duration Technical limitations may reduce the actual buffer duration below the set value. To activate and de-activate prerecording, assign prerecording to a user button. -
Page 85: Setting Audio Recording
Home screen and camera menu 7.6.5 Setting audio recording 1. Choose MENU > Recording > Audio recording. You have the following options: Audio recording ° Sets audio recording on or off. Channel 1/2 control ° Sets control mode of channel to Manual, Manual+Limiter or Auto. For technical information on limiter and auto gain functionality, see "Technical data", page 145. -
Page 86: Erasing A Cfast 2.0 Card
Home screen and camera menu NOTICE A CFast 2.0 card may need to be reformatted in the event of a sudden power loss while the camera is writing to the card. The camera will indicate the error with an alert message. Please follow the alert instructions to avoid damage to the card or further recordings. -
Page 87: Monitoring
Home screen and camera menu ARRI / A-MINI / FRAMELINES: for frame line imports to camera GRABS: for grabbed still frames LDA: for lens data archive imports/exports LICENSES: for license file installation LOG: for exported camera and update logfiles LOOKFILES: for look file imports/exports... -
Page 88: Status Info
Home screen and camera menu 7.8.1 Status info EVF and SDI Sensor FPS Reel and clip info SHUTTER value BAT level/status IRIS value Focal length EI Exposure index Alert and temperature status Internal ND filter Camera settings WB White balance EVF/SDI status Camera index letter Frame lines... - Page 89 Home screen and camera menu Status info Description (5) Internal ND filter Shows the current setting for the ND filter. (6) WB White balance Shows the current value for the white balance. (7) Camera index letter Shows the camera index letter. (8) LDS status Shows that the LDS interface has been disabled manually.
- Page 90 Home screen and camera menu Status info Description (9) Audio status Shows the current level of camera au- dio channel signals. If audio is cur- rently not possible, an orange speaker icon with a small x is shown. Black markers at signal levels -20, -18, -9 dBFS for reference test tone.
- Page 91 Indicates that EXT sync mode is acti- vated. (17) Fan icon Shows that the camera needs to in- crease the fan speed to cool the cam- era properly. (18) EVF/SDI processing Indicates the processing of the respec- tive output, in this case ARRI Look 2 file.
-
Page 92: Setting Evf/Sdi Status Info Components
Home screen and camera menu Status info Description (18) Exposure tool Shows that the exposure tool is active. If dark gray: Shows that the selected exposure tool cannot be used current- (18) Peaking Indicates that peaking is active on the respective output. -
Page 93: Live Monitor
Home screen and camera menu Lens data ° Enables/disables iris and focal length readings. Also available for monitor (in Monitor overlays menu screen). Lens focus distance ° Sub-option of lens data setting. Enables/disables display of focus distance readings, located on the lower left corner of the image. °... -
Page 94: Setting Evf/Monitor/Sdi Status Overlays
Home screen and camera menu Surround mask If surround view is active, the non-recorded area is masked. Style options for the mask are: Black line, colored line, or semitransparent mask. Center mark Marks the image center. Can be set to Off, Cross, Dot or Small Dot. 7.8.2 Setting EVF/Monitor/SDI status overlays ►... -
Page 95: Overlay Menu
Home screen and camera menu 7.8.4 Overlay menu The overlay menu offers a set of camera parameters for adjustment. When activated, it is visible in the top section of the image on the MVF-1 monitor and EVF and on any SDI output which has SDI processing activated. -
Page 96: Setting Frame Lines
NOTICE The camera contains a set of default frame lines with standard aspect ratios. You can also import external frame lines in XML format. You can create custom frame lines with the ARRI Frameline Composer on the ARRI webpage. 7.8.5.1 Setting frame lines 1. -
Page 97: Configuring And Resetting User Rectangle 1 And 2
Home screen and camera menu 7.8.5.5 Configuring and resetting user rectangle 1 and 2 You can configure width, height and offset (i.e. position from left and top screen edge) in per mill. You can also reset all settings. 1. Choose MENU > Monitoring > Frame lines > User rectangle 1 or MENU > Monitoring >... -
Page 98: Defining Peaking For Evf/Monitor/Sdi
Home screen and camera menu ► Press PK (2). You have activated peaking for both Monitor (1) and EVF (3). For information on peaking settings, see "Defining peaking for EVF/Monitor/SDI", page 98. 7.8.7.2 Defining peaking for EVF/Monitor/SDI Peaking highlights in-focus image sectors for better focus judgement. You can activate peaking via the menu, via user button or by pressing PK on the viewfinder (only for EVF/Monitor). -
Page 99: Exposure Tools
Home screen and camera menu 7.8.8 Exposure tools 7.8.8.1 Activating the exposure tool The EXP button (2) activates the configured exposure tool on the Monitor (1) and EVF (3). Use the exposure tool for evaluation of the image exposure levels. An activated exposure tool lights up the button (2). - Page 100 Home screen and camera menu False color mode ° The result of activating false color can be varied to either Monitoring-based or Log C-based. This choice is global and will be valid for all viewing outputs. Monitoring-based When choosing Monitoring-based false color and false color is activated (with the EXP button on the viewfinder, for example), false color is calculated based on the video signal of the respective monitoring output.
-
Page 101: Setting The Evf Zoom Position
Home screen and camera menu Monitor waveform ° Sets waveform overlay on monitor on or off. Monitor waveform size ° Sets size of monitor waveform overlay to small or large. Note: Waveform is a luminance waveform from a 0-100% signal level, calculated from the EVF and monitor image signals for each path. -
Page 102: Configuring Sdi Processing
Home screen and camera menu Format Reso- Samp- Frame rates lution ling 422 1.5G 1920x1080 4:2:2 23.976p, 24p, 25p, 29.97p, 30p, 50i, 59.94i, 60i, 23.976psf, 24psf, 25psf, YCbCr 29.97psf, 30psf 422 3G 1920x1080 4:2:2 48p**, 50p, 59.94p, 60p YCbCr 444 3G 1920x1080 4:4:4 23.976p, 24p, 25p, 29.97p, 30p DL 422 3G*... -
Page 103: Setting Sdi 1/2 Frame Rate
Home screen and camera menu DL 422 3G UHD** • DL 422 6G UHD** • ** only in 3.2K and 4K UHD. For information on the combination of formats, frame rates and scan formats, see "SDI configuration", page 101. ► Choose MENU > Monitoring > SDI > SDI 1 format or MENU > Monitoring > SDI >... -
Page 104: Cloning Sdi 1 Settings To Sdi 2
Home screen and camera menu If both SDI 1 and 2 are supposed to show processed images, SDI 2 needs to be configured as SDI 1 clone. See "Cloning SDI 1 settings to SDI 2", page 104 for more information. ►... -
Page 105: Playback
Home screen and camera menu Playback 7.9.1 Starting playback via the PLAY button 1. Press PLAY (1) for one second to see the last recorded clip on the CFast 2.0 card. The camera enters playback on Monitor, EVF and on SDI. 2. -
Page 106: Playback Screen Controls
Home screen and camera menu 7.9.2 Playback screen controls When starting playback, the camera loads the last recorded clip (paused on the • first frame). PLAY/PAUSE (6) button: • Toggles between play and pause. Play/pause can also be toggled by pressing the play button at the bottom of the viewfinder or by pressing on the jogwheel. -
Page 107: System
Home screen and camera menu 3. For the selected clip, clip properties are displayed below the cliplist: Codec: Recording codec of clip. ° Resolution: Recording resolution of clip. ° Duration: Clip duration at playback speed. ° Rec FPS: Sensor frame rate the clip was recorded with. °... -
Page 108: Adjusting The Image Detail Set/Active
° 7.10.1.4 EXT sync mode Up to 16 ALEXA Mini cameras can be synchronized for various applications requiring sensor synchronization. One camera is set as the master camera and the other cameras function as slave cameras. Cameras can be connected to each other via the EXT connector, using the MINI-EXT-sync cable (K2.0009051) and the EXT distribution... - Page 109 Home screen and camera menu *SDI 2 needs to be rewired in order to be used as a genlock input. Setting the EXT sync mode One camera is functioning as the master camera and the other camera(s) as slave camera(s). A slave camera can be a sensor slave (only sensor sync) or a settings slave (sensor and settings sync).
- Page 110 Home screen and camera menu EXT settings slave ° Configure the camera as a settings slave. The sensor is synchronized with the master camera. The SDI outputs of the slave camera are synchronized with the master camera. The slave camera inherits the timecode from the master camera.
- Page 111 Home screen and camera menu Monitoring the EXT sync cluster Card status with EXT sync In EXT sync mode, you can use recording media with different capacities in a cluster. The master camera calculates the overall remaining recording time based on the medium with the lowest capacity in the cluster.
-
Page 112: Setting Genlock Sync
The camera requires a black burst or tri-level sync signal running at sensor fps for the SYNC IN BNC connector. Note: ALEXA Mini does not offer a SYNC IN connector by default. Syncing to a black burst or tri-level signal via SYNC IN requires a hardware modification of the camera to function. -
Page 113: Mirroring The Sensor Image
Vertically and horizontally mirrored (i.e. rotated by 180°). 7.10.1.8 Working with a user pixel mask All sensors exhibit a certain number of defect pixels, and ARRI cameras have two mechanisms to catch and correct them: one is a static pixel correction based on a... -
Page 114: Setting The Fan Mode
As an added service, it is possible to send the User Pixel Mask to ARRI Service at service@arri.de for verification. We strongly recommend that you take advantage of this free service, as sometimes, clusters are difficult to spot depending on the background. -
Page 115: Setting The Bat In Warning Voltage Level
Home screen and camera menu 7.10.3.1 Setting the BAT in warning voltage level You can set the voltage level that triggers a power warning for external batteries on the BAT connector. ► Choose MENU > System > Power > BAT in warning and set the voltage level. 7.10.4 Lens mount settings You can enable/disable the LDS contacts of the lens mount and set your preferred focus unit. -
Page 116: Setting The Display Style
If you are using SUP 5.0 (or higher) with the single or dual 6G output for UHD • up to 60p, please make sure to update your camera at an ARRI service station with the latest SDI output board (IAOX Rev. H) to ensure best 6G or dual 6G performance. -
Page 117: Supported Rcp Parameters
With ALEXA Mini, after performing „Auto White Balance“, the RGB setting still is maintained. Look support: With ALEXA Mini in multicam mode, the look functions are part of the image parameter remote control of the RCP. Starting with SUP 5.0, other looks than the default Rec 709 can be used. - Page 118 RCP. Starting with SUP 5.0, other looks than the default Rec 709 can be used, typically ARRI 709 Multicam. Please also see "LOOK settings". NOTE: Please make sure you have a look loaded which is editable (e.g. ARRI 709 Multicam), some default looks included in the camera are write protected, these looks cannot be edited.
-
Page 119: Tally Control
In addition to controlling image parameters via a Sony RCP, the camera can also receive tally information e.g. from an image switcher. The ALEXA Mini displays an active tally by lighting up the integrated tally lights on the EVF, and by showing an overlay in the EVF and on the SDI outputs (SDI processed). -
Page 120: Camera Access Protocol (Cap)
The camera access protocol is an IP based API that allows for control of look file parameters as well as operational parameters: CAP can be used to send and receive color grading information to and from ARRI • cameras via network connection and modify the CDL parameters of the currently active Look file. -
Page 121: Selecting The Wifi Network
Home screen and camera menu 2. Enter a password. The WiFi password must be between 8 and 32 characters long. For information on using the on-screen keyboard, see "Using the on-screen keyboard", page 51. Note: The default password is: arriarri 7.10.9.4 Selecting the WiFi network You can select a WiFi network, if you have activated the WiFi power and when the WiFi mode is set to Client. -
Page 122: Setting The Region Of The Wireless Function
License keys are linked to the camera's serial number and cannot be transferred from one camera to another. The ARRI license webshop requires a hardware info file to identify the individual camera. Before ordering a license key, you must export the HW INFO file from the camera to a USB memory stick for upload during purchase. -
Page 123: Exporting Hw Info From The Camera
If a camera set was purchased including a preinstalled license, the license key can be found on the USB memory stick delivered with the camera. If a license was purchased from the ARRI license web shop, please use the license provided there. -
Page 124: Updating The Camera
° 3. Read the release notes carefully. 4. Copy the update file (*.SUP) to the ARRI/A-MINI/SUP folder on the USB stick. 5. Copy the update key (*.lic) to ARRI/A-MINI/LICENSES on the USB stick. 6. Safely remove the USB memory stick from the computer. -
Page 125: Updating Camera Components
You can update LBUS devices (CForce mini motors, CForce Plus motors, ARRI Master Grips and ARRI LCUBE) via the camera. 1. Copy the LBUS device update file onto an USB memory stick in folder ARRI/ECS/ 2. Connect the LBUS device to the LBUS connector of the lens mount. -
Page 126: Resetting The Electronic Horizon
Home screen and camera menu 5. Press CONFIRM to start the update. Cancel with BACK. 7.10.12 Resetting the electronic horizon ► Choose MENU > System > Reset electronic horizon. A screen showing the roll and tilt values is displayed. You are prompted to place the camera on a level surface and to press RESET. -
Page 127: Loading Setups
7.11.2 Loading setups You can load user setups stored on the camera or on a USB medium. In case you are using the ARRI WCU-4 unit, you can trigger the loading of internally stored setups from there. 1. You have the following options: Choose MENU >... - Page 128 Home screen and camera menu MENU > MONITORING > SDI > SDI 1&2 Image MENU > MONITORING > SDI > SDI 1&2 3G Level MENU > MONITORING > SDI > SDI2: Clone SDI1 MENU > MONITORING > SDI > Anamorphic Desqueeze MENU >...
- Page 129 Home screen and camera menu HOME > EI > ND (MINI) ND Filter HOME > LOOK Active Look* *if not found in list, then load ARRI709 HOME > EI > IRIS EF Iris Value LENS Allows you to change quickly between different lens setups. MENU >...
-
Page 130: Resetting To Factory Defaults
MENU > RECORDING > REC BEEPER / TALLY > Rec Beeper + Tally 7.11.4 Resetting to factory defaults You can reset the camera to the ARRI factory default values. 1. Choose MENU > Setup > Factory reset. You are asked to confirm the reset. - Page 131 Home screen and camera menu User button functions EVF+Mon. Surround * Switches surround view on or off. Supports smart behav- ior. EVF+Mon. Zebra/FC * Toggles the exposure tool between Zebra and False Col- EVF+Mon. Zoom * Switches the viewfinder zoom function on or off. Supports smart behavior.
- Page 132 Home screen and camera menu User button functions Audio Ch1 Decrease Decreases gain of audio channel 1 in 1dB steps. Note: User button is only functional with channel 1 control set either to Manual or Manual (+L). Audio Ch1+2 Increase Increases gain of audio channels 1+2 simultaneously in 1dB steps.
-
Page 133: Button Vf1 And Vf2
For information on user button functionalities, see "User buttons", page 130. 7.12.5 Assigning functions to GPIO user buttons The ARRI GPIO box (GPB-1, K.2.0007642) can be used as an interface to the camera for external user buttons. It connects to the camera via the EXT connector and has a 37-pin D-Sub connector carrying 14 GPI (General purpose input) connections plus 2 outputs (camera power status and camera recording status). -
Page 134: Assigning Functions To Lens Ret User Buttons
Home screen and camera menu 7.12.6 Assigning functions to lens RET user buttons You can assign a camera function to the RET button of ENG lens. If the lens does not support this, a disconnected plug is shown behind the menu entry. ►... -
Page 135: Viewing The Number Of Connected Ecs Devices
Home screen and camera menu 7.14.1.4 Viewing the number of connected ECS devices ► Choose MENU > Electronic Control System (ECS) > Radio > Connected devices. The number of connected devices is displayed. 7.14.2 Lens data Lens data can be provided in two different ways, depending on the type of lens: LDS lenses •... -
Page 136: Adding Lens Tables From Lens Data Archive (Lda)
Home screen and camera menu You can import lens tables into the camera from a USB medium anyway. For more information, see "Working with lists", page 51. For information on creating the required folder structure on your USB memory stick, see "Preparing USB medium", page 86. -
Page 137: Viewing Lens Data And Info
Home screen and camera menu 2. Select a lens, and with the jogwheel press SET. 7.14.2.3 Viewing lens data and info 1. Choose MENU > Electronic Control System (ECS) > Lens data. The lens data is displayed. 2. Select a lens and press LENS INFO. The following information is displayed: Lens type °... -
Page 138: Web Remote
Web remote Web remote ALEXA Mini has a web remote function for full remote control of the camera with a browser. It requires a connection to the camera via WiFi or Ethernet (with ALEXA Ethernet/RJ-45 Cable KC-153-S, K2.72021.0). By default, WiFi is active. If WiFi is inactive, enable WiFi via the MVF-1, by navigating to MENU>System. - Page 139 Web remote PLAY: Starts playback on the camera. Provides the same controls as the MVF-1, but does not show a video signal. REC INFO: Contains info on the main recording relevant parameters, plus a REC button. Click the big circle icon to start/stop recording. Note: Rec status and timecode may respond slightly delayed depending on the network's speed.
- Page 140 Web remote NOTICE Frequent reloading of the web remote camera interface connected with WiFi indicates a limited WiFi range. Please place the device closer to the camera or connect via ethernet. You may also consider to use the WiFi client mode which allows to connect the camera to a WiFi network.
-
Page 141: Transvideo Starlitehd5-Arri Monitor
► Press "PLAY" (6) to start playback. ► Press "REC" (5) to start or stop recording. ► Press "EXIT" (4) to exit the ARRI menu and to return to the standard Starlite mode. All overlays disappear after a few seconds of inactivity. - Page 142 Transvideo StarliteHD5-ARRI Monitor ► A gray button indicates an active user function. ► Return to the main menu by pressing the "BACK" touch icon on the monitor. User setup menu In the load user setup menu, you can load user setup files that have been stored on the camera.
- Page 143 Transvideo StarliteHD5-ARRI Monitor ► Choose a parameter by pressing the touch icon (1) or (3) on the monitor to move the selection rectangle left or right. ► Select the parameter by pressing the touch icon (2) on the monitor. The parameter can be edited.
- Page 144 Transvideo StarliteHD5-ARRI Monitor ► While playback is running, press "Fast backward" (1) or "Fast forward" (3) to decrease or increase playback speed. ► Exit playback and return to the main menu by pressing the "BACK" (3) touch icon on the monitor.
-
Page 145: Appendix
140 mm Width 125 mm Weight 2.3 kg / 5 lbs (camera body with titani- um PL mount) Sensor 35 mm format ARRI ALEV III CMOS with Bayer pattern color filter array Sensor photo ProRes: Resolution: sites S16 HD 1600x900 2880x1620 HD Ana. - Page 146 Shutter Electronic shutter, 5.0°-356.0° Exposure latitude 14+ stops over the entire sensitivity range from EI 160 to EI 3200 as mea- sured with the ARRI Dynamic Range Test Chart (DRTC-1) Exposure index adjustable from EI 160-3200 in 1/3 stops EI 800 base sensitivity ND filters Built-in motorized ND filters 0.6, 1.2,...
- Page 147 Appendix Recording info Target resolu- ProRes: Resolution: tions S16 HD 1920x1080 1920x1080 HD Ana. 1920x1080 2048x1152 2.39:1 2K Ana. 2048x858 3.2K 3200x1800 4K UHD 3840x2160 4:3 2.8K 2944x2160 ARRIRAW: 2.8K 2880x1620 OpenGate 3.4K 3424x2202 4:3 2.8K (OG 3424x2202 3.4K) 16:9 HD Ana. 3424x2202 (OG 3.4K) 2.39:1 2K Ana.
- Page 148 Appendix HD Ana. ProRes 422 LT ProRes 422 ProRes 422 HQ ProRes 4444 ProRes 4444 XQ ProRes 422 LT ProRes 422 ProRes 422 HQ ProRes 4444 ProRes 4444 XQ 2.39:1 2K Ana. ProRes 422 LT ProRes 422 ProRes 422 HQ ProRes 4444 ProRes 4444 XQ 3.2K...
-
Page 149: Dimensional Drawings
1 kHz sine @ -9 dBFS / -18 dBFS / -20 dBFS 10.2 Dimensional drawings Dimensional drawings are attached at the end of this document. They can also be downloaded from the ARRI website: https://www.arri.com/alexamini 10.3 Pin-outs Note: All pin-outs for camera interfaces appear as seen by the user. - Page 150 Appendix Audio cable K2.0006171 ARRI offers a cable with a matching connector to create audio adapters. The following table shows the wire assignments of this cable. Function Wire (old) Wire (new) Shield Shield Line 1 (+) White with blue White...
-
Page 151: Declarations Of Conformity
LTC out 10.4 Declarations of conformity EU Declaration of Conformity The product ALEXA Mini conforms to the specifications of the following European directives: For cameras delivered before 13 June 2016: DIRECTIVE 1999/5/EC OF THE EUROPEAN PARLIAMENT AND OF THE •... - Page 152 Appendix Note: This equipment generates, uses, and can radiate radio frequency energy and, if not installed and used in accordance with the instruction manual, may cause harmful interference to radio communications. Operation of this equipment in a residential area is likely to cause harmful interference in which case the user will be required to correct the interference at his own expense.
- Page 153 2.45” Optical Center 42.16 mm 124.83 mm 1.66” 4.91” ALEXA Mini Length Width Height Weight ALEXA Mini (camera body with titanium PL lens mount) 184.75 mm - 7.27” 124.83 mm - 4.91” 140 mm - 5.5” ~ 2.3 kg/5 lbs...
- Page 154 4 mm 2.38” 0.63” 0.16” M4 (8x) 4.4 mm deep ALEXA Mini Length Width Height Weight ALEXA Mini (camera body with titanium PL lens mount) 184.75 mm - 7.27” 124.83 mm - 4.91” 140 mm - 5.5” ~ 2.3 kg/5 lbs...
Need help?
Do you have a question about the ALEXA Mini and is the answer not in the manual?
Questions and answers