Advertisement
Table of Contents
- 1 Table of Contents
- 2 Wood Heater Safety
- 3 Before Installing Your Wood Heater
- 4 Clearances to Combustibles
- 5 Installation
- 6 Fan Operation
- 7 Operating Your Wood Heater
- 8 Wood Heater Maintenance
- 9 Trouble Shooting
- 10 Trouble Shooting
- 11 Warranty
- 12 Exploded Diagram
- 13 Spare Parts List
- Download this manual
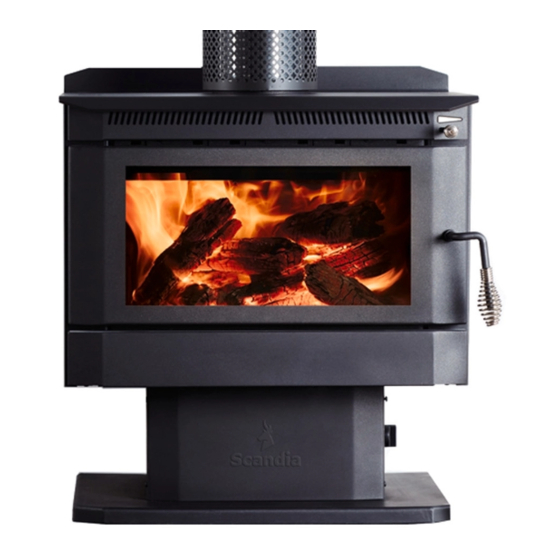
SUPREMACY RANGE
OWNERS MANUAL
Version 1.2
Contents of manual may be updated without notice.
For the latest version of this manual please refer to our website: www.scandiastoves.com.au
SERIES 1
Supremacy 200
Supremacy 300
Scandia Heating (Aust) Pty Ltd
Head Office
58 Access Way
Carrum Downs VIC 3201
Australia
+61 3 8579 5900
info@scandiastoves.com.au
www.scandiastoves.com.au
Advertisement
Table of Contents
Troubleshooting

Related Manuals for scandia Supremacy 300


Summary of Contents for scandia Supremacy 300
- Page 1 SUPREMACY RANGE OWNERS MANUAL SERIES 1 Supremacy 200 Supremacy 300 Scandia Heating (Aust) Pty Ltd Head Office 58 Access Way Carrum Downs VIC 3201 Australia +61 3 8579 5900 Version 1.2 info@scandiastoves.com.au Contents of manual may be updated without notice.
-
Page 3: Table Of Contents
Spare parts list INTRODUCTION Congratulations on purchasing a genuine Scandia Wood heater. When cared for properly, these high quality, finely crafted wood heaters will offer many years of reliable performance. This instruction manual has been developed to ensure optimum performance from your Scandia wood heater. It’s very important that you thoroughly read and understand all instructions before using your new wood heater. -
Page 4: Wood Heater Safety
WOOD HEATER SAFETY When properly maintained and operated your wood heater should give you many years of service, however there are important safety aspects of these products that you need to be aware of when operating a wood heater. This appliance is not intended for use by persons (including children) with reduced physical, sensory or mental capabilities, or lack of experience and knowledge, unless they have been given supervision or instruction concerning use of the appliance by a person responsible for their safety. -
Page 5: Before Installing Your Wood Heater
The floor protector must consist of 9mm thick bellis board which has a thermal resistance of 0. 1 m2 K/W, per 9mm thickness or equivalent. Scandia have a complete range of suitable ready to install hearth pads for straight wall and corner installations. -
Page 6: Clearances To Combustibles
1292 All measurements are in ‘mm’ When using Scandia default decorative mesh flue kit (fitted with an additional heat shield) Manufacturers recommendation: Keep all combustible materials at least 1.22 metres (4 feet) away from the appliance. This include rugs, fabrics, furnishings, papers, firewood, etc. NEVER dry clothing on or within 1.22 metres of the appliance. -
Page 7: Installation
The following drawing is meant as a guide only. Your wood heater must be installed by a qualified person whose work conforms with local council regulations, Australian/New Zealand standards (AS/NZS 2918:2001) & manufacturers recommendations. Scandia wood heaters are independently tested to Australian Standards using a Scandia flue kit, we always recommend using a Scandia flue kit when installing a Scandia wood fire. - Page 8 INSTALLATION ..continued Position the drop box between the angle brackets, keeping a 25mm clearance to combustibles. The located end of the drop box must protrude no less than 150mm down from the ceiling or any combustible material. Fix the drop box to the angle brackets.
- Page 9 MINIMUM INSTALLATION CLEARANCES FIGURE 1 FIGURE 2...
- Page 10 INSTALLATION ..continued FIREBOX ASSEMBLY: Remove all loose items from the fire box. First install the top baffle. Place the baffle in the firebox with the bent edges facing the same direction as in the below drawings. Lift the front edge of the baffle up and rest it on the top of the front baffle support lugs, continue to lift the rear of the baffle over the rear lugs, you will need to slide the baffle forward to clear the rear lugs.
-
Page 11: Fan Operation
OPERATING YOUR WOOD HEATER FAN CONTROL Fan Speed 1 Fan Speed 3 Fan Speed 2 Turn Fan ON / OFF CONTROLS AND THEIR USE FAN OPERATION Fan Power Cord Plug the supplied power lead into the heater Fan Controls Step 1 and into a power outlet Air Slide to control primary air intake Step 2... -
Page 12: Operating Your Wood Heater
OPERATING YOUR WOOD HEATER ..continued AIR CONTROLS Your wood heater needs air to burn the fuel. This air is supplied through a primary air slide at the right side of the front of your wood heater above the door. On the SCSP200and SCSP300 secondary air is drawn into the top rear of the firebox which is not adjustable. - Page 13 WOOD HEATER MAINTENANCE CHECK YOUR WOOD HEATER REGULARLY Initially, we recommend you check your flue system at least once per month. After the first few months you will notice a pattern of soot and creosote build up and you can then determine an inspection interval for checking soot and creosote build up that is suitable for your wood heater installation.
-
Page 14: Wood Heater Maintenance
There may be times however when you need to clean the glass. To do this, use a soft cloth and a non-abrasive glass cleaner. Only ever clean the glass when the wood heater is cold. For best results select from Scandia’s range of glass cleaning products. -
Page 15: Trouble Shooting
TROUBLE SHOOTING Many people under estimate the importance of using a professional installer with experience in wood heating who adheres to Australian Standards to install their wood fire. If you are having issues with your wood fire not working the way you think it should, we implore you to speak to your installer first; they can help you with issues such as burning too much or too little wood, smoke in the room when you open the door, blackened glass or build-up of creosote during use. -
Page 16: Trouble Shooting
WARRANTY SCANDIA LIMITED WARRANTY This limited warranty is given by Scandia Heating (Aust) Pty Ltd (ACN 005 868 093) (Scandia or we) to the original retail purchaser (you) of the wood heater to which this Warranty applies. Our goods come with guarantees that cannot be excluded under the Australian Consumer Law. You are entitled to a replacement or refund for a major failure and for compensation for any other reasonably foreseeable loss or damage. -
Page 17: Warranty
(including labour costs). Scandia will only be responsible for transport of the wood heater from the original place of purchase to Scandia’s premises (and back), and replacement or repair in accordance with this Warranty. - Page 18 SUPREMACY 200 EXPLODED DIAGRAM...
-
Page 19: Exploded Diagram
SUPREMACY 300 EXPLODED DIAGRAM... - Page 20 SUPREMACY 200 SPARE PARTS LIST LEGEND PART SCANDIA PART NO. Body weldment-2016 SPS2001 Inner heat shield-2016 SPS2002 Right side external heat shield-2016 SPS2003 Left side external heat shield-2016 SPS2004 Door frame weldment-2016 SPS2005 Lower decorative grill-2016 SPS2006 Rear heat shield-2016...
-
Page 21: Spare Parts List
SUPREMACY 300 SPARE PARTS LIST LEGEND PART SCANDIA PART NO. Body weldment-2016 SPS3001 Inner heat shield-2016 SPS3002 Right side heat shield-2016 SPS3003 Left side heat shield-2016 SPS3004 Door frame weldment-2016 SPS3005 Lower decorative cover-2016 SPS3006 Rear heat shield-2016 SPS3007 Pedestal front cover-2016...
Need help?
Do you have a question about the Supremacy 300 and is the answer not in the manual?
Questions and answers
Electrical diagram for Supremacy 300 including fuse size, current draw of fan at different speeds etc