Advertisement
Scandia Warmbrite Range
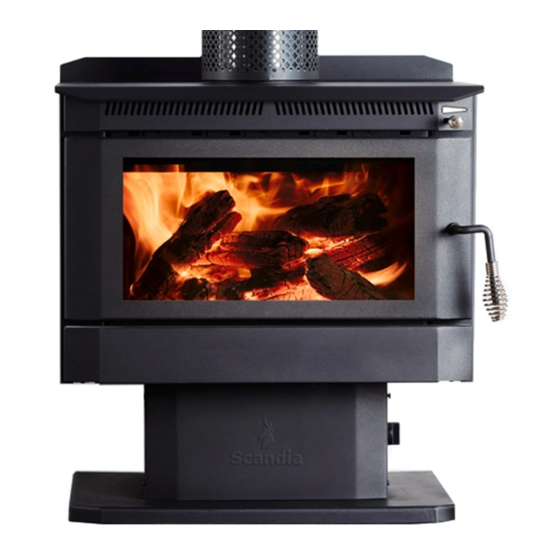
Freestanding Wood Heaters
Model Name
Warmbrite 140 Series 2
Warmbrite 200 Series 2
Warmbrite 200 Stacker Series 2
Warmbrite 300 Series 2
Introduction
Congratulations on purchasing a genuine Scandia Wood heater. When cared for properly,
these high quality, finely crafted wood heaters will offer many years of reliable performance.
This instruction manual has been developed to ensure optimum performance from your
Scandia wood heater. It's very important that you thoroughly read and understand all
instructions before using your new wood heater.
Check Local Council Requirements Eg. permits
When installing, operating and maintaining your wood heater, follow the guidelines
presented in these instructions, and make them available to anyone using or servicing the
wood heater. Your city, town, state or territory may require a building permit to install a
solid fuel burning appliance.
Always consult your local building inspector or local council to determine what regulations
apply in your area.
Your wood heater must be installed by a qualified person whose work
conforms with local council regulations, Australian standards & manufacturers
recommendations. Failure to do so will void your warranty and could possibly
void any home insurance.
Model Number
SCWB1402
SCWB200
SCWB200ST
SCWB300
~
1 ~
Advertisement
Table of Contents

Related Manuals for scandia Warmbrite 140 2 Series


Summary of Contents for scandia Warmbrite 140 2 Series
- Page 1 This instruction manual has been developed to ensure optimum performance from your Scandia wood heater. It's very important that you thoroughly read and understand all instructions before using your new wood heater.
-
Page 2: Wood Heater Safety
Wood Heater Safety When properly maintained and operated your wood heater should give you many years of service, however there are important safety aspects of these products that you need to be aware of when operating a wood heater. This appliance is not intended for use by persons (including children) with reduced physical, sensory or mental capabilities, or lack of experience and knowledge, unless they have been given supervision or instruction concerning use of the appliance by a person responsible for their safety. -
Page 3: Before Installing Your Wood Heater
Before Installing your wood heater You need to consider the following to ensure the safe operation of your wood heater. Provision of adequate air to support efficient combustion of the fuel. A well sealed flue/chimney system, hereinafter referred to as the “flue system”. The protection of combustible materials in proximity of the wood heater. -
Page 4: Installation
The floor protector must consist of 6.0mm thick cement fibre sheet which has a thermal resistance of 0.8m K/W, per 4mm thickness or equivalent. Scandia have a complete range of suitable ready to install hearth pads for straight wall and corner installations. - Page 5 For connecting into a standard installation using Scandia Default Flue Kits: The following drawing is meant as a guide only. Your wood heater must be installed by a qualified person whose work conforms with local council regulations, Australian/New Zealand standards (AS/NZS 2918:2001) & manufacturers recommendations.
- Page 6 Position the drop box between the angle brackets, keeping a 25mm clearance to combustibles. The located end of the drop box must protrude no less than 150mm down from the ceiling. Fix the drop box to the angle brackets. Add the remaining casings to the required height. Australian/New Zealand Standards state that “the flue pipe shall extend not less than 4.6m above the top of the floor protector”.
- Page 7 Firebox Assembly: Remove all loose items from the fire box. First install the top baffle. Place the baffle in the firebox with the bent edges facing the same direction as in the below drawings. Lift the front edge of the baffle up and rest it on the top of the front baffle support lugs, continue to lift the rear of the baffle over the rear lugs, you will need to slide the baffle forward to clear the rear lugs.
-
Page 8: Operating Your Wood Heater
Operating Your Wood Heater Fuel Your wood heater is designed to burn dry hardwood only.; it is not designed to burn, Soft wood Paper or cardboard, other than small amounts used to light stove. Treated or painted wood ... -
Page 9: Wood Heater Maintenance
Refueling Before refueling your wood heater, turn the air supply to high for a few moments until there is a good fire in the heater. This will ensure there is no build-up of harmful gases in the wood heater when the door is opened and will also get the new fuel burning quickly and not allow it to kill the fire. - Page 10 Ash removal When the stove is out and completely cold you may remove the ash into a steel bucket with a small shovel. Place a cover over the bucket so that when removing the bucket the ash does not blow about your house. Care of glass At times, especially when the air controls are turned to low settings or when damp wood is used, the wood heater glass will blacken.
-
Page 11: Troubleshooting
Trouble Shooting Fire not burning A wood heater not burning is generally caused by either a shortage of air and/or incorrect or damp fuel. If fuel is not the problem check: That the air controls are opened. There is no blockage in the flue system. ... - Page 12 Scandia Limited Warranty This limited warranty (Warranty) is given by Scandia Heating (Aust) Pty Ltd (ACN 005 868 093) (Scandia or we) to the original retail purchaser (You) of the wood heater to which this Warranty applies. Our goods come with guarantees that cannot be excluded under the Australian Consumer Law.
- Page 13 (including labour costs). Scandia will only be responsible for transport of the wood heater from the original place of purchase to Scandia’s premises (and back), and replacement or repair in accordance with this Warranty. Contact details...
Need help?
Do you have a question about the Warmbrite 140 2 Series and is the answer not in the manual?
Questions and answers
How to replace a baffle plate in Scandia Warmbrite 140 wood burning fire
To replace the baffle plate in a Scandia Warmbrite 140 2 Series wood heater:
1. Remove all loose items from the firebox.
2. Install the top baffle:
- Place the baffle inside the firebox with the bent edges facing the correct direction.
- Lift the front edge of the baffle and rest it on the front baffle support lugs.
- Continue lifting the rear of the baffle to clear the rear support lugs.
- Slide the baffle forward and then back so it sits properly above the rear lugs.
Ensure the baffle is positioned correctly for proper function.
This answer is automatically generated