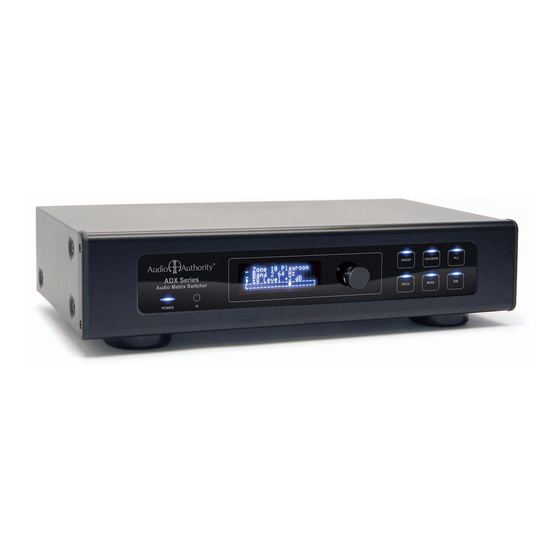
Audio Authority ADX-0808 Installation Manual
Audio matrix pre-amp systems
Hide thumbs
Also See for ADX-0808:
- Installation and operation manual (24 pages) ,
- Installation and operation manual (20 pages) ,
- Setup utility manual (12 pages)
Table of Contents
Advertisement
Quick Links
Advertisement
Table of Contents

Summary of Contents for Audio Authority ADX-0808
-
Page 1: Installation Guide
Installation Guide ADX-0808 and ADX-1616 Audio Matrix Pre-amp Systems... - Page 2 Warnings To reduce the risk of fire or electric shock, do not expose this unit to rain or moisture. The exclamation point symbol alerts users to important operating and maintenance instructions in this booklet. • Read this manual before installing or using this product. •...
-
Page 3: Table Of Contents
Specifications . . . . . . . . . . . . . . . . . . . . . . . . . . . . . . . . . . . . 15 2048 Mercer Road, Lexington, Kentucky 40511-1071 800-322-8346 • 859-233-4599 • Fax: 859-233-4510 www.audioauthority.com • support@audioauthority.com Audio Authority and the Double-A Symbol are registered trademarks of Audio Authority Corp. Copyright September, 2016, all rights reserved. -
Page 4: Introduction
ADX TIPS Key Features • Sixteen source inputs/sixteen zone outputs (ADX-1616) or eight source inputs/eight zone outputs (ADX-0808) • Advanced DSP features per zone output, including 10-band EQ, highpass filter, lowpass filter and tone controls • Integrates seamlessly with third party control systems such as Control4, URC, RTI and others •... -
Page 6: Getting Started
Section.) 2. Connect ADX zone output jacks to a multi-channel amplifier OR alternatively, connect the DB-25 audio output to an Audio Authority SonaFlex multi-channel amplifier. (Detailed instructions located in the Installation Section.) 3. Connect the ADX’s power supply to a suitable AC outlet using ONLY the furnished power supply. After a moment, the ADX boots up and is ready to perform switching. -
Page 7: Installation
INSTALLATION The ADX is designed so that it may be installed either on a shelf or in a standard 19-inch equipment rack. If rack mounting, remove the feet and the cover screws adjacent to the front panel of the unit. Reuse the cover screws to mount the Model 1192A rack adapters supplied with the ADX. -
Page 8: Operation
INPUT OUTPUT OUT TO AMPLIFIER OPERATION ZONES 1 - 8 Model ADX-1616 Audio Matrix Front Panel INPUT OUTPUT 800-322-8346 • 859-233-4599 www.audioauthority.com OUT TO AMPLIFIER 1- SLEEVE = +12V 18V DC 2- RING = GROUND ZONES 9 - 16 RS-232 SERIAL POWER The front panel is operated by using six touch sensitive keys: Group , Favorite... -
Page 9: Network Settings
This screen allows the front panel IR receiver to be turned on or off. Factory default is off. Rear Panel Wired IR / Trigger The wired IR/Trigger mode, time, and voltage level can be set up by using the ADX menu or by serial commands (see audio authority.com/page/adx_tips for details). -
Page 10: Configuration
Display Settings Shows current settings for the front panel display: Sleep timer (screen timeout) and display brightness. The sleep timer can be set to 5, 2 and 1 minute(s) or Disabled. Brightness can be set to 25%, 50%, 75% or 100%. Firmware Versions Displays the firmware versions of the primary firmware and the boot-loader. - Page 11 Network Tab This tab allows you to adjust Network settings (Enable DHCP, IP Address, Network Mask & Gateway), Lockouts (Front Panel Buttons & Front Panel IR), Front panel display brightness, and IR/ Trigger mode. Zone Tab Name zones, set volume levels, mute outputs, set fixed outputs, balance, and set Power On volume levels.
-
Page 12: Using Ethernet, Rs-232, And Ir
Follow the instructions for your Control4, RTI, URC, or other controller to connect to the ADX using the serial settings below, or Ethernet settings accessible via the ADX front panel menu. (A file containing the ADX serial and ethernet commands can be downloaded from the Audio Authority website, audioauthority.com/adx_tips). ADX TIPS •... - Page 13 ADX front panel IR sensor. If the ADX IR codes are available from your remote control company, download and/or activate those files. A CCF file containing the latest codes can be downloaded from the Audio Authority 3.5mm IR Pinout website, audioauthority.com/page/ir.
-
Page 14: Appendix A: Upgrading Adx Firmware
Freight charges for ® the replacement unit will be paid by Audio Authority (Ground service only). A copy of the invoice from an Authorized Reseller showing the item number and date of purchase (proof-of-purchase) must be submitted with the defective unit to constitute a valid in-warranty claim. -
Page 15: Appendix B: Troubleshooting
Appendix B: Troubleshooting Symptom Possible Cause No Power • Check for available AC power from wall outlet. • Check to make sure there is 18V available from the provided power supply. If not, reset the power supply (remove the power supply from the outlet and reconnect). No Audio •... - Page 16 2048 Mercer Road, Lexington, Kentucky 40511-1071 800-322-8346 • 859-233-4599 • Fax: 859-233-4510 www.audioauthority.com • support@audioauthority.com ADX TIPS 752-598 20161011...


Need help?
Do you have a question about the ADX-0808 and is the answer not in the manual?
Questions and answers