
Related Manuals for Security Camera King TVIPTZ-TP2IR18XME


Summary of Contents for Security Camera King TVIPTZ-TP2IR18XME
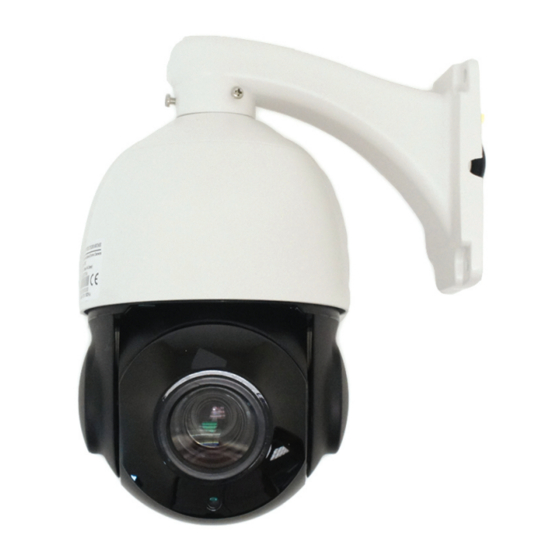
- Page 1 IPPTZ User's Manual TVIPTZ-TP2IR18XME 1080p Control View From Motion Resolution Anywhere Activated Warranty Recording...
- Page 2 WARNINGS AND CAUTIONS WARNING TO REDUCE THE RISK OF FIRE OR ELECTRIC SHOCK, DO NOT EXPOSE THIS PRODUCT TO RAIN OR MOISTURE. DO NOT INSERT ANY METALLIC OBJECTS THROUGH VENTILATION GRILLS OR OPENINGS ON THE EQUIPMENT. CAUTION EXPLANATION OF GRAPHICAL SYMBOLS This symbol, is intended to alert the user the presence of non-insulated “dangerous voltage”...
- Page 3 PRECAUTIONS: Anyone without technical qualifications should not attempt to operate this dome device before reading this manual thoroughly. Remove any power to the dome before attempting any operations or adjustments inside the dome cover to avoid potential damage to the mechanism. Inside the dome cover there are precision optical and electrical devices.
-
Page 4: Important Safeguards
IMPORTANT SAFEGUARDS 1. Read these instructions before attempting installation or operation of dome device 2. Keep these instructions for future reference 3. Heed all warnings and adhere to electrical specifications 4. Clean only with non abrasive dry cotton cloth, lint free and approved acrylic cleaners 5. -
Page 5: Table Of Contents
INDEX 1 Product Introduction........................5 1.1 Package Contents.......................5 1.2 Specification.........................6 1.3 Function Description......................7 2 Installation............................. 9 2.1 DIP Switch Settings......................9 2.1.1 Preparation....................... 9 2.1.2 Address Settings...................... 9 2.1.3 Baud Rate Settings....................10 2.1.4 RS-485 Bus Matching Resistance..............10 2.2 Bracket Dimensions......................11 2.2.1 Wall Mounted Bracket................... -
Page 6: Product Introduction
4.3.5 Pan Scan........................ 24 4.3.6 Park Action......................24 4.3.7 Privacy Zone......................25 4.3.8 Alarm (Optional).....................25 4.3.9 Advanced........................ 26 4.4 Camera..........................26 4.5 Language........................... 27 4.6 Display..........................27 4.7 Reset...........................27 5. Auto Temperature Control...................... 28 Appendix Ⅰ Anti-lightning, Anti-surge..................28 Appendix Ⅱ Clean Transparent Cover.................. 29 Appendix Ⅲ... -
Page 7: Specification
1.2 Specification Model#: TVIPTZ-TP2IR18XME Model#: TVIPTZ-TP2IR18XE Camera Camera Image Sensor 1/2.8” SONY CMOS Sensor 2.4MP Image Sensor 1/2.8” SONY CMOS Sensor 2.4MP Image Resolution 1080P Image Resolution 1080P S/N Ratio ≥58dB S/N Ratio ≥58dB Horizontal Rotation Speed 45°/s Horizontal Rotation Speed 60°/s... -
Page 8: Function Description
1.3 Function Description Super Communication Address, baud rate and protocol can be changed both from Dip switch or from software. Multilanguage OSD Menu The language display on screen menu, User can set the function or parameter, or check the related information through the OSD. Privacy Mask Privacy masking is a feature found in many IP cameras which is used to protect personal privacy by concealing parts of the image from view with a masked area. - Page 9 Users can manually adjust the aperture size to get the required picture brightness through pressing OPEN or CLOSE keys. Auto-recognize to Protocol and Module The dome can auto-recognize to the corresponding protocol and module during self-inspection. eg. Module: Sony, CNB, LG, Samsung, domestic etc. Protocol: PELCO_P, PELCO_D etc.
-
Page 10: Installation
Zero Alignment There is a point specified as zero point. When the dome is working, the preset point is not accurate. User can make the dome automatically enable the zero alignment . Auto Flip In the manual tracking mode, when a target goes directly beneath the dome, the dome will automatically rotate 180 degree in horizontal direction to maintain tracking. -
Page 11: Baud Rate Settings
2.1.3 Baud Rate Settings The 4th and 5th DIP Switches set the Baud rate. Factory-default setting is 2400bps. Baud rate: 1200bps, 2400bps, 4800bps, 9600bps selectable 2.1.4 RS-485 Bus Matching Resistance The 8 bit of DIP switch SW2 is to select the matching resistor. To the control center, in order to prevent the reflection and interference of RS-485 communication signal and other signals, the parallel matching resistor is needed in the communication interface of dome camera at the end away from the control center. -
Page 12: Bracket Dimensions
2.2 Bracket Dimensions 2.2.1 Wall Mounted Bracket 2.2.2 Corner Mounted Bracket 2.2.3 Pole Mounted Bracket... -
Page 13: Ceiling Mounted
2.2.4 Ceiling Mounted 2.3 Installation of Brackets. 2.3.1 Wall Mounted Fig 1 Installation conditions: Wall mounted dome can be used in the hard wall structure with a thickness that should be enough to install expansion bolt in indoor and outdoor environment. The wall can bear at least 4 times the weight of the dome. -
Page 14: Corner Mounted
Fig 3 2.3.2 Corner Mounted Fig 11 Installation conditions: Corner mounted dome can be used in the hard wall structure with an angle of 90° with a thickness that should be enough to install expansion bolt in indoor and outdoor environment. The wall can bear at least 4 times the weight of the dome. -
Page 15: Pole Mounted
Fig 13 c. As shown in fig 14, fix the wall hanging bracket with all cables power through it on the corner mounted attachment. Fig 14 2.3.3 Pole Mounted Fig 15 Installation conditions: Pole mounted dome can be used in the hard pole structure in indoor and outdoor environment whose diameter should match the installation size of stainless hose clamps. -
Page 16: Ceiling Mounted
Fig 16 b. As shown in fig 17, fix the wall hanging bracket with all cables through it on the pole mounted attachment. Fig 17 2.3.4 Ceiling Mounted Installation conditions: Ceiling mounted dome with thick pole can be used in the hard ceiling structure with a thickness that should be enough to install expansion bolt in indoor and outdoor environment. - Page 17 Fig 19 b. As shown in fig 20, at first unscrew the M4 screw at the side of the base of ceiling. Then make the three groups of cables Power,video/control and alarming insert into the side recessing seal groove of the ceiling connector bottom and through the core hole of the base of ceiling mount.
-
Page 18: Connection
2.4 Connection Connection of RS485 Fig 24 3. Function Instruction 3.1 Power Up Action <SYSTEM> <SYSTEM> PROTOCOL AUTO PROTOCOL AUTO DOME ID DOME ID COMM COMM VERSION VERSION TEMPERATURE TEMPERATURE DETECTING… PAN: XXX TILT: XXX Power Up Self Testing Pan, Tilt, Camera Self-test Completion Pan action: Pan rotate in certain direction and stop in zero coordinate. -
Page 19: Special Function
After FOCUS- button is pressed, the object in vicinity will become clearer while the object far away will become ambiguous. After FOCUS+ button is pressed, the object far away will become clearer while the object in vicinity will be ambiguous. Iris Press IRIS- to gradually shrink the iris and decrease the image brightness. - Page 20 Remark: 1. Items with“< >” mean they have sub menu. 2. “ → ”means the cursor selecting some option. 3. “ ※ ” means editing the content of some option selected. 4. When entering the setting page in menu, it is useless to call preset 94 to exit the menu directly.
-
Page 21: Osd Menu
4 OSD Menu 4.1 Menu Index... -
Page 22: System Information
<MAIN MENU> <SYSTEM> <DOME> <CAMERA> <LANGUAGE> <DISPLAY> <RESET> EXIT Get into the Menu Screen 4.2 System Information <SYSTEM> PROTOCOL AUTO DOME ID COMM 2400.N.8.1 VERSION TEMPERATURE EXIT MFG: Max 15 characters displayed on the screen. PROTOCOL: Display the protocol of the dome DOME ID: Display the dome address COMM: Form: Baud rate. -
Page 23: Communication
4.3.1 Communication <COMM RESET> <COMM> DEVICE ID RESET TO DIAL THE CODE CHECK ID 000000 TARGET ID SOFT PROTOCOL AUTO BAUD RATE 2400BPS <COMM RESET> SAVE EXIT EXIT DEVICE ID: Used to distinct from the ID of other domes. CHECK ID: Distinguish several domes with same ID. And altering target ID, soft protocol and baud rate needs to enter check ID in line with the device ID, otherwise altering can’t be completed. -
Page 24: Guard Tours
automatically. AMBIENT LIGHT: Ambient light is a system data. User can not change it manually. It changes according to the environment all the time. The data will refresh every time when user enter the OSD. It is from 0 to 50 grade. IR SWITCH ZOOM: When zoom value changes the IR LEDs with auto switch dependingonthe amount of zoom selected 01-23. -
Page 25: Pan Scan
DELETE: After deleted, the preset points of A and B display as 0. While the exact preset point information doesn’t be deleted. So it is convenient for user to select the preset point needing to be scanned. Speed and dwell time will reset as default setting. 4.3.5 Pan Scan <PAN SCAN>... -
Page 26: Privacy Zone
4.3.7 Privacy Zone <PRIVACY ZONE> <PRIVACY ZONE> <PRIVACY ZONE> MASK NO. MASK PRIVACY PROPOSED <SETTING> TO OPEN PRESET 1: SAVE EXIT MASK NO.: Mask No. depends on the number of the module supported. The selective range of Sony is from 1 to 24. MASK: Mask has on and off selectable. -
Page 27: Advanced
4.3.9 Advanced <ADVANCED> PWR ON ACTION MEMORY RATIO SPEED AUTO FLIP WIPER MODE WIPER SPEED WIPER TIMES <OTHERS> EXIT PWR ON ACTION: Power on action can be set as Memory, A-B scan, Pan scan, Park action, Guard tour 01, Guard tour 02, Guard tour 03 and No action. RATIO SPEED: Ratio speed can be set as ON or OFF status. -
Page 28: Language
4.5 Language <LANGUAGE> LANGUAGE ENGLISH EXIT LANGUAGE: Language can be set as Chinese or English. Default settings is English. 4.6 Display <DISPLAY> SYSTEM P AND T ACTION DOME ID COMM EXIT SYSTEML: Video system includes NTSC and PAL. N means NTSC and P means PAL. P AND T: On screen, it displays the pan and tilt degree, user can enable or disable it. -
Page 29: Auto Temperature Control
5. Auto Temperature Control This product has built-in fan and heater, which accordingly cool or heat through temperature sensitive circuit inside the dome. Appendix Ⅰ Anti-lightning, Anti-surge This product is extremely air discharge and lightning protection with TVS tube technology, which can effectively prevent the transient lightning below voltage 3000V, surge and damages caused by other types of pulse signals. -
Page 30: Appendix Ⅱ Clean Transparent Cover
Appendix Ⅱ Clean Transparent Cover In order to assure a clear image of dome, the under cover of dome should be cleaned regularly. Be careful when cleaning and hold the outer ring of under cover by hands to avoid directly touching with it. Because the acid sweat of finger membrane may corrode the surface coating of under cover. -
Page 31: Appendix Ⅳ Address Code Mapping Table
Appendix Ⅳ Address Code Mapping Table SW1 DIP Switch sets the dome address, which using binary encoded. The 8th is the top bits, and 1st is the lowest bits. Toggle the code bits of DIP Switch to ON, then the corresponding location is “1”. Conversely, it’s “0”. - Page 32 SW1-1 SW1-2 SW1-3 SW1-4 SW1-5 SW1-6 SW1-7 SW1-8 ---- ---- ---- ---- ---- ---- ---- ----...
-
Page 33: Appendix Ⅲ Exception Handling
Appendix Ⅲ Exception Handling Issue Possible Reason Solution After power Cable harness is improperly Verify that the orientation of the is applied, connected connector input there is no motion Input power voltage is too low Verify the voltage of the input power (self-test) and no video Power supply is not work...
Need help?
Do you have a question about the TVIPTZ-TP2IR18XME and is the answer not in the manual?
Questions and answers