SCIFIT AC5000 series User Manual
Hide thumbs
Also See for AC5000 series:
- Operation manual (40 pages) ,
- Assembly manual (38 pages) ,
- Service part replacement instruction (3 pages)

Related Manuals for SCIFIT AC5000 series


Summary of Contents for SCIFIT AC5000 series
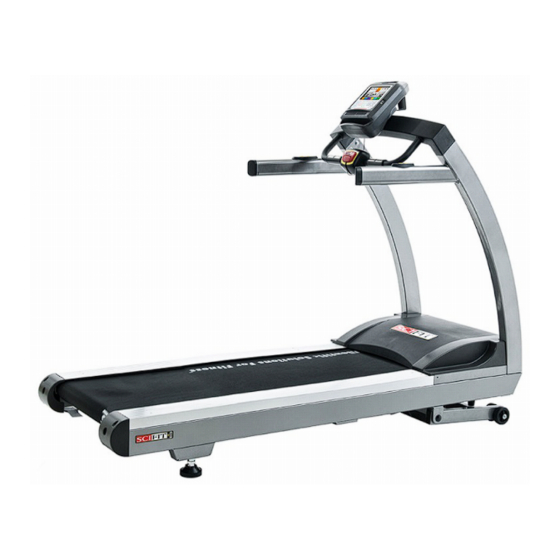
- Page 1 AC5000 Series Machine User's Manual Treadmill AC5000-XXXXXX, AC5000M-XXXXXX, AC5003M-XXX, AC5005-XXX...
- Page 3 Manuali di funzionamento e altre informazioni sui prodotti disponibili su http://www.scifit.com/resources/specifications-manuals/ Instrukcje obsługi i inne informacje o produktach dostępne na stronie http://www.scifit.com/resources/specifications-manuals/ Manuais de Operação e Informações sobre outros produtos disponíveis em http://www.scifit.com/resources/specifications-manuals/ http://www.scifit.com/resources/specifications-manuals/ Kullanım Kılavuzları ve Diğer Ürün Bilgileri http://www.scifit.com/resources/specifications-manuals/’da bulunmaktadır Page 3 of 22...
- Page 4 United Kingdom & Ireland AMERICAS Belgium Life Fitness UK LTD North America Life Fitness Benelux NV Queen Adelaide SCIFIT Parc Industrial de Petit-Rechain Ely, Cambs, CB7 4UB 4800 Verviers 5151 S. 110th E. Avenue Telephone: General Office (+44) BELGIUM Tulsa, OK, 74146 U.S.A 1353.666017...
-
Page 5: Table Of Contents
Authorized..................21 Effects of State Laws.......................21 Our Pledge To You........................21 © Copyright 2018, SCIFIT, a division of Brunswick Corporation. All Rights Reserved. 5151 S. 110th E. Avenue, Tulsa, OK 74146 • 1-800-745-1373 www.scifit.com • A7241A • 2018 Page 5 of 22... -
Page 6: Introduction
This SCIFIT machine is designed for class “S” (commercial) and class “A” (high accuracy) and class “II a” (medical directive) applications. The intended uses are for general health and wellness, cardio & pulmonary rehabilitation, sports medicine, physical therapy, physical conditioning and strength training. - Page 7 If warnings are missing or damaged, please contact customer service immediately for replacement warning labels. Warning labels are shipped with every product and should be installed before the product is used. SCIFIT is not responsible for missing or damaged warning labels.
-
Page 8: Service And Technical Data
Service and Technical Data Maintenance Component Action When Frame, Motor Cover and Console Damp Cloth Weekly Console LCD Screen LCD Cleaning Towelette Weekly Inside Motor Cover Vacuum Monthly Clean VFD Cooling Fan Monthly Inspect For tension 120 ft/lbs (178 kg/m) Motor Drive Belt Monthly and Cracks... -
Page 9: Adjustments
Adjustments Serial Number and Power Cord Location The serial number label and the power cord are located at the front of the machine. Emergency Stop Options Option 1: Attach the tether clip to your clothing. The E-Stop magnet will release when the tether is over extended. Option 2: Press the [STOP] button on the E-Stop module. -
Page 10: Machine Reloaction
Machine Reloaction Step 1: Press [Quick Start] button on the console and increase the elevation to 7%. Step 2: Turn off the machine, then unplug the power cord from the wall outlet. Attention: Two people required. Step 3: Carefully lift the machine from the rear and move to the new location. Page 10 of 22... -
Page 11: Footpad Adjustment
Footpad Adjustment Attention: A machine not level may cause walk belt tracking issues. Tools required: • Level • Cresent Wrenches (Qty. 2) Step 1: Place the level on top of the treadmill side rail. Step 2: Use the cresent wrenches to loosen the height adjustment nut (item 1) and jam nut (item 2) on both right and left footpads. Step 3: Lift and stabilize the rear of the treadmill until the machine is level (see bubble on the level), then adjust the right and left footpads until they touch the floor. -
Page 12: Belt Alignment And Tension
Step 4: Move the height adjustment nut back up to the top of the threads followed by the jam nut on both footpads, then tighten with the cresent wrenches. Belt Alignment and Tension Step 1: Press the [Quick Start] button and increase the speed to 2 mph (3.2 km/h). Step 2: * If belt tracks to the left, insert the T-handle into the left end cap and turn clockwise 1/4 at a time to move the belt to the right. -
Page 13: Belt Tension
Step 3: When the belt tracking is consistent, then increase the speed to 5 mph (8 km/h) and adjust the belt if needed according to step2. Belt Tension Step 1: Mount the treadmill and place your feet on the side rails straddling the machine, then press the [Quick Start] button. Step 2: Increase the speed to 3 mph (4.8 km/h), then grab hold of the handrails and begin to walk. -
Page 14: Elevation Calibration Test
Step 3: Stomp your foot in front of the motor cover. If the belt slips return to the "Belt Alignment/Tension" section. Elevation Calibration Test Step 1: Access the test screen by pressing in sequence the [Stop], then [Five Dot], then [One Dot] and finally the [Two Dot] buttons. Step 2: Standing off of the machine press the elevation [Up Arrow] and [Down Arrow] buttons at the same time, this will highlight the "POT"... - Page 15 Step 3: When the calibration is complete, the "POT" category will unhighlight. You may now exit by pressing and holding the [One Dot] button, then press the [Stop] button, then release both buttons. The screen will then change to the main menu. Page 15 of 22...
-
Page 16: Biomechanical Positioning
Biomechanical Positioning AC5 Treadmill Mounting Grab the handrail firmly and place one foot onto the siderail cover. Mount the machine and face the console. AC5 Treadmill Initiating a Workout Attach the emergency stop tether clip to your clothing. Select the workout program preferred (see Console Program manual) and begin the workout. Note: The console will show a count down starting at 3, then the workout will begin. -
Page 17: Specifications
Specifications Specifications - AC5000/AC5000M AC5 - 458 lbs/208 kg (Assembled), 500 lbs/227 kg (Boxed) AC5M Weight - 483 lbs/219 kg (Assembled), 525 lbs/238 kg (Boxed) Max User Weight 550 lbs (250 kg) Power 120V/15 amp dedicated circuit Power Cord 5-15P Right Angle AC5 - (0 to 15%) .5% increments AC5M - (-3 to 12%) .5% Elevation Range increments... - Page 18 Internal Parts Elevation Motor VFD With Shield Isolation Transformer Dynamic Resistor AC Power Inlet Module AC Motor AC Inline Filter Drive Belt Safety Perimeter 80” (2m) 80” (2m) 80” (2m) 80” (2m) Page 18 of 22...
-
Page 19: Troubleshooting
Noise coming from the belt each time the Noise goes away after a day or two, if noise Walk belt seam. seam of the belt passes over the roller. persists contact SCIFIT customer service. Motor making noise. Bearings of motor damaged. Replaced motor. -
Page 20: Warranty
Who Pays Transportation and Insurance For Service If the Product or any covered part must be returned to a service facility for repairs, We, SCIFIT, will pay all transportation and insurance charges for the first year. You are responsible for transportation and insurance charge after the first year. -
Page 21: What You Must Do
Warranty coverages and terms may differ outside the United States. Please contact the SCIFIT office servicing your country (contact information found at the front of this manual) or visit the applicable local SCIFIT website to receive the specific warranty information for your country. - Page 22 A7241A 2018 www.scifit.com...
Need help?
Do you have a question about the AC5000 series and is the answer not in the manual?
Questions and answers