Table of Contents
Advertisement
Quick Links
Advertisement
Table of Contents

Related Manuals for Mountz TorqueMate


Summary of Contents for Mountz TorqueMate
- Page 1 TorqueMate ® Electronic Torque Wrench...
-
Page 2: Table Of Contents
Subject Subject Subject Contents The Wrench Description Date Mode Upload Mode Recommended Use Trac Mode Calibrate Mode Basic Characteristics Peak Mode Backlit Mode Care Guidelines Preset Mode Battery Care LCD Display Set Mode Ratchet Head care Language Mode Recall Mode Unit Mode Clear Mode The PC Front End - TORQUE PCFE... -
Page 3: The Wrench
English help PC front user guide Select port: select communication port you wish to use to communicate with the wrench View: select pc front view of the wrench which you want, either memory or single function. Also select language for pc display. Change password: type current password. -
Page 4: Recommended Use
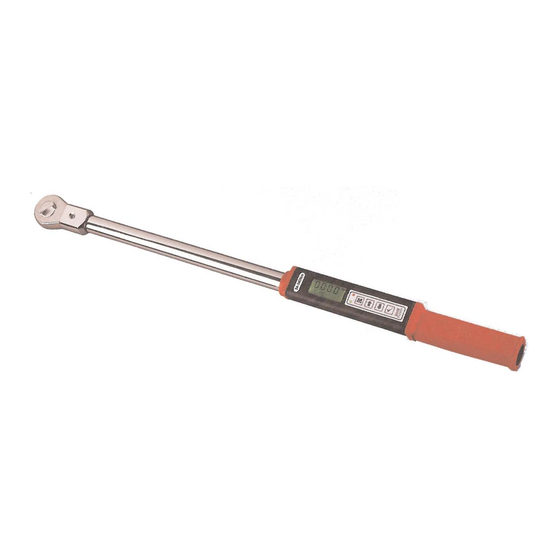
Description The TorqueMate Wrenches are "State of the Art" devices, comprising Intelligent Technology, Large Alphanumeric Display, Menu Driven. Total Tractability, Greater than 1% Accuracy, Simple to Set and Calibrate complete with Outstanding Performance and Ease of Use Features. The Torque Tools are, Hand-held Torque Measuring Instruments provide Precision Accuracy, High Repeatability, Simple Recalibration and Pass Code Operation. -
Page 5: Lcd Display
The LCD Display LCD Display Menu Button Confirming Button Counting Buttons Red Warning LED Green Warning LED Reading starts at 2% of Maximum with an Accuracy of 1% beginning at 10% of Maximum (Threshold to Maximum Span). When Reading under Threshold LCD will display "Under" BACKLIT MODE Backlit Mode - Keypad Function Backlit Mode User Information... -
Page 6: Language Mode
Language Mode - Keypad Function Language Mode User Information 1.Press to Scroll to the Language Menu The Languages of Operation available to the User are ….. 2 Press to enter Lang Menu EnG - English, Frn French, Ger - German, itA - Italian, SPn - Spanish. 3 Press to Scroll to Language Required 4 Press... -
Page 7: Peak Mode
Track Mode - Keypad Function Track Mode User Information 1 Press to Scroll to Trac Mode As Torque is applied the Wrench will actively display the applied 2 Press to operate in Trac Mode Torque reading to the Max Span of the Device. On removal of the Torque pressure the display will return to Zero. -
Page 8: Set Mode
Set Mode - Keypad Function Set Mode User Information 1 Press to Scroll to Set Mode 2 Press to enter Preset No Menu 3 Press to Scroll to required Preset No. (1 to 99) 4 Press to Confirm Preset No. selected 5 Press to Set your Nominal Value 6 Press... -
Page 9: Recall Mode
Recall Mode - Keypad Function Recall Mode User information 1 Press to Scroll to Recall Mode This mode allows the User to view the Stored Applied Torque Data. 2 Press to enter Memory Locations Only Locations containing data will be displayed. Note that as data is 3 Press to scroll through locations that contain data. -
Page 10: Upload Mode
Upload Mode - Keypad Function Up Load Mode User Information 1 Press to scroll to Upload Mode From the Wrench, this Mode allows the User to 2 Press to enter Upload Mode Upload Stored Torque Data from an individual or range of locations. to select "From Location"... -
Page 11: Calibrate Mode
Wrench LCD Display. Therefore repeat Steps No.4 & No. 5 8 Now Measurement Point No.4 (100% of Max Span) will appear on the Calibration Mode is only accessible at the Mountz Wrench LCD Display. Therefore repeat Steps No.4 & No. 5 Repair Centers. - Page 12 To Establish Communication with the Wrench 1. Place the Link Cable in the COM 1 PC Port. Note: Available PC Port configurations may vary. It is important that communications are attempted with the correct PC Port. The PC Link has been designed for connection with the standard 9-Way D-Type PC Port. Possible PC Port Configurations you may have: (a) The Standard PC will have a mouse port (din socket), leaving one D-Type 9-Way socket as COM 1, which you should use for the communications Link cable.
- Page 13 The PC FRONT-END is activated by double clicking it's Icon. The Top Half of the Page displays Wrench Data Preset Nom, Min & Max Values The Bottom Half of the Page displays Uploaded Peak and Preset Measurement Values...
- Page 14 THE PC FRONT-END Top of Page Preset Values Click to Power Off the Wrench Click to Clear All Preset Values Stores (Downloads) Current Preset Values to Wrench Click to Load other Preset Value Files Click to Save Uploaded Preset Value...
-
Page 15: Set A Preset
To Set a Preset 1. Click Once the required Field. 2. The Set Preset Values dailogue box will now appear. Input the Nominal, Min and Max Values... - Page 16 THE PC FRONT-END Top of Page Uploaded Peak Measurements Uploaded Preset Measurements Click to activate Continuous Upload Click to Upload all Peak & Preset Data Click to Clear Data in Fields Click to Clear Data from the Wrench Click to change Units in Field Click to Sort Preset &...
- Page 17 CLICK DIALOGUE BOX CLICK DIALOGUE BOX Current Mode Current Language To select Trac, Peak To Set Language. or Preset Mode of Operation. Activate by Clicking Activate by Clicking Span Units To Set Wrench Span Current Units Units. To Set / Change Units of Measure.
- Page 18 Click Power Off Wrench to Power down Wrench. Click Unit Conversion to change Units displayed on the PC. Click Store to Wrench to Store Data to the Wrench. Click Sort by Preset to to group displayed measurement data according to ascending preset numbers.
-
Page 19: Clear All Presets
CLICK DIALOGUE BOX CLICK DIALOGUE BOX To Save Preset Values To Load Preset Values to File on from File on Hard Drive PC Hard Drive Clear All Presets Clears all Presets of Nom, Min & Max Values Settings... - Page 20 CLICK DIALOGUE BOX To save readings taken in Preset Mode. This powerful function enables analysis of Data over defined period of time and can be converted in Excel to Graph Form.
- Page 21 The PC Front End - Mode Access IMPORTANT NOTICE The End User cannot access the Mountz Master Versions of the PC Front End. The End User does not require a Password to access PC Front End (Just Click OK at Password Prompt) This is to...
-
Page 22: To Activate Calibration
To Activate Calibration with TORQUE PCFE 2. Input "No of Days to next Calibration " in the 1. Input dd/mm/yyyy in the Calibrated On Filed Period of Calibration (in days) Field. 3. Click on "Activate Calibration" . 4. Click Default Calibration to Resset the Wrench. All data / settings stored Calibration must begin before the Wrench in the Wrench will be cleared and default calibration values for the wrench's automatically powers down (1.5 Min) - Page 23 Solution: When Torque has not been applied during the Calibration Procedure. 1 Connect the Wrench to the PCFE using the RS232 Connection Cable. 2 Wait until communication with the wrench is established. Note: Cal Coefficients will read 3 Click "Default Calibration" 4 Click "Yes"...
- Page 24 Angle wrench Set Mode - Keypad Function Angle wrench User Information 1 Press to Scroll to Set Mode, Press confirm and select "Set T" or Set "TA" A torque-angle wrench is used for applying torque, to fasteners or bolts, through 2 If you are setting a Torque only preset see page 6 of these instructions a tightening angle, at a rotational angular velocity.
- Page 25 Mountz Service Locations Western US Mexico Eastern US Mountz Mexico SA de CV 1080 North 11th Street 19051 Underwood Road Main Office & Service Center San Jose, CA 95112 Foley, AL 36535 Av. Cristobal Colon #15343 Phone: (800) 456-1828 Phone: (251) 943-4125 Col.
Need help?
Do you have a question about the TorqueMate and is the answer not in the manual?
Questions and answers