Table of Contents
Advertisement
Available languages
Available languages
Quick Links
{
STIHL FS 460 C-M
Instruction Manual
Manual de instrucciones
Warning!
Read and follow all safety
precautions in Instruction Manual –
improper use can cause serious or
fatal injury.
Advertencia!
Lea y siga todas las precauciones
de seguridad dadas en el manual
de instrucciones – el uso incorrecto
puede causar lesiones graves o
mortales.
Advertisement
Chapters
Table of Contents

Related Manuals for Stihl Operating instructions


Summary of Contents for Stihl Operating instructions
- Page 1 STIHL FS 460 C-M Instruction Manual Manual de instrucciones Warning! Read and follow all safety precautions in Instruction Manual – improper use can cause serious or fatal injury. Advertencia! Lea y siga todas las precauciones de seguridad dadas en el manual de instrucciones –...
- Page 2 Instruction Manual 1 - 47 Manual de instrucciones 49 - 99...
-
Page 3: Table Of Contents
For further information you Fueling can go to www.stihlusa.com. Fitting the Full Harness Contact your STIHL dealer or the STIHL Balancing the Trimmer/Brushcutter distributor for your area if you do not Starting / Stopping the Engine understand any of the instructions in this Operating Instructions manual. -
Page 4: Guide To Using This Manual
Fuel tank for gasoline Loosen the screw (1). and engine oil mixture Lever (2) ... Press to operate decom- In addition to the operating instructions, pression valve this manual may contain paragraphs that require your special attention. Such paragraphs are marked with the... -
Page 5: Safety Precautions And Working
STIHL for use on your FS STIHL does not recommend the use of safety precautions and model. rigid blades when cutting in stony areas. - Page 6 Most of these safety precautions and – Wear gloves and keep your hands warnings apply to the use of all STIHL warm. clearing saws. Different models may Warning! – Keep the AV system well have different parts and controls.
-
Page 7: Approved Combinations Of Cutting
STIHL for grip and help to protect Warning! use with the specific STIHL model are your hands. The deflector provided with your power authorized. Although certain unauthor- tool will not protect the operator from all... - Page 8 Using the grip, turn the spillage and damage to the unit. STIHL slowly. Never remove the fuel filler cap cap firmly clockwise as recommends that you keep metal while the engine is running.
- Page 9 English As can be seen in that chart, some Fold the grip flush with cutting attachments may require you to the top of the cap. If the Warning! change your deflector, limit stop and / or grip does not lie com- The cutting attachment must be prop- harness.
- Page 10 If your power tool shows an incorrect idle used in combination with of your harness (see appropriate speed, have your STIHL dealer check circular saw blades. chapter of this manual). your power tool and make proper adjustments and repairs.
- Page 11 English Warning! Warning! Warning! This unit is equipped with an ignition Never attempt to operate As soon as the engine is system that is normally in operational your power tool with one running, this product gen- readiness. After the setting lever is used hand.
- Page 12 50 feet (15 m) away. To reduce the risk During cutting, check the tightness and Operating Instructions of damage to property, also maintain this the condition of the cutting attachment distance from such objects as vehicles at regular short intervals with the engine or windows.
- Page 13 STIHL dealer. Never use a clearing always shut off the engine and remove Remove excess lubricant and all debris saw with a loose cutting attachment.
- Page 14 English If the lawn edges are planted with trees STIHL PolyCut mowing head or bordered by a fence etc., it is best to Warning! use a nylon line head. It achieves a To reduce the risk of severe or fatal "softer"...
- Page 15 English Risk of Kickout (Blade Thrust) with all Using the Grass Cutting Blade Rigid Cutting Blades To cut wild growth and scrub, lower the rotating brush knife down onto the All kinds of grass and weeds can be growth to achieve a chopping effect – easily cut with the grass cutting blade.
- Page 16 Use a circular saw Warning! STIHL recommends that the standard blade for such work. deflector be removed and replaced by The risk of kickout is highest when cut- the special limit stop deflector (see ting in the darker shaded area.
- Page 17 Use only identical STIHL replacement parts for maintenance and repair. Use of Never test the ignition system with the non-STIHL parts may cause serious or spark plug boot removed from the spark fatal injury. plug or with a removed spark plug, since uncontained sparking may cause a fire.
-
Page 18: Attachment, Deflector, Limit Stop And Harness
English Approved Combinations of Cutting Attachment, Deflector, Limit Stop and Harness Cutting attachment Deflector, limit stop Harness FS 460 C-M, FS 460 C-M L... -
Page 19: Mounting The Bike Handle
Cutting attachments Harnesses 17 Full harness must be used The machine is supplied with the clamp Mowing heads moldings (1) mounted to the STIHL SuperCut 40-2 handlebar (2). Warning! STIHL AutoCut 40-2 STIHL AutoCut 40-4 Based on the cutting attachment being... - Page 20 English Use the spring (9) from the parts kit supplied with the machine. Place the spring (9) in the lower clamp molding (10). Line up the control handle (5) Holding the control handle (5) in relative to the handlebar (2): The that position, push it on to the end of throttle trigger (6) must point toward the handlebar (2) and line up the...
- Page 21 English Fold the grip of the wing screw down Move the handlebar to the required Raise the grip of the wing screw (7) so that it is flush. position. to the upright position. Closing the wing screw Turn the wing screw Adjusting the handlebar counterclockwise as far as stop.
-
Page 22: Mounting The Deflector
English Swiveling the handlebar Mounting the Deflector Transport position Using the proper deflector Limit stop (3) is approved only for circular saw blades, thus limit stop (3) must be attached and guard ring (4) replaced before attaching a circular saw blade, see "Mounting the cutting attachment"... -
Page 23: Mounting The Cutting Attachment
– see clockwise "Mounting the deflector". Feeding out mowing line Mounting the mowing heads STIHL SuperCut, STIHL AutoCut, STIHL TrimCut, STIHL PolyCut A detailed description is contained in the information sheet for the respective Lay down the machine so that the mowing head. - Page 24 English Pull up the spool housing – turn Attaching grass cutting blades, counterclockwise – approx. 1/6 turn brush knives – until it engages – and then allow it to spring back Pull the ends of the line outward Repeat operation as needed until both ends of the line are approx.
- Page 25 English Attaching circular saw blades Fit the thrust washer (2) – curvature faces upward Position thrust plate (3) A thrust plate (3) for sawing use, with which the entire cutting depth of the circular saw blade can be used, is available as a special accessory.
-
Page 26: Fuel
Engines equipped with M-Tronic can be run on gasoline with an ethanol content of up to 25% (E25). Use only STIHL two-stroke engine oil or equivalent high-quality two-stroke engine oils that are designed for use only in air cooled two-cycle engines. -
Page 27: Fueling
English Opening Closing Fueling Preparations Raise the grip into an upright With grip in an upright position: position. Insert the cap – positioning marks on the cap and the fuel tank opening must line up. The cap should drop fully into the opening in this position. -
Page 28: Fitting The Full Harness
STIHL dealer for repair. Such misalignment can result from handling, cleaning or an improper attempt at tightening. -
Page 29: Balancing The Trimmer/Brushcutter
English Putting down the machine in an Balancing the Starting / Stopping the emergency Trimmer/Brushcutter Engine The machine will balance differently As soon as it becomes apparent Controls depending on the cutting attachment that a dangerous situation is mounted. developing, the machine must be put down quickly. - Page 30 English Starting the Engine the cutting attachment is not touching the ground of any other obstacles. Make sure you have a firm footing – either standing, stooping or kneeling. Hold the unit firmly on the ground with your left hand and press down –...
-
Page 31: Operating Instructions
STIHL recommends that such work be the first three tank fillings. This avoids unnecessary high loads during the performed by a STIHL servicing dealer. break-in period. As all moving parts have to bed in during the break-in Your machine is now ready for period, the frictional resistances in the operation. -
Page 32: Cleaning The Air Filter
English Remove and check the filter Cleaning the Air Filter Engine Management element (3) – replace if dirty or damaged. Dirty air filters reduce engine power, Exhaust emissions are controlled by the Fit the filter in the filter housing. increase fuel consumption and make design of the fundamental engine Fitting the filter cover starting more difficult. -
Page 33: M-Tronic
Remove shutter (2) from the shroud An arrow on the shroud (1) shows the STIHL recommends that you have Rotate shutter (2) from summer position of the shutter (2) for summer or servicing and repair work carried out position to winter position and winter operation. -
Page 34: Spark Plug
English At temperatures above Spark Plug +70 °F (+20 °C) If engine is down on power, difficult to start or runs poorly at idling speed, first check the spark plug. Fit a new spark plug after approx. 100 operating hours or earlier if the electrodes are badly eroded. - Page 35 To reduce the risk of fire and burn injury, electrodes are badly eroded. use only spark plugs authorized by STIHL. Always press spark plug boot (2) snugly onto spark plug terminal (1) of the proper size. (Note: If terminal has detachable SAE adapter nut, it must be attached.) A loose connection between...
-
Page 36: Engine Running Behavior
Fit the cap (1) on the shroud from (carbonization). the rear and push the lug (2) into the STIHL recommends that you have opening (3) in the shroud at the servicing and repair work carried out same time. - Page 37 Coat starter post uniformly with counterclockwise. STIHL gear lubricant – see "Special Hold the rotor steady. Accessories". Thread the new rope through the Pull out and straighten the twisted...
-
Page 38: Storing The Machine
English The starter grip must sit firmly in the rope Lubricate the new, ready-to-fit Storing the Machine bushing. If the grip droops to one side: replacement spring in the new Add one more turn on the rope rotor to spring housing with a few drops of increase spring tension. -
Page 39: Sharpening Metal Cutting Blades
Resharpen checked by a dealer and re- with a grinder or have the work done balanced as necessary – STIHL by a dealer – STIHL recommends a recommends a STIHL servicing STIHL servicing dealer. dealer. Resharpen frequently, take away as... -
Page 40: Inspections And Maintenance By Dealer
English Inspections and Maintenance by Dealer Maintenance Work STIHL recommends that you have servicing and repair work carried out exclusively by an authorized STIHL servicing dealer. If the engine is down on power, have the spark arrestor in the muffler checked. -
Page 41: Maintenance And Care
English Maintenance and Care The following intervals apply to normal operating conditions only. If your daily work- ing time is longer or operating conditions are difficult (very dusty work area, etc.), shorten the specified intervals accordingly. Visual inspection (condition, leaks) Complete machine Clean Control handle... - Page 42 (very dusty work area, etc.), shorten the specified intervals accordingly. Visual inspection Cutting attachment Replace Check tightness Metal cutting attachment Sharpen Safety labels Replace STIHL recommends that this work be done by a STIHL servicing dealer FS 460 C-M, FS 460 C-M L...
-
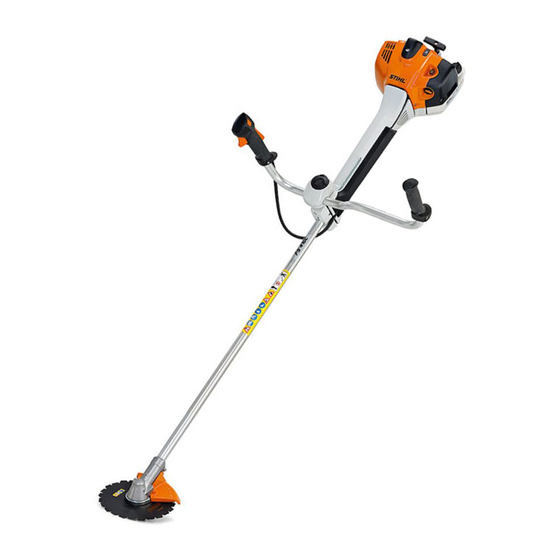
Page 43: Main Parts
English Main Parts Fuel Filler Cap Starter Grip Shutter Spark Plug Boot Muffler with Spark Arresting Screen Spacer Guard Plate Throttle Trigger Momentary Stop Switch 10 Throttle Trigger Lockout 11 Handlebar 12 Handle Support 13 Clamp Screw 14 Carrying Strip 15 Choke Lever 16 Fuel Pump 17 Filter Cover... - Page 44 English Definitions 12 Handle Support Connects the shaft and bike handle. Fuel Filler Cap 13 Clamp Screw For closing the fuel tank. Locks handlebar in selected position. Starter Grip 14 Carrying Strip The grip of the pull starter, for starting the engine. The device to connect the clearing saw to the harness.
-
Page 45: Specifications
English Specifications Spark plug (suppressed): NGK CMR6H Electrode gap: 0.02 in (0.5 mm) EPA / CEPA Fuel system The Emission Compliance Period All position diaphragm carburetor with referred to on the Emissions integral fuel pump Compliance Label indicates the number Circular Saw Blade of operating hours for which the engine Fuel tank capacity:... -
Page 46: Special Accessories
STIHL part number, the { built and equipped, at the time of sale, to logo and, in some cases, by the STIHL meet the U.S. EPA regulations for small parts symbol K. The symbol may non road engines. - Page 47 STIHL Incorporated at no STIHL service center as soon as a owner. STIHL Incorporated is liable for cost to the owner. Any warranted part which is not scheduled for replacement...
-
Page 48: And Harness 16 Trademarks
Service ® STIHL WOOD BOSS ® TIMBERSPORTS Bring the product to any authorized ® STIHL servicing dealer and present the YARD BOSS signed warranty card. Some of STIHL’s Common Law Maintenance Requirements Trademarks The maintenance instructions in this manual are based on the application of... - Page 49 Ematic™ / Stihl-E-Matic™ Any unauthorized use of these FixCut™ trademarks without the express written HT Plus™ consent of ANDREAS STIHL AG & Co. KG, IntelliCarb™ Waiblingen is strictly prohibited. Master Control Lever™ Micro™ Pro Mark™ Quad Power™ Quiet Line™...
- Page 50 English FS 460 C-M, FS 460 C-M L...
- Page 51 Equilibro de la unidad Comuníquese con su representante de Arranque / parada del motor STIHL o el distribuidor de STIHL para su Instrucciones para el uso zona si no se entiende alguna de las instrucciones dadas en el presente Limpieza del filtro de aire manual.
-
Page 52: Acerca De Este Manual De Instrucciones
La filosofía de STIHL es mejorar Según el modelo, los pictogramas continuamente todos sus productos. Se usa un punto para denotar un siguientes pueden aparecer en su Como resultado de ello, periódicamente... -
Page 53: Medidas De Seguridad Y Técnicas De Manejo
STIHL para usar en su modelo FS. únicamente para cortar pasto, graves o incluso Pida a su concesionario STIHL que le matorrales, madera y materiales mortales. - Page 54 / EE.UU – La mayor parte de las herramientas Advertencia! Advertencia! motorizadas de STIHL se ofrecen con un sistema antivibración ("AV") Para reducir el riesgo de ocasionar Esté alerta. Si se cansa, tómese un des- cuyo propósito es reducir la lesiones a las personas en la cercanía y...
- Page 55 El sistema de encendido de la máquina Para reducir el riesgo de la completa libertad de STIHL produce un campo electromag- lesionarse los ojos, movimiento. Use pantalo- nético de intensidad muy baja. El mismo nunca maneje la herra-...
- Page 56 Advertencia! usarse con el modelo específico de mente para impedir su vuelco, el STIHL. Si bien es posible conectar a la derrame de combustible y el daño a la Para reducir el riesgo de sufrir lesiones herramienta motorizada de STIHL cier- máquina.
- Page 57 Para hacer esto con esta en vacío por la acción de resorte. Nunca Elija una superficie despejada para tapa STIHL, levante la llenar el tanque y aléjese 3 m (10 pies) intente modificar los controles o los dis- empuñadura en la parte por lo menos del lugar en que lo haya positivos de seguridad.
- Page 58 español / EE.UU Advertencia! Advertencia! No instale ningún accesorio de corte en Para reducir el una máquina sin que todas las piezas riesgo de sufrir requeridas estén correctamente instala- lesiones corpora- das. Si no se utilizan las piezas debidas les debido a la se puede causar el desprendimiento de pérdida de control la cuchilla o el cabezal y lesionar grave-...
- Page 59 Advertencia! control correcto y menos fatiga de mal regulada, pida a su representante trabajo. Para prepararse para de STIHL que revise la herramienta emergencias, practique la liberación motorizada y haga los ajustes o Su herramienta motorizada es una rápida de la unidad del arnés.
- Page 60 español / EE.UU Condiciones de trabajo Advertencia! Advertencia! Maneje y arranque su herramienta motorizada solamente al aire libre en un Esta unidad tiene un sistema de encen- Nunca intente manejar la lugar bien ventilado. Manéjela dido que normalmente está listo para herramienta motorizada solamente en condiciones de buena usar en todo momento.
- Page 61 español / EE.UU En caso de emergencia, apague el Advertencia! Advertencia! motor inmediatamente – mueva el control deslizante / interruptor de parada La inhalación de ciertos polvos, espe- Antes de empezar a tra- a STOP. cialmente los polvos orgánicos, tales bajar, inspeccione el como el moho o polen, puede provocar área en busca de pie-...
- Page 62 Asegúrese que el accesorio de corte herramienta motorizada o daños a la caja de engranajes cuando está esté correctamente apretado. Utilice la cuchilla. Para ese tipo de trabajo, STIHL caliente. llave suministrada o cualquier otra que recomienda el uso de cabezas con hilo...
- Page 63 Cabeza segadora PolyCut de STIHL Sin embargo, el cabezal PolyCut de Uso de las cabezas segadoras STIHL con cuchilla de polímero produce No use con un hilo de segado más largo un mejor corte si no hay plantas a lo que el deseado.
- Page 64 español / EE.UU Observe los indicadores de El riesgo de expulsión (disparo de la Uso de la cuchilla de cortar pasto desgaste. cuchilla) existe con todas las cuchillas rígidas Advertencia! En la base (periferia) de la PolyCut hay tres marcas rectangulares de límite de desgaste.
- Page 65 Inspeccione la cuchilla para matorrales sierra circular para cortar árboles Advertencia! a intervalos periódicos y cortos en pequeños, STIHL recomienda retirar el busca de daños. No continúe traba- deflector estándar y sustituirlo con el jando con una cuchilla para matorrales...
- Page 66 Utilice solamente piezas de repuesto de aplicando presión uniforme. STIHL para cortar arbustos y árboles sólo STIHL para el mantenimiento y la repa- recomienda aplicar la sierra circular por deben ser usadas por operadores ración. El uso de piezas no fabricadas el lado derecho del árbol, usando la...
- Page 67 español / EE.UU Use guantes para manipular o reparar Advertencia! las cuchillas. Nunca repare los accesorios de corte Advertencia! dañados aplicándoles soldadura, ende- rezándolos o modificándoles su forma. Use la bujía especificada y asegúrese Esto puede causar el desprendimiento de que ella y el cable de encendido de alguna pieza del accesorio de corte están limpios y en buen estado.
-
Page 68: Combinaciones Aprobadas De Accesorio De Corte, Deflector, Tope Limitador Y Arnés
español / EE.UU Combinaciones aprobadas de accesorio de corte, deflector, tope limitador y arnés Accesorio de corte Deflector, límite de tope Arnés FS 460 C-M, FS 460 C-M L... -
Page 69: Montaje Del Manillar
Accesorios de corte Arneses La máquina se suministra con piezas Cabezas segadoras 17 Es obligatorio usar el arnés moldeadas de fijación (1) montadas en STIHL SuperCut 40-2 completo el manillar (2). STIHL AutoCut 40-2 Advertencia! STIHL AutoCut 40-4 Montaje del mango de control... - Page 70 español / EE.UU Utilice el resorte (9) del juego de piezas suministrado con la máquina. Coloque el resorte (9) en la pieza moldeada de fijación inferior (10). Alinee el mango de control (5) con Mantenga el mango de control (5) respecto al manillar (2): El gatillo de en esa posición, empújelo en el aceleración (6) debe apuntar hacia...
- Page 71 español / EE.UU Pliegue la empuñadura del tornillo Mueva el manillar a la posición Eleve la empuñadura del tornillo mariposa hasta que quede al ras. requerida. mariposa (7) a la posición vertical. Cierre del tornillo mariposa Gire el tornillo mariposa hasta el Ajuste del manillar tope en sentido contrahorario.
-
Page 72: Montaje De La Barra De Defensa
español / EE.UU Giro del manillar Montaje de la barra de defensa Posición de transporte Uso del deflector apropiado El tope limitador (3) está aprobado para uso únicamente con discos de sierra circular, por lo cual es necesario instalar el limitador (3) y sustituir el anillo protector (4) antes de fijar un disco de sierra circular, consulte... -
Page 73: Montaje Del Accesorio De Corte
Utilice el deflector adecuado para el accesorio de corte – vea "Montaje del deflector". Montaje de las cabezas segadoras STIHL SuperCut, STIHL AutoCut, STIHL TrimCut, STIHL PolyCut Coloque la máquina en el suelo de modo que el montaje para los... - Page 74 español / EE.UU Cabeza segadora SuperCut El giro desde el punto en que se emite Los accesorios de corte con 3 ó un chasquido hasta el chasquido 4 hojas (2, 3) pueden orientarse en El hilo se alimenta automáticamente siguiente suelta aproximadamente 4 cm cualquier sentido –...
- Page 75 español / EE.UU Cambio de anillo protector Montaje del accesorio de corte Quite la herramienta usada para bloquear el eje. Retire los accesorios de corte Bloquee el eje Destornille la tuerca en sentido horario Una tuerca muy floja debe sustituirse. Quite la arandela protectora (3) y la Fijación de discos de sierra circular placa de empuje (4).
-
Page 76: Combustible
50 a 1 de Use solamente el aceite STIHL para gasolina sin plomo y aceite STIHL para motores de dos tiempos o un aceite de Una tuerca muy floja debe motores de dos tiempos. -
Page 77: Llenado De Combustible
Cierre el envase y agítelo Apertura vigorosamente a mano para asegurar que se mezclen bien el aceite y la gasolina. Gaso- Aceite (STIHL 50:1 ó aceite lina de alta calidad equivalente) oz fl Cuando se abastece el EE.UU. EE.UU. - Page 78 español / EE.UU Quite la tapa de llenado de Mientras presiona la tapa hacia Agarre la tapa y revise el apriete. combustible. abajo, gírela con firmeza en sentido Si puede moverla, no está instalada horario hasta que haga tope de manera apropiada. (aprox.
-
Page 79: Colocación Del Arnés Completo
Si la tapa sigue sin ajustarse apropiadamente, podría estar dañada o rota; deje de utilizar la unidad de inmediato y llévela a su concesionario autorizado de STIHL A izquierda: Base de la tapa alineada para que la reparen. de manera inapropiada... -
Page 80: Equilibro De La Unidad
español / EE.UU Retiro rápido de la máquina en caso Equilibro de la unidad Arranque / parada del de emergencia motor La máquina se equilibra de forma Tan pronto como se hace Controles diferente, dependiendo del accesorio de evidente que una situación corte montado. - Page 81 español / EE.UU sistema de encendido se vuelve a Arranque Motor tibio y máquina colgando del conectar después que el motor deje de arnés. girar. Arranque del motor Coloque la máquina sobre el suelo: Agarre la máquina firmemente con Debe quedar firmemente apoyada la mano derecha en el tubo de en la placa protectora del motor y el mando, el soporte del mango o el...
-
Page 82: Instrucciones Para El Uso
Después de llenar el tanque, oprima repare la herramienta motorizada. funcionamiento con el acelerador a el bulbo de la bomba de STIHL recomienda que un fondo, deje funcionar el motor por un combustible por lo menos cinco concesionario de servicio STIHL rato en ralentí... -
Page 83: Limpieza Del Filtro De Aire
español / EE.UU intervalos de almacenamiento por Quite y revise el elemento de Limpieza del filtro de aire tiempo prolongado – vea filtro (3) – sustitúyalo si está sucio o "Almacenamiento de la máquina". dañado. La suciedad en el filtro de aire reduce la Instale el filtro en la caja de filtro. -
Page 84: Gestión Del Motor
– Símbolo "Sol" = funcionamiento de servicio para obtener ayuda. verano STIHL recomienda que un – Símbolo "Copo de nieve" = concesionario STIHL autorizado efectúe funcionamiento de invierno los trabajos de mantenimiento y reparación. - Page 85 español / EE.UU A temperaturas de más de +20 °C (+70 °F): El "juego de placa de tapa" contiene las piezas siguientes para cubrir la máquina: Placa para tapar parcialmente las Siempre vuelva a colocar el rendijas de la caja del arrancador obturador (2) en la posición de verano Inserto de tela y plástico para el...
-
Page 86: Bujía
español / EE.UU Fije el obturador (2) en posición de Bujía verano o de invierno Si el motor pierde potencia, es difícil arrancarlo o funciona de modo irregular a ralentí, revise la bujía primero. Instale una bujía nueva después de aprox. - Page 87 Para reducir el riesgo de incendio y de Filtro de aire sucio. quemaduras, utilice solamente las Condiciones desfavorables de bujías autorizadas por STIHL. Siempre funcionamiento, por ejemplo, empuje el casquillo (2) de la bujía firme- funcionando bajo carga parcial. mente en el borne (1) del tamaño adecuado.
-
Page 88: Funcionamiento Del Motor
(coquización) en el cuerda (4) con su portador (5), silenciador. trinquetes (6) y arandela (7). STIHL recomienda que un Colocar el portador (5) hacia abajo, concesionario STIHL autorizado efectúe de manera que los trinquetes y la los trabajos de mantenimiento y arandela no puedan caerse de su reparación. - Page 89 Cubrir el poste del arrancador de para girar el rotor seis revoluciones modo uniforme con lubricante para completas en sentido contrahorario. engranajes STIHL – ver Sujete firmemente el rotor. "Accesorios especiales". Tire y enderece la cuerda torcida. Deslice el rotor de la cuerda con el portador, trinquetes y arandela Suelte el rotor de la cuerda.
-
Page 90: Almacenamiento De La Máquina
Deseche el combustible de acuerdo trabajo se lo haga el concesionario con los requerimientos locales de – STIHL recomienda acudir a un Saque los tornillos (1). protección del medio ambiente. concesionario de STIHL. -
Page 91: Inspección Y Mantenimiento Por El Usuario
– o pida que un concesionario la revise y vuelva a ajustar el equilibrio según sea necesario – STIHL recomienda acudir a un concesionario STIHL para servicio. Verifique la libertad de movimiento del mango (1) en las pinzas moldeadas (2) en intervalos regulares. -
Page 92: Inspección Y Mantenimiento Por El Concesionario
/ EE.UU Inspección y mantenimiento por el concesionario Trabajos de mantenimiento STIHL recomienda que un concesionario STIHL autorizado efectúe Si el motor pierde potencia, haga los trabajos de mantenimiento y revisar el chispero del silenciador. reparación. Elementos antivibración Captador de combustible en el... -
Page 93: Información Para Mantenimiento
español / EE.UU Información para mantenimiento Los intervalos dados a continuación corresponden únicamente a condiciones nor- males de trabajo. Si el tiempo de trabajo por jornada es más largo que lo normal, o si las condiciones son extremas (zonas polvorientas, etc.), acorte los intervalos indi- cados de modo correspondiente. - Page 94 Revisar Elementos antivibración Reemplazar Inspección visual Accesorio de corte Reemplazar Revisar el apriete Accesorio de corte metálico Afilar Etiquetas de seguridad Reemplazar STIHL recomienda que un concesionario de servicio STIHL efectúe este trabajo FS 460 C-M, FS 460 C-M L...
-
Page 95: Componentes Importantes
español / EE.UU Componentes importantes Tapa de llenado de combustible Mango de arranque Obturador Casquillo de bujía Silenciador con chispero Espaciador Placa protectora Gatillo de aceleración Interruptor momentáneo de parada 10 Bloqueo de gatillo de aceleración 11 Manillar 12 Soporte del manillar 13 Tornillo de fijación 14 Correa de transporte 15 Palanca del estrangulador... - Page 96 español / EE.UU Definiciones 11 Manillar Para agarrar con la mano para manejar y controlar la máquina Tapa de llenado de combustible durante los trabajos. Para tapar el tanque de 12 Soporte del manillar combustible. Conecta el eje y el manillar tipo Mango de arranque bicicleta.
-
Page 97: Fs 460 C-M, Fs 460 C-M L
español / EE.UU Deflector para las herramientas Especificaciones Bujía (con supresión): NGK CMR6H segadoras metálicas Distancia entre 0,5 mm Sirve para reducir el riesgo de electrodos: (0,02 pulg) lesiones causadas por objetos EPA / CEPA extraños arrojados contra el Sistema de combustible operador por el accesorio de corte y por el contacto con el accesorio de El período de cumplimiento de... -
Page 98: Accesorios Especiales Información De Reparación
Los reclamos de garantía presentados después de realizadas las reparaciones La Agencia de Protección del Medio serán aceptados únicamente si las Ambiente (EPA) de los EE.UU. y STIHL mismas fueron ejecutadas por un Incorporated se complacen en concesionario de servicio autorizado explicarle la garantía del sistema de... - Page 99 STIHL de emisiones, la pieza será reparada o firma y remite la tarjeta de garantía a tan pronto surja el problema.
- Page 100 Magneto o sistema de encendido prueba del sistema de control de falta del mantenimiento requerido, electrónico (módulo de encendido) emisiones se realiza ya sea en la fábrica de STIHL Incorporated o en un reparaciones mal hechas o – Bujía laboratorio de ensayos independiente.
-
Page 101: Marcas Comerciales
Queda terminantemente prohibido todo FixCut™ uso de estas marcas comerciales sin el HT Plus™ consentimiento expreso por escrito de ANDREAS STIHL AG & Co. KG, IntelliCarb™ Waiblingen. La combinación de colores anaranjado- Master Control Lever™ gris (Números de registro EE.UU. - Page 102 español / EE.UU FS 460 C-M, FS 460 C-M L...
- Page 104 California to cause cancer, birth cáncer, defectos de nacimiento u otros efectos defects or other reproductive harm. defects or other reproductive harm. nocivos para los órganos de la reproducción. 0458-746-8621-A englisch / spanisch USA englisch / spanisch USA www.stihl.com *04587468621A* 0458-746-8621-A...
Need help?
Do you have a question about the Operating instructions and is the answer not in the manual?
Questions and answers