Table of Contents
Advertisement
Quick Links
Advertisement
Table of Contents

Related Manuals for Lynx SMART30F


Summary of Contents for Lynx SMART30F
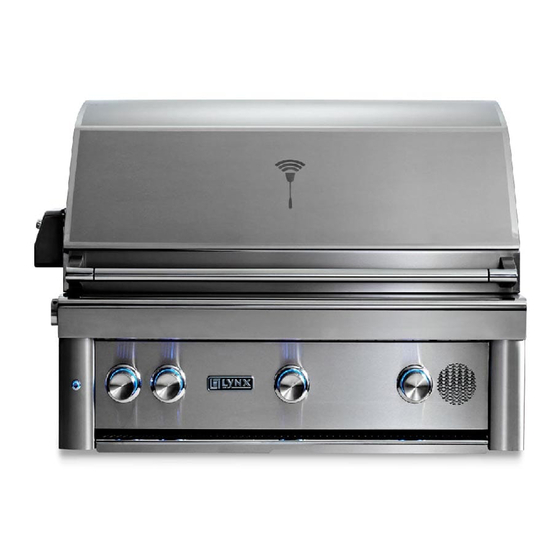
- Page 1 SMARTGRILL USER MANUAL...
- Page 2 WARNINGS WARNING READ THIS MANUAL CAREFULLY and completely before using your grill to reduce the risk of: 1. Fire 2. Burn hazard, personal injury or property damage 3. Ruined steaks or other unpleasant cooking experiences 4. Unapproved installation or servicing. THIS PRODUCT IS DESIGNED FOR OUTDOOR USE ONLY.
-
Page 3: Quick Start Power Connectivity & Wi-Fi Setup
APP ON YOUR PHONE OR TABLET AND CREATE YOUR ACCOUNT • Go to iTunes or Google Play and download “SmartGrill by Lynx” and install • Open the SmartGrill App and click Create Account then enter your grill serial number and PIN then click Continue. - Page 4 STEP #6—CALIBRATING YOUR SMARTGRILL Before your first grilling session, use your SmartGrill app to calibrate your SmartGrill by Lynx™. This will set a minimum flame level which is affected by ambient temperature, altitude, wind conditions and more. Calibration is required for optimum performance of your SmartGrill.
- Page 5 THIS MANUAL MUST REMAIN WITH THE PRODUCT OWNER FOR FUTURE REFERENCE. This product complies with ANSI standard To obtain replacement parts or service contact: Z21.58/CSA 1.6 latest edition and has been tested and Lynx Grills approved by Intertek. 7300 Flores Street Downey, CA 90242 888-289-5969 www.lynxgrills.com...
-
Page 6: Table Of Contents
Meet Your SmartGrill by Lynx™ Plugging In Your SmartGrill by Lynx™ Turning On Your SmartGrill by Lynx™ Connecting Your SmartGrill by Lynx™ to Your Wireless Network Downloading Your SmartGrill by Lynx™ App for iOS Devices Downloading Your SmartGrill by Lynx™ App for Android Devices SMARTGRILL BY LYNX™... -
Page 7: A Message From Lynx
Thank you again for joining the community of Lynx chefs. We love hearing about your experiences with our products. Please check us out on the Web and social media to let us know how you and your SmartGrill by Lynx™ are doing. -
Page 8: Important Safety Precautions
WARNINGS WARNING 1. Do not open the central electronics container as there are no user-serviceable parts inside, and doing so will void all warranties. All other services should be performed by a qualified technician. 2. All gas lines must have a gas shut-off valve that is readily and easily accessible. Be sure you know where the shut-off is located. -
Page 9: Grilling In Windy Conditions
These high-performance burners require a constant, steady supply of fresh air to mix with the fuel. Your Lynx grill pulls air But there are a few things you can do to further prevent the possibility of improper heat buildup: in through the front and vents hot gases out through the rear. -
Page 10: Before You Start
By carefully following the uncrating and unpacking steps, such enclosed area. you’ll be up and grilling on your Lynx SmartGrill by Lynx™ • Never locate the grill under unprotected in no time! combustible construction. -
Page 11: Clearance To Combustibles
6 feet above the counter top surface. A vent hood may be BUILT-IN INSTALLATIONS closer to the counter top surface than 6 feet. The SmartGrill by Lynx™ built-in grill is designed for easy installation into masonry enclosures. CLEARANCE TO COMBUSTIBLE MATERIALS... -
Page 12: Specifications & Installation
Proper levelling during installation is critical to the smooth REAR HOOD CLEARANCE operation of your SmartGrill by Lynx™. A grill that is out of level will cause erratic burner combustion and inefficient, A 3 inch clearance is required behind the grill to provide uneven heating. - Page 13 IMPORTANT: Please reference the Care & Use / Installation manual for details on gas plumbing requirements, electrical specifications and the proper installation of your Lynx outdoor kitchen equipment. This manual can be downloaded from the Lynx website at www.lynxgrills.com GRILLS...
- Page 14 SPECIFICATIONS & INSTALLATION OUTDOOR REFRIGERATORS OUTDOOR REFRIGERATORS ICE MACHINE CLEARANCE 3” MODEL L24REF 24.25 33.00 26.00 32.00 15” L24BF 24.25 34.50 26.00 34.25 25” L24DWR 24.25 34.50 26.00 34.25 34” L15ICE 15.25 34.50 26.00 33.50 L15WINE 15.25 35.50 26.00 34.375 ”...
-
Page 15: Gas Connections
NEVER CONNECT A GAS LINE DIRECTLY TO THE SMARTGRILL BY LYNX™. A PRESSURE REGULATOR MUST BE INSTALLED ON ALL GAS EQUIPMENT. ALL LOCAL CODES REQUIRE IT AND LYNX GRILLS SUPPLIES THE CORRECT REGULATOR FOR USE WITH YOUR GRILL. REMOVING OR FAILING TO INSTALL THE PRESSURE REGULATOR CAN RESULT IN FIRE AND SERIOUS PERSONAL INJURY AND WILL VOID THE WARRANTY. -
Page 16: Liquid Propane
20 lb. Liquid propane cylinder (Type 1). All use any other assembly than the one supplied fittings necessary to attach the assembly to the grill are with your Lynx SmartGrill by Lynx™. included. Do not attempt to use a 5LP-A equipped regu-... - Page 17 NOTE: The side burner will function manually only and is not • Turn the gas supply on and leak test all connections. (See connected to the SmartGrill by Lynx™ Wi-Fi. INDEX: “Leak Test” for further details.) NOTE: The side burner will function manually only and is not connected to the SmartGrill by Lynx™...
-
Page 18: Electrical Connections
• Do not use an outdoor cooking gas appliance for purposes other than intended. • Do not operate any outdoor cooking gas appliance with a damaged cord, plug, or after the appliance malfunctions or has been damaged in any manner. Contact Lynx for repair. CONNECTION TO AC POWER... -
Page 19: Final Checks
Please keep it somewhere safe for test using fire or flame. future reference. For technical support and customer service, call: Lynx Customer Care Department Leak Test Procedure: 7300 Flores Street Downey, CA 90242 • Create a soapy solution of 1 part soap and 3 parts water. -
Page 20: Getting Started
3. SmartGrill uses patented variable infrared burners. Doing an active cooking process, you will see the The first time you turn on your SmartGrill by Lynx™, the burners brighten and dim as the MyChef operating SmartGrill by Lynx™’s voice modulator will say "Please system regulates the cooking temperature. -
Page 21: Connecting Your Smartgrill By Lynx™ To Your Wireless Network
• Ensure that you have Android 2.1 or above. (Check Settings>About Phone and look for “Android Version” or “Firmware Version.”) • In the Search box, type in “SmartGrill by Lynx” to find the app. • Click to Download and follow the guided instructions. -
Page 22: Smartgrill By Lynx™ Safety Systems
TURNING OFF YOUR SMARTGRILL BY LYNX™ • Received any verbal commands for 30 minutes. • Received any commands via the SmartGrill by Lynx™ app Your SmartGrill by Lynx™ can be shut down by any of the in 30 minutes following methods. -
Page 23: How To Light Your Smartgrill By Lynx
• Recipe Cook: Select the recipe you wish to use in the app abrasion, wear and tear. and send it to the grill. The SmartGrill by Lynx™’s MyChef technology will handle the lighting and all temperature controls based on the recipe. See SmartGrill Recipe Mode CHECKLIST BEFORE EACH USE (FOR YOUR SAFETY) on page 23 for details. -
Page 24: Basic Operations
During Manual Cook, temperature is controlled by the • Click “Cook Now” knobs on the front panel of the SmartGrill by Lynx™. Manual Cook operates just like a traditional grill where you • Choose the number of burners you wish to use and control the temperature and time to cook your meal. -
Page 25: Party Mode
Function: This starts a Recipe using one of the recipes shut down all the burners and turn the grill off. included in the Lynx recipe database that can be seen using Command: “SmartGrill, Lights” the SmartGrill by Lynx™ app. The SmartGrill by Lynx™ will... -
Page 26: Using Your Smartgrill By Lynx™ Recipe Database
Lynx™ know that it’s been accomplished. If, for example, Note that this command does not shut off the grill. the SmartGrill by Lynx™ asks you to “Flip Steaks,” You would respond “SmartGrill, steaks flipped.” USING YOUR SMARTGRILL BY LYNX™ RECIPE DATABASE Your SmartGrill by Lynx™... - Page 27 • Click on the “Share on Community” switch so that it • Click on “Send to Grill.” shows green if you wish to share your recipe with the Lynx SmartGrill by Lynx™ community. • Follow the verbal and command prompts to carry out the recipe.
-
Page 28: Advanced Operations
Part of the appeal of your Lynx SmartGrill by Lynx™ is the • After each use, wipe down the exterior of the grill to fine grain finish. When removing stubborn stains: remove grease and splatters. - Page 29 The 304 stainless steel material used in the construction of With the hood up, turn all burners on high for 5 minutes. a Lynx SmartGrill by Lynx™ is highly rust resistant, however Do not touch the ceramic surfaces, and do not use water or chlorine in the air from swimming pools or salt in the sea cleaner on the ceramic surface.
-
Page 30: Troubleshooting Smartgrill By Lynx
If this is the first time you’ve activated your SmartGrill by First, go to the location of your grill with your iOS or Lynx™ app, you will be asked to input a PIN number and Android device. How strong is your signal at that location? the serial number for the Grill. - Page 31 “Downloading and installing your SmartGrill by glow. Lynx™ App”.) • Check all igniters. If they do not glow, call Lynx for service • Once the app has been connected to the SmartGrill by at 888-289-5969. Lynx™, the app will open up the “Grill Status” page.
- Page 32 Ensure that the supply line is at least ¾” inside diameter or on. Wait 5 minutes for the gas to dissipate, then try lighting 1” outside diameter. it again. If it still does not light, call Lynx at 888-289-5969. • Check Line pressure Audible: "Burner <N> could not stabilize."...
- Page 33 The grill will turn this burner off until the SmartGrill. If this is the issue, please call Lynx to request an valve is fixed. Call Lynx at 888-289-5969.
-
Page 34: Obtaining Service From Lynx
OBTAINING SERVICE FROM LYNX Before calling Lynx Customer Care, please make sure you For Warranty Service or a referral for an authorized service have the following information: agent near you, contact Lynx Customer Care at: (888) 289-5969 • Model number Agents are available Mon-Fri from 6AM to 4:30 PM, and •... -
Page 35: Smartgrill By Lynx™ Limited Warranty
The following grill parts are warranted to be free from defects 7) No one has the authority to add to or vary Lynx’s warranty, in material and workmanship, when subjected to normal or to create for Lynx any other obligation or liability in domestic use and service, for a period of five (5) years from connection with the sale or use of its products. -
Page 36: Wiring Diagrams
WIRING DIAGRAMS 30 INCH, ELECTRICAL DIAGRAM, SMART GRILL BURNERS MICROPHONE TC-1 (BURNER) ROTISSERIE TC-2 (BURNER) TC-4* (BURNER) VALVE-1 TC-C1 HALOGEN (GRATE) TC-C2 (GRATE) VALVE-2 SPEAKER GRATES MASTER VALVE-4* SWITCH I1 I2 I3 I4 V1 V2 V3 V4 RTSE HLGN SPKR MSTR SW TC I1 TC I2 TC I3... - Page 37 WIRING DIAGRAMS 36 INCH AND 42 INCH, ELECTRICAL DIAGRAM, SMART GRILL TC-1 BURNERS (BURNER) MICROPHONE TC-2 (BURNER) ROTISSERIE TC-3 (BURNER) VALVE-1 TC-4* (BURNER) VALVE-2 TC-C1 HALOGEN (GRATE) TC-C2 (GRATE) VALVE-3 SPEAKER TC-C3 (GRATE) MASTER GRATES VALVE-4* SWITCH I1 I2 I3 I4 V1 V2 V3 V4 RTSE HLGN SPKR MSTR SW TC I1...
-
Page 38: Model-Specific Btu Outputs & Max. Runs For Appliances
EXPLODED PARTS DIAGRAMS DETAIL A DETAIL B REFERENCE IR PANEL ASSY BILL DETAIL C DETAIL D CARE & USE/INSTALLATION... - Page 39 EXPLODED PARTS DIAGRAMS DETAIL E DETAIL F SEE MANIFOLDASSY FOR ORIFICE SIZE & PROPER GAS CONNECTION COMPONENTS. REFERENCE REFERENCE CONTROL PANEL ASSY BILL BULLNOSE ASSY BILL CARE & USE/INSTALLATION...
- Page 40 PARTS LIST 30" 36" 42" 30" 36" 42" 70302 FIREBOX, 30" SG, WELDMENT 33052 IGNITER, HOT SURFACE (SHORT) 70303 FIREBOX, 36" SG, WELDMENT 35292 COVER, BREAKOUT BOARD 70304 FIREBOX, 42" SG, WELDMENT 35369 TC RETAINER CLIP 70357 FRONT HOOD, 30", SG, WLDMT 35100 BRACKET, HOLDER, BURNER, SG 70358...
- Page 41 EXPLODED PARTS DIAGRAMS AND PARTS LIST CONTROL PANEL ASSEMBLY ITEM DESCRIPTION GRILL SI ZE 30" 36" 42" 70308 PANEL, CONTROL, 36" , WLDMT 70309 PANEL, CONTROL, 36" , WLDMT 70310 PANEL, CONTROL, 36" , WLDMT 80925 KNOB, ILLUMINATED, SG, ASSY * SEE BELOW L11074 LY NX LOGO 35062...
- Page 42 EXPLODED PARTS DIAGRAMS AND PARTS LIST BULLNOSE WELDMENT ALL SIZES BULLNOSE ASSEMBLY DESCRIPTION QTY. 80926 MICROPHONE DIAL ASSY 80953 SWITCH, PUSH-BUTTON, ASSY 35064 RTN RING, EXT, 3/8" SHAFT 35141 SPRING, WAVE, DISC, INFRARED PANEL ASSEMBLY ITEM DESCRIPTION GRILL SIZE 30" 36"...
- Page 43 EXPLODED PARTS DIAGRAMS AND PARTS LIST MANIFOLD ASSEMBLY ITEM DESCRIPTION GRILL SIZE 30" 36" 42" 70311 MANIFOLD, 30" SG, WLDMT 70312 MANIFOLD, 36" SG, WLDMT 70313 MANIFOLD, 42" SG, WLDMT 35065 VALVE, ELEC, MODULATING 35147 FTNG, NIP, REDUC, 3/8 X 1/8 NFTP 35146 FTNG, FLARED, STRAIGHT ADAP 35222...
- Page 44 MODEL-SPECIFIC BTU OUTPUTS & MAX. RUNS FOR APPLIANCES MODEL-SPECIFIC BTU OUTPUTS MODEL ROTISSERIE PROSEAR™ 2 TOTAL INPUT SMART30(F) 1 @ 14,000 2 @ 23,000 60,000 Btu/Hr SMART36(F) 1 @ 14,000 3 @ 23,000 83,000 Btu/Hr SMART42(F) 1 @ 16,000 3 @ 23,000 85,000 Btu/Hr MAXIMUM RUNS FOR ALL NOTE: IF A 1/2 INCH LINE IS USED...
- Page 45 CARE & USE/INSTALLATION...
-
Page 46: Care & Use/Installation
CARE & USE/INSTALLATION... -
Page 47: Index
Visible ..............10 Direct Heat Cooking ............. 28 Drip Tray ............... 29 Security Code Lock ............22 Downloading Your SmartGrill by Lynx™ App....21 Service, contacting LYNX ..........34 Side Burner Connections ..........17 Electrical Connections ..........18 Exploded Parts View ............ 38 Technical Assistance ............. - Page 48 Lynx Grills, Inc. 7300 Flores Street Downey, CA 90242 For more information please call, 1-888-289-5969 or visit www.lynxgrills.com P/N 35014 01/2015 ©Lynx Grills Voted “Most Coveted Product” by the Consumer Electronics Association staff at the 2014 Consumer Electronics Show U S A...
Need help?
Do you have a question about the SMART30F and is the answer not in the manual?
Questions and answers