Table of Contents
Advertisement
Advertisement
Table of Contents
Troubleshooting

Related Manuals for Agilent Technologies Cary 60


Summary of Contents for Agilent Technologies Cary 60
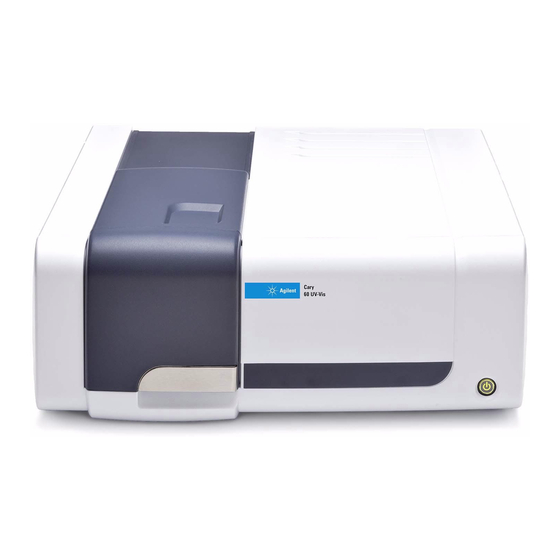
- Page 1 Agilent Cary 60 Spectrophotometer User’s Guide...
-
Page 2: Safety Notices
Agilent shall not be liable for errors or defined in FAR 2.101(a) or as damages on products or performance “Restricted computer software” as due to using non-Agilent genuine defined in FAR 52.227-19 (June 1987) parts. or any equivalent agency regulation or Agilent Cary 60 Spectrophotometer User’s Guide... -
Page 3: Table Of Contents
Modules, Covers and Panels Other Precautions Warning and Other Symbols CE Compliance Electromagnetic Compatibility EN55011/CISPR11 2. Specifications Measurement Category Pollution Degree Environmental Conditions Weights and Dimensions Electrical Specifications Mains Supply Computer Requirements 3. Installation Installation Agilent Cary 60 Spectrophotometer User’s Guide... - Page 4 Instrument Overview Indicator Lamp Connections Using the Software 5. Troubleshooting Access Denied Problem Solution No Green Light Indicating that the Cary 60 is Powered Problem Solution Start Button Replaced with Connect Button Problem 1 Agilent Cary 60 Spectrophotometer User’s Guide...
- Page 5 Absorbance is 10 Abs and Fluctuates Wildly During a Scan Problem Solution Instrument Performance Testing Problem Solution Wavelength Calibration Problem Solution Front Panel LED Troubleshooting LED Won’t Light Up Solid Red LED Flashing Red LED 6. Maintenance and Spare Parts Maintenance Spare Parts Agilent Cary 60 Spectrophotometer User’s Guide...
- Page 6 Contents This page is intentionally left blank. Agilent Cary 60 Spectrophotometer User’s Guide...
-
Page 7: General Information And Safety Practices And Hazards
User Documentation You have been provided with the following documentation to help you set up and operate your Agilent Cary 60 spectrophotometer: • Cary 60 Installation Card, with information on unpacking the instrument and setting up the system. -
Page 8: Conventions
To avoid electric shock, NEVER disassemble the module. When operating, the lamp module emits high intensity light that can cause serious damage to eyes. To avoid eye damage, never operate the lamp outside the instrument. Agilent Cary 60 Spectrophotometer User’s Guide... -
Page 9: Modules, Covers And Panels
Do not block any ventilation grills present on the computer. Consult the manuals supplied with your PC, monitor and printer/plotter for their specific ventilation requirements. Use of the Cary 60 system and accessories may involve materials, solvents and solutions that are flammable, corrosive, toxic or otherwise hazardous. -
Page 10: Warning And Other Symbols
The following symbol may be used on warning labels attached to the instrument. When you see this symbol, refer to the relevant operation or service manual for the correct procedure referred to by that warning label. Agilent Cary 60 Spectrophotometer User’s Guide... -
Page 11: Ce Compliance
Indicates viewing hole to check the operation of the Xenon flash lamp. CE Compliance Your Agilent Cary 60 spectrophotometer has been designed to comply with the requirements of the Electromagnetic Compatibility (EMC) Directive and the Low Voltage (electrical safety) Directive (commonly referred to as the LVD) of the European Union. -
Page 12: Electromagnetic Compatibility
Operation is subject to the following two conditions: This device may not cause harmful interference. This device must accept any interference received, including interference that may cause undesired operation. Agilent Cary 60 Spectrophotometer User’s Guide... - Page 13 Make sure that all peripheral devices are also certified. Make sure that appropriate cables are used to connect the device to peripheral equipment. Consult your equipment dealer, Agilent Technologies, or an experienced technician for assistance. Changes or modifications not expressly approved by Agilent Technologies could void the user’s authority to operate the...
- Page 14 General Information and Safety Practices and Hazards This page is intentionally left blank. Agilent Cary 60 Spectrophotometer User’s Guide...
-
Page 15: Specifications
The Measurement category is IEC61010:I. Do not to use this equipment for measurements within measurement categories II, III and IV. Pollution Degree The pollution degree is IEC61010:2. Pollution degree ‘2’ applies to a normal indoor atmosphere. Agilent Cary 60 Spectrophotometer User’s Guide... -
Page 16: Environmental Conditions
The room should be temperature- controlled if your analyses are particularly sensitive. Condition Altitude (m, ft) Temp. (°C, °F) Humidity (%RH) non-condensing Non-operating (transport) 0–4600, 0–15000 -40–70, -40–158 <90 Operating within performance 0–3100, 0–10000 5–40, 41–104 15–80 specifications Agilent Cary 60 Spectrophotometer User’s Guide... -
Page 17: Weights And Dimensions
Unpacked 477 x 567 x 196 mm (19 x 23 x 8 in) The Cary 60 has been designed to withstand 10 kg, the approximate weight of a 17 in. LCD monitor. The workbench should be about 90 cm (36 in) high. Remember to provide space for the computer, monitor and printer. -
Page 18: Electrical Specifications
Danger of electrocution. Good electrical grounding is essential to avoid potentially serious shock hazards. A 3-wire outlet with ground connection must be provided for the Cary 60. Make certain that power outlets are earth- grounded at the grounding pin. All power supplies for the Cary 60 must be single-phase, AC voltage,... -
Page 19: Computer Requirements
Specifications Computer Requirements The Cary 60 was evaluated under Agilent’s ISO9001 procedures using Cary WinUV software and a desktop computer. We strongly recommend a computer configuration that matches the system that was used during evaluations. Manufacturer Hewlett-Packard Model HP Desktop Small Form Factor... - Page 20 Specifications This page is intentionally left blank. Agilent Cary 60 Spectrophotometer User’s Guide...
-
Page 21: Installation
When using a Microsoft Windows 7 computer operating system, instructions for setting up the system are included in the Cary 60 Installation Card supplied with the instrument or the software installation instructions supplied with the software. Agilent Cary 60 Spectrophotometer User’s Guide... -
Page 22: Unpacking
Unpacking WARNING Heavy Weight The Cary 60 weighs 18 kg. To avoid injury to personnel or damage to equipment, always use two or more people when lifting or carrying the instrument. NEVER attempt to lift the instrument alone. After accepting delivery, take the equipment to the installation site. -
Page 23: Installing The Cary Winuv Software
To unpack the Cary 60 spectrophotometer: Open the packing box. Two people should lift the Cary 60 from the packaging. Installing the Cary WinUV Software Insert the CD into the computer’s CD-ROM drive. The installation program should automatically launch. If it does not, run NOTE d:\AgilentCaryWinUVSetup. -
Page 24: Installing The Hardware
Plug in the USB cable. Power Figure 1. Hardware connections Connect the power supply to the power cable and then plug in to the Cary 60 and wall power outlet. See Figure 1. Turn on the computer. Power button Serial number Figure 2. -
Page 25: Installing The Cary 60 Driver
Installing the Cary 60 Driver To install the Cary 60 driver: Turn on the Cary 60. The Cary 60 will calibrate for approximately 2 minutes. The ‘Found New Hardware Wizard’ dialog box will appear. Select Install this driver software anyway and then click Next. -
Page 26: Running The Tutorials
11 Once validation is finished, print the generated report and then close the Validate application. Running the Tutorials To run the Cary 60 tutorials double-click the tutorial icon on your computer desktop or click Start > Programs > Agilent > Cary WinUV > Cary Tutorial. -
Page 27: Cell Holder
F1 on your keyboard with a Cary WinUV application open. Cell Holder A Microcell Holder is supplied as standard with the Cary 60. Follow the instructions below to install and align it. Figure 3. Cell holder base (left) and Microcell Holder 1. - Page 28 Microcell Holder. Slide back the sample compartment lid (refer to Figure 4). Figure 4. Cary 60 showing the sample compartment lid (1) and front door (2) Remove the sample compartment front door (refer to Figure 4). If not already fitted, install the cell holder base in the sample...
-
Page 29: Alignment
Continue to adjust the adjustment screw until the beam hitting the paper appears the most intense. You may need to dim the room lights to see the light beam. NOTE Agilent Cary 60 Spectrophotometer User’s Guide... -
Page 30: Other Sample Holders
Installation Other Sample Holders Other sample holders are available for use with the Cary 60, such as the Solid Sample Holder. Instructions for their use are included in the Help provided with the Cary WinUV software. Installing Accessories For installation of all accessories to the Cary 60, please refer to the Cary WinUV Help. -
Page 31: Introduction
Introduction 4. Introduction Instrument Overview Indicator Lamp Connections Using the Software Instrument Overview Figure 5. Cary 60 showing the sample compartment lid (1), sample compartment front door (2) and power button (3). Agilent Cary 60 Spectrophotometer User’s Guide... -
Page 32: Indicator Lamp
Static on Instrument initializing (not scanning) Flashing Scan in progress while initializing/calibrating Static on Initialization or calibration failed. Instrument is still allowed to operate. Flashing Instrument is scanning after initialization or calibration has failed. Agilent Cary 60 Spectrophotometer User’s Guide... -
Page 33: Connections
25-pin D-range connector in the right side of the sample compartment for accessories (6 on Figure 4) Using the Software For information on how to use the software, please see the Cary 60 Tutorial and the Cary WinUV Help installed on your computer during the Cary WinUV software installation. - Page 34 Introduction This page is intentionally left blank. Agilent Cary 60 Spectrophotometer User’s Guide...
-
Page 35: Troubleshooting
This chapter contains troubleshooting information to help you solve various problems you may encounter when setting up or using your Cary 60 hardware. If the suggested solutions do not fix the problem, please contact your local Agilent field service engineer or representative. - Page 36 Click Remove and then Yes. Follow the instructions on the screen. Ensure the computer is turned off. Restart the computer. Re-install the Cary WinUV software according to the Cary 60 Installation Card on Microsoft Windows 7 computers. Agilent Cary 60 Spectrophotometer User’s Guide...
-
Page 37: No Green Light Indicating That The Cary 60 Is Powered
Cary 60 indicates when the instrument is powered. Problem The power indicator on the Cary 60 does not light when it is switched Solution Check the connection of the Cary 60 to the external power supply. -
Page 38: Problem 2
A defective Cary 60 main board. Contact your Agilent field service engineer to replace this board if fixing the problems listed above does not help. • Reboot the Cary 60 and wait for the power LED to turn solid green • Reboot the controlling PC... -
Page 39: Absorbance Is 10 Abs And Fluctuates Wildly During A Scan
Troubleshooting Absorbance is 10 Abs and Fluctuates Wildly During a Scan Problem The Cary 60 is reporting 10 Abs and a scan like that shown below is displayed on the screen: Figure 7. Wild absorbance fluctuation during a scan Solution The detector cable inside the Cary 60’s sample compartment is not... -
Page 40: Instrument Performance Testing
Windows desktop, and then double-click on the ‘System Information’ icon. If the text reads ‘UnCalibrated’ on the ‘Calibration’ tab turn the Cary 60 off and then back on again. Wait for the instrument to finish initializing and calibrating. When the calibration routine finishes, the text will change to ‘Calibrated’. -
Page 41: Wavelength Calibration
Restart the Cary 60. The calibration procedure occurs automatically on start up. Agilent recommends that as part of your standard operating procedure you restart the Cary 60 monthly. Perform the Instrument Performance Test suite in ‘Validate’ to ensure the instrument results meet specification. -
Page 42: Flashing Red Led
Check or perform the following: • The sample compartment for items blocking the beam. • The cuvette is inserted correctly and clean. • Reboot the Cary 60. • Contact your local Agilent field service engineer or representative. Agilent Cary 60 Spectrophotometer User’s Guide... -
Page 43: Maintenance And Spare Parts
Any spills in the sample compartment should be wiped up immediately. The exterior surfaces of the Cary 60 spectrophotometer should be kept clean. All cleaning should be done with a soft cloth. If necessary, this cloth can be dampened with water or a mild detergent. Do not use organic solvents or abrasive cleaning agents. -
Page 44: Spare Parts
Maintenance and Spare Parts For additional maintenance procedures, please see the Help provided with the Cary WinUV software. Spare Parts The following spare parts are available for use with your Cary 60 spectrophotometer. Always use Agilent-supplied spare parts, unless otherwise indicated. Part... - Page 46 The manual describes the following: • General Information and Safety Practices and Hazards • Specifications • Installation • Introduction • Troubleshooting • Maintenance and Spare Parts © Agilent Technologies 2011, 2014 Printed in Malaysia 09/14 *G6860-90001* *G6860-90001* G6860-90001 Issue 2...