Table of Contents
Advertisement
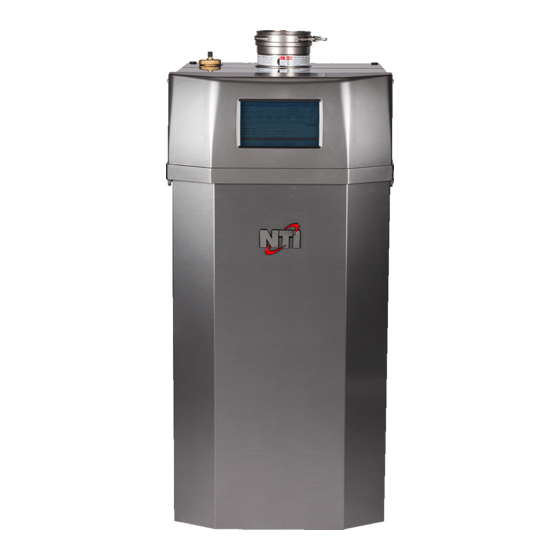
FTG Firetube Giant Boiler
Models: FTG 600 through FTG 2400
Version Date: 2017-08-14
INSTALLATION AND OPERATION MANUAL
TABLE OF CONTENTS
1.0
INTRODUCTION ................................................................................................................ 3
2.0
SPECIFICATIONS .............................................................................................................. 6
3.0
BOILER LOCATION .......................................................................................................... 8
4.0
GENERAL VENTING ....................................................................................................... 10
5.0
VENT/AIR-INLET TERMINATION CLEARANCES ..................................................... 22
6.0
CONDENSATE DRAIN .................................................................................................... 25
7.0
INSTALLING GAS PIPING .............................................................................................. 27
8.0
LIGHTING THE BOILER ................................................................................................. 29
9.0
GAS VALVE AND BURNER SET-UP ............................................................................ 31
10.0 BOILER AND HEATING SYSTEM PIPING ................................................................... 36
11.0 LEAD LAG INSTRUCTIONS ........................................................................................... 44
12.0 FIELD WIRING ................................................................................................................. 47
13.0 WIRING SCHEMATICS ................................................................................................... 52
14.0 INSTALLATION CHECKLIST ........................................................................................ 54
15.0 ANNUAL MAINTENANCE AND INSPECTION ........................................................... 55
16.0 TROUBLESHOOTING ..................................................................................................... 57
17.0 PARTS LIST ...................................................................................................................... 79
HAZARD SYMBOLS AND DEFINITIONS
unit may result in property damage, serious injury to occupants, or possibly death.
Danger Sign: Indicates a hazardous situation which, if not avoided, will
result in serious injury or death.
Warning Sign: Indicates a hazardous situation which, if not avoided,
could result in serious injury or death.
Caution Sign plus Safety Alert Symbol: Indicates a hazardous situation
which, if not avoided, could result in minor or moderate injury.
Caution Sign without Safety Alert Symbol: Indicates a hazardous
situation which, if not avoided, could result in property damage.
Notice Sign: Indicates a hazardous situation which, if not avoided,
could result in property damage.
This Boiler must be installed by a licensed and trained Heating
Technician or the Warranty is Void. Failure to properly install this
H
NTI # 85422
Advertisement
Table of Contents

Related Manuals for NTI FTG 600


Summary of Contents for NTI FTG 600
-
Page 1: Table Of Contents
FTG Firetube Giant Boiler Models: FTG 600 through FTG 2400 Version Date: 2017-08-14 INSTALLATION AND OPERATION MANUAL TABLE OF CONTENTS INTRODUCTION ........................ 3 SPECIFICATIONS ......................6 BOILER LOCATION ......................8 GENERAL VENTING ....................... 10 VENT/AIR-INLET TERMINATION CLEARANCES ............. 22 CONDENSATE DRAIN ....................25 INSTALLING GAS PIPING .................... - Page 2 │ Installation & Operation Manual Read Before Proceeding If you do not follow these instructions exactly, a fire or explosion may result causing property damage, serious injury or death. FOR YOUR SAFETY, READ BEFORE OPERATING_ A) This boiler does not have a pilot. It is equipped with an ignition device which automatically lights the burner.
-
Page 3: Introduction
Automatically Fired Boilers ANSI/ASME CSD-1.” This document pertains to the correct installation and operation of NTI FTG boiler models FTG 600, FTG 800, FTG 1200, FTG 1400, FTG 2000, FTG 2200 and FTG 2400. The instructions detailed in this document supersede any and all previous instructions provided by NTI, written or otherwise. - Page 4 Check your local codes for this requirement. Natural Gas to LP Conversion Kit Model Kit Part Number LP-Orifice FTG 600-1400 85418-1 FTG 2000-2400 85758-1 Exhaust Vent / Air-Inlet Piping The FTG is certified as a “Category IV” boiler, and requires a “Special Venting System”...
- Page 5 │Installation & Operation Manual IN THE STATE OF MASSACHUSETTS ONLY (a) For all horizontally vented gas fueled equipment installed in every dwelling, building or structure used in whole or in part for residential purposes, including those owned and operated by the Commonwealth and where the side wall exhaust vent termination is less than seven (7) feet above finished grade in the area of the venting, including but not limited to decks and porches, the following requirements shall be satisfied: INSTALLATION OF CARBON MONOXIDE DETECTORS At the time of installation of the side wall...
-
Page 6: Specifications
Installation & Operation Manual│ 2.0 SPECIFICATIONS Table 2-1 General Specifications DESCRIPTION FTG 600 FTG 800 FTG 1200 FTG 1400 FTG 2000 FTG 2200 FTG 2400 Gas Connection 1-1/4 1-1/2 (inches, NPT) Water Inlet (inches, groove-joint) Water Outlet (inches, groove-joint) Exhaust Vent... - Page 7 │Installation & Operation Manual High Altitude Operation The FTG is designed to operate at its maximum listed capacity in installations located at 0-2000 ft above Sea Level. Since the density of air decreases as elevation increases, maximum specified capacity should be de-rated for elevations above 2000 ft [610 m] in accordance with Table 2-3.
-
Page 8: Boiler Location
│ Installation & Operation Manual 3.0 BOILER LOCATION In all cases, the FTG boiler must be installed indoors in a dry location where the ambient temperature must be maintained above freezing and below 100F [38C]. All boiler components must be protected from dripping, spraying water, or rain during operation and servicing. - Page 9 │Installation & Operation Manual Closet/Alcove installations in US and Canada require approved CPVC, Polypropylene or Stainless Steel vent and air-inlet pipe and fittings (see Table 4-4); PVC is not permitted. Failure to follow these instructions may result in damage or serious injury. Figure 3-1 Closet Installation, Minimum Clearances Exhaust Vent Pipe Clearances as per Special Vent System...
-
Page 10: General Venting
│ Installation & Operation Manual 4.0 GENERAL VENTING The FTG boiler is certified as a “Category IV” boiler requiring a “Special Venting System” designed for pressurized venting. The Exhaust Vent must be piped to the outdoors, using the vent materials and rules outlined in this section. - Page 11 Failure to use the appropriate exhaust-vent adaptor for the type of venting being used, will lead to flue gas leakage possibly resulting in property damage, Carbon Monoxide poisoning or death. Air-inlet Connector (FTG 600-800) – the FTG 600 & 800 employ a universal air-inlet connector that accepts DuraVent’s 6 in. PolyPro ®...
- Page 12 The FTG 600-800 combustion air-inlet connector is designed to directly accept 6 in. PVC/CPVC, PolyPro®, FasNSeal® or Z-Vent® Special Gas Venting; no separate adapter is required. The FTG 600-800 exhaust vent outlet connector is designed to directly accept 6 in. FasNSeal® or Z-Vent® Special Gas Venting; no separate adapter is required.
- Page 13 │Installation & Operation Manual Figure 4-1(a) Near Boiler Venting (PVC) Figure 4-1(b) Near Boiler Venting (CPVC) PVC Air-inlet Pipe* Air-inlet PVC Air-inlet Pipe* Air-inlet PVC Exhaust-vent CPVC PVC Coupling Exhaust-vent CPVC Transition Pipe (see Table 4-2) Adapter to CPVC (see Table 4-3) Adapter to CPVC (see Table 4-3) Exhaust...
- Page 14 Minimum length of each the exhaust vent and combustion air-inlet piping is 5 feet equivalent. For models FTG 600-800, the last 6 ft. of exhaust vent piping (vent termination) can be reduced to 4 or 5 in. diameter vent pipe.
- Page 15 Centrotherm Concentric termination kits must use the applicable “Twin pipe to concentric adapter,” part number ICTC0446. 4 & 5 in. Vent Termination Kits may only be used with models FTG 600-800. 7 & 8 in. Vent Termination Kits may only be used with models FTG 1200-2400.
- Page 16 │ Installation & Operation Manual Termination Examples – Direct Vent Installation Figure 4-2(a) Two-pipe (Sidewall) Figure 4-2(b) Two-pipe (Roof) Exhaust – pointing Exhaust – pointing Combustion Air-inlet up, min. 18in. above out, min. 18in. above – pointing down, min. combustion air-inlet combustion air-inlet 12in.
- Page 17 │Installation & Operation Manual Figure 4-3(a) Concentric (Roof) Figure 4-3(b) Concentric (Sidewall) Exhaust – Combustion Air-inlet Refer to vent-teminal – drawn from bottom of exits the top manufacturer instructions for correctly connecting bell shape, min. 12in. above snow level to vent-terminal Exhaust Exhaust –...
- Page 18 │ Installation & Operation Manual Sidewall Termination Details – Direct Vent Installation Figure 4-4(a) Figure 4-4(b) Two-Pipe Termination (Sidewall) IPEX Concentric Termination (Sidewall) Horizontal 4-12” or greater than 36” Refer to documentation included with termination kit for complete installation instructions. Exhaust Exhaust Exhaust...
- Page 19 │Installation & Operation Manual Roof Termination Details – Direct Vent Installation Figure 4-5(a) Figure 4-5(b) Two-Pipe Termination (Roof) IPEX Concentric Termination (Roof) Exhaust Refer to documentation included with termination kit for Vent Screen complete installation instructions. Vent pipe piece to retain vent screen Vent pipe piece to retain vent screen...
- Page 20 Combustion air containing chemicals such as chloride, fluoride, bromine or iodine or dust and debris will cause corrosion damage of the heat exchanger voiding your NTI warranty. Refer to Table 4-1 for a list of corrosive products and contaminants sources to avoid.
- Page 21 │Installation & Operation Manual Figure 4-6 Venting Below Grade For installations that exit the wall below grade: Exhaust 1. Excavate site to a point below where the pipes are to exit as shown. 2. Ensure the wall is fully sealed where the pipes penetrate.
-
Page 22: Vent/Air-Inlet Termination Clearances
Installation & Operation Manual│ 5.0 VENT/AIR-INLET TERMINATION CLEARANCES The quick reference table below is to be read in conjunction with the numbered notes as indicated, Figures 5-1 and 5-2, and the Venting Rules and Guidelines in Section 4.0. The instructions detailed in this section are a combination of FTG specific and National Gas Code restrictions. Compliance alone does not insure a satisfactory installation as good common sense must also be applied. - Page 23 │Installation & Operation Manual Figure 5-1 Termination Clearance Quick Reference Diagram (See Table 5-1) Illustrations of Termination Clearances Figure 5-2 Sidewall Termination (See Table 5-1) Clearances “F” and “G” Canada – Minimum 3 ft. [915 mm] The US – Minimum 1 ft. [305 mm] Two-Pipe Termination Clearance “Q”...
- Page 24 Installation & Operation Manual│ Extra precaution must be taken to adequately support the weight of the Vent/Air-inlet piping in applications using roof-top terminations. Failure to follow these instructions may result in venting or boiler component failure resulting in flue gas spillage leading to property damage, serious injury or death.
-
Page 25: Condensate Drain
│Installation & Operation Manual 6.0 CONDENSATE DRAIN The FTG boiler produces liquid condensate in the heat exchanger and venting system as a product of combustion. Steps must be taken to ensure condensate does not collect in the venting system; therefore, all exhaust piping must slope back to the boiler a minimum ¼... - Page 26 Installation & Operation Manual│ Figure 6-1(a) Condensate Drain Trap – Exploded View Boiler Condensate Drain Support Bracket (factory supplied) Gear Clamp (factory supplied) Condensate Trap (factory supplied) Figure 6-1(b) Condensate Drain Trap - Assembled Prime Condensate Trap with water before firing boiler Tighten Gear Clamp Position the Condensate Trap securing Condensate Trap...
-
Page 27: Installing Gas Piping
Ensure that: The gas line connection to the boiler does not apply any weight to the gas valve. NTI recommends using approved flexible gas piping (if acceptable by local codes) to connect the boiler to the gas supply (see Figure 7-1 for details). - Page 28 Installation & Operation Manual│ Figure 7-1 Gas Line Connection (Typical) Gas Supply Line Must be externally supported. DO NOT support with boiler gas line connection. Union Manual Gas Shutoff Valve (field supplied) (Factory Supplied) Should overheating occur or the gas supply fails to shutoff, close the Manual Gas Shutoff Valve to the boiler.
-
Page 29: Lighting The Boiler
│Installation & Operation Manual LIGHTING THE BOILER Before Start-up refer to Mandatory Pre-commissioning Procedure for Plastic Venting in Section 4.0. Failure to follow these instructions can result in explosions, injury or death. Prior to turning the gas supply on and lighting the boiler, ensure all aspects of the installation are complete and in conformance with the instructions provided in this manual, including the Vent/Air-inlet, Condensate Drain, and System Water Piping. - Page 30 EXTREME ELECTRICAL SHOCK possibly causing serious injury or death. If the unit fails to light consistently and smoothly, contact NTI for technical assistance at 1-800-688-2575. Never allow the boiler to operate if the ignition or operation of the burner is rough or erratic.
-
Page 31: Gas Valve And Burner Set-Up
1. Turn the supply of gas to the boiler off. 2. For models FTG 600-1400, use a 3/16 in. hex wrench to remove the plug from the inlet flange of the gas valve, and install a 1/8 NPT x hose barb adapter suitable for connecting the tubing of the gas pressure manometer being used to measure gas line pressure. - Page 32 CO values are lower than the values obtained during maximum modulation, as per notes in Table 9-1. If not, do not adjust further, contact NTI for assistance. 5. For FTG 2000-2400 models converted to LP, perform the Gas Valve Offset Check/Adjustment procedure detailed in Figure 9-2.
- Page 33 │Installation & Operation Manual Figure 9-1(a) Gas Valve Assembly (FTG 600-1400) Front-Top Cover (must be removed to access Gas Valve components) Cap (remove to access Throttle Adjustment Screw) DO NOT Adjust Throttle / Input Adjustment Screw (use 3 mm hex wrench) High Gas Pres.
- Page 34 │ Installation & Operation Manual Figure 9-1(b) Gas Valve Assembly (FTG 2000-2400) Front-Top Cover (must be removed to access Gas Valve components) Pressure Tappings for Measuring Offset (Refer to Offset Adjustment Procedure – Figure 9-2) Air Filter Gas Valve Line Pressure Test Port (located on gas valve inlet flange) High Gas Pres.
- Page 35 – CO must be 0.5 to 1.0% lower at minimum modulation. If readings are out of tolerance – CONTACT NTI FOR ASSISTANCE. 6) Complete Test – shutdown the burner, remove the manometer tubing and reinstall the factory caps on Offset Pressure Tappings.
-
Page 36: Boiler And Heating System Piping
For retrofits, all system piping, including radiators, must be cleansed of build-up including sludge and scale. All systems, old and new, must be cleansed to remove flux, grease and carbon residue; NTI recommends cleaning the boiler system with “Fernox F3 Cleaner”. For retrofit applications with heavy lime scale and sludge deposits, a heavier duty cleaner may be required;... - Page 37 WATER” LED should illuminate. Generate a burner demand; the burner should not fire and “Lockout 67 ILK OFF” should appear on the screen. Contact NTI for assistance if this does not happen. 2. Fill the boiler with water; the “LOW WATER” LED should turn off. Press the TEST / RESET button on the LWCO and clear the Lockout from the display board –...
- Page 38 Installation & Operation Manual│ Figure 10-1 Near Boiler Piping Auto Air Vent (factory supplied) Pressure Relief Valve (factory supplied) Low Water Cutoff (factory installed) Groove Joint Coupling (factory supplied) Pressure/Temperature Gauge (factory supplied) Isolation Valve (Typical) Boiler Drain / Back- flush Valve (typical) Relief Valve Outlet –...
- Page 39 (See Table 10-2 for minimum flow rate requirements). To ensure the minimum flow rate is attained, carefully follow the plumbing instructions in this section. Table 10-2 Minimum Flow Rate Requirements Model Flow (US gpm) Model Flow (US gpm) FTG 600 FTG 2000 FTG 800 FTG 2200 FTG 1200 FTG 2400 FTG 1400 Failure to ensure the minimum water flow rate through the boiler when the burner is operating will result in “short-cycling”, reduced performance and operating efficiency,...
- Page 40 Installation & Operation Manual│ Figure 10-2(a) FTG 600-800 Head Loss Curve Figure 10-2(b) FTG 1200-1400 Head Loss Curve Figure 10-2(c) FTG 2000-2400 Head Loss Curve...
- Page 41 Contractor modifications to these instructions may be required, based upon existing piping and system design; consult NTI for required assistance (1-800-688-2575).
- Page 42 Installation & Operation Manual│ Figure 10-3 Plumbing Schematic – Single Central Heating Circulator Figure illustrates the basic plumbing requirements for an FTG boiler installation with a single Central Heating circulator, and an Indirect Water Heater. Refer to Figure 10-1 for boiler fitting identification.
- Page 43 │Installation & Operation Manual Figure 10-4 Plumbing Schematic – Multiple Central Heating Circulators Figure illustrates the basic plumbing requirements for an FTG boiler installation with a multiple Central Heating circulators, and an Indirect Water Heater. Refer to Figure 10- 1 for boiler fitting identification.
-
Page 44: Lead Lag Instructions
COM of each boiler in parallel; see Field Wiring Table 12-2 and Figure 12-3. System Sensor (Optional) – install a system sensor (NTI P/N: 84010) on the outlet (supply) pipe feeding the heating system, see Figure 11-1. Wire the system sensor to the SYSTEM SENSOR terminals of the Master Boiler;... - Page 45 │Installation & Operation Manual Figure 11-1 Multiple Boiler Cascade – Plumbing Configuration Figure illustrates the basic plumbing requirements for multiple FTG boilers installed in cascade configuration. Refer to Figure 10-1 for boiler fitting identification.
- Page 46 Installation & Operation Manual│ Lead Lag Instructions – Central Heating Central Heat Demand Switch (Room Thermostat) – connect to R (24VAC) and CH2 (LL) of the Master Boiler; see Field Wiring Table 12-2 and Figure 12-3. Switch must be an isolated end switch (dry contact). Central Heat Setpoint –...
-
Page 47: Field Wiring
FTG 600-1400 – 120V / 1Ph / 60Hz, fused (or protected via a circuit breaker) to a maximum of 15 Amps. FTG 2000 – 120V / 1Ph / 60Hz, fused (or protected via a circuit breaker) to a maximum of 20 Amps. - Page 48 Wiring Grommets connect 4-wire 3Ph power supply to switch, (factory supplied) as per Figure 12-2 - For FTG 600-2000, route 120V power supply through strain reliefs, and terminate at the line voltage Junction Box, as per Figure 12-2 Ethernet Connection...
- Page 49 │Installation & Operation Manual Figure 12-2 Line Voltage Field Wiring 3PH DISCONNECT SWITCH (FTG 2200/2400 ONLY) Located at the back of the boiler; see Figure 12-1 LINE VOLTAGE JUNCTION BOX Table 12-1 Line Voltage Field Wiring Connections Connection Location Description L1 (120VAC) Location for connecting line wire of 120V power supply.
- Page 50 Installation & Operation Manual│ Figure 12-3 Low Voltage Field Wiring...
- Page 51 Indirect Water Heater, or optional Tank Sensor (P/N 84632), see Appendix A. (NOTICE: tank sensor cannot be used for cascade boiler arrangements). System Water Temperature – An optional strap-on System Sensor is available from NTI (P/N 84010). When connected to terminals 15 and 16, the control will indicate a “CH” or SYSTEM “Lead-Lag”...
-
Page 52: Wiring Schematics
Installation & Operation Manual│ 13.0 WIRING SCHEMATICS Figure 13-1 FTG Connection Diagram... - Page 53 │Installation & Operation Manual Figure 13-2 FTG Ladder-Logic Diagram...
-
Page 54: Installation Checklist
Installation & Operation Manual│ 14.0 INSTALLATION CHECKLIST Installation 1. If operating on Propane Gas, convert boiler using the applicable Natural Gas to LP Conversion Instructions. 2. Locate the boiler in accordance with Section 3.0 of this manual. 3. Install the Vent/Air-inlet piping in accordance with Sections 4.0 and 5.0 of this manual. Ensure all joints are secured and cemented properly. -
Page 55: Annual Maintenance And Inspection
Take all necessary precautions and use recommended personal protective equipment as required. Cleaning Instructions (contact NTI for a more detailed procedure) 1. Power Down – Remove the demand for heat, allow the post-purge cycle to finish, turn gas and power supply off. - Page 56 │ Installation & Operation Manual 9. Condensate Trap – Disassemble the condensate trap and thoroughly clean it; then reassemble and securely connect it to the boiler condensate drain, see Section 6.0. 10. Reassemble – Assembly is in the reverse order as disassembly. Inspect all gaskets and insulation prior to assembly –...
-
Page 57: Troubleshooting
In addition, each FTG integrates internal circuit protection, as defined in Table 16-1. Table 16-1 Internal Circuit Protection – Fusing Applicable Desciption Location Component(s) Fused Models FTG 600-2400 Ignition Transformer Right side of control panel Ignition Transformer (120V, 7A) FTG 600-1400 24V Transformer... - Page 58 (right-side of control panel) o 120V – 7A Fuse 3Ph Fuse Block (remove cover to access fuses – 24V Transformer (FTG 600-1400) FTG 2200-2400 Only) o 24V Secondary – Circuit Breaker o 208/240V – 3 x 15A Fuses 24V Transformer (FTG 2000-2400) o 120V Primary –...
- Page 59 │Installation & Operation Manual Table 16-2 Troubleshooting Chart PROBLEM POSSIBLE CAUSE CORRECTIVE ACTION Burner not operating Heat demand satisfied; no call for heat Check Demand and Setpoints via Touchscreen. Check thermostat and DHW aquastat settings (as applicable). Appliance outlet temperature exceeds Check outlet temperature, setpoint and hysteresis “Setpoint - On Hysteresis”...
- Page 60 Pump flowing in the wrong direction Ensure water circulation through the boiler is in the Inlet/Outlet Inversion Limit correct direction, see Figure 10-1. Incorrect factory sensor wiring Disconnect flue sensor cable; screen should display “Hold 95 – Stack sensor fault”; if not contact NTI.
- Page 61 │Installation & Operation Manual Table 16-2 Troubleshooting Chart PROBLEM POSSIBLE CAUSE CORRECTIVE ACTION Lockout or Hold 88 – Outlet T Insufficient water flow See Lockout or Hold 81. Rise limit Hold 91– Inlet sensor fault Sensor disconnected Check sensor connection located on the bottom of the heat exchanger.
- Page 62 │ Installation & Operation Manual Table 16-2 Troubleshooting Chart PROBLEM POSSIBLE CAUSE CORRECTIVE ACTION Faulty Gas Valve The gas valve emits an audible click when it switches on or off. If the Sola controller is providing 24VAC to the gas valve, and the wiring is intact, it should be possible to detect if the valve is responding.
- Page 63 │Installation & Operation Manual Table 16-2 Troubleshooting Chart PROBLEM POSSIBLE CAUSE CORRECTIVE ACTION If Fuse “B” not blown, and Sola controller is pump Faulty Sola controller operating, navigate to pump diagnostic on display. Manually switch pump on, check for 120VAC at pump connection terminal on line voltage barrier strip.
- Page 64 │ Installation & Operation Manual Table 16-3 Hold and Lockout Codes Code Description Note None Hold / No lockout Unconfigured safety data Lockout Waiting for safety data verification Lockout Internal fault: Hardware fault Hold Internal fault: Safety Relay key feedback error Hold Internal fault: Unstable power (DCDC) output Hold...
- Page 65 │Installation & Operation Manual Table 16-3 Hold and Lockout Codes Code Description Note 24VAC voltage low/high Hold Modulation fault Hold Pump fault Hold Motor tachometer fault Hold AC inputs phase reversed Lockout Safety GVT model ID doesn’t match application’s model ID Lockout Application configuration data block CRC errors Lockout...
- Page 66 │ Installation & Operation Manual Table 16-3 Hold and Lockout Codes Code Description Note Flame lost in MFEP Lockout Flame lost early in run Lockout Flame lost in run Lockout Ignition failed Lockout Ignition failure occurred Hold Flame current lower than WEAK threshold Hold Pilot test flame timeout Lockout...
- Page 67 │Installation & Operation Manual Table 16-3 Hold and Lockout Codes Code Description Note Ignition OFF Lockout Pilot valve ON Lockout Pilot valve OFF Lockout Block intake ON Lockout Block intake OFF Lockout 166-168 RESERVED Safety opto bad in test state Lockout Safety relay opto feedback incorrect Lockout...
- Page 68 │ Installation & Operation Manual Table 16-3 Hold and Lockout Codes Code Description Note Invalid Pre-purge rate setting Lockout Invalid Pre-purge time setting Lockout Invalid Purge rate proving setting Lockout Invalid Run flame failure response setting Lockout Invalid Run stabilization time setting Lockout Invalid Stack limit enable setting Lockout...
- Page 69 │Installation & Operation Manual Table 16-3 Hold and Lockout Codes Code Description Note Blower fault detected during flap test Lockout Invalid DHW demand temperature setting Lockout Invalid preferred outlet high limit setting Lockout Invalid preferred lightoff rate setting Lockout Invalid preferred stack limit rate setting Lockout Table 16-4 Alert Codes Code...
- Page 70 │ Installation & Operation Manual Table 16-4 Alert Codes Code Description Parameter PCB in Program Module is too large for product Range PCB in Program Module was too large for product Alert PCB in Program Module was too large for product IAS start check was forced on due to IAS enabled Low voltage was detected in safety processor High line frequency occurred...
- Page 71 │Installation & Operation Manual Table 16-4 Alert Codes Code Description Modulation output type was invalid Firing rate control parameter was invalid Forced rate was out of range vs. min/max modulation Forced rate was invalid, % vs. RPM Slow start ramp value was invalid Slow start degrees value was invalid Slow start was ended due to outlet sensor fault Slow start was end due to reference set point fault...
- Page 72 │ Installation & Operation Manual Table 16-4 Alert Codes Code Description CH remote control parameter was invalid CH ODR not allowed with remote control CH control was suspended due to fault CH header temperature was invalid CH outlet temperature was invalid CH steam pressure was invalid Minimum water temperature parameter was greater than setpoint Minimum water temperature parameter was greater than time of day setpoint...
- Page 73 │Installation & Operation Manual Table 16-4 Alert Codes Code Description Lead Lag rate allocation setting was invalid Lead selection setting was invalid Lag selection setting was invalid Lead Lag slave return setting was invalid Lead Lag add stage method setting was invalid STAT may not be a Lead Lag CH demand source when Remote Stat is enabled Lead Lag base load rate setting was invalid Lead Lag master was suspended due to fault...
- Page 74 │ Installation & Operation Manual Table 16-4 Alert Codes Code Description CH time of day set point was invalid CH outdoor temperature was invalid CH ODR time of day setpoint was invalid CH ODR time of day set point exceeds normal set point CH max outdoor set point was invalid CH min outdoor set point was invalid CH min water set point was invalid...
- Page 75 │Installation & Operation Manual Table 16-4 Alert Codes Code Description Abnormal Recycle: Interrupted air flow switch was off during Pre-Ignition test Abnormal Recycle: Interrupted air flow switch was off during Pre-Ignition time Abnormal Recycle: Interrupted air flow switch was off during Main Flame Establishing Period Abnormal Recycle: Ignition failed due to interrupted air flow switch was off Abnormal Recycle: ILK off during Drive to Purge Rate Abnormal Recycle: ILK off during Measured Purge Time...
- Page 76 │ Installation & Operation Manual Table 16-4 Alert Codes Code Description Abnormal Recycle: Hardware PII INTLK shorted Abnormal Recycle: Hardware HFS LCI shorted Abnormal Recycle: Hardware HFS LFS shorted Abnormal Recycle: Invalid zero crossing Abnormal Recycle: fault stack sensor Abnormal Recycle: stack limit Abnormal Recycle: delta T limit Abnormal Recycle: fault outlet sensor Abnormal Recycle: outlet high limit...
- Page 77 │Installation & Operation Manual Table 16-4 Alert Codes Code Description Circulator sensor choice was invalid Circulator PID setpoint was invalid LCI demand lost in run Demand lost in run STAT demand lost in run Demand lost in run due to no flame LCI lost in Combustion Pressure Establishing Period LCI lost in Combustion Pressure Stabilizing Period RESERVED...
- Page 78 │ Installation & Operation Manual Table 16-4 Alert Codes Code Description CH ODR boost max offpoint temperature was too low Lead Lag ODR boost max offpoint temperature was invalid Lead Lag ODR boost max offpoint temperature was too low Time to rotate lead boiler to next firing slave Time to rotate lead boiler to next available slave Time to rotate lead boiler to first firing slave in order Time to rotate lead boiler to lowest running slave...
-
Page 79: Parts List
17.0 PARTS LIST For a list of parts that corresponds to the item numbers in the callouts, refer to Table 17-1. Note that some item numbers may appear more than once in the parts list depending on which model number is being referenced. Building Owners - Replacement parts are available from your stocking wholesaler. - Page 80 Figure 17-1(b) Exploded View – Control Panel 68,69 Figure 17-1(c) Exploded View – Trim/Install Kit 114 – Install & Operation Manual 112 – LP Conversion Instructions 113 – LP Conversion Label 115 – App. A, Touchscreen Manual 116 – User Instruction Manual...
- Page 81 Figure 17-1(d) Exploded View – Heat Exchanger & Gas Train...
- Page 82 Flue Collector, FTG 600-800 Flue Collector, FTG 1200-2400 FTG 1200-2400 84423 FTG 600-2400 Receptacle, 120VAC Sight Glass (c/w gaskets) FTG 600-2400 85274 FTG 600-800 Heat Exchanger ASME, FTG 600-800 (c/w doors) 85296 Heat Exchanger ASME, FTG 1200-1400 (c/w doors) FTG 1200-1400...
- Page 83 Insulation/Gasket, Rear Door, FTG 600-1400 FTG 600-1400 Insulation/Gasket, Rear Door, FTG 2000-2400 FTG 2000-2400 FTG 600-1400 Door, Combustion Chamber, Rear, FTG 600-1400 FTG 2000-2400 Door, Combustion Chamber, Rear, FTG 2000-2400 Insulation/Gasket, Front Door, FTG 600-2400 FTG 600-2400 Door, Combustion Chamber, Front, FTG...
- Page 84 FTG 600-800 Rear Top, FTG 1200-1400 FTG 1200-1400 Rear Top, FTG 2000-2400 FTG 2000-2400 Heat Exch. Support Frame, FTG 600-800 (c/w hardware) FTG 600-800 Heat Exch. Support Frame, FTG 1200-1400 (c/w hardware) FTG 1200-1400 FTG 2000-2400 Heat Exch. Support Frame, FTG 2000-2400 (c/w hardware)
- Page 85 FTG 600-2400 83018 FTG 600-800 Round Mesh Vent Screen, 4 in. 85445 FTG 600-1400 Natural Gas to LP Conversion Instructions, FTG 600-1400 85759 Natural Gas to LP Conversion Instructions, FTG 2000-2400 FTG 2000-2400 85418 LP Conversion Decal, FTG 600-1400 FTG 600-1400...
- Page 86 NOTES...
- Page 87 NOTES...
- Page 88 Visit us online NY Thermal Inc. 30 Stonegate Drive, Saint John, NB E2H 0A4 Canada Technical Assistance: 1-800-688-2575 Website: www.ntiboilers.com Fax: 1-506-432-1135...
Need help?
Do you have a question about the FTG 600 and is the answer not in the manual?
Questions and answers