
Related Manuals for INVENTOR IMCR8WZNa-M


Summary of Contents for INVENTOR IMCR8WZNa-M
- Page 1 Mi n i C h i l l e r S e r v i c e Ma n u a l S e r v i c e Ma n u a l S e r v i c e Ma n u a l...
-
Page 2: Table Of Contents
MINI CHILLER PRODUCT PRODUCT INTRODUCTION ................... 3 1 MODELS LIST ..........................3 1.1 Split Type ........................... 3 1.2 Integral Type ........................4 2 NOMENCLATURE ........................5 1.1 Split Type ........................... 5 1.2 Integral Type ........................5 3FUNCTION ........................... 5 4 PRODUCT DATA ......................... 6 4.1 Product Data at Rated Condition .................. -
Page 3: Product Introduction
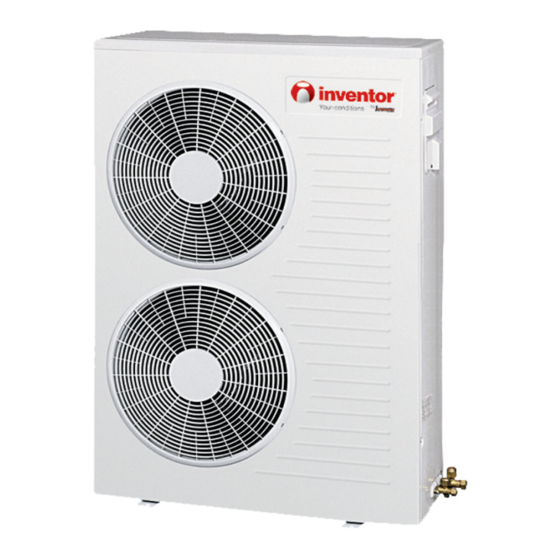
MINI CHILLER PRODUCT PRODUCT INTRODUCTION 1 MODELS LIST 1.1 Split Type Nominal Model Power Supply Appearance Capacity Refrigerant Model Name (V,Ph,Hz) Outdoor Unit indoor Unit 380~415V 3Ph 50Hz IMCR8WZNa-M IMCR10WZNa-M 10.0 R410A 12.5 IMCR12.5WZNa-M 15.0 IMCR15WZNa-M Note:1Ton =12000Btu/h = 3.517kW... -
Page 4: Integral Type
MINI CHILLER PRODUCT 1.2 Integral Type Nominal Model Power Supply Capacity Appearance Refrigerant Model Name (V,Ph,Hz) IMCR22SNa-M IMCR25SNa-M 380~415V R410A 3Ph 50Hz IMCR35SNa-M IMCR45SNa-M Note:1Ton =12000Btu/h = 3.517kW... -
Page 5: Nomenclature
MINI CHILLER PRODUCT 2 NOMENCLATURE 1.1 Split Type IMC R 15 W Z Na - M Description Options Mini chiller Product type R=Heat pump 8=8kW 10=10 kW Nominal Cooling Capacity 12.5= 12.5kW 15= 15kW Default=Vertical type Struct type W=Horizontal type Product configuration Z=Combination Refrigerant... -
Page 6: Product Data
MINI CHILLER PRODUCT 4 PRODUCT DATA 4.1 Product Data at Rated Condition 4.1.1 Split Type IMCR_WZNa-M Models 12.5 Btu/h 27300 34120 42650 51180 Cooling Nominal Capacity 15.5 Heating Btu/h 307000 37550 44356 54600 Cooling Power Consumption Heating Power Supply 380~415V,3Ph,50Hz High/Low pressure switch, compressor thermal protection, over Safeties current protection, lose of phase/anti-phase protection,... - Page 7 MINI CHILLER PRODUCT 4.1.2 Integral Type IMCR SNa-M Models Btu/h 64828 85300 119420 153540 Cooling Nominal Capacity Heating Btu/h 71650 92124 126250 184248 10.6 15.4 Cooling 11.8 17.1 Power Consumption Heating 8.85 12.3 16.6 Power Supply 380~415V 3Ph 50Hz High/Low pressure switch, compressor thermal protection, over current Safeties protection, lose of phase/anti-phase protection, antifreeze protection, water flow switch...
-
Page 8: Operation Range
Fan Motor Compressor Pump Total Rated Outdoor Model Power Supply each each (A) (A) (A) (A) (A) (A) IMCR8WZNa-M 21.2 23.4 380~41 13.2 IMCR10WZNa-M 5V 3Ph 16.1 IMCR12.5WZNa-M 50Hz IMCR15WZNa-M 33.5 4.4.2 Integral Type Compressor Fan Motor Pump Total Rated... -
Page 9: Piping Diagram
MINI CHILLER PRODUCT 5 PIPING DIAGRAM Inlet Outlet High-pressure Relief Expansion Flow Shell and tube heat switch valve switch drum exchanger Pump Compressor Low-pressure Cooling circuit switch Four-way valve Heating circuit High pressure tank Liquid-gas separator Aluminum fin-copper tube coil... - Page 10 INVENTOR COMMERCIAL AIR CONDITIONERS MINI CHILLER CONTROL...
-
Page 11: Units Control
MINI CHILLER CONTROL UNITS CONTROL 1 OPERATION FLOWCHART 1.1 Cooling Operation... -
Page 12: Heating Operation
MINI CHILLER CONTROL 1.2 Heating Operation Power Open unit running in heating mode Pump running Satisfying open comp condition Outdoor fan, compressor and valve running Temp of back water ≥ (Set temp + 5) (spilt type) Temp of back water ≥... -
Page 13: Main Logic
MINI CHILLER CONTROL 2 MAIN LOGIC 2.1 Cooling Mode When press ON button, if the outdoor temperature is over 16℃, it starts the water pump first After 30s, if the outlet water temperature meets the cooling running requirements, it starts the fans of outdoor unit. - Page 14 MINI CHILLER CONTROL 2.2 Heating Mode When press ON button, if the outdoor temperature is below 28℃, it starts the water pump first After 30s, if the outlet water temperature meets the heating running requirements, it starts the fans of outdoor unit.
-
Page 15: Wired Controller
MINI CHILLER CONTROL 2.3 Defrosting Mode The condition of start defrosting mode: Under heating mode, if the accumulative running time of compressor is over the set interval time of defrosting ( default 45min ) , and the defrosting temperature is lower than the set starting temperature(default -4℃) ,the unit will start running defrosting mode, and the 4-way valve will shut off and the outdoor fan will stop after 2s. - Page 16 MINI CHILLER CONTROL MODE CHECK QUIT Name Function description It can switch between cooling and heating, this button is MODE button available only on cooling and heating unit. Press it once under normal state to enter check mode, under check mode, press this button when “17” is displayed can change the value of “17”.
-
Page 17: Display View
MINI CHILLER CONTROL enter Check mode. Press ▲ and ▼ to change check object, press CHECK again till the present check object becomes “17”, value “17” switches between 01/03 (auxiliary heater on) and 00/02 (auxiliary heater off). That is 00 Off —>01 On —>00 Off, or 02 Off —>03 On —>02 Off. (2) Check Parameter: After electrify for 20s, press QUIT then ▲... - Page 18 MINI CHILLER CONTROL Under normal state, it shows temperature for back water. It means the value shown at present main display area is parameter. It Parameter display shows only under Parameter Check mode. Defrost display It displays when defrosting, otherwise it doesn’t displays. It displays when system or compressor orders, for showing which system System ID is defrosting.
-
Page 19: Control Wiring Design
MINI CHILLER CONTROL PVC pipe Fig6 : Surface Mounting of Cable Fig7 : Concealed mounting of Cable Fig 8 Schematic Diagram of Installation Name Wall Surface Bottom Plate of Wire Controller Screw M4X10 Panel of Wire Controller Caution: 1. The communication distance between the main board and the wire controller can be as far as 20m (The standard distance is 8m). - Page 20 MINI CHILLER CONTROL Indoor Unit Controller twisted-pair twisted-pair Outdoor Unit Controller Manual Unit Controller The controllers of the split type unit include manual controller, indoor unit controller and outdoor unit controller. The indoor unit controller communications with manual controller and outdoor unit controller in RS485.
- Page 21 INVENTOR COMMERCIAL AIR CONDITIONERS MINI CHILLER INSTALLATION...
-
Page 22: Units Installation
At delivery, the unit should be checked and any demage should be reported immediately to the carrier claims agent. Check if all indoor unit accessories are enclosed. The indoor unit is heavy and should be lifted by two persons. 1.3 DIMENSION DATA Split type IMCR8WZNa-M(O) - Page 23 MINI CHILLER INSTALLATION IMCR10WZNa-M(O),IMCR12.5WZNa-M(O) IMCR15WZNa-M(O)
- Page 24 MINI CHILLER INSTALLATION IMCR8WZNa-M(I), IMCR10WZNa-M(I) , IMCR 12.5WZNa-M(I) and IMCR15WZNa-M(I) Unit: mm 5 7 2 1 1 0 0 Integral Type IMCR22SNa-M、IMCR25Na-M G1" outlet G1" inlet G1/2" Water-filled vavle 1260 12mm 1460 IMCR35Na-M、IMCR45Na-M...
-
Page 25: Installation Clearance Data
MINI CHILLER INSTALLATION G1-1/2" Water Outlet G1-1/2" Water Inlet 1290 12mm 1750 直径 1.2 INSTALLATION CLEARANCE DATA Split type(Outdoor unit) air inlet air outlet unit:mm demonstration distance >500 >1000 >500 >500 Split type(Indoor unit)... - Page 26 MINI CHILLER INSTALLATION Seismic Spring Isolators unit:mm demonstration distance >250 >800 >1200 Integral Type...
- Page 27 MINI CHILLER INSTALLATION >2000...
-
Page 28: Water Piping Work
3.2.1 Electric Wiring Design- Split Type 3.2.2 Electric Wiring Design- Integral Type 3.3 SPECIFICATION OF POWER CORD & AIR SWITCH Minimum Minimum Capability Sectional Area Sectional Area Model Power Supply of Air of Earth of Power Switch(A) Wire(mm Cord(mm IMCR8WZNa-M 380~415V,3,50 IMCR10WZNa-M 380~415V,3,50... -
Page 29: Wiring Diagram
IMCR22SNa-M 380~415V,3,50 IMCR25SNa-M 380~415V,3,50 IMCR35SNa-M 380~415V,3,50 IMCR45SNa-M 380~415V,3,50 Note: 3.4 WIRING DIAGRAM 3.4.1 Wiring Diagram-Split Type 3.4.1.1 Outdoor Units Model:IMCR8WZNa-M Ά ρ Ά τ Ά σ Ά ς indoor unit BUBK COMP compressor Fan motor YEGN YEGN Model: IMCR10WZNa-M, IMCR12.5WZNa-M... -
Page 30: Indoor Units
MINI CHILLER INSTALLATION POWER Ά ρ Ά ς Ά τ Ά σ 5 1 4 6 BK BN BU YE COMP1 COMP2 compressor1 compressor2 Fan motor 2 Fan motor 1 indoor YEGN YEGN unit YEGN YEGN COMPONENT POSITION DIAGRAM Model: IMCR15WZNa-M 63622212 3.4.1.2 Indoor Units... -
Page 31: Wiring Diagram- Integral Type
MINI CHILLER INSTALLATION POWER 13OG 14GN XT1-2 HEATER XT1-1 pump YEGN heat1 pump end_switch flow in CN13 Water-Inlet Temp.Sensor CN11 flow out Water-Outlet CN12 Temp.Sensor anti-ice1 Frost-proof +12V Temp.Sensor COMPONENT POSITION DIAGRAM OUTDOOR UNIT controller 3.4.2 Wiring Diagram- Integral Type Model:IMCR22SNa-M, IMCR25SNa-M,... - Page 32 MINI CHILLER INSTALLATION R S T Ά ρ Ά σ Ά ς Specification: 1.Auxiliary electric heater is optional part for heat pump unit, once it is used, please connect the temp. restricter HT1 with XT2.1-1 and XT2.1-2. 2. Cooling only type unit do not have below parts: KM5, Auxiliary electric heater, LP12, LP22, Defrost temp. sensor 1. .
- Page 33 INVENTOR COMMERCIAL AIR CONDITIONERS MINI CHILLER MAINTENANCE...
-
Page 34: Units Maintenance
MINI CHILLER MAINTENANCE UNITS MAINTENANCE 1 ERROR CODE LIST Code Indication Error Name Control Description Comp. 1 High-pressure Press ON/OFF key to clear protection System 1 antifreeze Auto resume protection Comp. 1 Low pressure Press ON/OFF key to clear protection Comp. - Page 35 MINI CHILLER MAINTENANCE The unit cannot Power off Stop and restart start If the power supply is normal If fuse burnt Replace the fuse If phase If three-phase Adjust any two sequence unit phases protection If the power of Cut off the power, If the power mainboard is restart after the power...
-
Page 36: Disassembly And Assembly Procedure Of Main Parts
MINI CHILLER MAINTENANCE 3 DISASSEMBLY AND ASSEMBLY PROCEDURE OF MAIN PARTS 3.1 Split Type 3.1.1 Outdoor Unit... - Page 37 MINI CHILLER MAINTENANCE Operation Procedure Illustration (1) Remove the front case 1) Remove the panel · Loosen the two tappong screws fixing the front grill. ·Pull down and remove the front grill. (See Fig. 2) Fig. 1 2) Remove the cover. Fig.
- Page 38 MINI CHILLER MAINTENANCE 3)Remove the front plate. · Loosen the two tappong screws fixing the front plate. Remove the front plate.(See Fig. 5) grill Fig. 4 Fig. 5 4)Remove the grill · Loosen the two tappong screws fixing the grill. Remove the grill. (See Fig.
- Page 39 MINI CHILLER MAINTENANCE (2) Remove the axial fan · Loosen the ball nuts fixing the axial fan and remove the washer. ( See Fig. 7) · Pull outward to remove the impeller. (See Fig. 7) Ball Nut Fig. 7 (3) Remove the motor ·...
-
Page 40: Capillary Tube
MINI CHILLER MAINTENANCE · Loosen the two screws fixing the motor. Pull backward and remove the motor.(See Fig .10) ·Loosen the wire of motor, and pull it through the hole. Fig. 10 (4) Remove the 4-way valve and capillary tube 1)Remove the 4-way valve ·Loosen the screws fixing the coil of 4-way valve。... - Page 41 MINI CHILLER MAINTENANCE (5) Remove electric box · Loosen the screws fixing the box cover. Remove pressure switches and temp. sensor.(See Fig.13) Noise-absorbing cover Fig.13 (6)Remove compressor and gas-liquid separator · Remove the connection wire of compressor。 (See Fig.14) · welding out the suction pipe and discharge pipe.(See Fig.14)...
- Page 42 MINI CHILLER MAINTENANCE (7)Remove gas and liquid valve 1. Remove gas valve ·Loosen the bolts fixing the gas valve. · welding out the pipe connected to the gas valve (See Fig.15) 。 Note : When welding, the valve should be covered by wet cloth in order to avoid the high temp.
- Page 43 MINI CHILLER MAINTENANCE 3.1.2 Indoor Unit Operation Procedure Illustration (1) Remove the Cover ·Loosen the tappong screws fixing the cover.(See Fig. 1) ·Remove the cover(See Fig. 2) Fig. 1 Fig. 2 (2) Remove electric box · Loosen the screws fixing the box cover.
- Page 44 MINI CHILLER MAINTENANCE 3) Remove the water pump ·Loosen the joints fixing the water pump. Remove the water pump. (See Fig. 4) Water pump Fig. 4 4) Remove the tube in tube heat-exchanger · welding out the pipes connected to the tube in tube heat-exchanger. Remove tube tube...
- Page 45 MINI CHILLER MAINTENANCE 6)Remove the expansion gas tank · Loosen the joints fixing the expansion gas tank. Remove the expansion gas tank.(See Fig. 7) Expansion gas tank Fig. 7...
-
Page 46: Integral Type
MINI CHILLER MAINTENANCE 3.2 Integral Type (1) Remove the front case ·Loosen the tappong screws fixing the front case. (See Fig. 1) ·Pull down and remove the front case.(See Fig. 2) Fig. 1 Fig. 2... - Page 47 MINI CHILLER MAINTENANCE (2) Remove electric box · Loosen the screws fixing the box cover. Remove pressure switches and temp. sensor.(See Fig.3) Electric box Fig. 3 (3)Remove compressor and gas-liquid separator · Remove the connection wire of compressor。 (See Fig.4) ·...
- Page 48 MINI CHILLER MAINTENANCE 4)Remove the water pump ·Loosen the joints fixing the water pump. Remove the water pump.(See Fig. 5) Water pump Fig. 5 Expansion gas tank 5 ) Remove the expansion gas tank · Loosen the joints fixing the expansion gas tank.
- Page 49 MINI CHILLER MAINTENANCE 6)Remove the flow switch · Loosen the joints fixing the flow switch. Remove the flow switch. ( See Fig. 7) Flow switch Fig. 7 7 ) Remove the shell and tube heat-exchanger · welding out the pipes connected to the shell and tube heat-exchanger.
-
Page 50: Exploded Views And Part List
MINI CHILLER MAINTENANCE 4 EXPLODED VIEWS AND PART LIST 4.1 Exploded Views and Parts List- Split Type 4.1.1 Outdoor Units Model:IMCR8WZNa-M(O) Exploded Views:... - Page 51 MINI CHILLER MAINTENANCE Part List for IMCR8WZNa-M(O): No. Name of Part Part Code Quantity Front Grill 22265401 Front Plate 01435402 Protection Grill 01475401 Top Cover 01255402 Back Side Plate 01305401 Handle 26235252 Valve Support 01715402 Metal Base 01205402 Front Side Plate...
- Page 52 MINI CHILLER MAINTENANCE Model: 、 、 IMCR10WZNa-M(O) IMCR12.5WZNa-M(O) IMCR15WZNa-M(O) Exploded views:...
- Page 53 MINI CHILLER MAINTENANCE Part List for IMCR10WZNa-M(O): Quantity Name of Part Part Code Front Grill 22265251 Front Plate 01435433 Protection Grill 01475432 Top Cover 01255262 Back Side Plate 01305434 Handle 26235252 Valve Support 01715001 Metal Base 01205433 Front Side Plate 01305431 Protection Grill Gasket Axial Flow Fan...
- Page 54 MINI CHILLER MAINTENANCE Part List for IMCR12.5WZNa-M(O) Quantity Name of Part Part Code Front Grill 22265251 Front Plate 01435433 Protection Grill 01475432 Top Cover 01255262 Back Side Plate 01305434 Handle 26235252 Valve Support 01715001 Metal Base 01205433 Front Side Plate 01305431 Protection Grill Gasket Axial Flow Fan...
- Page 55 MINI CHILLER MAINTENANCE Part List for IMCR15WZNa-M(O) Name of Part Part Code Quantity Front Grill 22265251 Front Plate 01435433 Protection Grill 01475432 Top Cover 01255472 Back Side Plate 01305434 Handle 26235252 Valve Support 01715001 Metal Base 01205472 Front Side Plate 01305431 Protection Grill tub 42035201...
- Page 56 MINI CHILLER MAINTENANCE 4.1.2 Indoor Units Model:IMCR8WZNa-M(I)、IMCR10WZNa-M(I) IMCR12.5WZNa-M(I)、IMCR15WZNa-M(I) Exploded views:...
- Page 57 MINI CHILLER MAINTENANCE Part List for IMCR8WZNa-M(I) NO Name of Part Part Code Quantity Water Pump 43138218 Vertical Pillar Assy 01758216 Pedestal Parts 012021191 Front Panel Assy 015382471 Electric Box cover 014182371 Electric Box 01418235 Temperature Sensor 390001219 Temperature Sensor...
- Page 58 技术服务手册 户式(别墅)中央空调机组 Part List for IMCR10WZNa-M(I) Name of Part Part Code Quantity Water Pump MHI202 43138218 Vertical Pillar Assy 01758216 Pedestal Parts 012021171 Front Panel Assy 015382471 Electric Box cover 014182371 Electric Box 01418235 Temperature Sensor 390001219 Temperature Sensor 390001217 Temperature Sensor 390001216 Terminal Board...
- Page 59 技术服务手册 户式(别墅)中央空调机组 Part List for IMCR12.5WZNa-M(I) NO Name of Part Part Code Quantity Water Pump MHI202 43138218 Vertical Pillar Assy 01758216 Pedestal Parts 012021171 Left Side Plate 01302116 Electric Box cover 014182371 Electric Box 01418235 Temperature Sensor 390001219 Temperature Sensor 390001217 Temperature Sensor 3900012116...
- Page 60 技术服务手册 户式(别墅)中央空调机组 Part List for : IMCR15WZNa-M(I) Name of Part Part Code Quantity Water Pump MHI202 43138218 Vertical Pillar Assy 01758216 Pedestal Parts 012021171 Left Side Plate 01302116 Electric Box cover 014182371 Electric Box 01418235 Temperature Sensor 390001219 Temperature Sensor 390001217 Temperature Sensor 3900012116...
-
Page 61: Exploded Views And Parts List- Integral Type
技术服务手册 户式(别墅)中央空调机组 4.2 Exploded Views and Parts List- Integral Type Model: IMCR22SNa-M、IMCR25Na-M Exploded views: Part List for IMCR22SNa-M、IMCR25Na-M: Name of Part Part Code Quantity Front Panel 2 01542102 Encloser Sub-assy 01512101 10358202 Grill 01572101 Outlet Pipe Sub-assy 04362102 Fan Motor SW200B 15018501 Motor Support Sub-assy 01708222... - Page 62 技术服务手册 户式(别墅)中央空调机组 Right Side Plate Sub-assy 01312233 Transition Pipe Sub-assy (Four-way Valve-condenser) 04312244 Water Tray Sub-assy 01282102 Vertical Shaft 2 01852102 Transition Pipe Sub-assy 3 (Condenser-Capillary for heating) 04312110 Four-way Valve Sub-assy 1 04142226 Base Frame Sub-assy 01282253 Discharge Pipe Sub-assy 04632241 Base Plate Sub-assy 0119210102...
- Page 63 技术服务手册 户式(别墅)中央空调机组 Model:IMCR35Na-M、IMCR45Na-M Exploded views: Part List for : IMCR35Na-M、IMCR45Na-M No Name of Part Part Code Quantity Base Frame Sub-assy 01202113 Base Plate Sub-assy 01202111 01758211 Front Vertical Shaft Sub-assy Gas-liquid Separator 07228003 Compressor and Fittings 00202231 ZP83KCE-TFD-522 Electric Cabinet Sub-assy 01408249...
- Page 64 技术服务手册 户式(别墅)中央空调机组 Cover Plate for Electric cabinet 01258226 Front Side Plate 01302103 Condenser Components 01108240 10 Vertical Shaft(Front-right) 01722107 11 Water Pump MHI804 431382041 12 Inlet Pipe Sub-assy 04362101 13 Expansion Vessel 072282191 14 Water Flow Switch FSF50P-1R1 45028209 15 Left Side Plate 01308274 16 Vertical Shaft (Behind-right) 01722103...
Need help?
Do you have a question about the IMCR8WZNa-M and is the answer not in the manual?
Questions and answers