Table of Contents
Advertisement
Advertisement
Table of Contents

Subscribe to Our Youtube Channel
Related Manuals for thomann Ignition Co9 LED Flood IP65 540W RGBW


Summary of Contents for thomann Ignition Co9 LED Flood IP65 540W RGBW
- Page 1 Co9 LED Flood IP65 540W RGBW LED floodlight...
- Page 2 Musikhaus Thomann Thomann GmbH Hans-Thomann-Straße 1 96138 Burgebrach Germany Telephone: +49 (0) 9546 9223-0 E-mail: info@thomann.de Internet: www.thomann.de 15.02.2018, ID: 421760 (V2)
-
Page 3: Table Of Contents
Table of contents Table of contents General notes..........................4 1.1 Further information......................4 1.2 Notational conventions....................4 1.3 Symbols and signal words................... 4 Safety instructions......................... 6 Features............................8 Installation..........................9 Starting up..........................11 Connections and controls....................12 Operating..........................14 7.1 Starting the device....................... 14 7.2 Main menu........................ -
Page 4: General Notes
Our products are subject to a process of continuous development. Thus, they are subject to change. 1.1 Further information On our website (www.thomann.de) you will find lots of further information and details on the following points: Download This manual is also available as PDF file for you to download. - Page 5 General notes Signal word Meaning DANGER! This combination of symbol and signal word indicates an immediate dangerous situation that will result in death or serious injury if it is not avoided. WARNING! This combination of symbol and signal word indicates a possible dangerous situation that can result in death or serious injury if it is not avoided.
-
Page 6: Safety Instructions
Safety instructions Safety instructions Intended use This device is intended to be used as an electronic illumination effect using LED tech- nics. The device is designed for professional use and is not suitable for use in house- holds. Use the device only as described in this user manual. Any other use or use under other operating conditions is considered to be improper and may result in per- sonal injury or property damage. - Page 7 Safety instructions WARNING! Risk of epileptic shock Strobe lighting can trigger seizures in photosensitive epilepsy. Sensitive persons should avoid looking at strobe lights. NOTICE! Risk of fire Do not block areas of ventilation. Do not install the device near any direct heat source.
-
Page 8: Features
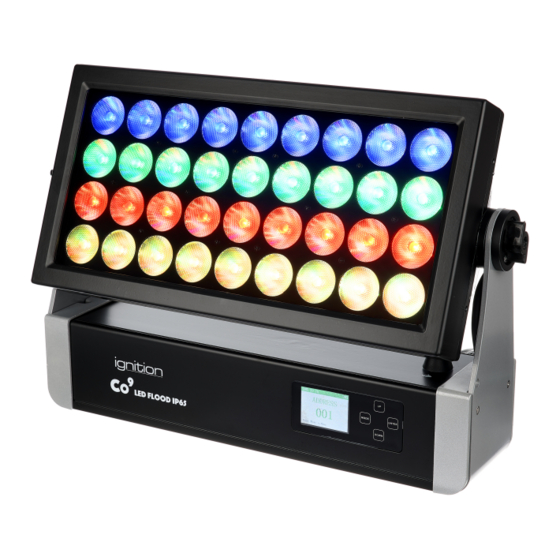
Features Features Special features of the device: 36 RGBW LEDs (each 15 W) Stand-alone and DMX mode operation (6 different modes) Easy operation via display and buttons on the unit Built-in automatic show programmes Automatic colour gradients Master / Slave mode Rugged aluminium housing Protection class IP65 allows outdoor operation W-DMX module for wireless DMX control... -
Page 9: Installation
Installation Installation Unpack and carefully check that there is no transportation damage before using the unit. Keep the equipment packaging. To fully protect the device against vibration, dust and moisture during transportation or storage use the original packaging or your own packaging material suitable for transport or storage, respectively. DANGER! Hazardous voltage The wiring, as well as all maintenance and repair work on the electrical... - Page 10 Installation Mounting options The quick lock openings on the housing bottom are used for secure attachment of the supplied Omega brackets. Here you can attach the flight adapters (such as the supplied C-hooks). The safety rope must pass through the notches on the bottom case as shown in the following figure.
-
Page 11: Starting Up
Starting up Starting up Create all connections while the device is off. Use the shortest possible high-quality cables for all connections. Take care when running the cables to prevent tripping hazards. Connections in DMX mode Connect the DMX input of the device to the DMX output of a DMX controller or another DMX device. -
Page 12: Connections And Controls
Connections and controls Connections and controls Overview Adjustable LED panel Locking screw for the LED panel Radio antenna Control panel with display membrane button [MENU] Activates the main menu and toggles between menu items. Closes an opened submenu. [UP] Navigates upwards in a menu list. Increases the displayed value by one. [DOWN] Navigates downwards in a menu list. - Page 13 Connections and controls Rear panel [DMX IN] DMX input (IP65 design) [DMX OUT] DMX output (IP65 design) [POWER OUT] Connection supply voltage outgoing (Power Twist IP65) [POWER IN] Connection supply voltage incoming (Power Twist IP65) Co9 LED Flood IP65 540W RGBW LED floodlight...
-
Page 14: Operating
Operating Operating 7.1 Starting the device Connect the device to the power supply to start operation. After a few seconds, the display indicates that a reset is in progress. The device is then ready for use. The dis- play shows the operating mode that was selected when the unit was last powered off. -
Page 15: Main Menu
Operating 7.2 Main menu Press [MODE]to activate the main menu. Use the buttons [UP] or [DOWN]to select a submenu. When the display shows the desired submenu, press [ENTER]to open it. To close the main menu, press [MODE]. The stored values are displayed in white in the display. - Page 16 Operating Main menu Menu level 2 Menu level 3 Menu level 4 Meaning 57…79 Random Ramp-down effect with increasing speed 80…102 Random strobe effect with increasing speed 103…127 Strobe-burst effect with decreasing duration of interruptions 128…250 Strobe effect with increasing speed 251…255 Open strobe ‘Red’...
- Page 17 Operating Main menu Menu level 2 Menu level 3 Menu level 4 Meaning 230…255 Rainbow effect 15 ‘Auto Program’ Automatic show 0…5 No automatic show 6…30 Automatic show 1 31…55 Automatic show 2 56…80 Automatic show 3 81…105 Automatic show 4 106…130 Automatic show 5 131…155...
- Page 18 Operating Main menu Menu level 2 Menu level 3 Menu level 4 Meaning ‘Cold White’ Cold white ‘Settings’ ‘Display Rev’ Display inversion ‘ON’ On, display is rotated by 180° ‘OFF’ Off, normal display ‘Display’ Automatic display shutdown when not in use ‘ON’...
-
Page 19: Operating Mode 'Dmx
Operating Main menu Menu level 2 Menu level 3 Menu level 4 Meaning ‘ON’ ‘Factory Reset’ Reset to factory defaults ‘OFF’ ‘ON’ Starting ‘Key lock’ Key lock ‘OFF’ ‘ON’ Enabled To unlock the keys, press successively [ENTER], [UP], [DOWN], [UP], [DOWN] and [ENTER]. ‘System Info’... -
Page 20: Menu Overview
Operating ‘Operating Mode: AUTO Fading’ : Automatic Fade effect ‘Operating Mode: AUTO Jumping’ : Automatic Jump effect ‘Operating Mode: STATIC’ : Freely mixable colour with optional rainbow and stro- boscopic effect or automatic show ‘Operating Mode: Color Macro’ : Selecting a pre-defined colour macro 7.3 Menu overview Co9 LED Flood IP65 540W RGBW LED floodlight... -
Page 21: Functions In 2-Channel Dmx Mode
Operating 7.4 Functions in 2-channel DMX mode Channel Value Function 0…255 Dimmer (0 % to 100 %) Colour macro 0…5 Blackout 6…13 14…21 Amber 22…29 Yellowish-amber coloured 30…37 Yellow 38…45 Green 46…53 Turquoise 54…61 Cyan 62…69 Blue 70…77 Lavender 78…85 Mauve 86…93 Magenta... -
Page 22: Functions In 3-Channel Dmx Mode 2
Operating Channel Value Function 251…255 Open strobe Colour macro 0…5 Blackout 6…13 14…21 Amber 22…29 Yellowish-amber coloured 30…37 Yellow 38…45 Green 46…53 Turquoise 54…61 Cyan 62…69 Blue 70…77 Lavender 78…85 Mauve 86…93 Magenta 94…101 Pink 102…109 Warm white 110…117 White 118…125 Cold white 126…127... -
Page 23: Functions In 4-Channel Dmx Mode
Operating 7.7 Functions in 4-channel DMX mode Channel Value Function 0…255 Intensity red (0 % to 100 %) 0…255 Intensity green (0 % to 100 %) 0…255 Intensity blue (0 % to 100 %) 0…255 Intensity white (0 % to 100 %) 7.8 Functions in 13-channel DMX mode Channel Value... - Page 24 Operating Channel Value Function 46…53 Turquoise 54…61 Cyan 62…69 Blue 70…77 Lavender 78…85 Mauve 86…93 Magenta 94…101 Pink 102…109 Warm white 110…117 White 118…125 Cold white 126…127 No function 128…191 Colour change effect, increasing speed 192…255 Colour transition effect, increasing speed Rainbow effect 0…5 Effect off...
-
Page 25: Functions In 16-Channel Dmx Mode
Operating Channel Value Function 6…30 Automatic show 1 31…55 Automatic show 2 56…80 Automatic show 3 81…105 Automatic show 4 106…130 Automatic show 5 131…155 Automatic show 6 156…180 Automatic show 7 181…205 Automatic show 8 206…230 Automatic show 9 231…255 Automatic show 10 0…255... -
Page 26: Functions In 29-Channel Dmx Mode
Operating Channel Value Function 0…255 Intensity red (0 % to 100 %), LED row 2 0…255 Intensity green (0 % to 100 %), LED row 2 0…255 Intensity blue (0 % to 100 %), LED row 2 0…255 Intensity white (0 % to 100 %), LED row 2 0…255 Intensity red (0 % to 100 %), LED row 3 0…255... - Page 27 Operating Channel Value Function 0…5 Blackout 6…13 14…21 Amber 22…29 Yellowish-amber coloured 30…37 Yellow 38…45 Green 46…53 Turquoise 54…61 Cyan 62…69 Blue 70…77 Lavender 78…85 Mauve 86…93 Magenta 94…101 Pink 102…109 Warm white 110…117 White 118…125 Cold white 126…127 No function 128…191 Colour change effect, increasing speed 192…255...
- Page 28 Operating Channel Value Function 182…197 Rainbow effect 12 198…213 Rainbow effect 13 214…229 Rainbow effect 14 230…255 Rainbow effect 15 Automatic show 0…5 No automatic show 6…30 Automatic show 1 31…55 Automatic show 2 56…80 Automatic show 3 81…105 Automatic show 4 106…130 Automatic show 5 131…155...
- Page 29 Operating Channel Value Function 0…255 Intensity blue (0 % to 100 %), LED row 1 0…255 Intensity white (0 % to 100 %), LED row 1 0…255 Intensity red (0 % to 100 %), LED row 2 0…255 Intensity green (0 % to 100 %), LED row 2 0…255 Intensity blue (0 % to 100 %), LED row 2 0…255...
-
Page 30: Technical Specifications
Technical specifications Technical specifications LEDs 36 RGBW LEDs (each 15 W) Number of DMX channels 2, 3, 4, 13, 16 or 29, depending on operating mode Power consumption 500 W Operating supply voltage 100–240 V 50/60 Hz Protection class IP65 Temperature range –20 °C …... -
Page 31: Plug And Connection Assignment
Plug and connection assignment Plug and connection assignment Introduction This chapter will help you select the right cables and plugs to connect your valuable equipment so that a perfect light experience is guaranteed. Please take our tips, because especially in ‘Sound & Light’ caution is indicated: Even if a plug fits into a socket, the result of an incorrect connection may be a destroyed DMX controller, a short circuit or ‘just’... -
Page 32: Troubleshooting
DMX interface circuits. If the procedures recommended above do not succeed, please contact our Service Center. You can find the contact information at www.thomann.de. Co9 LED Flood IP65 540W RGBW LED floodlight... -
Page 33: Cleaning
Cleaning Cleaning Optical lenses Clean the optical lenses, that are accessible from the outside, regularly in order to optimize the light output. The frequency of cleaning depends on the operating envi- ronment: wet, smoky or particularly dirty surroundings can cause more accumulation of dirt on the optics of the device. -
Page 34: Protecting The Environment
Protecting the environment Protecting the environment Disposal of the packaging material For the transport and protective packaging, environmentally friendly materials have been chosen that can be supplied to normal recycling. Ensure that plastic bags, packaging, etc. are properly disposed of. Do not just dispose of these materials with your normal household waste, but make sure that they are collected for recycling. - Page 36 Musikhaus Thomann · Hans-Thomann-Straße 1 · 96138 Burgebrach · Germany · www.thomann.de...
Need help?
Do you have a question about the Ignition Co9 LED Flood IP65 540W RGBW and is the answer not in the manual?
Questions and answers