Table of Contents
Advertisement
Quick Links
Advertisement
Table of Contents

Related Manuals for thomann STAIRVILLE xBrick HEX 16×8W RGBAW UV


Summary of Contents for thomann STAIRVILLE xBrick HEX 16×8W RGBAW UV
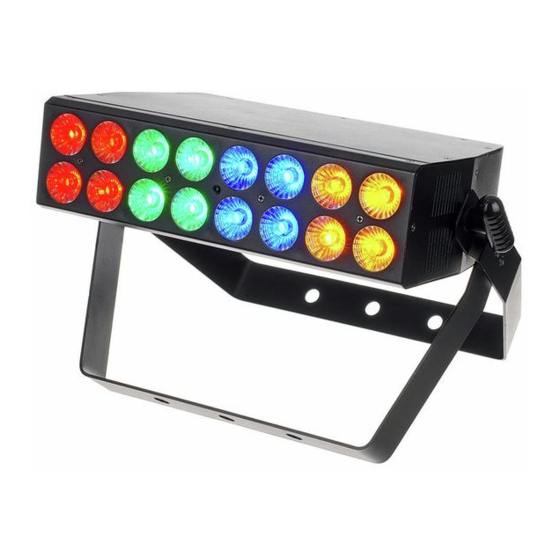
- Page 1 xBrick HEX 16×8W RGBAW UV LED floodlight user manual...
- Page 2 Musikhaus Thomann Thomann GmbH Hans-Thomann-Straße 1 96138 Burgebrach Germany Telephone: +49 (0) 9546 9223-0 E-mail: info@thomann.de Internet: www.thomann.de 20.01.2020, ID: 451258...
-
Page 3: Table Of Contents
Table of contents Table of contents General information......................4 1.1 Further information......................4 1.2 Notational conventions....................4 1.3 Symbols and signal words................... 5 Safety instructions......................... 6 Features............................8 Installation..........................9 Starting up..........................11 Connections and controls....................12 Operating..........................15 7.1 Starting the device....................... 15 7.2 Operating controls on the device................ -
Page 4: General Information
1.1 Further information On our website (www.thomann.de) you will find lots of further information and details on the following points: Download This manual is also available as PDF file for you to download. -
Page 5: Symbols And Signal Words
General information Instructions The individual steps of an instruction are numbered consecutively. The result of a step is indented and highlighted by an arrow. Example: Switch on the device. Press [Auto]. ð Automatic operation is started. Switch off the device. 1.3 Symbols and signal words In this section you will find an overview of the meaning of symbols and signal words that are used in this manual. -
Page 6: Safety Instructions
Safety instructions Safety instructions Intended use This device is intended for use as an electronic lighting effect by means of LED tech‐ nology. The device is designed for professional use and is not suitable for use in households. Use the device only as described in this user manual. Any other use or use under other operating conditions is considered to be improper and may result in personal injury or property damage. - Page 7 Safety instructions WARNING! Risk of epileptic shock Strobe lighting can trigger seizures in photosensitive epilepsy. Sensitive persons should avoid looking at strobe lights. NOTICE! Risk of fire Do not block areas of ventilation. Do not install the device near any direct heat source.
-
Page 8: Features
Features Features The LED floodlight is particularly suitable for professional lighting tasks, for example at events, on rock stages and in theatres and musicals. The device is characterised by excellent colour mixing properties and very high light output. Special features of the device: 16 ×... -
Page 9: Installation
Installation Installation Unpack and check carefully there is no transportation damage before using the unit. Keep the equipment packaging. To fully protect the product against vibration, dust and moisture during transportation or storage use the original packaging or your own packaging material suitable for transport or storage, respectively. WARNING! Risk of injury caused by falling objects Make sure that the installation complies with the standards and rules... - Page 10 Installation Please note that this device must not be connected to a dimmer. LED floodlight...
-
Page 11: Starting Up
Starting up Starting up Create all connections while the device is off. Use the shortest possible high-quality cables for all connections. Take care when running the cables to prevent tripping hazards. Connections in DMX mode Connect the DMX input of the device to the DMX output of a DMX controller or another DMX device. -
Page 12: Connections And Controls
Connections and controls Connections and controls Rear panel 1 Bracket for floor placement or hanging 2 Locking screws for the brackets. 3 [Power In] Lockable Power Twist input socket for power supply. 4 [Power Out] Lockable Power Twist output socket for power supply 5 Display 6 [Mode] Activates the main menu... - Page 13 Connections and controls 11 [DMX Out] DMX output 12 [DMX In] DMX input Front panel 13 Infrared sensor option for optionally available remote control xBrick HEX 16×8W RGBAW UV...
- Page 14 Connections and controls Remote control A remote control is optional accessory (item # 354223) and not included. 14 [ON/OFF] Button to turn the blackout on or off 15 [AUTO] Enables the Auto mode 16 [SPEED] Allows to set the running speed 17 [PRG] Enables the Programme mode 18 [STROBE]...
-
Page 15: Operating
Operating Operating 7.1 Starting the device Connect the device to the power supply to start operation. After a few seconds the unit is ready for use. 7.2 Operating controls on the device Press [Mode] to activate the display. The current settings as well as the software version and the device temperature are displayed. - Page 16 Operating DMX mode This setting is only relevant if the device is controlled via a DMX controller. Select the submenu ‘3:DMX’ and confirm with [Setup]. Use [Up] | [Down] in ‘1)Address’ to assign a DMX address in the range from ‘001’...
- Page 17 Operating Sound control Select the submenu ‘6:Sound’ and confirm with [Setup]. Use [Up] | [Down] in ‘1)Mode’ to choose a mode from ‘00’ to ‘28’ . Use [Up] | [Down] in ‘2)Sensitivity’ to adjust the microphone sensitivity in the range from ‘00’ to ‘31’ . Locking the display Press simultaneously [Mode] and [Setup] to lock the display.
- Page 18 Operating Settings Select the submenu ‘7:Settings’ and confirm with [Setup]. Use [Up] | [Down] in ‘1)Curves Select’ to select one of the following dimmer curves. The dimmer curve determines how the brightness increases or decreases depending on the set DMX value. Display Meaning ‘1)Linear’...
- Page 19 Operating Information mode Select the submenu ‘8:Information’ and confirm with [Setup]. ð The display shows the software version and the device temperature. The following information can be displayed: ‘Temperature: xx ° C’ The temperature is detected nor‐ mally. ‘Temperature: x’ The temperature can not be detected.
-
Page 20: Remote Control
Operating 7.2.1 Menu overview 7.3 Remote control The device can only be remote controlled if it's neither working in ‘DMX’ mode nor in ‘Master/Slave’ . Blackout Use [ON/OFF] to blackout the unit or cancel the blackout. Auto mode Press [AUTO]. The unit now operates in automatic stand-alone mode. LED floodlight... - Page 21 Operating Programme mode Press [PRG]. Use [+] and [–] to select a value between ‘01’ and ‘30’ . If you have selected programme ‘01’ , press one of the numeric or letter keys to select the desired colour (see table below). Use [+] and [–] to press [STROBE] to select a value between ‘01’...
-
Page 22: Functions In Dmx Modes
Operating Colour mode Press [Dimming] to adjust the brightness level of the primary colours. Use [R] (red), [G] (green), [B] (blue), [A] (amber), [W] (white) or [UV] (UV) and then [+] and [–] to select per colour in steps of 5 a value between ‘000’ and ‘255’... - Page 23 Operating 7.4.3 Functions in 12-channel DMX mode Channel Value Function 0 … 255 Intensity red (0 % to 100 %), segment 1/2 0 … 255 Intensity green (0 % to 100 %), segment 1/2 0 … 255 Intensity blue (0 % to 100 %), segment 1/2 0 …...
- Page 24 Operating Channel Value Function 0 … 255 Intensity blue (0 % to 100 %), segment 3 0 … 255 Intensity white (0 % to 100 %), segment 3 0 … 255 Intensity amber (0 % to 100 %), segment 3 0 …...
- Page 25 Operating Channel Value Function 0 … 255 Intensity UV (0 % to 100 %), segment 3 0 … 255 Intensity red (0 % to 100 %), segment 4 0 … 255 Intensity green (0 % to 100 %), segment 4 0 …...
- Page 26 Operating Channel Value Function 0 … 255 Intensity red (0 % to 100 %), segment 4 0 … 255 Intensity green (0 % to 100 %), segment 4 0 … 255 Intensity blue (0 % to 100 %), segment 4 0 …...
- Page 27 Operating Channel Value Function 193 … 200 Programme 25 201 … 208 Programme 26 209 … 216 Programme 27 217 … 224 Programme 28 225 … 232 Programme 29 233 … 240 Programme 30 241 … 255 Sound control Programme selection, if channel 26 = 1 … 8 0 …...
- Page 28 Operating Channel Value Function 168 … 174 R(255), G(0), B(175), W(0), A(0), UV(0) 175 … 181 R(255), G(0), B(100), W(0), A(0), UV(0) 182 … 188 R(255), G(0), B(100), W(50), A(0), UV(0) 189 … 195 R(255), G(0), B(25), W(50), A(0), UV(0) 196 …...
- Page 29 Operating Channel Value Function 171 … 179 Sound mode 19 180 … 188 Sound mode 20 189 … 197 Sound mode 21 198 … 206 Sound mode 22 207 … 215 Sound mode 23 216 … 224 Sound mode 24 225 …...
-
Page 30: Technical Specifications
Technical specifications Technical specifications Light source 16 × 6-in-1 RGBAW UV, each 8 W Optical proper‐ Beam angle 25° ties Control DMX, buttons and display on the unit IR remote (optional) Number of DMX channels 6, 8, 12, 24, 26, 28 Input connec‐... -
Page 31: Plug And Connection Assignments
Plug and connection assignments Plug and connection assignments Introduction This chapter will help you select the right cables and plugs to connect your valuable equipment so that a perfect light experience is guaranteed. Please take our tips, because especially in ‘Sound & Light’ caution is indicated: Even if a plug fits into a socket, the result of an incorrect connection may be a destroyed DMX controller, a short circuit or ‘just’... -
Page 32: Troubleshooting
DMX interface circuit. Check the displays in information mode (see Ä ‘Information mode’ on page 19). If the procedures recommended above do not succeed, please contact our Service Center. You can find the contact information at www.thomann.de. LED floodlight... -
Page 33: Cleaning
Cleaning Cleaning Optical lenses Clean the optical lenses, that are accessible from the outside, regularly in order to optimize the light output. The frequency of cleaning depends on the operating envi‐ ronment: wet, smoky or particularly dirty surroundings can cause more accumulation of dirt on the optics of the device. -
Page 34: Protecting The Environment
Protecting the environment Protecting the environment Disposal of the packaging material For the transport and protective packaging, environmentally friendly materials have been chosen that can be supplied to normal recycling. Ensure that plastic bags, packaging, etc. are properly disposed of. Do not just dispose these materials with your normal household waste, but make sure that they are fed to a recovery. - Page 36 Musikhaus Thomann · Hans-Thomann-Straße 1 · 96138 Burgebrach · Germany · www.thomann.de...
Need help?
Do you have a question about the STAIRVILLE xBrick HEX 16×8W RGBAW UV and is the answer not in the manual?
Questions and answers