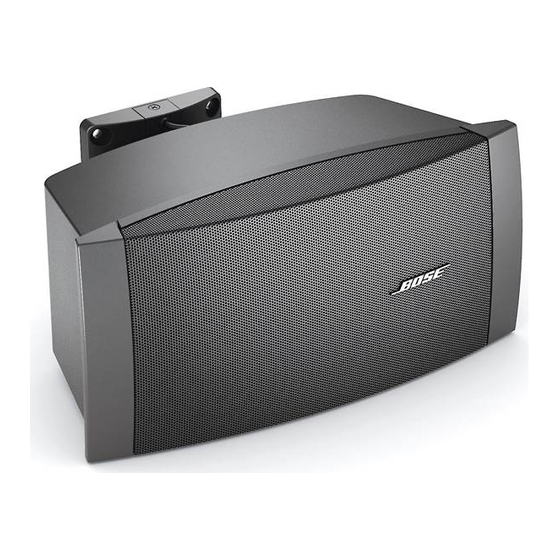
Bose FreeSpace DS 40SE Installation Manual
With ceiling mount bracket
Hide thumbs
Also See for FreeSpace DS 40SE:
- Installation manual (35 pages) ,
- Owner's manual (32 pages) ,
- Service manual (31 pages)
Advertisement
Quick Links
Bose
®
FreeSpace
* For use by professional installers only.
* Kun til brug for erfarne installatører.
* Montage ausschließlich durch ausgebildetes Installationspersonal.
* Para uso exclusivo de instaladores capacitados.
* Réservé aux installateurs ayant suivi une formation.
* Solo per l'uso da parte di installatori professionisti.
* Uitsluitend voor gebruik door ervaren installateurs.
* Ska endast användas av utbildade installatörer.
®
DS 40SE Loudspeaker with Ceiling Mount Bracket
Installation Guide*
Installationsvejledning*
Installationsanleitung*
Guía de instalación*
Guide d'installation*
Guida all'installazione*
Installatiehandleiding*
Installationsanvisning*
Advertisement

Related Manuals for Bose FreeSpace DS 40SE


Summary of Contents for Bose FreeSpace DS 40SE
- Page 1 Bose ® FreeSpace ® DS 40SE Loudspeaker with Ceiling Mount Bracket Installation Guide* Installationsvejledning* Installationsanleitung* Guía de instalación* Guide d’installation* Guida all’installazione* Installatiehandleiding* Installationsanvisning* * For use by professional installers only. * Kun til brug for erfarne installatører. * Montage ausschließlich durch ausgebildetes Installationspersonal.
- Page 2 ® FreeSpace DS 40SE Loudspeaker with Ceiling Mount Bracket Cosmetic cover Installation manual Mounting plate Loudspeaker 1 0.75 " FRONT VIEW RIGHT VIEW 0.62 " 273.0mm 15.9mm 6.42 " 0.32 " 163.0mm 8.0mm 4.61 " 117.0mm 12.14 " 308.5mm " 6.27 159.3mm 12.82...
- Page 3 Installation Requirements Installation Installation • WARNING: DO NOT mount to a wall or other vertical • ATTENTION : ne PAS utiliser cet accessoire sur un mur surface. ou autre surface verticale. • Choose a mounting position, method, and hardware • Pour le montage, choisissez une position, une méthode consistent with local building codes and regulations.
- Page 4 Positioning Guidelines Colocación y orientación del soporte 1. Según el modelo del altavoz, sitúe la placa de montaje a una distancia mínima de X (medida desde el agujero central) de las paredes adyacentes para asegurarse de que el altavoz tenga una gama completa de ajuste de inclinación y oscilación en oriental horizontal o vertical.
- Page 5 Mounting the Bracket to Ceiling Instalación de la placa de montaje Sujete la placa de montaje al techo: • ADVERTENCIA: NO realice el montaje en paredes ni otras superficies verticales. • Compruebe que la estructura puede soportar el peso del soporte y del altavoz.
- Page 6 Wiring the Bracket Llevar el cableado a los terminales del soporte El cable puede entrar en el soporte a través de: • Agujero central de la placa de montaje (dimensionado para dar cabida a un conducto de ") • Agujero secundario (descentrado) de la placa de montaje •...
- Page 7 Wiring the Bracket Wiring the bracket terminals Câblage des bornes du support 1. Connect wires to terminals. 1. Connecter les fils aux bornes. 2. Center wires over strain relief clamp hole and insert clamp: 2. Centrer les fils sur l’orifice de la languette anti-traction et insérer celle-ci : •...
- Page 8 Europese landen. Ausfall der Lautsprecher an derselben Leitung führen würde. Met de keramische aansluitklem, thermoschakelaar (zekering) en Terminal cerámico y bedrading die worden geleverd bij Bose ® Keramische aansluitklem en thermoschakelaar, kunt u de luidsprekerbox zo installeren dat conmutador térmico...
- Page 9 1. Bevestig het keramisch blok aan de beugel met de schroef die ® ® 1. Befestigen Sie den Keramikblock mithilfe der mit dem Bose met de betreffende Bose -accessoireset is meegeleverd. Keramikanschlussklemmen- und Thermosicherungskit (Zubehör) 2. Buig de thermische schakelaar (zekering) en draad voorzichtig mitgelieferten Schrauben an der Halterung.
- Page 10 Preparing the Loudspeaker * Factory default ** NC: No Connection (do not use) * Fabriksstandard ** NC: Ingen forbindelse (undgå brug) * Werkseitiger Standard ** NC: Keine Verbindung (nicht verwenden) 2.5W* * Ajuste de fábrica ** NC: Sin conexión (no utilizar) 8Ω...
- Page 11 Preparing the Loudspeaker Rotating the loudspeaker Rotation de l’enceinte For vertical mounting: Pour un montage vertical : 1. Remove screws from loudspeaker arm. 1. Déposer les vis du bras de l’enceinte. 2. Set the speaker in a vertical position. 2. Placer l’enceinte en position verticale. 3.
- Page 12 Preparing the Loudspeaker Rotating logo Rotation du logo For vertical mounting: Pour le montage vertical : 1. Firmly grasp logo and pull away from grille. 1. Saisissez fermement le logo et tirez pour l’écarter de la grille. 2. Rotate logo and release. 2.
- Page 13 Preparing the Loudspeaker Attaching cosmetic cover Fixation du couvercle décoratif 1. Align the cosmetic cover screw with the screw trough at the rear 1. Aligner la vis du couvercle décoratif sur sa goulotte à l’arrière du of the bracket. support. 2.
- Page 14 Attaching the Loudspeaker to the Bracket Mounting the loudspeaker Montage de l’enceinte 1. Mate the loudspeaker arm with the mounting plate extension. 1. Apparier le bras et l’extension de la plaque de montage. 2. Partially tighten the loudspeaker arm screw to hold the 2.
- Page 15 Attaching the Loudspeaker to the Bracket Plugging wire into the bracket Raccordement du fil au support Snap loudspeaker wire plug onto bracket connector. Raccorder la fiche du câble d’enceinte au connecteur du support. Tilslutning af ledning til beslaget Inserimento del filo nella staffa Klik højttalerledningens stik på...
- Page 16 Positioning the Loudspeaker Loudspeaker yaw adjustment Orientation latérale de l’enceinte 1. Loosen the yaw adjustment screw. 1. Desserrer la vis de réglage d’orientation latérale. 2. Rotate the loudspeaker and bracket to the desired yaw 2. Faire pivoter l’enceinte et son support pour obtenir la position position (+/- 30°).
- Page 17 Positioning the Loudspeaker Attaching cosmetic cover Fixation du couvercle décoratif 1. Align the cosmetic cover screw with the screw trough at the rear 1. Aligner la vis du couvercle décoratif sur sa goulotte à l’arrière du of the bracket. support. 2.
- Page 18 Positioning the Loudspeaker DS 100SE 90° – 0° 60° – 0° DS 40SE 90° – 0° 60° – 0° DS 16S/SE 90° – 0° 75° – 0° Loudspeaker pitch adjustment Setting loudspeaker angle Range of adjustment available when loudspeaker is mounted: 1.
- Page 19 Positioning the Loudspeaker Ajustar el ángulo del altavoz Hoek van de luidspreker instellen 1. Afloje el tornillo del brazo del altavoz. 1. Draai de schroef op de luidsprekerarm los. 2. Ajuste la inclinación a la posición deseada (+/- 90°). 2. Draai naar de gewenste hellingshoek (+/- 90°). 3.
- Page 20 Other Considerations NOT INCLUDED: safety cable Using a safety cable Utilisation d’un câble de sécurité • Choose a mounting position, method, and hardware consistent • Pour le montage, choisir une position, une méthode et des with local building codes and regulations. accessoires compatibles avec le code de la construction local.
-
Page 21: Safety And Regulatory Compliance
Safety and Regulatory Compliance The DS 40SE has passed extensive testing and complies with the following specifications and uses: • LISTED to ANSI/UL 1480-2005 • Fire Protective Signaling Use – UL Category UUMW, File Number S 3241. Control Number 42S9 when installed with a ceiling mount bracket. Not for use with DC-supervised systems. - Page 22 ©2010 Bose Corporation, The Mountain Framingham, MA 01701-9168 USA AM329497 Rev.00 pro.Bose.com...
Need help?
Do you have a question about the FreeSpace DS 40SE and is the answer not in the manual?
Questions and answers