
Related Manuals for Protherm Gepard


Summary of Contents for Protherm Gepard
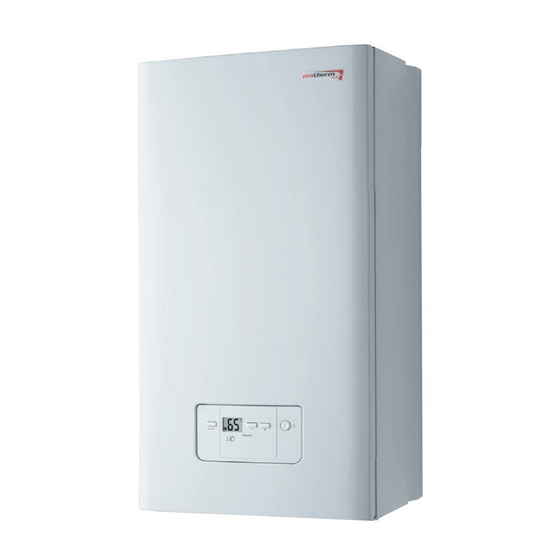
- Page 1 Gepard Installation manual 23 MTV v.19 23 MOV v.19 Wall-hang non-condensing boiler Power 8,5 - 23,3 kW Flow heating HW v e r s i o n...
-
Page 2: Table Of Contents
CONTENTS INTRODUCTION Manual Product documentation .............. 3 Relevant documents ..............3 Explanation of symbols .............. 3 Descriction device Safety regulation ............... 3 Data plate ................... 3 Type of gas ................. 3 Regulations and legal provisions ..........3 Hydraulic scheme ..............5 Safety instructions and regulations Safety instructions .............. - Page 3 CONTENTS ÚDR ŽB A Search and trouble-shooting 12.1 Diagnosing faults ..............25 12.2 Fault codes ................25 Gas conversion 13.1 Settings ..................26 Discharging water 14.1 Heating system ............... 27 Servising 15.1 Function check ................ 27 Replacement parts Spare parts Techni cal parameters - 2 -...
-
Page 4: Product Documentation
European Directive 92/42/ EEC on effi ciency, the European Directive 2006/95/EC on • Do not plug or obstruct the ventilation system. electrical means of operation for use in certain voltage ranges P2_GEPARD_installer manual_ work basis_EN_02 - 03/10 - protherm - 3 -... - Page 5 CH (heating) + HW (hot water) documents: The GEPARD boiler (model MTV and MOV) supplies both - in the design area: STN 06 0310 and STN 06 0830; central heating and hot water for the home.
-
Page 6: Hydraulic Scheme
16 CH pressure sensor 17 3–way motor valve 18 HW fl ow sensor 19 HW fi lter 20 Inlet valve CH outlet HW outlet Gas inlet HW inlet CH inlet P2_GEPARD_installer manual_ work basis_EN_02 - 03/10 - protherm - 5 -... - Page 7 17 CH pressure sensor 18 3–way motor valve 19 HW fl ow sensor 20 HW fi lter 21 Inlet valve CH outlet HW outlet Gas inlet HW inlet CH inlet P2_GEPARD_installer manual_ work basis_EN_02 - 03/10 - protherm - 6 -...
-
Page 8: Safety Instructions
• Use only original spare parts. • Use only new O-rings and gaskets. • Upon completion of work on gas or water components of check seal. P2_GEPARD_installer manual_ work basis_EN_02 - 03/10 - protherm - 7 -... -
Page 9: Location
20˚C. Minimum fl ow must be 400 l/h. The piping system construction must prevent air bubbles from developing, making permanent bleeding of the system easier. P2_GEPARD_installer manual_ work basis_EN_02 - 03/10 - protherm - 8 -... -
Page 10: Dimensions
7 4 2 4 1 0 3 1 1 5.3.2 Gepard 23 MTV Ø 3 1 8 4 2 0 5 7 4 2 4 1 0 3 1 1 P2_GEPARD_installer manual_ work basis_EN_02 - 03/10 - protherm - 9 -... -
Page 11: Mounting The Boiler
Connect heating water, hot water and gas distribution pipes to the isolation valves. Install lever for topping up water into the heating system. Fill boiler with water. Perform check of tightness of all connections. P2_GEPARD_installer manual_ work basis_EN_02 - 03/10 - protherm - 10 -... - Page 12 Legend gas valve safety valve plate to plate heat exchanger - 12 plates auto air vent WILO AC pump with two automatic speeds fi lling loop P2_GEPARD_installer manual_ work basis_EN_02 - 03/10 - protherm - 11 -...
- Page 13 Air and exhaust lines Legend chimney - 110 mm pre 12 kW, 125 mm pre 25 kW over-fl ow safety device draught diverter heat exchanger combustion chamber burner - 13 blades P2_GEPARD_installer manual_ work basis_EN_02 - 03/10 - protherm - 12 -...
- Page 14 INSTALATION Legenda air pressure switch draught diverter heat exchanger combustion chamber burner - 13 blades P2_GEPARD_installer manual_ work basis_EN_02 - 03/10 - protherm - 13 -...
-
Page 15: Regulations
39 mm must be removed. vertical distance of 0.6 m. The exhaust piping into the shared P2_GEPARD_installer manual_ work basis_EN_02 - 03/10 - protherm - 14 -... - Page 16 (whether chimney or pipe), and when drawing in air at least 1.2 m3 of air/ hour per kW of boiler output must be available. P2_GEPARD_installer manual_ work basis_EN_02 - 03/10 - protherm - 15 -...
- Page 17 fl ammability according to STN 73 0823) must be used for sealing, e.g., masonry mortar, plaster etc. Openings in combustible walls or roofs must be made according to the fi rst section of this part. P2_GEPARD_installer manual_ work basis_EN_02 - 03/10 - protherm - 16 -...
-
Page 18: Entrance To Bmu
BMU is accessible when the front cover of the boiler and unloading ebox. Bellow the back cover is BMU, the composition of which it is possible to select the BMU. Legenda plastic clips P2_GEPARD_installer manual_ work basis_EN_02 - 03/10 - protherm - 17 -... -
Page 19: Bmu
INSTALATION Legend Removable connector for 24V & Ebus room thermostats & outdoor sensor P2_GEPARD_installer manual_ work basis_EN_02 - 03/10 - protherm - 18 -... -
Page 20: Boiler Wiring Diagram
14 NTC CH return water temperature sensor 15 Thermal fuse 16 NTC CH fl ow sensor 17 NTC HW fl ow sensor 18 3–way motor valve 19 CH pressure sensor P2_GEPARD_installer manual_ work basis_EN_02 - 03/10 - protherm - 19 -... -
Page 21: External Accessories
When fi lling the boiler the following conditions must be Room regulators may be connected to the GEPARD boiler via observed: eBUS communication. For this type of equipment, however, we... -
Page 22: Status Of The Appliance
EBUS controller is connected to the boiler, check that S.30 a wiring link is present on terminals 3 and 4 of the boiler´s main board. S.31 "Hot water only" mode P2_GEPARD_installer manual_ work basis_EN_02 - 03/10 - protherm - 21 -... - Page 23 Switching option relay 2 Filling loop mode 0. manual 1. Semi-automatic 2. Full automatic Position setpoint of the TWV 100 = DHW 0 = heating 40 = middle position P2_GEPARD_installer manual_ work basis_EN_02 - 03/10 - protherm - 22 -...
- Page 24 4: 25 KTO 5: 25 KTV 6: 30 KTV 7: 12 KOO 8: 25 KOO 9: 25 KOV Reset fault codes list Software Version of PeBus participiants 1. BMU 2. AI P2_GEPARD_installer manual_ work basis_EN_02 - 03/10 - protherm - 23 -...
-
Page 25: Re-Check And Restart
P2_GEPARD_installer manual_ work basis_EN_02 - 03/10 - protherm - 24 -... -
Page 26: Diagnosing Faults
Incorrect fl ow value from stepmotor gas valve Flame sensing error – ionisation signal contrary to closed gas valve Failure to light burner at fi rst attempt Loss of fl ame during burner operation P2_GEPARD_installer manual_ work basis_EN_02 - 03/10 - protherm - 25 -... -
Page 27: Settings
20 mbar 37 mbar Jet diameter (mm) 0,77 0,73 Pmin (mbar) Pmin (mm H 25,49 22,43 Pmax (mbar) 13,0 12,0 28,0 29,6 Pmax (mm H 132,6 122,4 288,5 301,8 P2_GEPARD_installer manual_ work basis_EN_02 - 03/10 - protherm - 26 -... -
Page 28: Heating System
After putting into operation, it is necessary to carry out a functional check of the boiler and heating system throughout, as well as the external devices connected to the boiler. P2_GEPARD_installer manual_ work basis_EN_02 - 03/10 - protherm - 27 -... -
Page 29: Replacement Parts
MAINTENANCE Replacement parts 16.1 Burner 16.2 P2_GEPARD_installer manual_ work basis_EN_02 - 03/10 - protherm - 28 -... - Page 30 MAINTENANCE 16.3 Air pressure switch P2_GEPARD_installer manual_ work basis_EN_02 - 03/10 - protherm - 29 -...
- Page 31 MAINTENANCE 16.4 Over - fl ow safety device 16.5 Return heating NTC sensor 16.6 Flow heating NTC sensor P2_GEPARD_installer manual_ work basis_EN_02 - 03/10 - protherm - 30 -...
- Page 32 MAINTENANCE 16.7 Pressure sensor 16.8 Ignition transformator P2_GEPARD_installer manual_ work basis_EN_02 - 03/10 - protherm - 31 -...
- Page 33 MAINTENANCE 16.9 Plate to plate exchanger P2_GEPARD_installer manual_ work basis_EN_02 - 03/10 - protherm - 32 -...
- Page 34 MAINTENANCE 16.10 Gas valve P2_GEPARD_installer manual_ work basis_EN_02 - 03/10 - protherm - 33 -...
- Page 35 MAINTENANCE 16.11 DHW fl ow sensor P2_GEPARD_installer manual_ work basis_EN_02 - 03/10 - protherm - 34 -...
- Page 36 MAINTENANCE 16.12 Expansion vessel P2_GEPARD_installer manual_ work basis_EN_02 - 03/10 - protherm - 35 -...
-
Page 37: Spare Parts
Check the spare parts installed in the correct position and in the right direction. After installation of the spare parts or servicing the equipment must be tested for safe operation. P2_GEPARD_installer manual_ work basis_EN_02 - 03/10 - protherm - 36 -... - Page 38 Fume ducting diameter Exhaust gas temperature °C Quantity of exhaust gas produced 21,0 Noise < 50 Dimensions: height / width / depth 740 / 410 / 298 Weight without water P2_GEPARD_installer manual_ work basis_EN_02 - 03/10 - protherm - 37 -...
- Page 39 60 / 100 , 80 / 125 , 80 / 80 Exhaust gas temperature °C Quantity of exhaust gas produced 13,4 Noise < 50 Dimensions: height / width / depth 740 / 410 / 298 Weight without water P2_GEPARD_installer manual_ work basis_EN_02 - 03/10 - protherm - 38 -...
- Page 41 Protherm spol. s r.o. Pplk. Pľjušťa 45 909 01 Skalica Tel.: 034 6966 101 fax: 034 6966 111...
Need help?
Do you have a question about the Gepard and is the answer not in the manual?
Questions and answers