Table of Contents
Advertisement
Advertisement
Chapters
Table of Contents

Related Manuals for Branson Digital Sonifier 250


Summary of Contents for Branson Digital Sonifier 250
- Page 1 Digital Sonifier ® Models 250 & 450 User’s Manual E D P 1 0 0 - 2 1 4 - 2 3 9 R e v . A B R A N S O N U l t r a s o n i c s C o r p o r a t i o n 4 1 E a g l e R o a d D a n b u r y , C o n n e c t i c u t 0 6 8 1 3 - 1 9 6 1 U .
- Page 2 Manual Change Information A t B r a n s o n , w e s t r i v e t o m a i n t a i n o u r p o s i t i o n a s t h e l e a d e r i n u l t r a s o n i c s p l a s t i c s j o i n i n g , c l e a n i n g a n d r e l a t e d t e c h n o l o g i e s b y c o n t i n u a l l y i m p r o v i n g t h e d e s i g n s , c i r c u i t s a n d c o m p o - n e n t s i n o u r e q u i p m e n t .
- Page 3 Digital Sonifier ® User’s Manual Forward C o n g r a t u l a t i o n s o n y o u r c h o i c e o f a B r a n s o n U l t r a s o n i c s C o r p o r a t i o n s y s t e m ! ®...
- Page 4 For Your Notes 100-214-239 Rev. A...
- Page 5 Digital Sonifier 100-214-239 Rev. A...
- Page 6 Warranty - - - - - - - - - - - - - - - - - - - - - - - - - - - 1-4 How to Contact Branson - - - - - - - - - - - - - - - - - - - 1-5 1.1 Safety Considerations...
- Page 7 Safety and Support 1.2 General Precautions 1.2.1 Intended Use of the System The 250/450 Digital Sonifiers can be used to disrupt cells, bacteria, spores, or tis- sue, and are ideal for initiating and accelerating chemical, biochemical, and phys- ical reactions, and for de-gassing liquids. With the Digital Sonifier, you can prepare an emulsion to 0.01 micron, homogenize immiscible liquids, polymerize some materials, and depolymerize others.
- Page 8 Digital Sonifier General Precautions The unit is equipped with a three-conductor cord and three-prong grounding type plug and must be plugged into a three-prong grounded receptacle. DO NOT under any circumstances remove the power cord ground prong, or use a plug ‘Adapter’. DO NOT operate equipment with the cover removed.
- Page 9 This warranty is limited to the original purchaser and is not transferable. Horns and tips fabricated by Branson for use in equipment described in this manual are manufactured to exacting parameters. Using altered or modified horns and tips or horns and tips otherwise unqualified by Branson can produce undue stresses that may damage the equipment.
- Page 10 This manual provides information for troubleshooting and resolving problems that could occur with the equipment (see Chapter 7). If you still require assistance, Branson Product Support is here to help you. The following questionnaire lists the common questions you will be asked when you contact the Product Support department, to help identify the problem.
- Page 11 Notify the Branson office prior to shipping the equipment. NOTE To Return Equipment to Branson, you must first obtain an RGA number from a Branson representative, or the shipment may be delayed or refused. For equipment not covered by warranty, include a purchase order for the repair costs to avoid delay.
- Page 12 To return equipment to Branson, you must first obtain an RGA number from a Branson representative, or the shipment may be delayed or refused. If you are returning equipment to Branson for repair, you must first call the Danbury Repair department to obtain a Returned Goods Authorization (RGA) number. (If you request it, the repair department will fax a Returned Goods Authorization form to fill out and return with your equipment.)
- Page 13 Safety and Support For Your Notes 100-214-239...
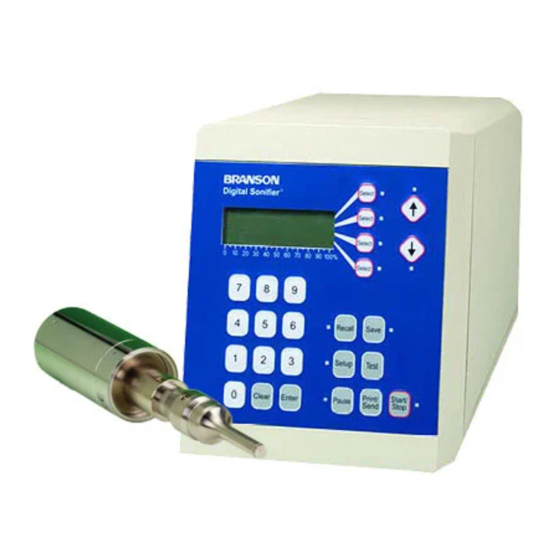
- Page 14 Digital Sonifier Overview of Digital Sonifier Introduction to the Digital Sonifier Overview of Digital Sonifier- - - - - - - - - - - - - - - - - - 2-1 Controls and Commands - - - - - - - - - - - - - - - - - - - 2-3 System Features - - - - - - - - - - - - - - - - - - - - - - - 2-9 2.1 Overview of Digital Sonifier T h e 2 5 0 / 4 5 0 D i g i t a l S o n i f i e r i s o f t e n u s e d b y l a b o r a t o r y p e r s o n n e l i n t h e m e d i c a l a n d c h e m i c a l...
- Page 15 Introduction to the Digital Sonifier T h e 2 5 0 a n d 4 5 0 D i g i t a l S o n i f i e r s d i f f e r o n l y i n t h e i r o u t p u t p o w e r r a t i n g s , m e a s u r e d w h e n t h e o u t p u t c o n t r o l i s a t m a x i m u m s e t t i n g .
- Page 16 Digital Sonifier Controls and Commands 2.2 Controls and Commands T h i s s e c t i o n d e s c r i b e s t h e c o n t r o l s a n d c o m m a n d s t h a t y o u u s e t o o p e r a t e t h e D i g i t a l S o n i f i e r . A d e t a i l e d d e s c r i p t i o n o f h o w a n d w h e n t o u s e e a c h f r o n t p a n e l c o n t r o l , t h e v a l i d f o r m a t s f o r t h e d a t a t h a t y o u e n t e r , a n d t h e r e s p o n s e y o u r e c e i v e f r o m t h e s y s t e m w h e n y o u u s e e a c h o f t h e s e c o n t r o l s i s p r o v i d e d i n C h a p t e r 6 , O p e r a t i o n s .
- Page 17 Introduction to the Digital Sonifier O p e r a t i o n o f t h e D i g i t a l S o n i f i e r c a n a l s o b e c o n t r o l l e d t h r o u g h a r e m o t e c o m p u t e r t e r m i n a l o r U s e r I / O d e v i c e .
- Page 18 Digital Sonifier Controls and Commands Line Select Keys T h e r e a r e f o u r L i n e S e l e c t k e y s t o t h e r i g h t o f t h e d i s p l a y . W h e n a L i n e S e l e c t k e y i s a c t i v e , t h e L E D n e x t t o i t i s t u r n e d o n .
- Page 19 Introduction to the Digital Sonifier Pause Key (!H Command) T h e P a u s e k e y a n d t h e ! H c o m m a n d a r e a c t i v e o n l y w h e n t h e u n i t i s o p e r a t i n g . W h e n y o u p r e s s t h e P a u s e k e y o r t y p e i n t h e ! H c o m m a n d , o p e r a t i o n o f t h e u n i t h a l t s a n d t h e P a u s e k e y ’...
- Page 20 Digital Sonifier Controls and Commands Clear Key T h e C l e a r k e y o n t h e D i g i t a l S o n i f i e r i s a c t i v e a t a n y t i m e w h e n a p a r a m e t e r c a n b e c h a n g e d . I f y o u p r e s s t h e C l e a r k e y w h e n y o u a r e m o d i f y i n g a p a r a m e t e r v a l u e , t h e e n t r y f i e l d b e c o m e s b l a n k , a n d t h e c u r s o r i s m o v e d t o t h e l e a s t s i g n i f i c a n t p o s i t i o n .
- Page 21 Introduction to the Digital Sonifier 2.2.3 Back Panel Connections Figure 2.3 Back Panel of Digital Sonifier IEC-type power cordset connector Fuse holder Converter cable Temperature Probe and connector connector Remote Parallel User I/O Terminal Printer connector (RS-232) T h e b a c k p a n e l o f t h e D i g i t a l S o n i f i e r i s e q u i p p e d w i t h : •...
- Page 22 Digital Sonifier System Features 2.3 System Features T h e D i g i t a l S o n i f i e r i n c l u d e s t h e f o l l o w i n g f e a t u r e s : •...
- Page 23 Introduction to the Digital Sonifier For Your Notes 2-10 100-214-239 Rev. A...
- Page 24 Digital Sonifier Delivery and Handling Delivery and Handling 3.1 Delivery and Handling T h e D i g i t a l S o n i f i e r h a s n o s p e c i a l h a n d l i n g c o n s t r a i n t s . O n r e c e i p t o f y o u r D i g i t a l S o n i f i e r s y s - t e m , t a k e t h e f o l l o w i n g s t e p s : Inspect the carton for signs of damage.
- Page 25 Delivery and Handling For Your Notes 100-214-239 Rev. A...
-
Page 26: Table Of Contents
• Converter • Horn (and horn tips, if applicable) • Spanner wrench (can be ordered from Branson; refer to Appendix C.) • Open-ended wrench (can be ordered from Branson; refer to Appendix C.) • Any accessories shipped with the unit •... -
Page 27: System Block Diagram
Installation and Setup 4.2 System Block Diagram T h e b l o c k d i a g r a m s h o w s t h e r e l a t i v e i n t e r a c t i o n o f t h e c o m p o n e n t s o f a D i g i t a l S o n i f i e r s y s - t e m . - Page 28 Temperature Probe: Omega Technologies model #OL-703-PP, 0.125 inches in diameter and 4.5 inches in length. This item is sold separately by Branson. A p p e n d i x B , O p t i o n a l I t e m s P a r t s L i s t...
- Page 29 Installation and Setup CAUTION DO NOT allow the horn or microtip to contact lab stands, beakers, test tubes or similar objects. Microtip failure may result. Breakage of glassware may result in the loss of a specimen. D i s r u p t o r h o r n s a r e t h e b a s e f o r m a n y m i c r o t i p a p p l i c a t i o n s . D i s r u p t e r h o r n s a r e t h r e a d e d s o t h a t t h e y m a y a l s o b e i n s e r t e d i n t o a F l o w - T h r u c h a m b e r a t t a c h m e n t ( s e e p a g e 4 - 6 ) .
- Page 30 Digital Sonifier System Component Description Cup Horn Cup Horn Cavity Inlet / Outlet C u p H o r n s a l l o w m a t e r i a l s t o b e t r e a t e d i n s m a l l v i a l s o r t e s t t u b e s w i t h o u t i m m e r s i n g t h e u l t r a s o n i c h o r n o r m i c r o t i p i n t h e m a t e r i a l , t h e r e b y p r o v i d i n g c o m p l e t e l y s t e r i l e c o n d i t i o n s .
- Page 31 Installation and Setup Flow-Thru Horn Stud Flow-Thru Horn Inlet / outlet hollow core T h e F l o w - T h r u H o r n h a s t w o i n p u t s o r o r i f i c e s a t t h e n o n - v i b r a t i n g , n o d a l p o i n t o f t h e h o r n . A p r e - m i x e d s u b s t a n c e i s f e d t h r o u g h o n e o f t h e i n p u t s w h i l e t h e h o r n i s u l t r a s o n i c a l l y a c t i - v a t e d .
- Page 32 Digital Sonifier System Component Description T h i s a t t a c h m e n t , w h i c h i s s c r e w e d o n t o t h e d i s r u p t o r h o r n , p e r m i t s c o n t i n u o u s p r o c e s s i n g o f l o w - v i s c o s i t y m a t e r i a l s a t r a t e s o f u p t o 3 8 l i t e r s p e r h o u r .
- Page 33 Installation and Setup Soundproof Enclosure A l t h o u g h u l t r a s o u n d i s a b o v e t h e n o r m a l r a n g e o f h u m a n h e a r i n g , a u d i b l e s o u n d s o m e t i m e s o c c u r s w h e n l i q u i d s a r e t r e a t e d u l t r a s o n i c a l l y , e s p e c i a l l y d u e t o c a v i t a t i o n p r o d u c e d b y u l t r a - s o n i c v i b r a t i o n .
-
Page 34: Assembling The Equipment
Digital Sonifier Assembling the Equipment 4.4 Assembling the Equipment T h e D i g i t a l S o n i f i e r u n i t i s p r e - a s s e m b l e d a n d r e q u i r e s n o s p e c i a l t o o l s , h o w e v e r o t h e r c o m - p o n e n t s m u s t b e c o n n e c t e d t o t h e u n i t i n o r d e r f o r t h e s y s t e m t o o p e r a t e . - Page 35 Installation and Setup 4.4.2 Connecting Tips, Horns, and Converters Connecting the Horn to the Converter T o c o n n e c t t h e h o r n t o t h e c o n v e r t e r , t a k e t h e f o l l o w i n g s t e p s : Step Action Clean the contacting surfaces of the converter and horn, and remove any...
- Page 36 Digital Sonifier Assembling the Equipment Tightening a tip on a horn, using spanner wrench and open-end wrench Converter Spanner Horn Tip Wrench 100-214-239 Rev. A 4-11...
- Page 37 Installation and Setup 4.4.3 Horn Amplitudes U s e t h e f o l l o w i n g c h a r t s t o d e t e r m i n e t h e c o r r e c t s y s t e m s e t t i n g s f o r t h e h o r n s y o u a r e u s i n g . Suggested Amplitude Values for various Horns Amplitude Control Settings Horn EDP No.
-
Page 38: Input Power Requirements
Digital Sonifier Input Power Requirements 4.5 Input Power Requirements T h e i n p u t p o w e r r e q u i r e m e n t s f o r t h e D i g i t a l S o n i f i e r a r e : •... - Page 39 Installation and Setup 4.6.2 Remote Terminal Connection T h e r e m o t e t e r m i n a l i s c o n n e c t e d t o t h e r e a r o f t h e D i g i t a l S o n i f i e r t h r o u g h a n i n d u s t r y - t y p i c a l B a c k P a n e l o f D i g i t a l S o n i f i e r R S - 2 3 2 c o n n e c t i o n .
- Page 40 Digital Sonifier Electrical Connections to Equipment 4.6.5 Temperature Probe Connection T h e t e m p e r a t u r e p r o b e i s c o n n e c t e d t o t h e D i g i t a l S o n i f i e r u s i n g a 1 / 4 i n c h R C A - t y p e p h o n e j a c k c o n n e c t o r .
- Page 41 Installation and Setup E a c h u s e r - c o n t r o l a p p l i c a t i o n m a y b e d i f f e r e n t , i t i s l e f t t o t h e r e a d e r t o d e s i g n a n d c r e a t e t h e c u s t o m e r - e n d p o r t i o n o f a U s e r I / O i n t e r f a c e .
-
Page 42: Guards And Safety Equipment
Digital Sonifier Guards and Safety Equipment 4.7 Guards and Safety Equipment A l t h o u g h t h e D i g i t a l S o n i f i e r o p e r a t e s o u t s i d e t h e n o r m a l r a n g e o f h u m a n h e a r i n g , s o m e a p p l i - c a t i o n s c a n c r e a t e a u d i b l e n o i s e a b o v e 8 5 d B . -
Page 43: Ultrasonic Test
Installation and Setup 4.8 Ultrasonic Test T h e T e s t b u t t o n o n t h e f r o n t p a n e l o f t h e D i g i t a l S o n i f i e r i s u s e d t o v e r i f y t h a t t h e u n i t i s f u n c - t i o n i n g ( p r o v i d i n g u l t r a s o n i c e n e r g y t o t h e C o n v e r t e r a n d H o r n ) . - Page 44 Digital Sonifier Technical Specifications Technical Specifications Technical Specifications - - - - - - - - - - - - - - - - - - - 5-1 Physical Description - - - - - - - - - - - - - - - - - - - - - 5-2 System Performance Benchmark- - - - - - - - - - - - - - - 5-3 5.1 Technical Specifications T h e f o l l o w i n g t a b l e o u t l i n e s t h e t e c h n i c a l s p e c i f i c a t i o n s f o r t h e D i g i t a l S o n i f i e r :...
- Page 45 Technical Specifications 5.2 Physical Description T h e f o l l o w i n g t a b l e o u t l i n e s t h e p h y s i c a l c h a r a c t e r i s t i c s o f t h e D i g i t a l S o n i f i e r . Converter Weight 4 lbs.
- Page 46 Digital Sonifier System Performance Benchmark 5.3 System Performance Benchmark E a c h a p p l i c a t i o n a n d s y s t e m c o n f i g u r a t i o n i s s l i g h t l y d i f f e r e n t . S y s t e m p e r f o r m a n c e w i l l v a r y w h e n y o u c h a n g e s e t u p p a r a m e t e r s a n d i f y o u r h o r n o r t i p s c h a n g e , a n d c a n a f f e c t t h e r e s u l t s o f y o u r e x p e r i m e n t s .
- Page 47 Technical Specifications Branson Digital Sonifier Setup Form M a k e a c o p y o f t h i s f o r m a n d u s e i t t o r e c o r d a b e n c h m a r k f o r y o u r s y s t e m ’ s s e t u p .
- Page 48 Digital Sonifier Setup and Operation Operation Setup and Operation - - - - - - - - - - - - - - - - - - - - - 6-2 Front Panel Controls - - - - - - - - - - - - - - - - - - - - - 6-5 Entering System Setup Parameters - - - - - - - - - - - - - 6-9 System Setup - Language - - - - - - - - - - - - - - - - - - 6-10 System Setup - Date...
-
Page 49: Setup And Operation
Operation 6.1 Setup and Operation WARNING Do NOT touch the vibrating horn, or place the vibrating horn against solid objects such as beakers and crucibles. Touching or holding the horn can result in burns or injury, and contact- ing solid materials with the vibrating horn or tip can cause breakage. CAUTION DO NOT run the microtip above an Amplitude setting of 70%. - Page 50 Digital Sonifier Setup and Operation Pulse/Pause Process Cycle I n P u l s e / P a u s e M o d e , t h e s y s t e m a p p l i e s u l t r a s o n i c s ( e i t h e r P u l s e d o r n o t ) t o t h e s a m p l e u n t i l i t r e a c h e s t h e P u l s e T e m p e r a t u r e .
- Page 51 Operation T h e f o l l o w i n g c h a r t s u m m a r i z e s t h e S y s t e m M o d e o p t i o n s , i n c l u d i n g t h e u s e o f L i m i t s : Pulse On and Time Max.
- Page 52 Digital Sonifier Front Panel Controls shows the Amplitude setting and some parameters, and the appropriate LEDs are illuminated. The sys- tem must be in the Ready state for you to start a new experiment or make changes to any parameters. •...
- Page 53 Operation 6.2.2 Temperature Probe T h e o p t i o n a l T e m p e r a t u r e P r o b e i s r e q u i r e d f o r t h e T e m p e r a t u r e M o d e , t h e P u l s e / P a u s e M o d e , o r t o u s e T e m - p e r a t u r e a s a L i m i t f o r y o u r e x p e r i m e n t .
-
Page 54: Front Panel Controls
Digital Sonifier Front Panel Controls Figure 6.1 Digital Sonifier front panel, showing a Ready mode display including Amplitude ® Digital Sonifier PRESET ID#__ TIME=_:__:__ hr/m/s MAX. TEMP=___._ ° AMPLITUDE= 17 % CAUTION Do not use a sharp or pointed object to press the front panel controls. The soft-touch mem- brane front panel can be permanently damaged. - Page 55 Operation 6.2.5 Menu Navigation W h e n t h e p a r a m e t e r s e l e c t i o n m e n u i s d i s p l a y e d , y o u c a n u s e t h e P a g e U p a n d P a g e D o w n a r r o w s t o n a v i g a t e u p a n d d o w n b e t w e e n t h e p a g e s o f t h e m e n u t o l o c a t e t h e p a r a m e t e r s y o u w a n t t o c h a n g e .
-
Page 56: Entering System Setup Parameters
Digital Sonifier Entering System Setup Parameters 6.3 Entering System Setup Parameters A t S y s t e m S e t u p , y o u c a n s e l e c t a n d s t o r e s y s t e m p a r a m e t e r s s u c h a s t i m e , d a t e , l a n g u a g e , r e m o t e o p e r a t i n g p a r a m e t e r s , a n d p r i n t e r c a p a b i l i t i e s . -
Page 57: System Setup - Language
Operation System Setup - Language T h e L a n g u a g e p a r a m e t e r a f f e c t s t h e d i s p l a y s a n d t h e p r i n t e d r e p o r t s . NOTE The Language choice also affects the Date format, and the Reports sent to the Printer and/ or the Remote Terminal. - Page 58 Digital Sonifier Entering System Setup Parameters Press the same Line Select key again to toggle among the possible values for Language: English, Spanish, German, Italian, or French. Press the Enter key to store the choice for Enter Language. Press the Setup key to exit the System Setup menu.
-
Page 59: System Setup - Date
Operation System Setup - Date T h e D a t e p a r a m e t e r a f f e c t s t h e d a t e s h o w n o n t h e d i s p l a y a n d p r i n t e d o n t h e R e p o r t s . Take this action…... - Page 60 Digital Sonifier Entering System Setup Parameters Use the numeric keys to enter the current 7 8 9 date, using an American or European date format as appropriate. If you set English as 4 5 6 the Language parameter, the system uses 1 2 3 the American date format (MM/DD/YYYY).
-
Page 61: System Setup - Time Of Day
Operation System Setup - Time of Day T h e T i m e o f D a y p a r a m e t e r a f f e c t s t h e T i m e s h o w n o n t h e d i s p l a y a n d p r i n t e d o n t h e R e p o r t s ( 2 4 - h o u r f o r m a t o n l y ) . - Page 62 Digital Sonifier Entering System Setup Parameters 7 8 9 4 5 6 Use the numeric keys to enter the current time, based on a 24-hour clock. 1 2 3 Enter Press the Enter key to store the value for Time of Day, or press the Clear key to re-enter the time.
-
Page 63: System Setup - Temperature Units
Operation System Setup - Temperature Units T h e T e m p e r a t u r e p a r a m e t e r a f f e c t s w h e t h e r t h e s y s t e m u s e s C e l s i u s o r F a h r e n h e i t u n i t s . Take this action…... - Page 64 Digital Sonifier Entering System Setup Parameters Press the same Line Select key again to toggle between the possible values for Temperature units: °F or °C. Press the Enter key to store the value Enter for Temperature units. Press the Setup key to exit the System Setup menu.
-
Page 65: System Setup - Printer
Operation System Setup - Printer T h e P r i n t e r p a r a m e t e r e n a b l e s o r d i s a b l e s t h e a b i l i t y t o s u p p o r t a P r i n t e r . Take this action…... - Page 66 Digital Sonifier Entering System Setup Parameters Press the same Line Select key to toggle between the two possible values for Printer: On if a printer will be enabled, or Off if it will be disabled. Press the Enter key to store the value Enter for Printer.
-
Page 67: System Setup - Printer Model
Operation System Setup - Printer Model T h e M o d e l p a r a m e t e r s e l e c t s t h e p r i n t e r m o d e l f r o m s e v e r a l c h o i c e s , w h e n t h e P r i n t e r p a r a m e t e r i s e n a b l e d . Take this action…... - Page 68 Digital Sonifier Entering System Setup Parameters Press the same Line Select key again to toggle among the possible values for your printer Model: Panasonic, Epson, or IBM. Press the Enter key to store the value Enter for Model. Press the Setup key to exit the System Setup menu.
-
Page 69: System Setup - Reports
Operation System Setup - Reports T h e R e p o r t s p a r a m e t e r e n a b l e s o r d i s a b l e s t h e R e p o r t s o p t i o n t o y o u r P r i n t e r a n d / o r y o u r R e m o t e C o m p u t e r o r T e r m i n a l . - Page 70 Digital Sonifier Entering System Setup Parameters Press the same Line Select key again to toggle between the possible values for Reports: Enabled or Disabled. Press the Enter key to store the value Enter for Reports. Press the Setup key to exit the System Setup menu.
-
Page 71: Entering Operation Parameters
Operation 6.4 Entering Operation Parameters Y o u c a n e n t e r O p e r a t i o n p a r a m e t e r s t h r o u g h t h e k e y p a d o r t h r o u g h t h e r e m o t e t e r m i n a l , i f t h e t e r m i n a l i s e n a b l e d i n t h e S y s t e m S e t u p m e n u . - Page 72 Digital Sonifier Entering Operation Parameters T h e O p e r a t i o n p a r a m e t e r s t h a t y o u c a n s e t f r o m t h e k e y p a d a r e d e s c r i b e d i n t h e f o l l o w i n g t a b l e . D e t a i l e d s t e p s f o r e a c h p a r a m e t e r a r e d e s c r i b e d i n t h e p a g e s t h a t f o l l o w .
-
Page 73: Parameter Entry - Time
Operation Parameter Entry - Time T h e T i m e p a r a m e t e r , i f u s e d , i d e n t i f i e s t h e t i m e d u r a t i o n o f a n e x p e r i m e n t , i n h o u r s , m i n u t e s a n d s e c o n d s , d u r - i n g w h i c h u l t r a s o n i c v i b r a t i o n s a r e a c t i v e a n d a r e p u t t i n g e n e r g y i n t o y o u r e x p e r i m e n t . - Page 74 Digital Sonifier Entering Operation Parameters 7 8 9 4 5 6 Use the numeric keys to enter a value for Time, how long you want the experi- 1 2 3 ment to run. Enter Press the Enter key to store the value for Time, or press the Clear key to re-enter the time.
-
Page 75: Parameter Entry - Maximum Temperature
Operation Parameter Entry - Maximum Temperature T h e M a x i m u m T e m p e r a t u r e p a r a m e t e r , i f u s e d , i d e n t i f i e s t h e m a x i m u m t e m p e r a t u r e a l l o w e d i n t h e e x p e r i m e n t . M a x i m u m T e m p e r a t u r e m a y b e u s e d a s a L i m i t f o r a l l m o d e s e x c e p t P u l s e / P a u s e M o d e . - Page 76 Digital Sonifier Entering Operation Parameters 7 8 9 4 5 6 Use the numeric keys to enter the value for Max. Temp. 1 2 3 Enter Press the Enter key to store the value for Max Temp, or press the Clear key to correct and re-enter the temperature.
-
Page 77: Parameter Entry - Pulse On And Pulse Off
Operation Parameter Entry - Pulse On and Pulse Off T h e P u l s e O n a n d P u l s e O f f p a r a m e t e r s i d e n t i f y t h e d u r a t i o n o f t h e r e p e a t i n g U l t r a s o n i c s O n P u l s e a n d o f t h e p e r i o d i n b e t w e e n O n P u l s e s , r e s p e c t i v e l y , u s e d i n t h e P u l s e m o d e a n d P u l s e / P a u s e m o d e . - Page 78 Digital Sonifier Entering Operation Parameters Enter Press the Enter key to store the value for Pulse On, or press the Clear key to re-enter the value. Clear 7 8 9 As soon as you have pressed Enter to store the Pulse On value, the system 4 5 6 moves to the Pulse Off parameter line.
-
Page 79: Parameter Entry - Pulse Temperature
Operation Parameter Entry - Pulse Temperature T h e P u l s e T e m p e r a t u r e i s t h e l o w e r t e m p e r a t u r e p a r a m e t e r o f t h e P u l s e / P a u s e m o d e t e m p e r a t u r e r a n g e . E n t e r i n g a v a l u e f o r t h e P u l s e T e m p e r a t u r e e n a b l e s t h e P u l s e / P a u s e m o d e ;... - Page 80 Digital Sonifier Entering Operation Parameters 7 8 9 4 5 6 Use the numeric keys to enter the 1 2 3 Pulse Temp. Enter Press the Enter key to store the value for Pulse Temp, or press the Clear key to correct and re-enter the value.
- Page 81 Operation 6.5 Remote Computer or Terminal F o r y o u r r e m o t e c o m p u t e r o r t e r m i n a l t o b e a c t i v e , y o u m u s t e n a b l e i t i n t h e S y s t e m S e t u p m e n u a s d e s c r i b e d o n p a g e 6 - 3 8 .
-
Page 82: Remote Computer / Terminal
Digital Sonifier Remote Computer or Terminal Table 6-3: Remote Terminal Commands Command Terminal Displays User / System Action Type a value for the time, and press Enter on your TIME= remote computer or terminal. Type the maximum temperature, and press Enter on MAX TEMP= your remote computer or terminal. -
Page 83: System Setup - Remote Terminal
Operation System Setup - Remote Computer / Terminal T h e R e m o t e p a r a m e t e r e n a b l e s o r d i s a b l e s s u p p o r t f o r a c u s t o m e r - p r o v i d e d R e m o t e C o m p u t e r o r T e r m i n a l . Take this action…... - Page 84 Digital Sonifier Remote Computer or Terminal Press the same Line Select key to toggle between the two possible values for Remote: On if a remote computer or termi- nal will be enabled, Off if it will be disabled. Press the Enter key to store the value for Enter Remote.
-
Page 85: System Setup - Baud Rate
Operation System Setup - Baud Rate T h e B a u d R a t e p a r a m e t e r i d e n t i f i e s t h e c o m m u n i c a t i o n r a t e o f t h e S e r i a l P o r t u s e d f o r t h e r e m o t e c o m p u t e r o r t e r m i n a l . - Page 86 Digital Sonifier Remote Computer or Terminal Press the same Line Select key again to toggle among the possible values for Baud Rate: 1200, 2400, 9600, or 19200. Press the Enter key to store the value for Enter Baud Rate. Press the Setup key to exit the System Setup Setup menu.
-
Page 87: Save And Recall Presets
Operation 6.6 Save and Recall Presets T h e S a v e a n d R e c a l l f u n c t i o n s a l l o w y o u t o e n t e r a s e t o f O p e r a t i o n p a r a m e t e r s a n d s a v e t h e m u n d e r a u n i q u e I D n u m b e r . -
Page 88: Printing/Sending Reports
Digital Sonifier Printing/Sending Reports 6.7 Printing/Sending Reports A f t e r a n e x p e r i m e n t , t h e s y s t e m c a n p r o d u c e a r e p o r t s h o w i n g t h e d a t e a n d t i m e o f t h e e x p e r i m e n t , t h e p a r a m - e t e r s i n e f f e c t , a n d s t a t i s t i c s f o r e n e r g y , p o w e r , a m p l i t u d e , a n d t e m p e r a t u r e . - Page 89 Operation 6.8 Displays During the Experiment Runtime Displays W h i l e t h e e x p e r i m e n t i s i n p r o g r e s s , t h e s y s t e m s h o w s c e r t a i n r u n t i m e d a t a o n t h e L C D d i s p l a y a n d o n t h e r e m o t e c o m p u t e r o r t e r m i n a l i f o n e i s e n a b l e d .
-
Page 90: Displays During The Experiment
Digital Sonifier Displays During the Experiment Keypad Enabled I f t h e k e y p a d i s e n a b l e d , t h e U p a n d D o w n a r r o w s , S t a r t / S t o p , a n d P a u s e k e y s a r e a c t i v e , a n d t h e d i s p l a y s h o w s t h e i n f o r m a t i o n d e s c r i b e d i n t h e f o l l o w i n g t a b l e : Table 6-4: Data Displayed During the Experiment when the Keypad is Enabled... -
Page 91: Warning And Error Messages
Operation 6.9 Warning and Error Messages W h e n t h e s y s t e m e n c o u n t e r s a n e r r o r c o n d i t i o n , a m e s s a g e i s d i s p l a y e d o n t h e f r o n t p a n e l o f t h e D i g i t a l S o n i f i e r u n i t a n d o n t h e r e m o t e c o m p u t e r o r t e r m i n a l i f o n e i s e n a b l e d . - Page 92 Digital Sonifier Maintenance and Troubleshooting Maintenance Maintenance and Troubleshooting - - - - - - - - - - - - - - 7-1 Reconditioning the Stack Interface - - - - - - - - - - - - - - 7-2 Troubleshooting Charts - - - - - - - - - - - - - - - - - - - 7-5 Interconnect Diagram - - - - - - - - - - - - - - - - - - - - - 7-9 7.1 Maintenance and Troubleshooting...
- Page 93 Maintenance Power Output Loss T h e r e a r e s e v e r a l c o n d i t i o n s t h a t c a n c a u s e a d e c r e a s e i n o r l o s s o f p o w e r o u t p u t , i n c l u d i n g •...
- Page 94 Digital Sonifier Reconditioning the Stack Interface 7.2.1 Refacing the Mating Surfaces NOTE Never clean the Converter or Horn mating surfaces with a buffing wheel. Disassemble the Converter / Horn Stack and wipe the mating surfaces with a clean cloth or paper towel. Examine all mating surfaces.
- Page 95 Maintenance Lapping Procedure Holding the part to recondition, place the interface surface on the emery cloth. Grasp the part at the lower end, with your thumb over the spanner-wrench hole, and lap the part in a straight line across the emery cloth. NOTE Do not apply downward pressure.
- Page 96 Digital Sonifier Troubleshooting Charts 7.2.3 Stud Reinsertion T h e S t u d i s i n t e n d e d t o b e a u s e - o n l y - o n c e p a r t , a s i t h a s k n u r l s o n i t s e n d w h i c h ‘ b i t e ’ i n t o t h e r e l a t i v e l y s o f t e r h o r n m a t e r i a l .
- Page 97 Maintenance Table 1: System Trouble Analysis Chart Symptom Probable Cause Corrective Action Main power fuse fails or • Cordset has failed • Replace cordset circuit breaker trips when • Power Switch has failed. system is plugged into • Return for repair •...
- Page 98 Digital Sonifier Troubleshooting Charts Table 1: System Trouble Analysis Chart Symptom Probable Cause Corrective Action • Foreign material is between • Remove, examine, and horn surface and replaceable clean tip; reinstall tip tip. If horn is hot to the touch, •...
- Page 99 Maintenance Table 1: System Trouble Analysis Chart Symptom Probable Cause Corrective Action • A Setup parameter has been changed • Run at least one cycle to capture report data • No report data stored in buffer since last report • enable Reports in Setup; •...
- Page 100 Digital Sonifier Interconnect Diagram 7.4 Interconnect Diagram (Export models only) Variac Cordset Line Power Terminal Block Connector Filter Switch Temperature RS-232 Probe Jack (9-pin) Converter Variac/ Ultrasonic Cable Curr Loop Power connection Digital Controls Board Supply Module Sonics J8 Display P5 User I/O (15-pin) Printer...
- Page 101 Maintenance For Your Notes 7-10 100-214-239 Rev. A...
- Page 102 Digital Sonifier Appendix A APPENDIX A: Application Information Operating Considerations T h e f o l l o w i n g s e c t i o n s d i s c u s s o p e r a t i n g t e c h n i q u e s u n d e r v a r y i n g c o n d i t i o n s . Limiting Temperature Rise A n i m p o r t a n t o b j e c t i v e i n u l t r a s o n i c e m u l s i f i c a t i o n i s t o k e e p p r o c e s s e d s a m p l e s c o o l .
- Page 103 Application Information NOTE All baths need a magnetic stirrer. F o r s m a l l e r v o l u m e s w i t h l e s s t h a n 3 0 s e c o n d s t r e a t m e n t t i m e , a n i c e - w a t e r b a t h i s s u f f i c i e n t . F o r l o n g e r p e r i o d s , e s p e c i a l l y w h e n h i g h p o w e r i s r e q u i r e d , a l o w e r t e m p e r a t u r e b a t h i s r e q u i r e d .
- Page 104 Digital Sonifier Appendix A Minimizing Undesirable Factors S o m e f a c t o r s m a y b e d e t r i m e n t a l t o e n z y m e o r b i o l o g i c a l a c t i v i t y a n d c a n r e d u c e t h e e f f e c t i v e - n e s s o f u l t r a s o n i c p r o c e s s i n g .
- Page 105 Application Information Disrupting Tissues and Solids Y o u c a n e f f e c t i v e l y h o m o g e n i z e o r d i s r u p t m a n y k i n d s o f t i s s u e a n d o t h e r s o l i d s . E n e r g y r a d i - a t e s o n l y f r o m t h e h o r n ’...
- Page 106 Digital Sonifier Appendix A The Effects of Ultrasonic Irradiation on Various Biological Materials A c t i n o m y c e s : 3 m i n u t e s o f s o n i f y i n g p r o d u c e s e x c e l l e n t d i s r u p t i o n w i t h 5 0 % p r o t e i n r e l e a s e a n d e x c e l l e n t e n z y m e a c t i v i t y .
- Page 107 Application Information B . s t e r e o t h e r m o p h i l i s s p o r e s : c o m p l e t e d i s r u p t i o n i n 2 m i n u t e s . B .
- Page 108 Digital Sonifier Appendix A C a l c i u m : m o u s e E h r l i c h a s c i t e s t u m o r c e l l s w e r e s o n i f i e d f o r 1 m i n u t e t o d e t e r m i n e t h e a m o u n t o f b o u n d c a l c i u m p r e s e n t .
- Page 109 Application Information E u g o e n a : c o m p l e t e d i s r u p t i o n i n 1 2 m i n u t e s , 9 0 % d i s r u p t i o n i n 8 m i n u t e s w i t h p i g m e n t r e l e a s e d .
- Page 110 Digital Sonifier Appendix A H y d r o p h i l i c v e g e t a b l e g u m s : d i s p e r s e s a n d s o l u b i l i z e s h y d r o p h i l i c v e g e t a b l e g u m s i n w a t e r ; m a k e s d i s p e r s i o n s o f a d d e d p a r t i c u l a t e m a t t e r .
- Page 111 Application Information M i c r o c o c c u s l a c t i l i t i c u s : 7 5 m l o f a 2 0 % s u s p e n s i o n w a s d i s i n t e g r a t e d i n 1 5 m i n u t e s a n d a g o o d y i e l d o f t h e e n z y m e X a n t h i n e d e h y d r o g e n a s e e x t r a c t e d .
- Page 112 Digital Sonifier Appendix A P h o s p h a t i d a t e p h o s p h o h y d r o l a s e : t h e m o s t p o t e n t i n h i b i t o r s f o r t h i s e n z y m e w e r e o b t a i n e d b y m a k i n g f i v e d i s p e r s i o n s w i t h t h e S o n i f i e r C e l l D i s r u p t o r .
- Page 113 Application Information R e t i n a l o u t e r s e g m e n t s : u l t r a s o n i c t r e a t m e n t b r e a k s p a r t i c l e s d o w n t o a l m o s t m o l e c u l a r s i z e . R h o d o p s e u d o m o n i s p a l u s t r i s : c o m p l e t e d i s r u p t i o n i n 4 m i n u t e s .
- Page 114 Digital Sonifier Appendix A S k i n : 1 g m d i s i n t e g r a t e s i n a b o u t 4 m i n u t e s . E p i d e r m a l h o m o g e n a t e s t h a t r e s p i r e a n d u t i l i z e s u b s t r a t e c a n b e e x t r a c t e d .
- Page 115 Application Information T h e r m o p h i l i c b a c i l l u s : i s o c i t r a t e l y a s e w a s e x t r a c t e d f r o m a s p o r e - f o r m i n g b a c i l l u s s i m i l a r t o S t e a r o t h e r m o p h i l u s .
- Page 116 101-053-002 Replacement adaptor Stud Stud 100-098-249 (horn to converter) Converter 102C Converter (CE compliant) 101-135-022 For use with Branson Sonifier Cell Dis- ruptors. 201-118-019 Wrenches • Spanner • Open-end, for 1/2" disruptor tip 201-118-010 Extends 1/2" diameter disruptor horn 1/2 Wave HornExtension an additional 1/2 wavelength (approx.
- Page 117 , 1 0 2 C c o n v e r t e r , c o r d s e t , a n d h o r n a s n o t e d . Item Kit Description EDP Number Kit, Digital Sonifier Model Digital Sonifier 250 system kit, 101-063-588 250, 117V 1/2” Horn 117 volt, including 1/2” horn Kit, Digital Sonifier Model...
- Page 118 Digital Sonifier Appendix C APPENDIX C: Accessories Parts List Branson EDP Item Description Number • 1/2" diameter stepped, w/grad. scale 101-147-036 • 1/2" diameter stepped, tapped 101-147-037 • 1/2" diameter stepped, solid 101-147-038 • 3/8" diameter stepped, solid 101-147-039 • 1/2" diameter exponential, tapped...
- Page 119 Accessories Parts List Branson EDP Item Description Number Cooling cell for continuous circulation of the substance being processed. The cell is equipped with intake and output connections for continuous processing and a double cham- Continuous Flow, ber for cooling. Normally, adequate cooling is...
- Page 120 Digital Sonifier Appendix C Branson EDP Item Description Number A two-piece horn consisting of a coupling sec- tion and a lower tip. The standard disruptor horn must be removed prior to using this tip. Recommended for use on extremely small Double-step Micro volumes (0.5-20 ml).
- Page 121 Accessories Parts List For Your Notes 100-214-239 Rev. A...
- Page 122 Digital Sonifier Appendix D APPENDIX D: Wyse-55 Settings Wyse-55 Terminal Setup Parameters T h e f o l l o w i n g s e t u p i s f o r t h e W y s e m o d e l W Y - 5 5 T e r m i n a l w i t h t h e e x t e n d e d P C - s t y l e k e y - b o a r d , a v a i l a b l e a s a k i t f r o m B r a n s o n u s i n g E D P # 2 0 0 - 1 0 3 - 2 2 8 .
- Page 123 Wyse-55 Terminal Settings Wyse-55 Function Key Setup Parameters F1 Key Setup, DISP Columns Cursor Scrn Saver Blink Blk Lines Display Reverse Char Cell 10x15 Page 1 x Lines Autopage 80/132 Clr F2 Key Setup, GENRL Personality 220-8 Enhance Status Line Scrl Autoscrl Wrap EOL...
- Page 124 Digital Sonifier Appendix D F6 Key Setup, MISC WPRT WPRT Normal WPRT Rev Intensity Undrln Multiple Blk End CRLF/ETX Attribute Char Page Rest/Act. Margin Bell Bell Volume None Times F7 Key Setup, ANSI1 Char Set Multinational Char Mode Multinational ANSI ID VT100 Cursor Keys Normal...
- Page 125 Wyse-55 Terminal Settings For Your Notes 100-214-239 Rev. A...
- Page 126 ..........2-6 baud rate setup................6-17 biological materials effects of ultrasonic irradiation on......A-4 block diagram ..............4-2 Branson how to contact ............1-6 100-214-239 CONFIDENTIAL - For Review Only 2nd Review copyfilename: C:\Documents and Settings\Stéphanie\My Documents\CD-ROM\Sonifier\Manuals\Digital-English\Index.fm, modified Thursday, August 23,...
- Page 127 Index caution, warning, and error messages ......6-41 compliance with RFI guidelines ........1-3 component description ...........4-2 components standard ..............4-2 connecting the tip to the horn .........4-8 connecting tips, horns, and converters......4-7 connection printer ..............4-11 remote terminal ............4-10 connections back panel ..............2-6 continuous-flow attachment..........4-5 controls ................2-2 front panel ..............6-3...
- Page 128 ..............A-4 glossary ................2-7 guards and safety equipment ........4-11 horn connecting tip to ............4-8 horns connecting ..............4-7 how to contact Branson ..........1-6 input power requirements ..........4-10 installation and setup............4-1 installation checklist............4-1 intended use ..............1-1 introduction ..............2-1 100-214-239 CONFIDENTIAL - For Review Only...
- Page 129 Index keypad entering parameters from ........6-23 keypad description ............2-3 language setup................6-9 limitation of remedy and liability ........1-6 limited warranty ..............1-4 limiting temperature rise ..........A-1 maintenance ..............7-1 maximum temperature parameter entry ............6-27 messages ..............6-41 micro tip ................4-3 minimizing undesirable factors ........A-2 model setup................6-21 modes................6-1...
- Page 130 Digital Sonifier Index parameter entry amplitude ..............6-29 maximum temperature ..........6-27 pulse off..............6-33 pulse on ..............6-31 pulse temperature ...........6-35 time................6-25 parameters entering from keypad..........6-23 pause................6-37 performance specifications..........5-2 physical description ............5-3 power output loss ............7-2 power requirements input.................4-10 precautions ..............1-1 presets save and recall ............6-36 preventing cross-contamination ........
- Page 131 Index recall preset ..............6-36 remedy and liability limitation of ..............1-6 remote setup................6-7 remote terminal ............6-37 remote terminal commands ..........2-6 remote terminal connection ..........4-10 reports printing and sending ..........6-39 setup................6-19 requirement specifications..........5-1 returns ................1-3 RFI guidelines compliance with ............1-3 risk of loss ..............1-3 Rosett cell...............4-5 CONFIDENTIAL - For Review Only 100-214-239...
- Page 132 Digital Sonifier Index safety ................1-1 safety considerations............1-1 safety equipment ............4-11 safety measures .............1-2 sample discoloration ............. A-3 save and recall presets ..........6-36 save preset ..............6-36 sending reports.............6-39 setting up the workplace..........1-2 setup................4-1 setup procedure .............4-6 shipment .................1-3 solids disrupting ..............A-3 solution using glass powders with .........
- Page 133 Index technical specifications for the Digital Sonifier ....5-1 temperature setup................6-11 temperature probe ............4-11 temperature rise and vessel capacity ..........A-2 limiting ..............A-1 terminal.................6-37 terms and conditions of sale...........1-3 test................4-11 time parameter entry ............6-25 time of day setup................6-13 tip erosion ...............7-1 tips connecting ..............4-7 tissue disruptor ...............4-5...
- Page 134 Digital Sonifier Index warning .................6-41 warranty................1-4 warranty statement ............1-3 workplace setting up ..............1-2 100-214-239 CONFIDENTIAL - For Review Only 2nd Review copyfilename: C:\Documents and Settings\Stéphanie\My Documents\CD-ROM\Sonifier\Manuals\Digital-English\Index.fm, modified Thursday, August 23,...
- Page 135 Index I-10 CONFIDENTIAL - For Review Only 100-214-239 filename: C:\Documents and Settings\Stéphanie\My Documents\CD-ROM\Sonifier\Manuals\Digital-English\Index.fm, modified Thursday, August 23, 2001 10:52 AM...
Need help?
Do you have a question about the Digital Sonifier 250 and is the answer not in the manual?
Questions and answers