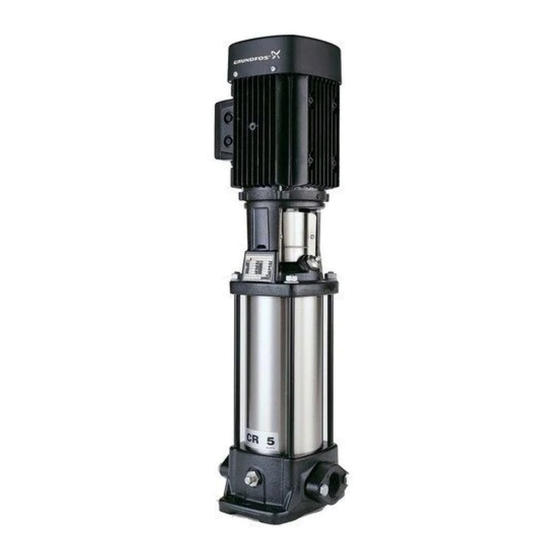
Grundfos CR Series Installation And Operation Manual
Vertical multistage centrifugal pumps
Hide thumbs
Also See for CR Series:
- Installation and operating instructions manual (384 pages) ,
- Service instructions manual (32 pages) ,
- Product manual (91 pages)
Summary of Contents for Grundfos CR Series
- Page 1 GRUNDFOS INSTRUCTIONS Installation and Operation CR, CRI, CRX, CRN, CRT Vertical Multistage Centrifugal Pumps Please leave these instructions with the pump for future reference...
-
Page 2: Nameplate Data
Code for shaft seal * In August 2003 the NEMA pump code was discontinued for all material numbers created by GRUNDFOS manufacturing companies in North America. The NEMA version pump code will still remain in effect for existing material numbers. NEMA version pumps built in North America after this change will have either an A or U as the pump version code depending on the date the material number was created. -
Page 3: Pre-Installation Checklist
— Centrifugal pump; all parts in contact with water are 316 stainless steel construction — Centrifugal pump; all parts in contact with water are titanium construction — Centrifugal pump with a Grundfos MLE VFD motor attached 2. Check the condition of the pump The shipping carton your pump came in is specially designed around your pump during production to prevent damage. - Page 4 362 / 25 362 / 25** * while pump is off or during start-up Consult Grundfos for other working conditions. ** during operation Select pump location The pump should be located in a dry, well-ventilated area which is not subject to freezing or extreme variation in temperature. Care must be taken to ensure the pump is mounted at least 6 inches (150 mm) clear of any obstruction or hot surfaces.
-
Page 5: Suction Pipe
If there is excessive sediment or suspended particles present, it is advised a strainer or filter be used. Grundfos recommends that pressure gauges be installed on inlet and discharge flanges or in pipes to check pump and system performance. -
Page 6: Check Valves
CR, CRN 64 CR, CRN 90 110* CRT 2 CRT 4 CR, CRX, CRN, CRT 8 CR, CRX, CRN, CRT 16 *Grundfos Cool-Top is only available in the following pump types. Pump CR 1s CR 1 CR 3 CR 5 CR 10... -
Page 7: Field Wiring
Motor Grundfos CR pumps are supplied with heavy-duty 2-pole (3600 RPM nominal), ODP or TEFC, NEMA C frame motors selected to our rigid specifications. Motors with other enclosure types and for other voltages and frequencies are available on a special-order basis. CRN-SF pumps are supplied with an IEC (metric) type motor with a reverse thrust bearing. -
Page 8: Starting The Pump The First Time
Starting the Pump Figure 5a Figure 5b the First Time Priming Vent Plug CR(I)(N) 1s, 1, 3, 5, 10, 15, 20 CR(X)(N)(T) 2, 4, 8, 16 Priming To prime the pump in a closed system or an open system where the water Suction Discharge source is above the pump, close the pump isolation valve(s) and open the... -
Page 9: Motor Inspection
Motor Inspection Inspect the motor at regular intervals, approximately every 500 hours of operation or every three months, whichever occurs first. Keep the motor clean and the ventilation openings clear. The following steps should be performed at each inspection: WARNING: DO NOT TOUCH ELECTRICAL CONNECTIONS BEFORE YOU FIRST ENSURE THAT POWER HAS BEEN DISCONNECTED. -
Page 10: Preventative Maintenance
Preventative Maintenance At regular intervals depending on the conditions and time of operation, the following checks should be made: Pump meets required performance and is operating smoothly and quietly. There are no leaks, particularly at the shaft seal. The motor is not overheating. Remove and clean all strainers or filters in the system. -
Page 11: Parts List
CR(N) 32, 45, 64, 90 Parts List For each CR pump model Grundfos offers an extensive Parts List and diagram of part used in that pump and is recommended to have on hand for future maintenance. In addition, the listings also provide information about prepackaged Service Kits for those pump components most likely to exhibit wear over time, as well as the complete Impeller Stack needed to replace the "guts"... -
Page 12: Current Measurement
WARNING: WHEN WORKING WITH ELECTRICAL CIRCUITS, USE CAUTION TO AVOID ELECTRICAL SHOCK. IT IS RECOMMENDED THAT RUBBER GLOVES AND BOOTS BE WORN, AND METAL TERMINAL BOXES AND MOTORS ARE GROUNDED BEFORE ANY WORK IS DONE. FOR YOUR PROTECTION, ALWAYS DISCONNECT THE PUMP FROM ITS POWER BEFORE HANDLING. Preliminary tests What it means Supply... -
Page 13: Diagnosing Specific Problems
Diagnosing specific problems Problem Possible cause Remedy The pump does not run No power at motor. Check for voltage at motor teminal box. If no voltage at motor, check feeder panel for tripped circuits and reset circuit. Fuses are blown or circuit Turn off power and remove fuses. - Page 14 Diagnosing specific problems Problem Possible cause Remedy The pump runs but at Incorrect drain plug installed. If the proper drain plug is replaced with a standard plug, reduced capacity or water will recirculate internally. Replace with proper plug. does not deliver water Improper coupling setting.
-
Page 15: Three Phase Motors
Three Phase Motors Below is a worksheet for calculating current unbalance on a three-phase hookup and selecting the proper wiring. Use the calculations in the left-hand column as a guide. EXPLANATION & EXAMPLES Here is an example of current readings Hookup 1 at maximum pump loads on each leg of T1 = 51 Amps... -
Page 16: Limited Warranty
Products which are sold but not manufactured by GRUNDFOS are subject to the warranty provided by the manufacturer of said products and not by GRUNDFOS' warranty.


Need help?
Do you have a question about the CR Series and is the answer not in the manual?
Questions and answers