Blackmagicdesign Cintel Installation And Operation Manual
With 35mm gate
Hide thumbs
Also See for Cintel:
- Installation and operation manual (1730 pages) ,
- Installation and operation manual (1074 pages) ,
- Installation and operation manual (117 pages)
Table of Contents
Advertisement
Quick Links
Advertisement
Table of Contents

Related Manuals for Blackmagicdesign Cintel


Summary of Contents for Blackmagicdesign Cintel
- Page 1 Installation and Operation Manual Cintel Scanner April 2018...
- Page 2 GPU’s in the host computer, this scanner itself does not need to be cluttered with bulky expensive electronics assemblies. This means Cintel is smaller, lighter and has more value engineered into the parts of the scanner that result in better quality film scans, such as precision mechanical film handling components, optics, high intensity diffuse light source and the built in camera.
-
Page 3: Table Of Contents
Playback Controls Trimming Clips Standby Mode Mapping Keyboard Shortcuts Capturing from Cintel Adding Transitions using DaVinci Resolve Adding Titles The Cintel Scanner Interface Color Correcting your Clips Calibration Using Scopes Film Type Secondary Color Correction Light Source Qualifying a Color Image Stabilization... -
Page 4: Unpacking And Mounting
If you are reading the printed version of this manual that was included with your Cintel scanner, you can also download the latest version in PDF form. This PDF provides the manual in many different languages and can be downloaded from the Blackmagic Design support center at www.blackmagicdesign.com/support... -
Page 5: Desk Mounting
When desk mounted, you can securely fasten your scanner to your work surface by screwing M6 safety bolts into your scanner’s feet. NOTE Your safety is important to us and we strongly advise reading the warning information on the following page before mounting your Cintel scanner. Unpacking and Mounting... -
Page 6: Wall Mounting
Wall Mounting Cintel’s elegant industrial design and narrow profile make it ideal for wall mounting. To do this, the first thing you’ll need to do is remove the feet and support strut from the base of your scanner. Place your scanner face up with its feet over the edge of a solid, stable surface capable of supporting your scanner’s weight. -
Page 7: Warning For Safely Installing Your Scanner
Warning for Safely Installing your Scanner The Cintel Scanner weighs up to 70kg, or 155 pounds, when loaded with film. This is significantly heavier than a large screen television. If you are unsure of the structural capability of the wall or desk to support the total weight of the scanner and film loaded then you must obtain the advice of a qualified engineer to correctly analyze the mounting to ensure safety. -
Page 8: Plugging In Power
HDMI port for focusing or preview purposes. If you have installed the latest Blackmagic Cintel Installer software, the next time you connect your Cintel scanner to your computer it will prompt you to update your scanner’s internal software. Simply follow the on screen prompts to complete the installation. -
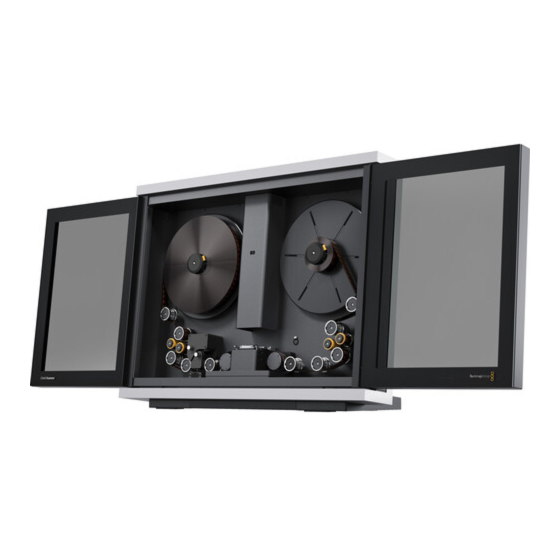
Page 9: Lacing Film
DaVinci Resolve’s film scanner panel Resolve controls all capture settings. Lacing Film Now that your scanner and DaVinci Resolve are communicating with each other, you can lace up your film. Accessing the Scanner Open your scanner’s sliding doors. On the internal front panel you’ll see a feeding spool on the left, and a taking spool on the right. - Page 10 Preparing the Take up Spool Slide the supplied 75mm spool core and core clamp onto your scanner’s taking spindle. To apply the core clamp, hold in the clamp’s button and push it onto the spindle until you feel resistance, then release the button and push the clamp on the rest of the way until you hear a ‘click.’...
- Page 11 NOTE The sprockets on the sprocket wheels are designed to fit 16mm and 35mm film. It’s important that your film is laced over the appropriate sprockets so it glides smoothly over the skid plate, and that the sprockets are engaged cleanly with the film perforations to ensure gentle film loading.
- Page 12 Simply turn the focus assist feature on by enabling the checkbox in DaVinci Resolve’s film scanner panel, then watch the HDMI output from your Cintel scanner, or the viewer in the film scanner panel, as you adjust the focus dial. Film grain is a terrific indicator.
- Page 13 Now that you have laced your film, set the tension, focused your image and closed the scanner doors, you can start capturing! Please refer to the Cintel section of the DaVinci Resolve reference manual for details on calibrating the light source, setting the stabiliser, and the capture palette settings for capturing images. The DaVinci reference manual also details how to sync optical audio and shows how you can manage your capture files when scanning.
-
Page 14: Using Your Scanner
Using Your Scanner Wind Types The ‘wind type’ refers to the loading and unloading position, as well as the turn direction of film on your scanner’s feeding and taking spools. As you can see in the diagram below, an ‘A’ wind refers to film loading/unloading from the top of the spool, while a B type loads or unloads from the bottom. -
Page 15: Switching To 16Mm
Switching to 16mm The optional Cintel Scanner 16mm Gate kit contains all the parts you’ll require and making the changes to your scanner’s setup are minimal. 16mm skid plate Inner spacer Outer spacer The 16mm kit contains a 16mm skid plate, two inner spacers and two outer spacers. - Page 16 When removing the skid plate you will need to Removing the 35mm skid plate. push the retention levers down and then turn them outward. To secure a skid plate lift the retention levers all the way up and turn them inward. Inserting the 16mm Inner Spacer Insert the rubber 16mm inner spacer at the base of the feeding and taking spools.
-
Page 17: Playback Controls
Lacing Complete the lacing procedure as you would for 35mm film, with the exception of lacing your 16mm film through the inner sprockets on the sprocket wheels. Before pressing ‘load’ or manually tensioning your 16mm film, make sure that the film is properly threaded over the sprocket wheels’... -
Page 18: Standby Mode
For example calibrating your scanner, adjusting the light source strength and color temperature, setting image stabilization, and more. You can even set how gentle your Cintel scanner handles film which may have become delicate with age. Capturing from Cintel using DaVinci Resolve... -
Page 19: The Cintel Scanner Interface
If you want more room for viewing the Cintel scanner controls, click the full height button that’s all the way to the right of the UI toolbar, and turn off the ‘metadata’ panel. -
Page 20: Film Type
It’s important to make sure the image in the viewer is not zoomed in when you do this. Command-Left Arrow on your keyboard moves the frame up, while Command-Right Arrow moves the frame down. Capturing from Cintel using DaVinci Resolve... -
Page 21: Light Source
Analyzes the current frame displayed in the viewer and does an automatic adjustment to set the black point for negative, or for print to set the white point. For positive film types, the ‘auto black’ button changes to ‘auto white’. Capturing from Cintel using DaVinci Resolve... -
Page 22: Image Stabilization
Horizontal Position slider: Your Cintel scanner attempts to automatically place the stabilization detection overlay at the best location, with reference to the perforation shown on the currently loaded frame, for the best stabilization result. -
Page 23: Film Protection
For best performance, turn full resolution off after checking stabilization. Film Protection These controls are intended to allow delicate film to be handled gently by the Cintel Scanner. Fast acceleration and shuttle speeds can be hard on archival footage, so it’s recommended to lower both of these sliders from their defaults whenever you’re scanning older film. -
Page 24: Editing Capture Info Metadata
Editing Capture Info Metadata When DaVinci Resolve is used in conjunction with Cintel Scanner, a set of capture metadata fields appears at the bottom of DaVinci Resolve’s film scanner panel. The ‘capture info’ panel has editable metadata fields that describe capture properties such as where to save files, the type of codec, frame rate, and the format of file names. - Page 25 Capture: When you have a Cintel Audio and KeyKode Reader fitted, this menu gives you options for ‘audio only’ so no images will be captured, or ‘image and sound’. Alternatively, you can capture ‘image only’ if audio is not important.
-
Page 26: Film Scanning Workflows
Cintel Scanner, open DaVinci Resolve and create the project you’ll be using to scan film, and then click the ‘Cintel scan’ button on the media page. Now click the ‘Film Scanner’ tab to select DaVinci Resolve’s film scanner panel. -
Page 27: Reset The Timecode
NOTE Your Cintel Scanner has built in ‘Options Interface’ ports for adding optional hardware in the future. This offers the ability to add optional features such as reading KeyKode from the camera negative. It also gives you the ability to scan optical audio in real time while you are scanning the picture. -
Page 28: Choose A Location To Save The Scanned Frames
If you want to save all your clips together in one master destination folder, simply deselect the checkbox. Check the Codec DaVinci Resolve selects the ‘Cintel Raw’ codec by default, or you can choose ‘Cintel Raw 3:1’. The Cintel Raw Format The Cintel Raw Format Bayer pattern of each film frame scanned with your Cintel scanner’s sensor is saved with embedded scanner metadata as a 12-bit linear Cintel... -
Page 29: Adjusting The Color Of The Scanner
Once that’s accomplished, adjust the RGB controls to rebalance all three color channels by varying amounts to alter the color temperature of the light source used to illuminate the film, to produce the most useful, or neutral, color balance in the scanned result. Capturing from Cintel using DaVinci Resolve... -
Page 30: Scanning One Or More Sections Of Film
‘extract audio’. Resolve analyzes the overlapping optical track area of each frame and automatically generates a matching audio track, synchronized with the scanned image sequence. Capturing from Cintel using DaVinci Resolve... -
Page 31: Audio Extraction Settings
However, the condition of the optical track can vary with the condition of the film being loaded and in some instances this can confuse the automation. If this happens, you can bypass the automatic features and make adjustments manually. Capturing from Cintel using DaVinci Resolve... - Page 32 For manual adjustments, simply open the ‘Audio Extraction’ settings window by clicking on ‘Show Cintel Audio Settings’ in the inspector options near the top right of the viewer. The Audio Extraction settings let you make manual adjustments if needed. Audio extraction settings let you make the following manual adjustments: Show audio scan area This checkbox turns the audio scan area guides on or off.
- Page 33 This setting is on by default and automatically adjusts the guide box height to align with the audio waveform at the top of each frame. The automatic feature works well for normal audio conditions, however, if during extraction Capturing from Cintel using DaVinci Resolve...
-
Page 34: Color Space And Sizing
Color Space and Sizing A pair of 1D LUTs, ‘Cintel Negative to Linear,’ and ‘Cintel Print to Linear,’ have been provided to help you convert scanned media to a color space in which you can do further work. You can apply these LUTs via a node in the ‘color’... - Page 35 ‘change input sizing preset’ command, found in the contextual menu of selected clips. For more information on sizing, see the DaVinci Resolve manual’s “Transforms and the Sizing Palette” section of Chapter 29, “Color Page Effects.” Creating a sizing preset in the Sizing palette of the Color page Capturing from Cintel using DaVinci Resolve...
-
Page 36: Optional Audio And Keykode Reader
Optional Audio and KeyKode Reader The optional Audio and KeyKode Reader expands your Cintel scanner’s capabilities by capturing optical and magnetic soundtracks at any speed, from slow to faster than real time. It can also scan KeyKode information about the frame’s position in the reel and film stock used. - Page 37 . Remove the four M4 screw plugs from your Cintel scanner using a 2mm Allen key. The correct screws are the top left screw, and bottom two screws located beneath the left options interface XLR connector.
- Page 38 Plug the reader into the left options interface XLR connector and fasten the reader to your Cintel scanner using the three captive M3 screws. Reattach the Audio and KeyKode Reader covers and tighten the cover screws. Reattach the upper adjustment knob and lightly tighten the retention screw to the flat side of the spindle.
-
Page 39: Reading Audio
NOTE When scanning optical audio pay particular attention to the position of the 16mm and 35mm scanning LEDs. 35mm is closer to the Cintel chassis, while 16mm is further away. When film is laced through the reader’s audio path, DaVinci Resolve will automatically record audio and add it to your clips. -
Page 40: Setting The Reader For Audio Scanning
Setting the Reader for Audio Scanning Once your film is laced, go to DaVinci Resolve’s film scanner panel and set the ‘use film’ and ‘audio type’ settings in the reader accessory pane. These settings let you set which function you want your reader to perform, for example setting the reader to scan KeyKode information, or to different audio types, for example optical or magnetic audio. - Page 41 Optical audio narrow track lets you reduce the audio scanning area so you can avoid unwanted interference when scanning film that suffers from shrinkage Magnetic Audio: If you want to scan the magnetic striped audio track on 16mm film, set the ‘use film’...
- Page 42 Enable the ‘flip image’ option to mirror the frame. Capture speed When the Audio and KeyKode Reader is installed and configured to capture audio, your Cintel scanner’s maximum scan speed will be capped to 125% of your film’s target frame rate.
- Page 43 Previewing Audio via HDMI and the Headphones Jack Film soundtracks are printed several frames ahead of the images they sync to, therefore, your Cintel scanner automatically delays the audio so it is synced to the picture via the HDMI output and also synced in the scanned clip.
-
Page 44: Reading Keykode
‚ Optical audio focus adjustment For most users, these changes will never be necessary. For information on these advanced adjustments, contact your Blackmagic Support Center at www.blackmagicdesign.com/support Commencing your scan Once you have set your audio type and adjusted the tracking, simply commence your scan as detailed in the section ‘Scanning One or More Sections of Film.’... -
Page 45: Setting The Reader For Keykode Scanning
Once film is laced through the KeyKode reader and tensioned, you will need to ensure your Cintel scanner is set to read KeyKode. To set the reader function for KeyKode, simply go to the DaVinci Resolve film scanner panel and set the ‘use film’... -
Page 46: Transcoding To Dpx Including Keykode Metadata
All the clips on your timeline will now be transcoded to DPX files with the KeyKode embedded. For more information about transcoding your Cintel Raw files to other formats, refer to the Media Management section of the DaVinci Resolve manual. - Page 47 KeyKode Reader is locked To update the internal software: First make sure power is connected to your Cintel scanner and the Audio and KeyKode Reader is connected to your computer via its USB type C connector. Run the installers contained in the latest Blackmagic Cintel Installer software. Refer to the ‘getting started’...
-
Page 48: Servicing
If you find your particle transfer rollers losing stickiness even after washing, or have become difficult to mount and remove through age, wear and tear, you can purchase new rollers from the Blackmagic Design website at www.blackmagicdesign.com Dusting Dusting your scanner should be performed daily. This is as easy as using an air duster to remove any particles from your scanner’s skid plate, sprocket wheels and any other film... - Page 49 Pay special attention to the skid plate infill when dusting You may occasionally wish to clean the lens over your scanner’s RGB light source. This can be done with a clean cloth and a small amount of isopropyl alcohol. Both air dusters and isopropyl alcohol are available at most electronics stores. Cleaning the Audio and KeyKode Reader Roller The Audio and KeyKode Reader contains a rubber roller for film laced through its upper track.
- Page 50 Spare Parts for your Cintel Scanner Spares of major Cintel scanner components are available through your local Blackmagic Design support office. Servicing your Cintel Scanner is generally quite easy and intuitive, but if required, documentation can be provided from your local sales office to assist.
-
Page 51: Working With Clips In Davinci Resolve
DaVinci Resolve. Because your Cintel Scanner captures a CRI raw image format with a wide dynamic range, DaVinci Resolve will help you adjust your shots to get any kind of look you are after. DaVinci Resolve is the same tool used on most major blockbuster movies, so it’s much more than a simple NLE software... -
Page 52: Editing Your Clips
You’ll now see the ‘media’ page with a ‘media storage’ browser at the top left. The ‘media storage’ browser displays all your linked media folders from where you’ll drag your clips and drop them into the media pool. If your clip folder doesn’t appear in the library, you’ll need to add it. This is easily done by right clicking inside the ‘media storage’... -
Page 53: Trimming Clips
Double click a clip in the media pool to open the clip in the source viewer. Use the mouse pointer to scrub the play head in the source viewer left and right until you find the start frame you want for the clip. Mark the in point with the ‘I’ shortcut. Do the same for the end frame using the ‘O’... -
Page 54: Mapping Keyboard Shortcuts
The zoom slider is located above the timeline, to the right of the tools that are centered in the toolbar. By dragging the slider left and right you can zoom in and out of your timeline to make fine adjustments. Trim your clips by dragging their start and end points left or right, and press the ‘snapping’... -
Page 55: Adding Transitions
Use the ‘set to’ drop down menu to choose one of the keyboard shortcuts you may already be familiar with from other editing software Adding Transitions A transition is a visual effect used to bridge one clip to another in a pleasing way, for example dissolves, wipes, dips to color, and more. -
Page 56: Adding Titles
To add a dissolve transition between two clips: Make sure there are two clips edited right next to one another on the timeline. Click the ‘effects library’ button in the UI toolbar at the top of the ‘edit’ page, and make sure the ‘toolbox’... -
Page 57: Color Correcting Your Clips
Drag a title type from the ‘titles’ palette and drop it on an empty track Color Correcting your Clips Once you have edited your sequence of clips, you can start color correcting. This is best begun after you have finished editing your sequence so you can maintain a consistent look, but part of the fun of DaVinci Resolve is being able to move between the edit and color page to make fine adjustments and discover new creative choices. -
Page 58: Using Scopes
Using Scopes Most colorists make creative color choices by focusing on the emotion and the look they want their program to have and then simply work using the monitor to achieve that look. You can look at everyday objects and how different types of light interact with them to generate ideas on what you can do with your images and a little practice. -
Page 59: Secondary Color Correction
Adjusting the ‘lift’ With your first clip selected on the color timeline, click on the ‘lift’ dial underneath the first color wheel. Slide it back and forth and watch how it affects your image. You’ll see the brightness of the dark regions of your picture increase and decrease. Set it to where you want the dark areas to look their best. -
Page 60: Qualifying A Color
However if you need to adjust specific parts of your image, say for example you wanted to improve the color in the grass in a scene, or you wanted to deepen the blue in a sky, then you can use secondary corrections. Secondary color corrections are where you select a part of the image and then adjust just that part. - Page 61 Use power windows to mask out areas you don’t want to be affected by the HSL qualifier secondary adjustments For example, you can track a window on a person in order to make color and contrast changes just to that person without affecting his or her surroundings. By making corrections like this you can influence the audience’s attention on areas you want them to look at.
-
Page 62: Tracking A Window
Tracking a Window The camera, object or area in your shot may be moving, so to make sure your window stays on your selected object or area, use DaVinci Resolve’s powerful tracking feature. The tracker analyzes the pan, tilt, zoom and rotation of the camera or object in your clip so you can match your windows to that movement. -
Page 63: Mixing Your Audio
OFX plugins are a quick and easy way to create an imaginative and interesting look Mixing Your Audio Mixing Audio in the Edit Page Once you have edited and color corrected your project, you can begin to mix your audio. DaVinci Resolve has a helpful set of features for editing, mixing and mastering audio for your project directly in the ‘edit’... -
Page 64: The Fairlight Page
For projects requiring more advanced audio tools, the Fairlight page provides you with a full audio post production environment. The Fairlight Page The ‘Fairlight’ page in DaVinci Resolve is where you adjust your project audio. In single monitor mode, this page gives you an optimized look at the audio tracks of your project, with an expanded mixer and custom monitoring controls that make it easy to evaluate and adjust levels in order to create a smooth and harmonious mix. -
Page 65: What Is A Bus
What is a Bus? A bus is essentially a destination channel to which you can route multiple audio tracks from the timeline, so that they are mixed together into a single signal that can be controlled via a single channel strip. Main Bus ‘Main busses’... -
Page 66: Using The Equalizer To Enhance Your Audio
Using the Equalizer to Enhance your Audio After adjusting the audio levels of your audio clips in your project, you may find that the audio needs further finessing. In some cases you may find that the dialogue, music and sound effects are competing for the same frequency on the audio spectrum, making your audio too busy and unclear. - Page 67 The middle sets of band controls let you make a wide variety of equalization adjustments, and can be switched between lo-shelf, bell, notch, and hi-shelf filtering options. Bell Bell filters boost or cut frequencies around a given center point of the bell curve, and as the name suggests the shape of the curve is like a bell.
-
Page 68: Mastering Your Edit
Once you have added EQ to your clip or track, you can adjust the EQ for each band. Note that controls may vary depending on which band filter type is selected. To adjust the EQ for a band filter: Select the band filter type from the drop down menu for the band you want to adjust. Adjust the ‘frequency’... -
Page 69: Reducing Grain Using Noise Reduction
Underneath the presets you will see the timeline filename and the target location for your exported video. Click the ‘browse’ button and choose the location where you want to save your exported file. Immediately above the timeline, you’ll see an options box with ‘entire timeline’ selected. This will export the entire timeline, however you can select a range of the timeline if you want to. - Page 70 In many instances, temporal NR is sufficient to clean up your image. Spatial noise reduction is useful for reducing noise that temporal NR does not, however it should be applied in small increments, as aggressive use can affect the resolution of your image. In this section you can find details about each setting and how to use it.
- Page 71 Chroma Threshold: Lets you determine how much or how little temporal NR to apply to the chroma component of the image. The range is 0-100, where 0 applies no noise reduction at all, and 100 is the maximum amount. Too high a setting may eliminate fine color detail from the image, although you may find you can raise the ‘chroma threshold’...
- Page 72 Radius: Options include ‘large’, ‘medium’, and ‘small’. A smaller radius offers greater real time performance, and can provide good quality when using low luma and chroma threshold values. However, you may see more aliasing in regions of detail when using low NR threshold values.
- Page 73 If you’re not satisfied with the tradeoff between the maximum possible threshold of noise reduction and the prevention of motion artifacts, you may want to adjust the motion threshold setting, lowering it to omit more of the motion from the noise reduction operation, or raising it to include more motion.
-
Page 74: Specifications
Specifications 1055mm 360mm 880mm 2010mm Weight: 132lbs/60kg unloaded. Dimensions wall mounted: (H) 785mm, (D) 265mm Scanner Features Film Stocks Native Resolution HDMI Formats - Print, Negative, 4096 x 3072 3840 x 2160 Ultra HD or Interpositive, Internegative. 1920 x 1080 HD, Effective Resolutions auto selected to match - Mono and Colour. -
Page 75: Power Requirements
Power Requirements Voltage Range Power 90 - 240V AC 200W Accessories - 16mm accessory pack - Audio and KeyKode Reader Audio and KeyKode Reader Equalisation Optical Audio 35mm Full Modulation Level Optical audio SMPTE, -18dBFS Bandwidth Magnetic audio IEC 40Hz-16kHz +-2dB Headphones Level SnR Signal to Noise Ratio ** Supported KeyKode... -
Page 76: Regulatory Notices And Safety Information
Regulatory Notices and Safety Information Disposal of waste of electrical and electronic equipment within the European union. The symbol on the product indicates that this equipment must not be disposed of with other waste materials. In order to dispose of your waste equipment, it must be handed over to a designated collection point for recycling. - Page 77 Continued form previous page WARNING The Cintel Scanner weighs up to 70kg / 155 pounds when loaded with film. This is significantly heavier than a large screen television. If you are unsure of the structural capability of the wall or desk to support the total weight of the scanner and film loaded then you must obtain the advise of a qualified engineer to correctly analyze the mounting to ensure safety.
-
Page 78: Help
Help The fastest way to obtain help is to go to the Blackmagic Design online support pages and check the latest support material available for your Cintel scanner. Blackmagic Design Online Support Pages The latest manual, software and support notes can be found at the Blackmagic Design support center at www.blackmagicdesign.com/support. - Page 79 Remove the rear panel of your Blackmagic Cintel Scanner. The USB port for system recovery is in the centre near the top. It is on the side of the circuit board facing the front of the Cintel Scanner and is visible when you look at the top of the Cintel scanner. NOTE If you don’t have immediate access to the rear panel and need to move...
- Page 80 Download the latest version of the Blackmagic Desktop Video Setup utility from the Blackmagic Design website and install it on your computer. When launched, the utility will detect your computer is plugged into your Cintel Scanner’s USB recovery port. Click ‘update now’.
-
Page 81: Warranty
OF THIS PRODUCT. USER OPERATES THIS PRODUCT AT OWN RISK. © Copyright 2018 Blackmagic Design. All rights reserved. ‘Blackmagic Design’, ‘Cintel’, ‘DeckLink’, ‘DaVinci Resolve’ are registered trademarks in the US and other countries. All other company and product names may be trademarks of the respective companies with which they are associated.
Need help?
Do you have a question about the Cintel and is the answer not in the manual?
Questions and answers