Table of Contents
Advertisement
Advertisement
Table of Contents

Related Manuals for Walkera Runner 250 PRO


Summary of Contents for Walkera Runner 250 PRO
- Page 1 QUICK START GUIDE V1.0 18th-OCT-2016 www.walkera.com...
-
Page 2: Table Of Contents
Contents 1.0 Get to know your aircraft 2.0 Get to know your Remote Controller 3.0 Specifications 4.0 Attention before Flying 5.0 Charge the Battery 6.0 Prepare the Remote Controller 7.0 Prepare the aircraft 8.0 Ready to Fly 8.1 Starting the aircraft 8.2 GPS indicator lights 8.3 Motor Unlock / Lock 9.0 Operation Instruction... -
Page 3: Get To Know Your Aircraft
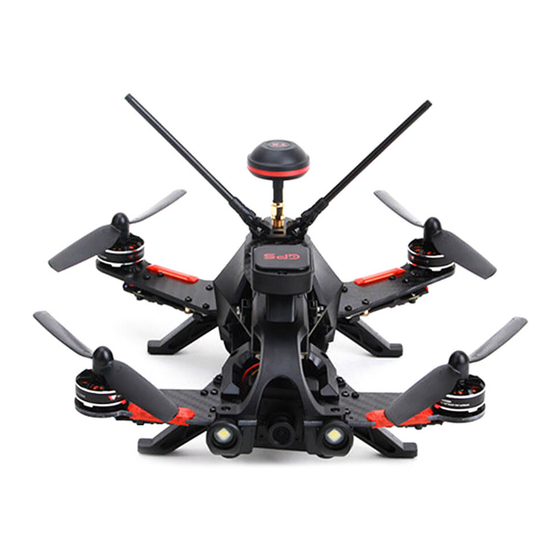
Quick Start Guide 1.0 Get to know your aircraft The RUNNER 250 body is created using CFP for outstanding crash survivability. Modern industrial and modular design, improves the product performance and permit easy maintainance and upgrades. Advanced 5.8ghz live video and OSD system, for a unforgettable visual FPV experience. Equip with dual GPS module, the RUNNER 250 advance can realize GPS hold mode, Circle Flight, Hyper IOC and one key return to home. -
Page 4: Get To Know Your Remote Controller
Quick Start Guide 2.0 Get to know your Remote Controller Equipped with the Manual Mode / GPS hold mode / one key return to home / Circle Flight / Hyper IOC, camera controlling switches, the RUNNER 250 is easier to control. (You can select suitable flight mode according to your flying skill.) 1. -
Page 5: Specifications
Quick Start Guide 3.0 Specifications Aircraft Main Rotor Dia.: 143mm Overall (L x W x H): 221 x 205 x 117mm Weight: 464g (Battery excluded) Remote Controller: DEVO 7 Receiver: DEVO-RX717 Main Controller: FCS-250 Transmitter: TX5834(FCC)/TX5835(CE) (OSD included) Brushless Motor: WK-WS-28-014A(CW/CCW) Brushless ESC: F210 ESC... -
Page 6: Attention Before Flying
Quick Start Guide 4.0 Attention before Flying 1) The RUNNER 250 is recomended for pilots, 14 years or older, with RC hobby experience. 2) Only fly the RUNNER 250 in dry weather, with low wind, please do not fly in rain or heavy foggy conditions. 3) Always choose large open fields for flying. -
Page 7: Prepare The Aircraft
Quick Start Guide 7.0 Prepare the aircraft Install 5.8G antenna Open-end wrench Firstly install 5.8G antenna onto the transmitter, and tighten with open-end wrench. Install propellers Fix the CW propeller( ) onto the CW motor Front according to the direction of blue arrow, and fix the CW propeller CCW propeller CCW propeller(... -
Page 8: Ready To Fly
Quick Start Guide 8.0 Ready to Fly Attention: Place the aircraft in a wide open space, with the rear facing you. (This position is known as “TAIL IN”) Put all the function switches to the 0 position, put all trims and dials to the Middle position, move the throttle to the lowest position, then turn on the Remote Controller. -
Page 9: Gps Indicator Lights
Quick Start Guide 8.2 GPS indicator lights When the right red LED light (GPS) begin to flash, you can work GPS function. 8.3 Motor Unlock / Lock Motor Unlock After the success of IMU preheating, Check that all trims are neutral, the throttle stick is ALL the way Down with the display indicating 0% throttle. -
Page 10: Operation Instruction
Quick Start Guide 9.0 Operation Instruction Please unlock the motor before start flying, then take off in manual mode(push up the throttle). GPS hold mode MIX switch Throttle stick to “1” position return neutral Ground Attention: 1) Make sure that the received GPS signal (RIGHT red LED light blinks). 2) In the GPS mode, there are Altitude hold, fixed point, brake function, the flight speed is slower (≤5m/s). - Page 11 Quick Start Guide RETURN TO HOME Throttle stick MIX switch return neutral to “2” position Aircraft with Home point horizontal distance > 30m Height over HP>25m a. If the flight altitude is higher than 25m, the aircraft will keep the current altitude and return above the Home Point then descend vertically.
-
Page 12: End Flying
3) Avoid flying over people, animals, do not fly over crowds, concerts or sports stadiums. Avoid flying close to powerlines and cellphone towers as these may crash you. Visit walkera.com for more suggestions and for WALKERA racing gates. 10.0 End Flying Manual landing or return to home function landing. -
Page 13: Additional Remarks
Quick Start Guide 11.0 Additional remarks 11.1 DEVO 7 Remote Controller Setting Boot Screen(Main interface) Battery remaining power Timer display MODE 1(THRO trim) MODE 1(ELEV trim) MODE 2(ELEV trim) MODE 2(THRO trim) Throttle/Model display Rudder trim display Aileron trim display SELEC MODEL Main interface... - Page 14 Quick Start Guide WING MODEL WING UP/DN MODEL WING NORM Press R or L to select NORM, Press ENT to confirm and then press EXT to return to MODEL. OUTPUT MODEL MODEL GEAR GEAR UP/DN MODEL OUTPU MODEL MODEL MODEL MODEL AUX2 AUX2...
-
Page 15: Tx5834(Fcc)/Tx5835(Ce) Video Transmitting Channel Selection
Quick Start Guide 11.2 TX5834(FCC)/TX5835(CE) Video transmitting channel selection Port introducton 1. Position of 5.8G antenna 2. Transmitter code switch 3. OSD code switch Video transmitting channel selection There are 8 channels avilable, chose the best channel based on the image quality on your screen. Select the channel by adjusting the dip-switches on the video-transmitter according to the diagram. -
Page 16: Introduction For Fcs-250 Main Flight Controller
Upgrading www.walkera.com USB Cable Please upgrade online via Walkera official website 11.5 Introduction for DEVO-RX717 receiver Fixed ID Code - clearing method If you want to clear the fixed-ID, after having set a fixed-ID from the remote controller, Press the CLEAN button and power the RUNNER 250, when successful, the receivers RED LED will blink slowly to indicate the fixed-ID have been cleaned. -
Page 17: Compass Calibration
Quick Start Guide 11.7 Compass Calibration Attention: If there is circles or drift in flying, please calibrate the compass. (the motor must be locked and LEFT red LED light go out ) Please calibration outdoors and far away from strong electromagnetic interference. The compass calibration steps are as follows: Do this by moving both sticks DOWN and to the middle position at the same time about 5 seconds, the aircraft left red LED light... -
Page 18: Instructions For Ga005 Balance Charger
Quick Start Guide 12.0 Instructions for GA005 balance charger Parameters of GA005 balance charger Input voltage Input current Output current Dimension Weight DC15-18V 1000mA ≤800mA 62.5 x 47 x 20.8mm Features of GA005 balance charger 1) GA005 utilizes microcomputer chips to monitor and control over the whole charging process in a balanced way with LED indicator to display the charging status at real time. - Page 19 Tel: 400-9318-878 User manual is subject to change without prior notice. Please go to Walkera official website to get the latest version.
Need help?
Do you have a question about the Runner 250 PRO and is the answer not in the manual?
Questions and answers