Table of Contents
Advertisement
Quick Links
Advertisement
Table of Contents

Related Manuals for Walkera Voyager 5


Summary of Contents for Walkera Voyager 5
- Page 1 QUICK START GUIDE V1.1 Oct. 22th, 2018 www.walkera.com...
-
Page 2: Table Of Contents
Contents 1.0 Get to know your aircraft 2.0 Get to know your Remote Controller 3.0 Specifications 4.0 Attention Before Flight 5.0 Check Battery Levels 6.0 Charge the Batteries 7.0 Downloading and Installing APP 8.0 APP Interface Instructions 9.0 Prepare for Remote Controller 10.0 Prepare for Aircraft 9-10 11.0 Ready for Flight... -
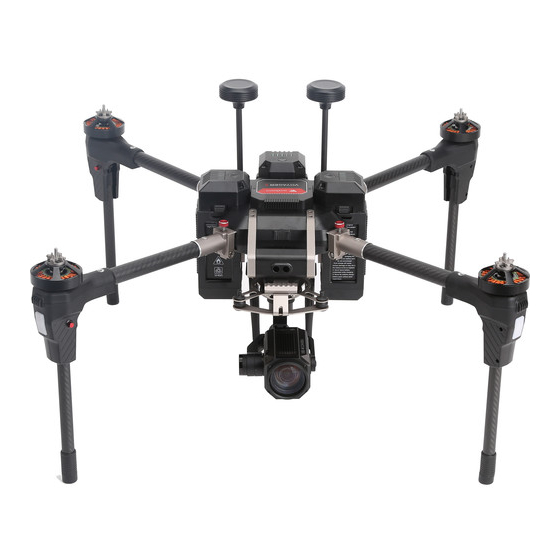
Page 3: Get To Know Your Aircraft
1 battery still can ensure the flight safety. Voyager 5 integrated a safety assurance system called FlightSafety, which is composed of a dual IMU, dual compass, and dual GPS system, in order to make it much more reliable and safer. -
Page 4: Get To Know Your Remote Controller
Quick Start Guide 2.0 Get to know your Remote Controller DEVO-F18 with the built-in Bluetooth Module, ensure the Max transmission distance can reach 1.5km, can see the clear picture by the APP in mobile device. 13. Status LED 1. Mobile Device Holder 14. -
Page 5: Specifications
No payload weight: 2.4kg / Maximum takeoff weight: 5.5kg Remote Controller DEVO F18 Brushless Motor WK-WS-58-001 Brushless ESC Voyager 5 Max Ascent Speed 5m/s Max Descent Speed 3m/s Max Horizontal Flight Speed positioning mode 5m/s, motion mode 8m/s, posture mode 28m/s. -
Page 6: Attention Before Flight
6.0 Charge the Batteries 1) Connect the charger to the AC power (100 ~ 240v 50/60hz). 2) Only use the walkera charger for your Intelligent Flight Battery and remote controller. Please turn off the intelligent flight battery and remote controller before charging. -
Page 7: Downloading And Installing App
APP software supports Android 5.1 and above systems iOS 9.0 and above, Android system please download at Walkera official website (www.walkera.com) or go to Google play to search for Walker Drone or scan the QR code to download and install;... -
Page 8: Prepare For Remote Controller
Quick Start Guide 13. Setting: Click the icon to open the Setting menu, Normal setting, aircraft, remote controller, gimbal and battery can be charged. 14. Display/hidden picto: Display/hidden 3 batteries capacity. 15. Camera Settings: Touch icons it has preview settings, recording settings and so on. Under identical Video Size, the larger the stream Rate, the better the picture quality, anyway, the video transmission distance is shortened accordingly. -
Page 9: Prepare For Aircraft
Quick Start Guide 10.0 Prepare for Aircraft Unfolded The Arms and Landing Gears Remove the camera fixture. Press the machine arm folding lock, Press the landing gear lock, launches the machine arm upwards, launches the landing gear downwards, and then loosen the lock buckle. and then loosen the lock buckle. -
Page 10: Ready For Flight
Quick Start Guide Install 4G Communication SIM Card(should buy it by your own) Prepare two 4G communication cards Put the 4G communication card Put the 4G communication (should by it by your own) into 4G card slot of the aircraft. card into the mobile device. -
Page 11: Connect The App
6. Remote controller serial number 5. Select remote controller(RC) , 4. Click “Select Model”, select will pop up automatically, click “Connect”. “Voyager 5-4G”, and then click “serial number and connect”. click “Go to Connect”. 7. Select the aircraft serial 8. Click "Add", 9. -
Page 12: Gps Indicator Lights
Quick Start Guide 11.3 GPS Indicator Lights When blue and red LED lights flash at the same time, you can work GPS function. Blue LED Light Blue LED Light Red LED Light Red LED Light 11.4 Motor Unlock/Lock Motor Unlock After successful code-matching, move the left &... -
Page 13: Flight Control
Quick Start Guide 12.0 Flight Control 1) Make sure that the GPS signal is received (the blue and red LED lights blink at the same time). 2) Only when “Connected” displays on the upper bar of the main interface of he APP, you can perform APP operation. - Page 14 Quick Start Guide Motion mode (Remote Controller Operation) Attention: Beginner Beginner 1) In the Motion mode, there are Altitude hold, fixed point, brake function, Common Common the flight s eed is faster (≤8m/s). AUX2 AUX2 2) If the GPS signal is poor or no signal, can only be Altitude hold, AUX3 AUX3 but not fixed point.
- Page 15 Quick Start Guide RETURN TO HOME (Remote Controller or APP Operation) Long press this key(3-5 seconds) Click this key in the APP on the remote controller and the interface and the aircraft aircraft will return automatically will return automatically Horizontal distance between aircraft & Home point>30m a.
-
Page 16: Remote Controller Operation
Quick Start Guide Waypoint Flight (APP Operation) Waypoints Flight (APP Operation) Click icon on APP map interface, Click icon on APP map interface, Click icon to enter the waypoint flight interface. Click icon to enter the waypoints flight interface. 1. Click this icon to add waypoint 1. - Page 17 Quick Start Guide Control the gimbal (remote controller or APP operation) Three-axis stabilization gimbal makes the camera steady so that it can shoot stable photos even fly with hight altitude. And you can control pitch and horizontal angle of the gimbal by Gimbal stick on Remote Controller or APP Software.
-
Page 18: End Flight
Quick Start Guide 13.0 End flight 1. Manual Landing, AUTO Landing or Return to Home function landing. 2. First, turn off the 3 batteries one by one, then turn off the remote controller. 3. Finally, remove the battery from the aircraft. 14.0 Additional remarks 14.1 Camera Gimbal Removal and Installation Screw... -
Page 19: Downward Vision System
Quick Start Guide 14.3 Downward Vision System Downward vision system use the camera to get the aircraft Position information, at the same time, can use the Infrade senser to fix the aircraft attitude, to ensure the aircraft precise positioning. It is suitable for environments with altitude of less than 3 meters without GPS signal or with weak GPS signal. -
Page 20: Main Board Introduction
Used for upgrading 7. USB Port: 8. Connection Port: Used to connect power board flexible flat cable Upgrading USB Prot Please upgrade online via Walkera official website 14.6 Brushless ESC and Brushless Motor connection diagram Brushless Brushless Brushless Brushless motor... -
Page 21: Stick Mode Switch & Stick/Thumbwheel Calibration
Quick Start Guide 14.7 Stick Mode Switch & Stick/Thumbwheel Calibration Factory setting of DEVO F18 stick mode & stick calibration has been determined; please refer to the following operation method for switching and calibration. Be sure to switch off the aircraft power or lock motor before operation. Stick Mode Switch Stop 1. -
Page 22: Intelligent Flight Battery Safety Guidelines
2) Never use non-walkera batteries. Go to www. walkera.com to purchase new batteries. Walkera takes no responsibility for any damage caused by non-walkera batteries. - Page 23 Manufacturer: Guangzhou Walkera Technology Co.,Ltd. Add: No.48 Wantai Rd, Taishi Industrial Park, Dongchong Town, Nansha Dist, Guangzhou, China.511453 Hotline:+86 20-84915115 This manual is subject to update without prior written notice. Please refer to Walkera official website for latest version.
Need help?
Do you have a question about the Voyager 5 and is the answer not in the manual?
Questions and answers