Table of Contents
Advertisement
Quick Links
Advertisement
Table of Contents

Related Manuals for Z-Com ZCN-1523H-2-8


Summary of Contents for Z-Com ZCN-1523H-2-8
-
Page 1: Quick Installation Guide
IEEE 802.11N WIRELESS OUTDOOR CPE Quick Installation Guide V2.0 July 2010... - Page 2 Copyright Copyright © 2010 all rights reserved. No part of this publication may be reproduced, adapted, stored in a retrieval system, translated into any language, or transmitted in any form or by any means without the written permission of the supplier. About the Quick Installation Guide This Quick Installation Guide is intended to guide professional installer to install the IEEE 802.11N WIRELESS OUTDOOR CPE.
-
Page 3: Chapter 1 Introduction
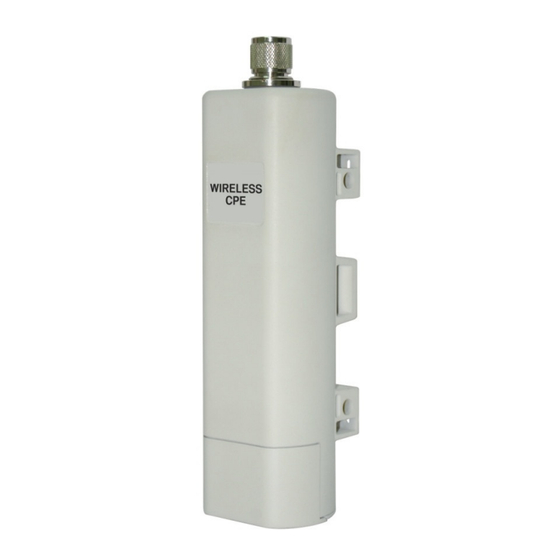
Chapter 1 Introduction Introduction The IEEE 802.11N WIRELESS OUTDOOR CPE is a multi-mode last-mile broadband solution for customers like wireless ISP (WISPs) and system integrators. By the nature of complying with the IEEE802.11n standard and featuring high power output, IEEE 802.11N WIRELESS OUTDOOR CPE supports higher bandwidth with longer range for outdoor applications. -
Page 4: Chapter 2 Preparation Before Installation
Chapter 2 Preparation Before Installation This chapter describes safety precautions and product information you have to know. Please check this chapter before installing the IEEE 802.11N WIRELESS OUTDOOR CPE. Professional Installation Required Please seek assistance from a professional installer who is well trained in the RF installation and knowledgeable in the local regulations. -
Page 5: Installation Precautions
Installation Precautions To keep the IEEE 802.11N WIRELESS OUTDOOR CPE well while you are installing it, please read and follow these installation precautions. 1. Users MUST use a proper and well-installed surge arrestor with the IEEE 802.11N WIRELESS OUTDOOR CPE; otherwise, a random lightening could easily cause fatal damage to IEEE 802.11N WIRELESS OUTDOOR CPE. - Page 6 Note: Product CD contains Quick Installation Guide and User Manual! - Pole Mounting Ring - Power cord & PoE Injector Warning: Users MUST use the “Power cord & PoE Injector” shipped in the box with the IEEE 802.11N WIRELESS OUTDOOR CPE. Use of other options will cause damage to the IEEE 802.11N WIRELESS OUTDOOR CPE.
-
Page 7: Chapter 3 System Installation
Chapter 3 System Installation The bottom of the IEEE 802.11N WIRELESS OUTDOOR CPE is the movable cover. Grab the cover and pull it back harder to take it out as the figure shown below. Plug a standard Ethernet cable into the RJ45 port. Chapter 3 System Installation... - Page 8 Slide the cover back to seal the bottom of the IEEE 802.11N WIRELESS OUTDOOR CPE. Take out the power cord and PoE injector, and plug the power cord into the DC port of the PoE injector as the bottom right picture shows. Put what in the Step.3 and Step.4 together by plugging the other side of the Ethernet cable in the Step.3 into the PoE port of the PoE injector in the Step.4.
- Page 9 Turn the IEEE 802.11N WIRELESS OUTDOOR CPE over. Put the pole mounting ring through the middle hole of the IEEE 802.11N WIRELESS OUTDOOR CPE. Note: Unlock the pole mounting ring by a screw driver before putting it through the IEEE 802.11N WIRELESS OUTDOOR CPE as the bottom right picture shows.
- Page 10 pole mounting ring tightly. 8. Successful installation. Chapter 3 System Installation...
-
Page 11: Using The External Antenna
Using the external antenna If you prefer to use the external antenna with N-type connector for your application instead of the built-in directional antenna, please follow the steps below. Grab the black rubber on the top of the IEEE 802.11N WIRELESS OUTDOOR CPE, and slightly pull it up as the figure shown below. - Page 12 Warning: Users MUST power off the IEEE 802.11N WIRELESS OUTDOOR CPE first before connecting the external antenna to it. Do not switch from built-in antenna to the external antenna from WEB management without physically attaching the external antenna onto the IEEE 802.11N WIRELESS OUTDOOR CPE;...
-
Page 13: Chapter 4 Configuration
Chapter 4 Configuration Connect the IEEE 802.11N WIRELESS OUTDOOR CPE with your PC by an Ethernet cable plugging in LAN port of PoE injector in one side and in LAN port of PC in the other side. Power on the IEEE 802.11N WIRELESS OUTDOOR CPE by PoE from PoE injector. Assign a static IP address to your PC which should be in the same network segment with the IEEE 802.11N WIRELESS OUTDOOR CPE. - Page 14 Now, you will see the log-in page of the IEEE 802.11N WIRELESS OUTDOOR CPE. The default “Name” and “Password” are “admin” and “password” respectively. Enter them and then click Login. * Since the IEEE 802.11N WIRELESS OUTDOOR CPE covers “AP mode”, “Wireless Client mode”, “Bridge mode”...
- Page 15 To be reminded that you are able to choose “External (N-Type)” only when you have well done installing the external antenna; otherwise, it might hurt IEEE 802.11N WIRELESS OUTDOOR CPE itself. Choose Security Settings in the left column, and here comes the “Security Settings” page.
- Page 16 another PC aside. Now, you can see “Join_me” in the list. CPE Mode Choose Wireless > Basic Settings. Then you will see the “Wireless Basic Settings” page. Choose “Wireless Client” from Wireless Mode, and click Apply to save it. Feel free to change the other parameters to optimize your application before clicking Apply.
- Page 17 Click Site Survey, and a “Wireless Site Survey” window will pop up. The window lists all the available access points / routers in the wireless network. Select the one you prefer to connect to, and click Selected to build the connection. 3.
- Page 18 WDS Mode 1. Choose Wireless > Basic Settings. Then you will see the “Wireless Basic Settings” page. Choose “Bridge” from Wireless Mode, and click Apply to save it. Feel free to change the other parameters to optimize your application before clicking Apply. Note: For longer transmission of the Bridge, you may also use an external antenna;...
- Page 19 2. After enabling WDS mode, users must input the MAC address of another AP you wirelessly want to connect to into the appropriate field in “WDS Settings” page. Hit “Apply” to save the settings. 3. If the AP you connect to needs authentication or password, click Security Settings in the left column, fill out the corresponding items, and click Apply to build the connection.
- Page 20 AP Repeater Mode 1. Choose Wireless > Basic Settings. Then you will see the “Wireless Basic Settings” page. Choose “AP Repeater” from Wireless Mode, and click Apply to save it. Feel free to change the other parameters to optimize your application before clicking Apply. Note: For longer transmission of the IEEE 802.11N WIRELESS OUTDOOR CPE, you may also use an external antenna;...
- Page 21 2. After enabling AP Repeater mode, users must input the MAC address of another AP you wirelessly want to connect into the appropriate field in “WDS Settings” page. Hit “Apply” to save the settings. 3. If the wireless device you connect to needs authentication or password, click Security Settings in the left column, fill out the corresponding items, and click Apply to build the connection.
- Page 22 There are two network modes available in IEEE 802.11N WIRELESS OUTDOOR CPE: Bridge Mode and Router Mode. Users are recommended to pay attention to the following warnings when they configure the network mode. Warning: In AP mode, IEEE 802.11N WIRELESS OUTDOOR CPE must establish connection with another wireless device before it is set to Router mode.
-
Page 23: Chapter 5 Troubleshooting
Chapter 5 Troubleshooting Why can’t I go to the log-in page, while I key in 192.168.1.1 in the address bar of the web browser? Make sure that the IEEE 802.11N WIRELESS OUTDOOR CPE is correctly connected with you PC, and powered on already. Then make sure that the IP address of your PC is set in the same network segment with the IEEE 802.11N WIRELESS OUTDOOR CPE, which means that the IP address of your PC should be between 192.168.1.2 and 192.168.1.254.
Need help?
Do you have a question about the ZCN-1523H-2-8 and is the answer not in the manual?
Questions and answers