
Related Manuals for Victa VRX Series


Summary of Contents for Victa VRX Series
- Page 1 OPERATOR MANUAL VRX SERIES RIDE LAWNMOWER RANGE SIDE DISCHARGE MODELS REAR CATCH MODELS IMPORTANT READ THIS BOOK CAREFULLY BEFORE OPERATING THIS MACHINE...
- Page 2 To contact your closest Victa Authorised Service Centre, you will find the latest Service Centre listing on the Victa website, www.victa.com.au or by contact Victa Customer Service on 1800 356 632.
-
Page 3: Table Of Contents
TABLE OF CONTENTS 1. SAFETY ........................Regulations for using the machine safely 2. IDENTIFICATION OF THE MACHINE AND COMPONENTS ........How to identify the machine and its main components 3. UNPACKING AND ASSEMBLY ................. How to remove the packing and assemble loose parts 4. -
Page 4: Safety
1. SAFETY 1.1 HOW TO READ THE MANUAL Some paragraphs in the manual containing important information regarding safety and operation are emphasized in the following ways: NOTE IMPORTANT These give details or further information on what has already been said, in the aim to prevent damage to the machine. WARNING! Non-observance will result in the risk of injury to oneself or others. - Page 5 4) Keep in mind that the operator or user is responsible for accidents or hazards oc curring to other people or their pro perty. 5) Do not carry passengers. 6) All drivers should seek and obtain professional and practical instruction. Such instruction should emphasise: –...
- Page 6 1. SAFETY (cont.) 6) Use care when pulling loads or using heavy equipment: – use only approved drawbar hitch points; – limit loads to those you can safely control; – do not turn sharply. Use care when reversing; 7) Disengage the blades before crossing surfaces other than grass. 8) Never use the machine with damaged guards, or without the safety protective devices in place.
- Page 7 1.3 SAFETY LABELS Your machine must be used with care. This is why labels with illustrations have been placed on the machine, to remind you of the main precautions to take during use. These labels are to be considered an integral part of the machine. Should a label come off or become illegible, contact your dealer to replace it.
-
Page 8: Identification Of The Machine And Components
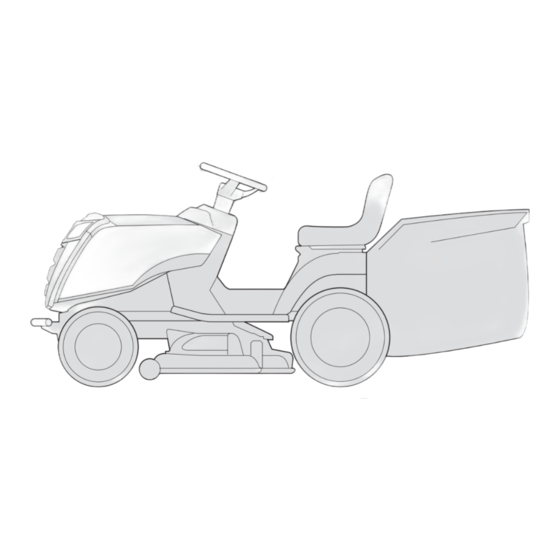
2. IDENTIFICATION OF THE MACHINE & COMPONENTS 2.1 IDENTIFICATION OF THE MACHINE The label located near the battery housing has the essential data of each machine. ** Rear catch bag illustrated (only available on selected models.) 1. Brand Marking 2. Model Number 3. -
Page 9: Unpacking And Assembly
3. UNPACKING AND ASSEMBLY For storage and transport purposes, some components of the machine are not installed in the factory and have to be assembled after unpacking. Follow the instructions below. IMPORTANT The machine is supplied without engine oil or fuel. Before starting the engine, fill with oil and fuel following the instructions given in the engine manual. - Page 10 3. UNPACKING AND ASSEMBLY (cont.) Fit the steering wheel (5) onto the hub (1) with the spokes directed towards the seat. Fit the spacer (6) and fasten the steering wheel in place using the screws supplied (7), in the indicated order.
- Page 11 3.5 FITTING THE FRONT BUMPER Fit the Front Bumper (1) onto the chassis mounting holes (5) and fasten in place using screws (2) four places. Note that access can be improved by temporarily removing the Hood Bonned from the Hinge (3), or by turning the steering wheel to adjust the position of the wheel (4).
- Page 12 3. UNPACKING AND ASSEMBLY (cont.) 3.6.2 ASSEMBLY AND COMPLETING THE REAR PLATE (Rear Catch Models Only) Assemble the two lower brackets (1) and (2), following the assembly direction as shown in the illustration, and fasten them with the screws (3) and nuts (4), tightening them completely.
- Page 13 Finish fastening the lower part (5) of the rear plate, completely tightening the two central screws (8) that you previously removed and the four upper screws (9); then tighten the two lower nuts (7) com- pletely. Insert the lever (11) of the “grass-catcher full”...
- Page 14 3. UNPACKING AND ASSEMBLY (cont.) 3.7 REPOSITIONING THE ANTI-CHIPPING WHEELS For transport reasons, on some select models the anti-chipping wheels (1) are fastened on the top hole. In order for them to work properly, the anti-chipping wheels (1) must be repositioned in the hole which is most suited for the type of ground ( 5.4.5).
- Page 15 For a sound operation, mow the lawn frequently and regularly to reduce the height of the grass. MULCHING Always avoid removing a large quantity of grass, to avoid blocking the cutting deck or overloading the engine and the cutting parts. Regulate the forward speed depending on the lawn conditions and the quantity of...
-
Page 16: Controls And Instruments
4. CONTROLS AND INSTRUMENTS 4.1 STEERING WHEEL Turns the front wheels. 4.21-4.31 4.2 THROTTLE This regulates the engine's r.p.m. 4.31 The positions are indicated on a 4.2a plate showing the following sym- bols: «CHOKE» cold starting «SLOW» for minimum engine speed 4.22 4.32... - Page 17 4.4 PARKING BRAKE This brake stops the machine from moving when it has been parked. There are two positions: «A» = Brake off «B» = Brake on – The brake is applied by pressing the pedal right down (4.21 or 4.31) and moving the lever to position «B».
- Page 18 4. CONTROLS (cont) 4.21 Mechanical transmission 4.21 CLUTCH / BRAKE PEDAL This pedal has two functions: during the first part of its travel it acts as a clutch, engaging & disengaging drive to the wheels, and in the second part it acts as a brake on the rear wheels.
-
Page 19: How To Use The Machine
4.33 HYDROSTATIC TRANSMISSION DISENGAGEMENT LEVER This lever has two positions: «A» = Transmission engaged: for all uses, when moving & during cutting; «B» = Transmission disengaged: this 4.33 makes it much easier to move the machine by hand, with the engine turned off. -
Page 20: Why The Safety Devices Cut In
Do not use the machine when in a precarious state of health or under the effect of medicine or any other substances that can reduce your reflex actions and your ability to concentrate. It is the user’s responsibility to assess the potential risk of the area where work is to be carried out, and to take all the necessary precautions to ensure his own safety and that of others, particularly on slopes or rough, slippery &... - Page 21 5.3.2 Tyre pressure Having the right tyre pressure is the main condition for ensuring that the cutting deck is horizontal and mows evenly. Unscrew the valve caps and connect a compressed air line with a gauge to the valves and adjust the pressure to the indicated values. 21.7 psi / 1,5 bar (13 inch Ø) 17.4 psi / 1,2 bar...
- Page 22 5.3.4 Fitting the exit guards (Rear catch models only) WARNING! Never use the machine without having fitted the grass catcher! 5.3.5 Checking the protection at the exit (stone-guard) (Side Discharge Models only) WARNING! Never use the machine without the exit guards or when the guards are damaged! Always check that the inner spring of the stone-guard (1) works properly, whilst...
- Page 23 5.3.7 Emptying the grass-catcher (Rear Catch Models Only) IMPORTANT This operation can only be done with the blades disengaged, otherwise the engine stops. Do not let the grass-catcher become too full as this may block the collector channel. When the grass-catcher is full you will hear a sound warning. At this point: –...
-
Page 24: Using The Machine
5. HOW TO USE THE MACHINE (cont) 5.4 USING THE MACHINE 5.4.1 Starting DANGER! The engine must be started in an open or well-ventilated area! ALWAYS REMEMBER THAT EXHAUST GASES ARE TOXIC! To start the engine: – open the fuel tap (1); –... - Page 25 Gradually reach the desired speed using the throttle and gear lever. To change gear, press the clutch halfway down ( 4.21). Hydrostatic transmission Disengage the parking brake and release the brake pedal ( 4.31). Press the drive pedal ( 4.32) in direction «F» and reach the required speed by progressively increasing pressure on the pedal and moving the accelerator.
- Page 26 5. HOW TO USE THE MACHINE (cont) The different heights of the wheels allows you to maintain a safe distance between the cutting deck edge and the ground. To change the position, unscrew & remove the screw (2) and reposition the wheel (1) with the spacer (3) in the hole at the desired height;...
- Page 27 5.4.8 Cleaning the machine After use, clean the outside of the machine. Clean the plastic parts of the body with a damp sponge using water and detergent, taking care not to wet the engine, the electrical parts or the electronic circuit board located under the dashboard.
-
Page 28: Using On Slopes
5. HOW TO USE THE MACHINE (cont) 5.4.9 Storage and inactivity for long periods If you intend not to use the machine for a long period (more than 1 month), disconnect the battery cables and follow the instructions in the engine instruction manual. -
Page 29: Transporting The Machine
DANGER! Never use reverse to reduce speed going downhill: this could cause you to lose control of the vehicle, especially on slippery ground. Mechanical transmission DANGER! Never ride the machine on slopes in neutral or with the clutch out! Always shift into a low gear before leaving the machine at a standstill &... -
Page 30: Maintenance
9. If the engine speed is lowered while you are cutting grass or if the cutting deck tends to get blocked, you should reduce the forward speed since this may be too high for the condition of the grass. If the problem persists, the probable causes are either badly sharpened blades or deformed wings. -
Page 31: Routine Maintenance
6.2 ROUTINE MAINTENANCE The table is to help you maintain your machine’s safety and performance. It summarises the main interventions to be made and the frequency applicable to each of them. The boxes at the side are for you to mark the date or number of working hours at which the intervention was made. - Page 32 6. MAINTENANCE (cont.) 6.2.2 Rear axle This is a sealed single unit that does not require maintenance. It is permanently lubricated and its lubricant does not need changing or topping up. 6.2.3 Battery The battery must be carefully maintained to ensure long life. The machine battery must always be charged: –...
- Page 33 This battery charger supplied with some models must only be used for keeping charged 12 Volt lead/acid batteies, either sealed (acid level maintenance free) or traditional, with a maximum capacity of 30 Ah. In cases, it can also be used for emergency charging.
- Page 34 6. MAINTENANCE (cont.) If the battery is not removed from the machine, make sure that the key on the control panel is in the “OFF” position. Connect the battery charger to the mains power supply and then attach the connector (2): -to the corresponding connector of the machine’s wiring (if fitted) -or otherwise to the wire (3) with the serrated-edge grips, attaching theses to the terminals of the battery in the following sequence:...
-
Page 35: Interventions On The Machine
The battery charger has a thermal protection device against overcharging, also pro- tecting from short circuits and reversal of terminals. in addition, if unconnected to the battery, the connector or the grips will not be live. If the thermal protection has cut in the power supply is stoped restarting automatically after about 30 seconds. - Page 36 6. MAINTENANCE (cont.) NOTE If you have to replace one or both rear wheels or tyres, make sure that any differences in their external diameter does not exceed 8-10 mm. Change in wheel/tyre size may cause an uneven cut & may be necessary to adjust the alignment of the cutting deck.
-
Page 37: Environmental Protection
6.3.5 Replacing a fuse The machine is fitted with fuses (1) with different capacities and functions. Specifically: – 10 A fuse = protects the main and power circuits of the electronic board. When it blows, the machine stops. – 25 A fuse = protects the battery charger circuit. When it blows, the battery gradually lose charge and the machine will have problems starting. -
Page 40: Accessories On Request
9. ACCESSORIES (SOME MACHINES MAY INCLUDE ACCSESSORIES) 1. “MULCHING” KIT Finely chops the grass cuttings and leaves it on the lawn, as an alternative to lateral ejection. 2. BATTERY-CHARGER KIT This keeps the battery in good working order when the machine is in storage, guaranteeing an optimum level of charge and longer battery life. -
Page 41: Specifications
10. SPECIFICATIONS Maximum noise and vibration levels Noise Level (Measured to NSW Regulation) 75dBa Vibration level (according to the standard EN 1032) .... m/s 0.5 (33” & 38” Models) / 0.72 (42” Models) – Measurement uncertainty (2006/42/EC) ... m/s 1151 1725 (Side Discharge) 1814 (Rear Catch) 1197 (38’’... - Page 42 11. NOTES...
- Page 44 ©2014 Briggs and Stratton Australia Pty Ltd Victa is a trademark of Briggs and Stratton Australia Pty Ltd. All rights reserved. No part of this booklet may be reproduced by any means without prior written permission. All information herein is subject to change without notice.
Need help?
Do you have a question about the VRX Series and is the answer not in the manual?
Questions and answers
Forward and reverse stopped working. What could be the issue?
If the forward and reverse functions stopped working on a Victa VRX Series, possible issues could include:
1. The Reverse button was not pressed and held while reversing, which can cause the engine to cut out.
2. A problem with the hydrostatic transmission, such as a worn or damaged transmission belt.
3. Improper drive adjustment.
4. Failure in the blade brake or engagement system.
5. General mechanical or electrical failure affecting the drive system.
Routine maintenance checks, especially of the transmission belt, drive adjustment, and blade engagement components, are recommended to identify and resolve such issues.
This answer is automatically generated
Replace the starter coils starter sill won't turn it over what it next
If the starter coils are replaced on a Victa VRX Series and it still won't turn over, the next step is to contact your Dealer or a specialized Service Centre, as recommended when any malfunction is detected.
This answer is automatically generated
I bought the mower second hand, how do you make the mower shred the grass, also I can't seem to make the grass go into the catcher either, I haven't mucked around with it too much, I came across this part of the menual where you can ask a question, so I thought I'd ask, at the moment it just clumps even if the catcher is on.
To make the Victa VRX Series mower shred grass and ensure proper collection in the catcher:
1. Remove the mulching plug from the cutter deck, as it recycles grass instead of collecting it.
2. Ensure the grass catcher (rear bag) is properly attached and in good condition.
3. Mow frequently and avoid cutting too much grass at once to prevent clogging.
4. Adjust the forward speed based on lawn conditions and grass thickness.
5. Check that the blades are engaged and in working condition.
6. Empty and clean the catcher regularly to maintain airflow and proper collection.
This answer is automatically generated
How do I get the blades to work on my Victa Vrx rideon
The manual does not provide explicit instructions on how to engage the blades. However, to operate the mower safely, ensure you are familiar with the controls and how to stop the blades quickly. Also, never put your hands or feet near rotating parts.
This answer is automatically generated
how to change the drive belt .seeing there is a bolt on the pulleys.