Advertisement
Advertisement
Table of Contents

Related Manuals for Seakeeper 7HD


Summary of Contents for Seakeeper 7HD
- Page 1 OPERATION MANUAL *THIS MANUAL ALSO COVERS THE SEAKEEPER 7HD MODEL* Rev 6 JAN 2017...
- Page 2 Product: Document #: Rev: OPERATION MANUAL SEAKEEPER 9 / 7HD 90223 SEAKEEPER 9 / 7HD OPERATION MANUAL JANUARY 2017 Contents: Section 1 – System Overview Section 2 – System Operation Section 3 – Power Failures, Alarms, and Troubleshooting Section 4 – Maintenance Section 5 –...
-
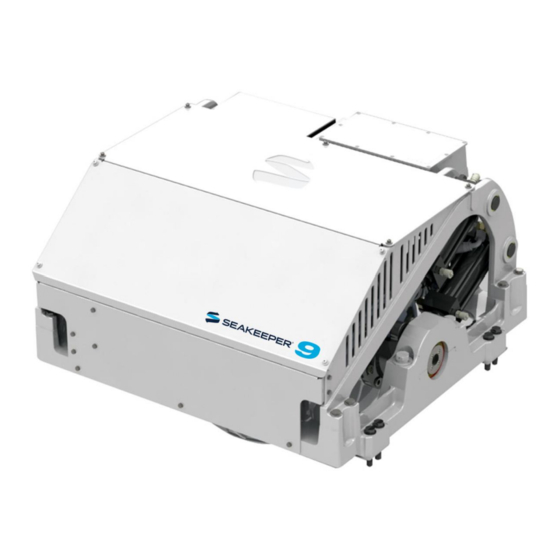
Page 3: System Overview
Seakeeper’s web site at www.seakeeper.com. The Seakeeper web site also contains videos of Seakeeper operation and videos of several different boats operating in waves with the Seakeeper on and off. It is recommended that the reader play these videos prior to reading the remainder of this manual. - Page 4 +/- 70 degrees about this position. The amount of torque that the Seakeeper exerts on a boat’s hull to counter the wave induced roll is directly proportional to the precession rate. The further the Seakeeper is from vertical (zero degrees) the lower the anti-roll torque.
- Page 5 3 of 8 Section 1: SYSTEM OVERVIEW There is a large torque about the gimbal axis when the Seakeeper is precessing. Seakeeper cover panels are provided to prevent personnel or equipment from contacting the Seakeeper while it is in operation.
- Page 6 This foundation transfers the loads that the Seakeeper produces to the hull structure. An active hydraulic brake mechanism is located on the Seakeeper assembly to regulate the Seakeeper’s precession motions about the gimbal shaft. It includes two hydraulic cylinders and a hydraulic manifold.
- Page 7 5 of 8 Section 1: SYSTEM OVERVIEW 1.2 Display The display shown below is the user interface to the Seakeeper 9 and should be mounted at the primary helm station. It is used to start, operate, monitor and shutdown the Seakeeper.
-
Page 8: Electronic Control Module
Section 1: SYSTEM OVERVIEW 1.3 Drive Box The glycol/water mix that cools the Seakeeper is also circulated through a cold plate inside the Drive Box to remove heat from high-power electronic components. The Motor Drive Box contains hazardous voltage and the cover should not be removed while the flywheel is spinning and the AC input voltage is present. - Page 9 Locking solenoids are installed in the circuit to lock the Seakeeper so it cannot precess if there is a leak in the circuit or a mechanical problem with the Seakeeper.
- Page 10 Product: Document #: Rev: Page: OPERATION MANUAL SEAKEEPER 9 / 7HD 90223 8 of 8 Section 1: SYSTEM OVERVIEW 1.7 Cooling The cooling circuit is a closed loop that supplies a glycol/water (50% distilled water and 50% glycol) mix to: ...
-
Page 11: Display Screens: Overview
This section describes operation of the Seakeeper 9 system. Display Screens: Overview 1) When 24 VDC is applied to the Seakeeper the DISPLAY will power up and initialize. The SPLASH screen will be displayed 2) After the DISPLAY has initialized the HOME screen will be displayed 3) The DISPLAY has a set of five buttons that are under the BUTTON ICONS that appear on the display screen. - Page 12 1. The ICON will change from red (Seakeeper OFF) to green (Seakeeper ON) 2. The ICON will turn red indicating the SEAKEEPER is off when a fault appears 3. When a FAULT occurs the BUTTON is used to reset the active...
- Page 13 Product: Document #: Rev: Page: OPERATION MANUAL SEAKEEPER 9 / 7HD 90223 3 of 12 Section 2: SYSTEM OPERATION HOME SCREEN VIEW 1. Switches the HOME screen views from an animation screen, to a screen displaying arrows with no animation, to a screen...
- Page 14 Product: Document #: Rev: Page: OPERATION MANUAL SEAKEEPER 9 / 7HD 90223 4 of 12 Section 2: SYSTEM OPERATION 1. When the button is depressed the BRIGHTNESS settings appears 2. The BRIGHTNESS is decreased or increased by depressing the MINUS button or the PLUS button 3.
- Page 15 6) The Seakeeper information screen displays the Seakeeper model, Seakeeper serial number, Seakeeper software version, DISPLAY software version, RUN hours, and SEA hours, the IMU software version as well as the Motor Drive software version. Seakeeper Service personnel may access this screen to gather additional service functions.
- Page 16 3) Turn on the boat’s AC circuit breaker that supplies power to the Seakeeper. 4) In most cases, the seawater pump will be wired to turn on when the Seakeeper is turned on. However, in some cases the seawater pump is on a separate AC or DC circuit breaker and it is necessary to turn it on.
- Page 17 7 of 12 Section 2: SYSTEM OPERATION 6) When the Seakeeper reaches its maximum operating speed where maximum stabilization is available, the PROGRESS BAR will disappear and the Seakeeper is available for maximum stabilization. Stabilization For stabilization after Seakeeper is ON and at speed: 1) Press the LOCK/UNLOCK button.
- Page 18 LOCK/UNLOCK button will turn RED indicating the command has been accepted. It takes approximately 4+ hours for the speed to drop to zero rpm. If it is necessary to stop Seakeeper motion for any reason press the LOCK/UNLOCK button. The LOCK symbol will turn RED indicating that the Seakeeper is locked.
-
Page 19: Normal Shut-Down
AC and DC breakers can be switched OFF. The Seakeeper will continue to spool down to zero rpm. No cooling is required during this time. Note: The seawater pump may run for 5 minutes after the Seakeeper is switched off and is coasting (with AC power applied). - Page 20 No cooling is required during this time. Note Seakeeper will take 4+ hours to coast down to zero rpm from full speed. Note: The seawater pump may run for 5 minutes after the Seakeeper is switched off and is coasting (with AC power applied).
- Page 21 Boat Transit and Speed Adjustment When cruising without Seakeeper stabilization, run the Seakeeper at 1000 rpm to maintain lubrication of the bearings. The Seakeeper will use less than 300 watts of AC power while operating in this mode. 1) Press the SETTINGS button...
- Page 22 Seakeeper speed. The selected speed will turn yellow. 1000 RPM is used for boat transit without stabilization. a. Seakeeper 9: Normal operational speed is 9000 RPM. Quiet mode operates at 7200 RPM, which allows stabilization at a reduced flywheel speed. When 24V power is removed from the Seakeeper, the speed selection will revert to 9000 RPM.
-
Page 23: Power Failures
24 Volts DC powers the Seakeeper for all the control electronics. 208 - 230 Volts AC powers the Motor Drive Box to drive the motor inside the Seakeeper. These are supplied on Cables 1 and 2 which are shown on Seakeeper drawing 90257, Cable Block Diagram. - Page 24 230 VAC Fluctuation, Spike or Momentary Failure If the AC voltage to the Motor Drive Box is outside Seakeeper’s specified range (208 – 230 VAC), the Motor Drive Box will briefly shut down for protection. The Motor Drive Box will continue operation when the voltage returns to the specified range.
- Page 25 If the ALARM appears and there is an INFORMATION button on the screen the ALARM has more information associated with it. By depressing the INFORMATION button the INFORMATION screen will appear. To reset the ALARM utilize the Seakeeper ON/OFF button...
- Page 26 Document #: Rev: Page: OPERATION MANUAL SEAKEEPER 9 / 7HD 90223 4 of 4 Section 3: POWER FAILURES, ALARMS, AND TROUBLESHOOTING Alarm and Warning History The Service page on the Display shows the recent alarms and warnings. The alarms and warnings are in chronological order starting with the most recent.
-
Page 27: Maintenance
Scheduled Maintenance to keep the Seakeeper running trouble-free. If the Seakeeper is installed in a wet space, efforts should be made to keep the Seakeeper free of salt residue from either condensation or direct exposure to salt spray. If exposed, a regular wipe down with mild soap and water with a rinse will help limit corrosion and keep the Seakeeper assembly in good cosmetic condition. -
Page 28: Scheduled Maintenance Table
Product: Document #: Rev: Page: OPERATION MANUAL SEAKEEPER 9 / 7HD 90223 2 of 3 Section 4: MAINTENANCE SCHEDULED MAINTENANCE TABLE The following pages contain the scheduled maintenance table organized by systems: Mechanical, Hydraulic, Cooling, and Electrical. Scheduled maintenance is not covered under warranty. - Page 29 Product: Document #: Rev: Page: OPERATION MANUAL SEAKEEPER 9 / 7HD 90223 3 of 3 Section 4: MAINTENANCE SYSTEM / COMPONENT TASK INTERVAL PARTS / SPECIAL TOOLS Inspect at 12 Replace brake bushings, Hydraulic hand pump kit, Months or 1000...
-
Page 30: Warranty
24 months from date the product put into service, which shall conclusively be presumed to be the date of sale of a vessel, on which a SEAKEEPER product is installed, to a retail customer or date put into service on an existing vessel (refit). - Page 31 Buyer/User, with written specifications of the claimed defect. If a warranty claim is valid, SEAKEEPER, INC. will repair or replace the Product, or part of the Product, proven to be defective, at its sole discretion, in a timeframe provided by SEAKEEPER, INC., on a reasonable best effort...
-
Page 32: Limitation Of Liability
Seakeeper shall be and shall remain Seakeeper's property. Except as specifically provided for in the order, Buyer shall have no right in any technical data, Intellectual Property Rights, and computer software associated with the order. - Page 33 Rev: Page: OPERATION MANUAL SEAKEEPER 9 / 7HD 90223 1 of 3 Section 6: SEAKEEPER SPECIFICATIONS Seakeeper 9 / 7HD Specifications & Summary Seakeeper 9 Seakeeper 7HD Rated RPM 9,000 RPM 7,000 RPM Angular Momentum at Rated RPM 9,000 N-M-S...
- Page 34 Cover Subsystems. Installation Location The Seakeeper is a torque device and does not have to be installed in a specific hull location or on the centerline. However, the Seakeeper should not be installed forward of the longitudinal center of gravity in a planing vessel.
- Page 35 The installer is responsible for supplying 208-230 VAC, 50/60 Hz, single phase power on a 20A service to the Motor Drive Box and 24 VDC @ 10A service to the Seakeeper Control System. Separate circuit breakers should be used for each Motor Drive Box in multiple Seakeeper installations.
Need help?
Do you have a question about the 7HD and is the answer not in the manual?
Questions and answers