Table of Contents
Advertisement
Available languages
Available languages
Quick Links
Advertisement
Table of Contents

Related Manuals for Franke FTU 3805 X


Summary of Contents for Franke FTU 3805 X
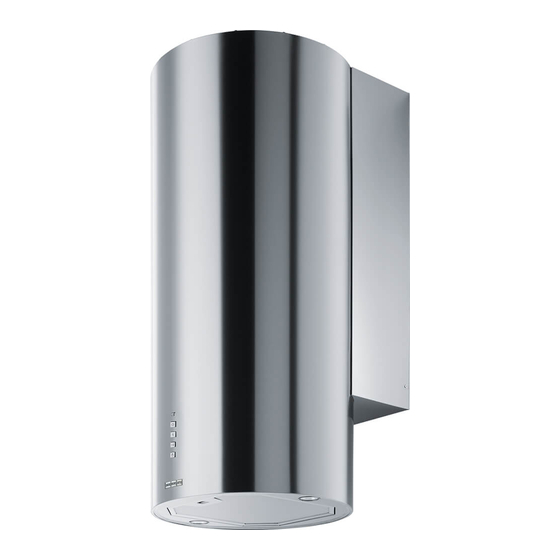
- Page 1 Instructions for use and installation Cooker Hood Istruzioni per l’uso e l’installazione Cappa Mode d’emploi et installation Hotte de Cuisine Bedienungsanleitung und Einrichtung Dunstabzugshaube Kullanım ve montaj talimatları Davlumbaz FTU 3805 X...
-
Page 2: Table Of Contents
INDEX RECOMMENDATIONS AND SUGGESTIONS ........................3 CHARACTERISTICS ................................4 INSTALLATION..................................5 USE ......................................9 MAINTENANCE ................................... 10 INDICE CONSIGLI E SUGGERIMENTI............................11 CARATTERISTICHE................................12 INSTALLAZIONE ................................. 13 USO...................................... 17 MANUTENZIONE ................................18 SOMMAIRE CONSEILS ET SUGGESTIONS............................19 CARACTERISTIQUES................................. 20 INSTALLATION..................................21 UTILISATION .................................. -
Page 3: Recommendations And Suggestions
RECOMMENDATIONS AND SUGGESTIONS The Instructions for Use apply to several versions of this appliance. Accordingly, you may find descriptions of individual features that do not apply to your specific appliance. INSTALLATION • The manufacturer will not be held liable for any damages resulting from incorrect or im- proper installation. -
Page 4: Characteristics
CHARACTERISTICS Dimensions Min. Min. 650mm 650mm Components Ref. Q.ty Product Components Hood Canopy complete with: Controls, Light, Filters Suction unit PVC Pipe Directional Grille Air outlet reducer-plug Reduction flange ø 150-120 mm Ref. Q.ty Installation Components Wall plugs ø 10 Screws 4.2 x 44.4 Screws M3 x 8 Torx Screws 2.9 x 9.5... -
Page 5: Installation
INSTALLATION Drilling the Wall and Fixing the Motor unit Given the complexity of installation operations, they should be carried out by at least two people. Rear Ducting Outlet If the hood is fitted in the recirculation version, bear in mind that there must be a minimum dis- tance of at least 8-10 Cm left between the top of the hood and the surface above it (ceiling or shelf). - Page 6 Air Outlet Connection - Ducting Version When installing the Ducting version, join the Hood to the outlet duct using a rigid or flexible pipe ø 150 or 120 mm, selection of which is at the discretion of the installation technician. The pipe may come out of the ø...
- Page 7 Fitting the hood body – Ducting Version Ducting Version Rear outlet • If the air outlet on the Rear of the hood has been selected, the Air outlet Reduction-plug 8c must be screwed into the top part of the Hood using 2 Screws 12e provided. Ducting Version Top outlet •...
- Page 8 Fitting the hood body – Recirculation Version • Detach the 2 brackets that can be seen inside the opening on the top part of the hood canopy. • Rest the Hood Canopy 1 on the Suction Unit 3, inserting it, and fix it at the side using the 2 screws 12b. •...
-
Page 9: Control Panel
Control panel BUTTON FUNCTIONS T1 Speed Turns the Motor on at Speed one. Turns the Motor off. T2 Speed Turns the Motor on at Speed two. T3 Speed Fixed When pressed briefly, turns the Motor on at Speed three. Flashing Pressed for 2 Seconds. -
Page 10: Maintenance
MAINTENANCE Grease filters CLEANING METAL SELF- SUPPORTING GREASE FILTERS • The filters must be cleaned every 2 months of operation, or more frequently for particularly heavy usage, and can be washed in a dishwasher. • Remove the filters one at a time by pushing them towards the back of the group and pulling down at the same time. -
Page 11: Consigli E Suggerimenti
CONSIGLI E SUGGERIMENTI Questo libretto di istruzioni per l'uso è previsto per più versioni dell' apparecchio. É possibile che siano descritti singoli particolari della dotazione, che non riguardano il Vostro apparecchio. INSTALLAZIONE • Il produttore declina qualsiasi responsabilità per danni dovuti ad installazione non corretta o non conforme alle regole dell’arte. -
Page 12: Caratteristiche
CARATTERISTICHE Ingombro Min. Min. 650mm 650mm Componenti Rif. Q.tà Componenti di Prodotto Corpo Cappa completo di: Comandi, Luce, Filtri Gruppo Aspiratore Tubo PVC Griglia Direzionata Tappo-Riduzione uscita aria Flangia di riduzione ø 150-120 mm Rif. Q.tà Componenti di Installazione Tasselli ø 10 Viti 4,2 x 44,4 Viti M3 x 8 Torx Viti 2,9 x 9,5... -
Page 13: Installazione
INSTALLAZIONE Foratura Parete e fissaggio Gruppo motore Data la complessità dell’installazione si raccomanda di effettuarla minimo in due persone. Uscita Aspirante Posteriore Nel caso di installazione della cappa in versione filtrante, tenere in considerazione che, sopra la cappa, deve rimanere una distanza dal limite superiore (Soffitto o Mensola) di almeno 8-10 Cm. Tracciare sulla Parete: •... - Page 14 Connessione Uscita Aria Versione Aspirante Per installazione in Versione Aspirante collegare la Cappa alla tubazione di uscita per mezzo di un tubo rigido o flessibile di ø 150 o 120 mm, la cui scelta è lasciata all'installatore. Il tubo può uscire sia dalla parte ø...
- Page 15 Montaggio corpo cappa Versione Aspirante Versione Aspirante uscita Posteriore • Nel caso in cui sia stata scelta l’uscita dell’aria sulla parte Posteriore della cappa si dovrà avvitare il Tappo-Riduzione uscita aria 8c con 2 Viti 12e in dotazione sulla parte supe- riore della Cappa.
- Page 16 Montaggio corpo cappa Versione Filtrante • Staccare le 2 staffe visibili all’interno del foro sulla parte superiore del Corpo Cappa. • Appoggiare infilando il Corpo Cappa 1 al Gruppo A- spiratore 3 e fissarlo lateralmente utilizzando le 2 viti 12b. •...
- Page 17 Quadro comandi TASTO FUNZIONI T1 Velocità Acceso Accende il Motore alla Prima velocità. Spegne il Motore. T2 Velocità Acceso Accende il Motore alla Seconda velocità. T3 Velocità Fisso Premuto brevemente Accende il Motore alla Terza velocità. Lampeggiante Premuto per 2 Secondi . Attiva la Quarta velocità...
-
Page 18: Manutenzione
MANUTENZIONE Filtri antigrasso PULIZIA FILTRI ANTIGRASSO METALLICI AUTOPORTANTI • Sono lavabili anche in lavastoviglie, e necessitano di essere lavati ogni 2 mesi circa di utilizzo o più frequentemente, per un uso particolarmente intenso. • Togliere i Filtri uno alla volta, spingendoli verso la parte poste- riore del gruppo e tirando contemporaneamente verso il basso. -
Page 19: Conseils Et Suggestions
CONSEILS ET SUGGESTIONS La présente notice d'emploi vaut pour plusieurs versions de l'appareil. Elle peut contenir des descrip- tions d'accessoires ne figurant pas dans votre appareil. INSTALLATION • Le fabricant décline toute responsabilité en cas de dommage dû à une installation non correcte ou non conforme aux règles de l’art. -
Page 20: Caracteristiques
CARACTERISTIQUES Encombrement Min. Min. 650mm 650mm Composants Réf. Q.té Composants du produit Corps hotte équipé de : Commandes, Éclairage, Filtres Groupe aspirateur Tube PVC Grille orientée Bouchon-réduction sortie air Buse de réduction ø 150-120 mm Réf. Q.té Composants de l’installation Chevilles ø... -
Page 21: Installation
INSTALLATION Perçage paroi et fixation du groupe moteur Compte tenu de la complexité de l’installation, il est recommandé de l’effectuer au moins à deux personnes Sortie aspirante postérieure En cas d’installation de la hotte en version filtrante, n’oubliez pas qu’au-dessus de la hotte, la distance de la limite supérieure (plafond ou étagère) doit être d’au moins 8-10 cm. - Page 22 Connexion sortie air version aspirante Pour l’installation en version aspirante, relier la hotte au tube de sortie au moyen d’un tube rigide ou flexible de ø 150 ou 120 mm, dont le choix est laissé à l’installateur. Le tube peut sortir aussi bien par la partie ø...
- Page 23 Montage corps de hotte version aspirante Version aspirante sortie postérieure • Si vous avez choisi la sortie de l’air sur la partie postérieure de la hotte, il faudra visser le bouchon-réduction sortie air 8c, avec 2 vis 12e fournies, sur la partie supérieure de la hotte.
- Page 24 Montage corps de hotte version filtrante • Détacher les 2 buses visibles à l’intérieur du trou sur la partie supérieure du corps de hotte. • Appuyer en enfilant le corps de hotte 1 au groupe aspi- rateur 3 et le fixer latéralement à l’aide des 2 vis 12b. •...
-
Page 25: Utilisation
UTILISATION Tableau des commandes TOUCHE VOYANT FONCTIONS T1 Vitesse Allumé Démarre le moteur en première vitesse. Coupe le moteur. T2 Vitesse Allumé Démarre le moteur en deuxième vitesse. T3 Vitesse Fixe Appuyée brièvement, démarre le moteur en troisième vitesse. Clignotant Appuyée pendant 2 secondes. -
Page 26: Entretien
ENTRETIEN Filtres anti-graisse NETTOYAGE FILTRES ANTI-GRAISSE METALLIQUES AUTOPORTEURS • Lavables au lave-vaisselle, ils doivent être lavés environ tous les 2 mois d’emploi ou plus fréquemment en cas d’emploi par- ticulièrement intense. • Retirer les filtres l’un aprés l’autre, en les poussant vers la par- tie arrière du groupe et en tirant simultanément vers le bas. -
Page 27: Empfehlungen Und Hinweise
EMPFEHLUNGEN UND HINWEISE Diese Gebrauchsanleitung gilt für mehrere Geräte-Ausführungen. Es ist möglich, dass einzelne Ausstat- tungsmerkmale beschrieben sind, die nicht auf Ihr Gerät zutreffen. MONTAGE • Der Hersteller haftet nicht für Schäden, die auf eine fehlerhafte und unsachgemäße Montage zurückzufüh- ren sind. -
Page 28: Charakteristiken
CHARAKTERISTIKEN Platzbedarf Min. Min. 650mm 650mm Komponenten Bez. Menge Produktkomponenten Haubenkörper, komplett mit: Bedienelementen, Beleuchtung, Filter Absaugeinheit PVC Rohr Umlenkgitter Reduzierkappe Luftaustritt Reduzierflansch ø 150-120 mm Bez. Menge Installationskomponenten Dübel ø 10 mm Schrauben 4,2 x 44,4 Torx-Schrauben M3 x 8 Schrauben 2,9 x 9,5 Menge Dokumentation Betriebsanleitung... -
Page 29: Montage
MONTAGE Bohren der Wand und Befestigung der Motoreinheit Aufgrund der Komplexität der Installation sollte diese immer zu zweit durchgeführt werden. Luftaustritt an der Rückseite Achtung: Bitte beachten Sie bei der Montage das Gewicht der kompletten Haube. Die Tragfähigkeit der Decke oder alternativ der Trägerplatte für diese Zugbelastung muss vor der Montage geprüft und gegebenenfalls durch die Anbringung von geeigneten Befestigungs- oder Stabilisierungselementen hergestellt werden. - Page 30 Luftaustrittanschluss Abluftversion Für die Installation als Abluftversion die Haube mittels eines starren oder flexiblen Rohrs mit ø 150 oder 120 mm, das vom Installateur ausgewählt wird, an die Ableitung an- schließen. Das Rohr kann sowohl an der Oberseite, als auch ø...
- Page 31 Montage des Haubenkörpers bei der Abluftversion Abluftversion, hinterer Austritt • Falls der Luftaustritt an der Rückseite der Haube gewählt wurde, muss die Reduktionskappe des Luftaustritts 8c mit 2 den mitgelieferten Schrauben 12e an der Oberseite der Haube angeschraubt werden. Abluftversion, oberer Austritt •...
- Page 32 Montage des Pumpenkörpers bei der Abluftversion • Die 2 im Innern der Bohrung an der Oberseite des Pumpenkörpers sichtbaren Bügel entfernen. • Den Haubenkörper 1 mit der Absaugeinheit 3 verbinden und mit den 2 Schrauben 12b seitlich befestigen. • Das Umlenkgitter 8 am Rohr anlegen und seine korrekte Installation kontrollieren.
-
Page 33: Bedienung
BEDIENUNG Schalttafel TASTE FUNKTIONEN T1 Betriebsgeschwindigkeit Eingeschaltet Schaltet Motor ersten Betriebsgeschwindigkeit ein. Stellt den Motor ab. T2 Betriebsgeschwindigkeit Eingeschaltet Schaltet Motor zweiten Betriebsgeschwindigkeit ein. T3 Betriebsgeschwindigkeit Bleibend Schaltet Motor dritten Betriebsgeschwindigkeit ein. Blinkend Bei 2 Sekunden langem Drücken: Aktiviert die auf 10 Minuten geregelte vierte Betriebsgeschwindigkeit, nach deren Ablauf zu der zuvor eingestellten Geschwindigkeit zurückgekehrt wird. -
Page 34: Wartung
WARTUNG Fettfilter SELBSTTRAGENDER METALLFETTFILTER REINIGUNG • Sie müssen nach 2-monatigem Betrieb bzw. bei starkem Ein- satz auch häufiger gereinigt werden, was im Geschirrspüler möglich ist. • Die Filter nacheinander aushaken, indem sie auf die Rückseite der Gruppe geschoben und gleichzeitig nach unten gezogen werden. -
Page 35: Tavsiyeler Ve Öneriler
TAVSIYELER VE ÖNERILER Bu kullanma talimatι birden fazla cihaz modeli için geçerlidir. Cihazιnιza uymayan bazι donanιm özellikleri tarif edilmiş olabilir. MONTAJ • Yalnιş veya eksik montajdan doğan herhangi bir zararιn sorumluluğu üreticiye ait değildir. • Davlumbaz ile pişirici cihazιn ocak kιsmι arasιndaki minimum güvenlik mesafesi 650 mm.dir (bazı... -
Page 36: Özellikler
ÖZELLIKLER Boyutlar Min. Min. 650mm 650mm Parçalar Ref. Miktar Ürün Aksamı Davlumbaz Gövdesi şunlardan oluşur: Kumandalar, Işık ve Filtreler Aspiratör Grubu PVC boru Yönlendirilmiş Izgara Hava çıkışı redüksiyon tapası Redüksiyon flanşı ø 150-120 mm Ref. Miktar Kurulum Aksamı Dübel ø 10 Vida 4,2 x 44,4 Vida M3 x 8 Torx Vida 2,9 x 9,5... -
Page 37: Montaj
MONTAJ Duvarın Delinmesi ve Motor grubunun sabitlenmesi Kurulum karmaşık olduğundan en az iki kişiyle yapılması tavsiye edilir. Aspiratör Arka Çıkış Filtre edici versiyon davlumbaz kurulumu durumunda, davlumbazın üstünde, üst sınırdan (Tavan ya da Konsol) en az 8-10 cm mesafe kalması gereği göz önünde tutulmalıdır. Duvar üzerinde çizin: •... - Page 38 Tahliyeli Sistemde Hava Çıkışı Bağlantısı Davlumbazın Emici Versiyonda kurulumu için, kurulumu yapan kişinin tercihine göre ø150 veya 120 mm’lik sert veya esnek bir boruyla çıkış kanalına bağlayınız. Boru, davlumba- zın hem üst hem de arka bölümünden çıkabilir. ø 150 ø 120 ARKA ÇIKIŞ...
- Page 39 Tahliyeli Sistem davlumbaz gövdesinin montajı Arkadan Çıkışlı Tahliyeli Sistem • Hava çıkışı davlumbazın Arka kısmında olacak şekilde seçildiğinde hava çıkışı Redüksiyon-Tapasının 8c 2 ürünle birlikte gelen Vidayla 12e Davlumbazın üst kısmına vidalanması gerekir. Üstten Çıkışlı Tahliyeli Sistem • Hava çıkışı davlumbazın üstünden olacak şekilde seçildiğinde Davlumbaz Gövdesinin üst kısmında görünen 2 çubuğu çıkarmanız gerekir.
- Page 40 Filtre Edici Sistem davlumbaz gövdesinin montajı • Görünen çubuğu Davlumbaz Gövdesinin üst kısmındaki deliğin içinden çıkarın. • Davlumbaz Gövdesini 1 Aspiratör Grubuna 3 geçirerek yaslayın ve 2 Vidayı 12b kullanarak yanlardan sabitleyin. • Yönlü Izgarayı 8 Borunun üzerine yerleştirin ve kurulumunun doğru olup olmadığını...
-
Page 41: Kullanim
KULLANIM Kumanda Tablosu TUŞ FONKSİYON T1 Hız Açık Birinci hızda motoru çalıştırır. Motoru durduruyor. T2 Hız Açık İkinci hızda motoru çalıştırır. T3 Hız Sabit Hafifçe basılınca, üçüncü hızda motoru çalıştırır. Flaşör 2 saniye süreyle basılınca: 10 dakikaya ayarlanmış dördüncü hızı etkin duruma getirir. Bu sürenin sonunda, ayarlanmış... -
Page 42: Bakim
BAKIM Yağ tutucu filtreler METALİK YAĞ TUTUCU FİLTRELERİN TEMİZLENMESİ • Bu filtreler bulaşık makinasında da yıkanabilir ve normal kul- lanıldıklarında iki ayda bir, yoğun kullanım halinde ise daha sıkça yıkanmalarıı gereklidir. • Filtrleri, grubun arka tarafından ittirerek ve aynı anda aşağı doğru çekerek tek tek çıkarınız. - Page 44 Franke S.p.a. Via Pignolini,2 37019 Peschiera del Garda (VR) www.franke.it 436005835_ver4...
Need help?
Do you have a question about the FTU 3805 X and is the answer not in the manual?
Questions and answers