Table of Contents
Advertisement
Quick Links
Advertisement
Table of Contents

Subscribe to Our Youtube Channel
Related Manuals for Audionet PAM G2


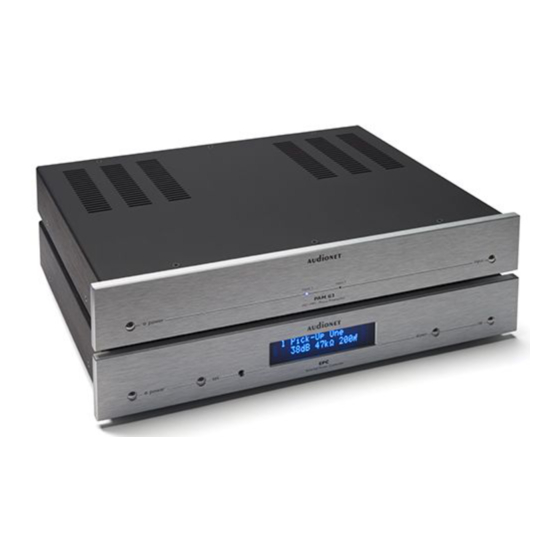
Summary of Contents for Audionet PAM G2
- Page 1 Phono Preamplifier & External Power Controller User's Manual...
-
Page 3: Table Of Contents
Overview back panels ..............8 EPC back panel ................8 PAM G2 back panel..............9 Installation and power supply..........10 Placement ..................10 Mains connection ................10 Connection of EPC & PAM G2 ..........11 Connection diagram ..............13 Audionet Link ................14 Inputs and outputs ..............15 Inputs...................15 Outputs ..................15 Operating ...................16... - Page 4 Matching the pick-up's electrical characteristic ....34 9.1.1 MM Systems ................34 9.1.2 MC Systems ................34 9.1.3 Typical setups................35 Factory defaults ................35 Further adjustments ..............35 9.3.1 Adjusting the input capacity............35 9.3.2 Resistance reduction..............36 Security advice................37 10.1 Technical data - PAM G2 ............38 10.2 Technical data - EPC..............39...
-
Page 5: Preface
Bochum works by our experienced and passionate work- force. But before you start listening to your new Audionet PAM G2 and EPC, please read this manual carefully so you are able to use and enjoy all functions of these units without drawback on music quality. -
Page 6: Included
Always use the plastic bags to prevent scratches on the casing. · Please allow the PAM G2 and EPC to adapt to the climatic condi- tions in your listening room before you switch on the units for the first time after transport. -
Page 7: Overview Front Panels
Overview front panels... -
Page 8: Overview Back Panels
Overview back panels 3.1 EPC back panel... -
Page 9: Pam G2 Back Panel
3.2 PAM G2 back panel... -
Page 10: Installation And Power Supply
Do not expose the units to direct sunlight. · Do not cover the ventilation slots. · Do not place the EPC or PAM G2 in close range to heat sources like radiators. · Do not place the EPC or PAM G2 on top of other units, especially not on top of power amplifiers, preamplifiers or similar that produce heat. -
Page 11: Connection Of Epc & Pam G2
2. Connect the EPC and PAM G2 with the included 7-pin EPC/EPS connection cable from socket 6 of the EPC to the corresponding socket 13 on the back panel of the PAM G2. The shape of the plug prevents any wrong polarity. - Page 12 4. Connect only the EPC to mains. 5. Switch on the EPC at the back panel first. 6. Use key power at the front panel of the EPC / PAM G2 or the keys Power On or Power Toggle of the Audionet System Remote Control Harmony One to switch on the EPC.
-
Page 13: Connection Diagram
4.4 Connection diagram... -
Page 14: Audionet Link
Audionet Link interface. You only need a optical 'Toslink' cable to connect the Audionet Link output of your Audionet preamplifier to the Audionet Link input IN 8 of the EPC. In case you would like to automatically switch on/off further Audionet... -
Page 15: Inputs And Outputs
Important · During connecting and removing of turntables or preamplifiers to the PAM G2 all units of your audio system have to be switched off to prevent damage of the PAM G2 or any of the other connected units. ·... -
Page 16: Operating
17). After that the EPC and the connected PAM G2 are in normal operating mode and ready to use. If you would like to switch off the EPC and the PAM G2, please press the power key on the front panel of the EPC / PAM G2. The display shows the message Going to sleep. -
Page 17: Mains Phase Detection
Right after switching on the unit from stand-by mode by pressing the power key on the front panel of the EPC / PAM G2 the following message will appear in the display in case the mains polari- zation is incorrect: ►... -
Page 18: Control Elements On The Front Panels
26). Important · If your PAM G2 is equipped with just one input channel, switching the channel using the up key of the EPC or input key of the PAM G2 is disabled as only Input 1 is available. -
Page 19: Display
Display In the normal operating mode the display provides information about the current settings of the connected PAM G2. You can choose among three different formats. a) Set Display: Name & Values This is the default setting on delivery of the EPC. The display shows the number of the currently selected PAM G2 input channel, the fully user- definable channel name and its settings. -
Page 20: Input Selection
In this case, only Input 1 is available. Note · You can also use the input key on the front panel of the PAM G2 to select the active input channel. · Using the Audionet System Remote Control Harmony One, select an... -
Page 21: Audionet System Remote Control
Audionet System Remote Control In combination with the EPC all functions and settings of the PAM G2 are accessible via the Audionet System Remote Harmony One. Addition- ally, up to 14 other devices can be controlled by the Harmony One. - Page 22 (please refer to separate manual of the remote control Harmony One). Note · Please read the separate user's manual to your Audionet System Re- mote Control Harmony One. Activities, Devices and Device Mode as well as customizing the remote control are discussed there in detail.
-
Page 23: Key Assignment Epc
Use the key Info to activate the 'Show' function of the EPC. The screen saver (if active) will be interrupted and the display shows the settings of the active PAM G2 input channel. This key has the same function as Show on screen page 1 (see section 'Screen 1' on page... -
Page 24: Screen 1
Vol+ selects input 2 of the connected PAM G2, also for selecting setup options. This key has the same function as key up on the EPC front panel. Vol- selects input 1 of the connected PAM G2, also for selecting setup options. -
Page 25: Screen 2
Power Toggle switches off the unit to stand- by mode. Directly selects input 1 of the connected PAM G2. This key has the same function as the down key on the EPC front panel (see section 'Input selection' on page 20). -
Page 26: Setup Menu
Setup menu To adjust the EPC and PAM G2 to your preferences, please use the setup menu. Push the set key on the front panel of the EPC for less than two seconds to go to the first item of the setup menu. Navigate to the next menu item, by pushing the set key again for less than two seconds. -
Page 27: Set Gain
PAM G2's active channel using the keys up and down. You can choose between the supported gain values of the PAM G2: 38 dB, 48 dB, 58 dB or 68 dB. The display shows the number of the currently active input channel and the selected gain value. -
Page 28: Set Resistance
Set the gain so that the output voltage of the PAM G2 U is approx. PAMG2 1...1.5 V. With a given pick-up voltage U the gain calculates to: pick-up gain PAMG2 pickup Refer to the following table to get the gain in dB from the calculated gain... -
Page 29: External Input Resistance (Set Rext)
If fine adjustments of the input resistance via the parallel RCA ports 19 or 20 on the back panel of the PAM G2 are made (see section 'Further adjustments' on page 35), you can enter the value of the external resistor in the EPC setup. -
Page 30: External Input Capacitance (Set Cext)
If fine adjustments of the input capacitance via the parallel RCA ports 19 or 20 on the back panel of the PAM G2 (see section "Further ad- justments" on page 35) are made, you can enter the value of the external capacitor in the EPC setup. - Page 31 · Get to the option Set Dim Level at anytime using the key Dim Display on screen page 1 of the Audionet System Remote Control Harmony One (see section 'Screen 1' on page 24). Use keys Vol- and Vol+ to select desired brightness.
-
Page 32: Set Display
You can assign a fully user-definable name up to 14 characters in length to each of the two input channels of the connected PAM G2. Push the set key on the front panel eight times. The display will then show the number of the currently selected input channel and the assigned channel name. - Page 33 EPC to mains (i.e. use the mains switch 1 on the back panel) the unit starts up automatically to normal op- erating mode. Use this setting for timer controlled opera- tions. or switched on/off by Activities on the Audionet System Remote Control; see separate user's manual Harmony One...
-
Page 34: Matching The Pick-Up's Electrical Characteristic
MC Systems MC pick-up systems cover a great range of different output levels. To achieve an output matching the level of your other sources, the PAM G2 offers 4 gain settings: For pick-ups with a 'normal' output level (approx. 1...2 mV output volt- age) set the gain to 58 dB. -
Page 35: Typical Setups
· For optimum adjustment to your pick-up follow the recommen- dations of the manufacturer! If necessary ask your dealer. 9.2 Factory defaults Upon delivery of the PAM G2 to following settings are configured by default: Gain 38 dB Input resistance... -
Page 36: Resistance Reduction
Example: If a capacity of C = 500 pF is needed, select the base capacity of = 420 pF. Then add an additional capacitor of C = 82 pF to the EXT. input C/R ext. 15 or 16 to get the required input capacity of 500 pF. Note In the above example the arithmetically resulting value of 80 pF was replaced with the suitable capacitor of 82 pF from commonly available... -
Page 37: Security Advice
During connecting or removing the PAM G2 to/from sources and/or power amplifiers all units have to be switched off to prevent damage of the PAM G2 or any of the other connected units. ¨ Use dry cloth for cleaning! ¨ Do not place the EPC directly under/above or to the left of the PAM G2! Otherwise the transformers in the EPC might induce hum- ming into the signal path of the PAM G2. -
Page 38: Technical Data - Pam G2
¨ Technical data 10.1 Technical data - PAM G2 Function phono preamplifier 40 – 30.000 Hz (+/- 0.2dB) Frequency response 18 – 80.000 Hz (+/- 1.0dB) Subsonic filter 4nd order high pass fg = 8 Hz Gain 38 dB, 48 dB, 58 dB, 68 dB (@ 1 kHz) <... -
Page 39: Technical Data - Epc
Errors and omissions excepted. Specifications and design are subject to changes without prior notice. 10.2 Technical data - EPC ultra low noise, highly stable and constant power Type supply and controller for Audionet PAM G2 two encapsulated 100VA toroidal transformers Power supply and 260.000 mF capacity reference voltage sources for pos.
Need help?
Do you have a question about the PAM G2 and is the answer not in the manual?
Questions and answers