
Subscribe to Our Youtube Channel
Related Manuals for MD SPORTS 1556306


Summary of Contents for MD SPORTS 1556306
-
Page 1: Assembly Instructions
MODEL: 1556306 BJ’S ASSEMBLY INSTRUCTIONS Please contact us before returning the product to the store. themdsports.com Register Now on and Earn a One-Year Warranty for Free! - Page 2 2 - Please review the replacement parts list and make sure that you have all of your parts before beginning assembly. For questions that may arise or for missing/damaged parts, please contact us. (Continued on the next page.) www.themdsports.com 1556306...
- Page 3 3 years. Strong adults needed No children in Keep away from pets Do not use or keep product outdoors. For indoor use only. assembly area No wet/humid conditions. (Continued on the next page.) www.themdsports.com 1556306...
- Page 4 1556306 PARTS LIST Tube - 2 Tube - 3 Tube - 4 Tube - 1 586mm 710mm 256mm 200mm Tube - 7 Tube - 8 Tube - 5 Tube - 6 400mm 700mm 822mm 290mm Tube - 9 Tube - 11...
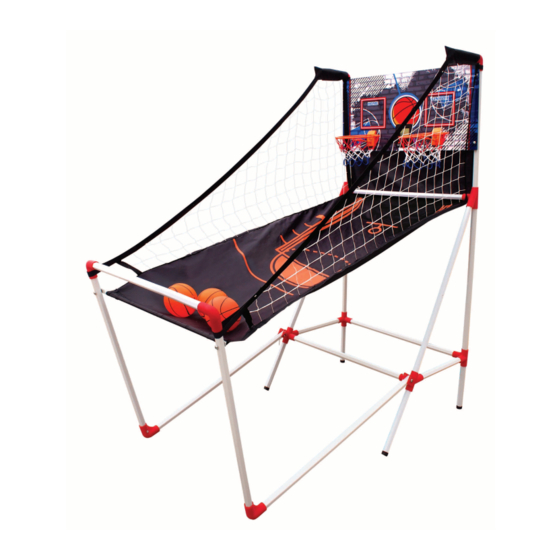
- Page 5 1556306 PRE-INSTALLED PARTS Rim with Paddle Rim Net Electronic Scorer ASSEMBLY INSTRUCTIONS: 1. Find a clean, level place to begin the assembly of your product. 2. Remove all the parts from the box and verify that you have all of the listed parts as shown on the parts list page.
- Page 6 FIG. 1 Note: Reinforcing Reinforcing Reinforcing inside 4 way connect D must be line up in the middle with Tube-7. (Continued on the next page.) www.themdsports.com 1556306...
- Page 7 3. Attach Tubes (#4), (#6), (#7) and (#8) using Connectors (#D), (#E) and (#F) as shown in FIG. 1. FIG. 2 FIG.2 4. Attach Tubes (#3), (#5) and (#8) using Connectors (#B) and (#C) as shown in FIG. 2. (Continued on the next page.) www.themdsports.com 1556306...
- Page 8 FIG.3 5. Attach Tubes (#1) and (#2) using L Connectors-A (#A), as shown in FIG. 3. FIG. 4 FIG.4 6. Attach Tubes (#2) using Connectors (#B) and (#C) as shown in FIG. 4. (Continued on the next page.) www.themdsports.com 1556306...
- Page 9 7. Attach Tubes (#9) and (#10) using Connectors (#E), (#F) and (#G) as shown in FIG. 5. FIG. 6 WARNING: COLLAPSING HAZARD Do not climb or lean on product. FIG.6 8. Attach Tube (#8) with Connectors (#A) as shown in FIG. 5. (Continued on the next page.) www.themdsports.com 1556306...
- Page 10 FIG. 7 FIG.7 9. Attach the Backboard (#12) to the Tubes (#2) as shown in FIG. 7. 10. Attach Connectors (#A) to the Tubes (#10) as shown in FIG. 7. (Continued on the next page.) www.themdsports.com 1556306...
- Page 11 11. Slide elastic straps and sleeve of the Ball Return Net (#13) onto top Tubes (#1) as shown in FIG. 8A and 8B. 12. Slide the Tube (#11) into the end of the Ball Return Net (#13) as shown in FIG. 8C and 8D. (Continued on the next page.) www.themdsports.com 1556306...
- Page 12 FIG.9 Back View Ramp Tab FIG.9A FIG.9 13. Attach the Backboard (#12) and the Ball Return Net (#13) to the Tubes (#2) as shown in FIG. 9A. (Continued on the next page.) www.themdsports.com 1556306...
- Page 13 14. Folding the basketball game - First remove the Locking Pin (#17).See FIG. 10A. Then pull the handle and the bottom of the tube (#10) , and slowly lower the table to the floor. See FIG. 10 and 10A. (Continued on the next page.) www.themdsports.com 1556306...
- Page 14 . Each player starts with 20 points and 2 points are deducted for every shot made in their own hoop. . There is no time limit. . The winner is the player who gets to zero, or scores 10 shots, first. (Continued on the next page.) www.themdsports.com 1556306...
- Page 15 2) Do not mix old and new batteries. 3) Do not mix alkaline, standard (carbon zinc), or rechargeable (nickel-cadmium) batteries. This Class B digital apparatus complies with Canadian ICES-003. YOU ARE NOW READY TO PLAY! (Continued on the next page.) www.themdsports.com 1556306...
Need help?
Do you have a question about the 1556306 and is the answer not in the manual?
Questions and answers