Advertisement
Quick Links
ASSEMBLY INSTRUCTIONS
INSTRUCCIONES DE ARMADO
Please contact us before returning the product to the store.
Por favor póngase en contacto con nosotros antes de
devolver el producto a la tienda.
Register Now on
¡Regístrese ahora en
themdsports.com
themdsports.com
TM
MODEL/MODELO: 1544126
and Earn a One-Year Warranty for Free!
y gana 1 Año de Garantía Gatuita!
WM.COM
Advertisement

Summary of Contents for MD SPORTS 1544126
-
Page 1: Assembly Instructions
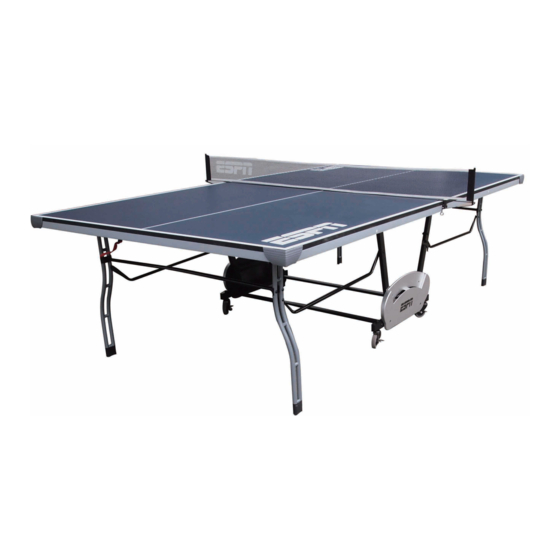
MODEL/MODELO: 1544126 WM.COM ASSEMBLY INSTRUCTIONS INSTRUCCIONES DE ARMADO Please contact us before returning the product to the store. Por favor póngase en contacto con nosotros antes de devolver el producto a la tienda. themdsports.com Register Now on and Earn a One-Year Warranty for Free! themdsports.com... - Page 2 Give Us Your Opinion and Receive A FREE FULL YEAR EXTENTED WARRANTY! Write a review for a recently purchased item on TheMDSports.com and receive an extended full year limited warranty, valued at $150.00. TheMDSports.com See for additional details.
- Page 3 Por favor comunique con el minorista por su política de devolución. (Continued on the next page.) (Continúe en la siguiente página.) www.themdsports.com 1544126...
-
Page 4: Tools Required
Mantener alejados a los exterior. Solo para uso en interior. necesarios area de ensamble animales domesticos No utilizar ni guardar el producto en del area de ensamble lugares humedos o mojados (Continued on the next page.) (Continúe en la siguiente página.) www.themdsports.com 1544126... - Page 5 English Español 1544126 PARTS LIST / LISTA DE PARTES Superficie de Superficie de Table Surface - 2 Leg - A Leg - B Pierna - A Pierna - B Table Surface - 1 Tabla - 2 Tabla - 1 Tubo de Soporte...
-
Page 6: Instrucciones De Ensamblaje
English Español 1544126 PARTS LIST / LISTA DE PARTES Llave Llave Inglesa Wrench Allen Key Allen 1544126 PRE-INSTALLED PARTS / PIEZAS PREINSTALADAS Caster Frame Gorra de Marco Leg Cap Gorra de Pierna de Ruedecita ASSEMBLY INSTRUCTIONS: INSTRUCCIONES DE ENSAMBLAJE 1. Find a clean, level place to begin the assembly of your 1.Encuentre un lugar limpio, plano para comenzar el... - Page 7 6. Attach one Handle (#23) to the surface using four Screws (#A2). See FIG.1B. 6. Adjunte 1 Manija (#23) a la superficie usando 4 Tornillos (A2). Vea la FIG. 1B. 1544126 www.themdsports.com (Continued on the next page.) (Continúe en la siguiente página.)
- Page 8 Tabla (#1 y #2) usando 4 Tornillos (#A1) y 8 Tornillos (A2) per Support Tube. See FIG. 2 and 2A. (#A2) Vea la FIG. 2 y 2A. 1544126 www.themdsports.com (Continued on the next page.) (Continúe en la siguiente página.)
- Page 9 (#3 & #4) usando 2 Cerrojos (#A6), 4 Arandelas (#A4) y (#A3) per Linkage Tube - A. See FIG. 3B. 2 Tuercas (#A3) por Tubo de Conexión - A. Vea la FIG. 3B. 1544126 www.themdsports.com (Continued on the next page.) (Continúe en la siguiente página.)
- Page 10 NOTE: Make sure all Aprons are inside the Plastic 13. Repita dichos pasos para la otra Superficie de Mesa. Corners. NOTA: Asegúrese que todos los Delantales están dentro de los Rincones Plástico. 1544126 www.themdsports.com (Continued on the next page.) (Continúe en la siguiente página.)
- Page 11 15. Pegar las Ruedecillas con Cerraduras (#15) al (#5) using one Nut (#16) per caster. See FIG. 5. Marcos de Ruedecita (#5) usando 1 Tuerca (#16) por ruedecilla. Vea la FIG. 5. 1544126 www.themdsports.com (Continued on the next page.) (Continúe en la siguiente página.)
- Page 12 (#A4), 1 Arandela “T” (#13) y 1 Tuerca (#A3) por See FIG. 6B. Cerradura de Gravedad. Vea la FIG. 6B. Note: Please make sure the casters are locked. Nota: Asegúrese que todas las ruedecitas están cerrados. 1544126 www.themdsports.com (Continued on the next page.) (Continúe en la siguiente página.)
- Page 13 Screws (#A1) per frame. See FIG. 7. usando 4 Tornillos (#A1) por marco. Vea la FIG. 7. Now go back and tighten all connections. Ahora vuelva y aprete todas las conexiones. 1544126 www.themdsports.com (Continued on the next page.) (Continúe en la siguiente página.)
- Page 14 No apoyes Nota: Lift off floor and lean table la mesa Levante desde turn in the air on legs! sobre el piso y voltee piernas! en el aire 1544126 www.themdsports.com (Continued on the next page.) (Continúe en la siguiente página.)
- Page 15 (#17) a través del centro de la mesa y resbale la red the opposite side. See FIG. 9. sobre el poste del lado opuesto. Vea la FIG. 9. 1544126 www.themdsports.com (Continued on the next page.) (Continúe en la siguiente página.)
- Page 16 YOU ARE NOW READY TO PLAY! ¡USTED ESTA AHORA LISTO PARA JUGAR! 1544126 www.themdsports.com (The last page) (La ultima página)


Need help?
Do you have a question about the 1544126 and is the answer not in the manual?
Questions and answers