Subscribe to Our Youtube Channel
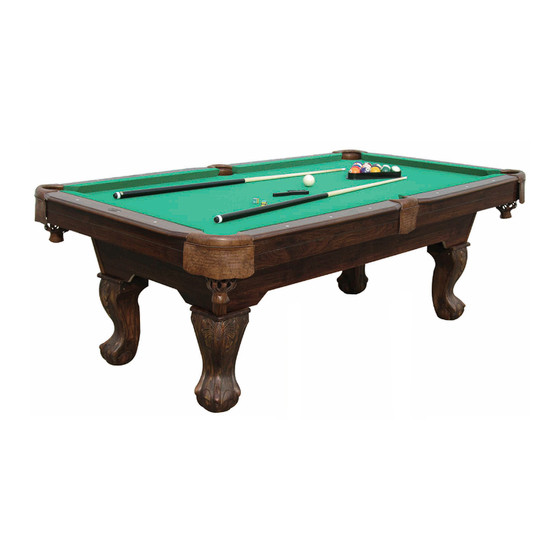
Summary of Contents for MD SPORTS 1639021
-
Page 1: Assembly Instructions
MODEL: 1639021 VM Innovations ASSEMBLY INSTRUCTIONS ATTENTION DO NOT RETURN TO THE STORE Contact MD Sports Customer Service * For additional resources and Frequently Ask Questions, please visit us at themdsports.com... - Page 2 3 - Since you build all tables upside down, please inspect tabletops or playing surfaces right away before putting together, all damaged table tops/playing surfaces need to be returned to the store. Please contact with retailer for their return policy. 1639021 (Continued on the next page.) www.themdsports.com...
-
Page 3: Tools Required
WARNING: Adult Assembly Required. WARNING: No Children in Keep away from pets Do not use or keep product Strong Adults Needed outdoors. For indoor use only. Assembly Area No wet/humid conditions. 1639021 www.themdsports.com (Continued on the next page.) - Page 4 1639021 PARTS LIST Mainframe Inside Leg - A Inside Leg - B Leg Base Plastic Leg - A Plastic Leg - B Plastic Leg - C Plastic Leg - D “U” Plastic Leg Leveler Lower Side Apron Lower End Apron...
- Page 5 1639021 PARTS LIST Cue Rack Hook F3 x 1/2” Screw Chalk Brush Cue Rack-Left Side Cue Rack-Right Side Cue Rack-Middle Shelf Cue Rack-Top Panel Triangle Holder Cue Rack-Base Panel Cue Holder 1639021 PRE-INSTALLED PARTS Adjustable Corner Pocket Side Pocket 5/16” Nut "L"...
- Page 6 Side View NOTE: Outer edge of Steel Bracket should be flush with edge of Leg. FIG.2 See FIG. 2. 4. Attach the Steel Brackets (#16) to the legs using two Bolts (#18) per Leg. 1639021 www.themdsports.com (Continued on the next page.)
- Page 7 NO “CLICK” = NOT LOCKED. FIG.4 7. Carefully align the seams of the Plastic Legs - A (#5) and Plastic Legs - B (#6); lock them together using the locking pieces in the legs. See FIG. 4. 1639021 www.themdsports.com (Continued on the next page.)
- Page 8 10. Align the holes of the Plastic Legs (#5 & #6, #7 & #8),then attach together using four Screws (#20) per Leg. Note: it is not recommended to use a power screwdriver when assembling the Plastic Legs. Over - tightening of the screw can cause damage to the legs. 1639021 www.themdsports.com (Continued on the next page.)
- Page 9 12. Align the Lower Side and End Aprons (#10 & #12) with Top Boards as shown in FIG. 8. Slide the Apron Corners (#13) onto the Lower Side and End aprons (#10 & #12). See FIG. 8A. 1639021 www.themdsports.com (Continued on the next page.)
- Page 10 13. Attach the Leg Top Panels (#14) to the corners of the Aprons using two Screws (#21) per Leg Top Panel. See FIG. 9. X 16 FIG. 10 X 16 FIG.10 14. Attach the pre-assembled Legs to the Aprons using four Bolts (#22) per Leg. See FIG. 10. 1639021 www.themdsports.com (Continued on the next page.)
- Page 11 CAUTION: Four strong adults are recommended to turn the table over as shown. 1. Life the table off of the ground. 2. Turn the table over. 3. Place it on all four feet at the same time on the ground. 1639021 www.themdsports.com (Continued on the next page.)
- Page 12 17. Place the Support Boards (#15) between the Lower Side Aprons (#10) as shown in FIG.13. Attach the “U” Brackets (#11) to the Lower Side Aprons (#10) using four Screws (#26) per “U” Bracket. 1639021 www.themdsports.com (Continued on the next page.)
- Page 13 19. Attach the Adjustable "L" Brackets (#P1) to the underside of the Mainframe (#1) using two Screws (#26) per "L" Bracket. See FIG. 14C. Go back and make sure that all connections are tight. 1639021 www.themdsports.com (Continued on the next page.)
- Page 14 Do not lean or sit on the end or side rails as this may damage the table. 1639021 www.themdsports.com (Continued on the next page.)
- Page 15 X 16 FIG. 16 FIG. 16A FIG. 16B 1639021 (Continued on the next page.) www.themdsports.com...
- Page 16 26. Attach the Cue Rack - Top Panel (#40) to the Cue Rack - Left Side (#37) and Cue Rack - Right Side (#38) using four Screws (#17). See FIG. 16B. YOU ARE NOW READY TO PLAY! 1639021 www.themdsports.com (The last page)


Need help?
Do you have a question about the 1639021 and is the answer not in the manual?
Questions and answers