Table of Contents
Advertisement
Quick Links
CARDIN ELETTRONICA spa
Via del lavoro, 73 – Z.I. Cimavilla
3 1 0 1 3 C o d o g n è ( T V ) I t a l y
Tel:
Fax:
email (Italian): Sales.office.it@cardin.it
email (Europe):
Http:
TECHNICAL SPECIFICATIONS
Mains power supply
Motor power supply
Electrical input
Power input
Thrust
Travel distance (worm screw)
Duty cycle
Opening time 90°
Maximum opening angle
Protection grade
C A R D I N
Via del lavoro, 73 – Z.I. Cimavilla
31013 Codognè (TV) Italy
Tel:
Fax:
email (Italian):
email (Europe):
Http:
+39/0438.404011
+39/0438.401831
Sales.office@cardin.it
www.cardin.it
AUTOMATION FOR HINGED GATES
Vac
Vdc
A
W
N
mm
%
s
°
IP
E L E T T R O N I C A
+39/0438.404011-401818
+39/0438
Sales.office.it@cardin.it
Sales.office@cardin.it
www.cardin.it
BL
Instruction manual
ZVL560.00
Questo prodotto è stato testato e collaudato nei laboratori della casa costruttrice, la quale ne ha verificato la
perfetta corrispondenza delle caratteristiche con quelle richieste dalla normativa vigente. This product has been
tried and tested in the manufacturer's laboratory who have verified that the product conforms in every aspect to the
24Vdc
safety standards in force. Ce produit a été testé et essayé dans les laboratoires du fabriquant. Pour l'installer suivre
attentivement les instructions fournies. Dieses Produkt wurde in den Werkstätten der Herstellerfirma auf die perfekte
Motors
Übereinstimmung Übereinstimmung seiner Eigenschaften mit den von den geltenden Normen vorgeschriebenen
Merkmalen getestet und überprüft. Este producto ha sido probado y ensayado en los laboratorios del fabricante, que
ha comprobado la perfecta correspondencia de sus características con las contempladas por la normativa vigente.
24Vdc Motors
ATTENTION! Before installing this device read the
following instructions carefully!
Installation example
Assembly
Limits of use
Wiring diagrams (installation examples)
Important remarks
User instructions
Installation instructions
Electrical connection
Manual release mechanism
Technical specifications
200/BLA24S
230
24
2
60
2200
350
70
20
120
44
s p a
1
Series
Model
BLA
24S-24L
10-09-2014
200/BLA24S
200/BLA24L
ENGLISH
Pag.
Pag.
Pag.
Pag.
Pag.
Pag.
Pag.
Pag.
Pag.
Pag.
200/BLA24L
Date
2
3-5
6
10
10
10
10-11
11
11
20
230
24
2
60
2200
500
70
25
120
44
Advertisement
Table of Contents

Related Manuals for Cardin Elettronica 24S-24L


Summary of Contents for Cardin Elettronica 24S-24L
- Page 1 CARDIN ELETTRONICA spa Instruction manual Series Model Date Via del lavoro, 73 – Z.I. Cimavilla ZVL560.00 24S-24L 10-09-2014 3 1 0 1 3 C o d o g n è ( T V ) I t a l y Questo prodotto è stato testato e collaudato nei laboratori della casa costruttrice, la quale ne ha verificato la Tel: +39/0438.404011...
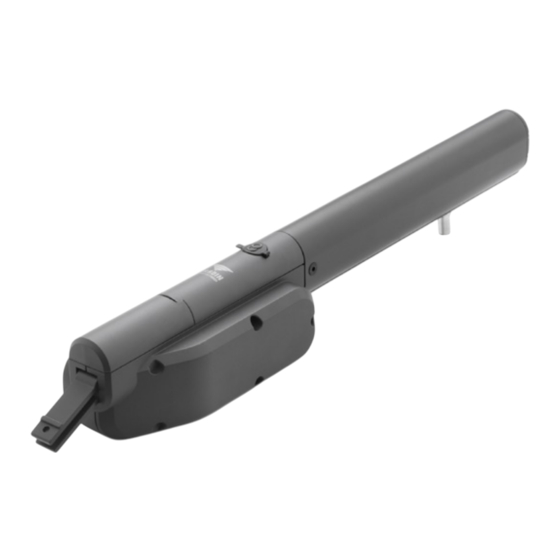
- Page 2 ESEMPIO D'INSTALLAZIONE - INSTALLATION EXAMPLE - EXEMPLE D'INSTALLATION - INSTALLATIONSBEISPIEL - INSTALACIÓN ESTÁNDAR - 5 0 LEGEND 1 Geared motor (SX - left) 2 Geared motor (DX - right) 3 Internal photocells 4 External photocells 5 Warning lights 6 Mechanical selector switch 7 Electric locking device 8 External antenna (RG58 coaxial cable - impedance 50Ω) 9 All-pole circuit breaker with a minimum of 3 mm between the...
- Page 3 200/BLA24S - 200/BLA24L SCHEMA DI MONTAGGIO ASSEMBLY DRAWING SCHÉMA DE MONTAGE All rights reserved. Unauthorised copying or use of the information contained in this document is punishable by law MONTAGEVERFAHREN ESQUEMA DE MONTAJE SCALA: 1:2 Description : Prodotti TELCOMA Drawing number : DI0290 SCHEMA DI MONTAGGIO BLA24A Product Code :...
- Page 4 200/BLA24S - 200/BLA24L SCHEMA DI MONTAGGIO ASSEMBLY DRAWING SCHÉMA DE MONTAGE MONTAGEVERFAHREN All rights reserved. Unauthorised copying or use of the information contained in this document is punishable by law ESQUEMA DE MONTAJE 1043 Description : Prodotti TELCOMA Drawing number : DI0616...
- Page 5 200/BLA24S - 200/BLA24L 200/BLA24S - 200/BLA24L SCHEMA DI MONTAGGIO ASSEMBLY DRAWING SCHÉMA DE MONTAGE MONTAGEVERFAHREN All rights reserved. Unauthorised copying or use of the information contained in this document is punishable by law ESQUEMA DE MONTAJE Ø8,5 Ø10,5 Description : Prodotti TELCOMA Drawing number : DI0618...
- Page 6 LIMITI D’IMPIEGO - LIMITS OF USE - CONTRAINTES D'UTILISATION - ANWENDUNGSGRENZEN - LIMITES DE EMPLEO 1) 200/BLA24L E = 970 mm B, alfa max 90° B, alfa max 100° 130 < B < 170 140 < B < 180 150 < B < 190 160 <...
- Page 7 SCHEMA ELETTRICO IMPIANTO TIPO - STANDARD WIRING DIAGRAM - SCHÉMA ÉLECTRIQUE DE L'EXEMPLE D'INSTALLATION STANDARD SCHALTPLAN - ESQUEMA ELÉCTRICO INSTALACIÓN ESTÁNDAR All rights reserved. Unauthorised copying or use of the information contained in this document is punishable by law PRG900 Pos.1 Pos.2 Fuse F4A Fuse F4A...
-
Page 8: Important Remarks
Suitable differential collection, environmental friendly treatment and disposal Cardin Elettronica who have verified that the product conforms in every aspect contributes to avoiding negative effects on the ambient and consequently to the safety standards in force. -
Page 9: Electrical Connection
Check which of the possible solutions is applicable to your automation project ELECTRICAL CONNECTION and perform a few manual trials before fixing the brackets. If necessary use the adjustable brackets 206/BLASR. In order to guarantee the correct operation of the appliance you must •... - Page 10 CARDIN ELETTRONICA spa Instruction manual Series Model Date Via del lavoro, 73 – Z.I. Cimavilla ZVL531.00 PRG900 01-02-2013 3 1 0 1 3 C o d o g n è ( T V ) I t a l y Questo prodotto è stato testato e collaudato nei laboratori della casa costruttrice, la quale ne ha verificato la Tel: +39/0438.404011...
- Page 11 ights reserved. Unauthorised copying or use of the information contained in this document is punishable by law SCHEMA ELETTRICO IMPIANTO TIPO - STANDARD WIRING DIAGRAM - SCHÉMA ÉLECTRIQUE DE L'EXEMPLE D'INSTALLATION - ELEKTRISCHER SCHALTPLAN ANLAGENART - ESQUEMA ELÉCTRICO INSTALACIÓN ESTÁNDAR CC242ESSB PRG900 ANS400...
- Page 12 • This product and all its relative components has been designed den to connect binding posts 7 and 8 directly to a circuit that and manufactured by Cardin Elettronica who have verified that receives power greater than 30 Vac/dc. the product conforms in every aspect to the safety standards in •...
-
Page 13: Terminal Board Connections
Terminal board connections 31-32-33 Not connected Outer conductor for radio receiver antenna. 1- 2 M1 power supply motor 1 Inner conductor for radio receiver antenna (if an external antenna is fitted use 3- 4 M2 power supply motor 2 a coaxial type cable RG58 with an impedance of 50Ω). CMN common for all inputs and outputs Note The total of the 2 external device outputs must not exceed 10 W. - Page 14 PROGRAMMING PROCEDURE (Setting the programmer and the current sensor) • The installation of both anti-derailment buffers is absolutely obligatory before starting programming. • Make sure the safety devices are at rest and the ECU is receiving mains power otherwise you will not be able to enter programming. •...
-
Page 15: Display Menu
DISPLAY MENU Using the PROG button you can access the following functions in sequence: - set the limited opening distance; - memorising the status of the dip-switches; - set the current sensor level; - display the status of the command and safety devices; - selecting the type of motor;... -
Page 16: Function Modes
Draft : P.J.Heath Date : 13-04-2001 CARDIN ELETTRONICA S.p.A - 31020 San Vendemiano (TV) Italy - via Raffaello, 36 Tel: 0438/401818 Fax: 0438/40183 Flashing slowly: memorises a single code CONNECTING THE ANTENNA Permanently lit: memory full. -
Page 17: Battery Powered Operation
BATTERY POWERED OPERATION Brief flashing: voltage variation has been detected at the battery charger binding posts (e.g. when the batteries are being connected or removed); This device allows the propulsion unit to work during blackouts. Single flashes: this repeats every 2 seconds indicating that the batteries •... -
Page 18: Start-Up Display
INDICATIONS ON THE DISPLAY (D1, page 2) Start up display Current sensor updating for gate leaf 2 (only during programming) Shown for 2 seconds: "PRG900" = ECU model; Current sensor updating for gate leaf 1 + 2 (only during programming) Indicates the dip-switch setting memorisation stage and firmware version Opening + compensation sensor 1...
Need help?
Do you have a question about the 24S-24L and is the answer not in the manual?
Questions and answers