Table of Contents
Advertisement
Changes in this Issue
•
New Model Added
Service
Information
© 2015 Reg. Office: Peterborough PE2 9JB Registered in London: 106725
Indesit Company UK Ltd
5413295 Issue 5 April 2015
C00290924 ~ SM003446
HOTPOINT
MONO CONTROL
ELECTRONIC
MULTIFUNCTION
PYROLYTIC
BUILT IN
SINGLE OVENS
with
LED DOOR
LIGHTING
Models
Covered
SX1046LPX
SX1046LPXS
SX1046SLPX
SX1046SLP0X
Comm.
Code
77138
80824
82495
87096
Advertisement
Table of Contents

Related Manuals for Hotpoint SX1046LPX


Summary of Contents for Hotpoint SX1046LPX
- Page 1 SINGLE OVENS with LED DOOR LIGHTING Changes in this Issue • New Model Added Models Comm. Covered Code SX1046LPX 77138 SX1046LPXS 80824 Service SX1046SLPX 82495 SX1046SLP0X 87096 Information Indesit Company UK Ltd © 2015 Reg. Office: Peterborough PE2 9JB Registered in London: 106725...
-
Page 2: Serial Number / Industrial Code Explanation
Indesit Company SAFETY NOTES & GENERAL SERVICING ADVICE 1. This manual is NOT intended as a comprehensive repair/maintenance guide to the appliance. 2. It should ONLY be used by suitably qualified persons having technical competence applicable product knowledge and suitable tools and test equipment. 3. -
Page 3: Table Of Contents
Indesit Company INDEX Serial Number / Industrial Code Explanation ........2 Model Number Definition . -
Page 4: Introduction
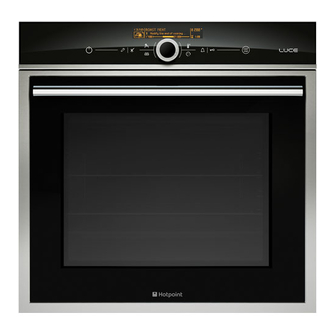
INTRODUCTION OF THE HOTPOINT LUCE MULTIFUNCTION BUILT IN SINGLE OVEN Model SX1046LPX was introduced into the Hotpoint Luce built in range during October 2011. During March 2013, a new model with a 'S' suffix at the end of the model number was introduced. - Page 5 Indesit Company Total Absorbed Power 2800W @ 230V - 12.18 Amps Theoretical Resistance 18.88 Temperature Control By means of probe PT500 Class C Supply Voltage 230V - 240V 50Hz Mains Cable Supplied, 2.0 metres with plug, H05VV-F 3 x 1.5 mm Mains terminal block located rear middle lower on rear panel Oven Lamp Halogen 25W 220V...
-
Page 6: Disposal
Indesit Company DISPOSAL To minimise the risk of injury to children please dispose of your product carefully and safely. Remove all doors and lids. Remove the mains cable (where fitted) by cutting off flush with the appliance and always ensure that no plug is left in a condition where it could be connected to the electricity supply. -
Page 7: Safety Information
Indesit Company SAFETY INFORMATION The following information has been taken from the User Instructions: The oven is designed specifically for domestic use and responsibility will not be accepted for use in any other installation. NOTE: - When the oven is first used, an odour may be emitted - this will cease after a short period of use. -
Page 8: Installation Instructions
Indesit Company INSTALLATION INFORMATION Taken from the Instructions for Installation and User Instructions. The appliance must be installed only be a qualified person in compliance with the instructions provided. The manufacturer declines all responsibility for improper installation which may harm persons and animals and damage property. - Page 9 Indesit Company In order to ensure adequate ventilation, the back panel of the cabinet unit must be removed. Installing the oven so that it rests on two strips of wood is preferable. If the oven rests on a continuous, flat surface, there must be an aperture of at least 45 x 560 mm. Fig.
-
Page 10: Electrical Connections
Indesit Company ELECTRICAL CONNECTION THESE APPLIANCES MUST BE EARTHED. These models are supplied with a cable and plug fitted. If the plug or the cable need to be replaced, follow the details below. The electrical connection to the mains must be made on the appliance. The power voltage and frequency are as indicated on the rating plate. - Page 11 Indesit Company Replacing the Plug Ensure that before disposing of the plug itself, you make the pins unusable so that it cannot be accidentally inserted into a socket. Instructions for connecting cable to an alternative plug: How to Connect an Alternative Plug The wires in this mains lead are coloured in accordance with the following code: GREEN &...
-
Page 12: Description Of The Appliance
CONTROL PANEL GUIDES for the sliding racks position 5 GRILL Rack position 4 position 3 DRIPPING PAN Rack position 2 position 1 Control Panel - SX1046LPX, SX1046LPXS & SX1046SLPX Display DOOR / SETTINGS MANUAL TEMPERATURE icon CONTROL PANEL LOCK icon COOKING... - Page 13 Indesit Company Display Selected menu Temperature indicator indicator Cooking mode number indicator Selected cooking mode icon / COOKING DURATION recommended rack position icon indicator TIME Suggests a course of action indicator OF COOKNG TIME or displays the activity currently indicator being performed by the oven Display in cooking mode Suggests a course of action or...
-
Page 14: Using The Oven
Indesit Company USING THE OVEN (Taken from user handbook) The first time you use your appliance, heat the empty oven with its door closed at its maximum temperature for at least half an hour. Ensure that the room is well ventilated before switching the oven off and opening the oven door. - Page 15 Indesit Company Settings Menu Commands To enter the settings menu, switch on the control panel and press the icon. Use the control dial to highlight the individual menu commands. To modify the setting, press the icon. The following parameters are listed in the menu: LANGUAGE: Select the language shown on the display.
- Page 16 Indesit Company Setting the Clock To set the clock, switch on the oven by pressing the icon, then press and follow the steps described. 1. Scroll through the menu commands using the control dial, select CLOCK and press 2. Adjust the time using the control dial. 3.
- Page 17 Indesit Company 6. During cooking it is always possible to: adjust the temperature by pressing the icon, turning the control dial and confirming by pressing again (manual modes only); set the duration of a cooking mode (see Cooking Modes); stop cooking by pressing the icon.
- Page 18 Indesit Company Stand-By This product complies with the requirements of the latest European Directive on the limitation of power consumption in stand-by mode. If no buttons are pressed for 30 minutes and the control panel/door lock has not been activated, the appliance automatically reverts to stand-by mode. The ECO Mode symbol appears on the display to indicate stand-by mode.
- Page 19 Indesit Company Safety Temperatures The safety temperatures that cause a fault code to show during normal operation of the appliance are: 1. F04 - If the NTC sensor on the main board reaches 85°C during oven operation; 2. F06 - If the PTC sensor in the oven reaches 360°C during cooking. If one of these two conditions occurs, a safety procedure is activated and all elements are disconnected except for the cooling fan which will run at maximum speed and a fault code will be displayed.
-
Page 20: Cooking Modes
Indesit Company COOKING MODES Every time the oven is switched on, it suggests the first manual cooking mode. MANUAL COOKING MODES All cooking modes have a default cooking temperature which may be adjusted manually to a value between 30°C and 250°C as desired. In the GRILL mode, the default power level value is indicated as a percentage (%) and may also be adjusted manually. -
Page 21: Cooking Modes
Indesit Company PIZZA mode The top and circular heating elements switch on and the fan begins to operate. This combination heats the oven rapidly. If you use more than one rack at a time, switch the position of the dishes halfway through the cooking process. - Page 22 Indesit Company To use this technique, you must use a vacuum-packing machine and the appropriate bags. Follow the instructions supplied relating to vacuum-packing food carefully. The vacuum-packing technique may also be used for raw products (fruit, vegetables, etc.) as well as pre-cooked products (traditional cooking).
- Page 23 Indesit Company BEEF/VEAL/LAMB mode Use this function to cook beef, veal and lamb. Place the food inside the oven while it is still cold. The dish may also be placed in a preheated oven. Some of the ROAST modes offer the option of selecting the desired cooking level: 1.
- Page 24 Indesit Company DESSERTS mode This function is ideal for cooking desserts which are made using natural yeast, baking powder and desserts which contain no yeast. Place the dish in the oven while it is still cold. The dish may also be placed in a preheated oven.
-
Page 25: Programming Cooking
Indesit Company PROGRAMMING COOKING A cooking mode must be selected before programming can take place. Programming the Duration 1. Press the icon. 2. Turn the control dial to set the duration; hold the dial in this position to scroll through the numbers more quickly and make the setting process easier. -
Page 26: Practical Cooking Advice
Indesit Company PRACTICAL COOKING ADVICE Do not place racks in position 1 and 5 during fan assisted cooking. This is because excessive direct heat can burn temperature sensitive foods. In the GRILL and FAN GRILLING cooking modes, particularly when using the rotisserie spit, place the dripping pan in position 1 to collect cooking residues (fat and/or grease). -
Page 27: Cooking Advice Tables
Indesit Company COOKING ADVICE TABLE Modes Foods Weight Rack position Preheating Recommended Cooking (in kg) Temperature duration (°C) (minutes) Standard Sliding Manual guide rails guide rails Multilevel* 210-220 Pizza on 2 racks 2 and 4 1 and 3 20-25 Pies on two racks/cakes on 2 racks 2 and 4 1 and 3 30-35... -
Page 28: Cooking Advice Tables
Indesit Company COOKING ADVICE TABLE continued Modes Foods Weight Rack position Preheating (in kg) Standard Sliding Automatic** guide rails guide rails Bread*** Bread (see recipe) 2 or 3 Beef Roast beef 1-1,5 2 or 3 Veal Roast veal 1-1,5 2 or 3 Lamb Leg of lamb 1-1,5... -
Page 29: Care & Cleaning
Indesit Company CARE & CLEANING BEFORE CLEANING OR CARRYING OUT ANY MAINTENANCE ON THE OVEN, IT MUST BE DISCONNECTED FROM THE POWER SUPPLY Cleaning The Appliance • Slight differences in colour on the front of the oven are due to the different materials used, i.e. glass, plastic or metal. - Page 30 Indesit Company Replacing the Light Bulb To replace the oven light bulb: Lamp Holder 1. While holding the glass cover, carefully prise off one of the compartment metal securing clips and remove the glass cover of the lamp-holder. Lamp 2. Remove the light bulb and replace it with a similar one: halogen lamp voltage 230 V, Glass cover...
-
Page 31: Automatic Cleaning Using The Pyrolytic Cycle
Indesit Company AUTOMATIC CLEANING USING THE PYROLYTIC CYCLE The cleaning cycle can cause the internal temperature of the oven to reach 500°C. The pyrolytic cycle is activated, burning away food and grime residues. Dirt is literally incinerated. Keep children away from the appliance during the automatic cleaning cycle as surfaces may become very hot. -
Page 32: Troubleshooting
Indesit Company 4. Press to begin the pyrolysis schedule. 5. The display shows the remaining time, moving the delayed start bar backwards. 6. Once pyrolysis has begun, the display will indicate the remaining time by filling the duration bar. 7. When the time has elapsed, 'CLEANING CYCLE FINISHED' appears on the display and a buzzer sounds. -
Page 33: Oven Temperature Test Procedure & Temperature Limits
Indesit Company TEST PROCEDURE FOR OVEN TEMPERATURE MEASUREMENTS ELECTRIC OVENS The following is the preferred method to be used when calculating any Mean Oven Centre Temperature (M.O.C.T.). Equipment: - Surface Temperature Probe Part No. C00222632 (5600081) Digital Thermometer Part No. C00222854 (5700036) Thermocouple Part No. - Page 34 Indesit Company TEMPERATURE LIMITS Mean Oven Centre Temperature Limits All appliances: - Upper Limit M.O.C.T. 215°C = Thermostat accuracy ± 15°C Lower Limit M.O.C.T. 185°C Maximum Differential of Overshoot and Undershoot Conventional Main Oven 26°C Fan Oven 22°C CONVENTIONAL COOKING FAN COOKING Service Manual UK English...
-
Page 35: Fault Codes
Indesit Company FAULT CODES FAULT SUBCODE DESCRIPTION CHECKS Main PCB probe short circuited. Main PCB probe circuit open. Rtn out of range Vline out of range No mains voltage / Master Relay Fans open Mains voltage present / Master Relay Fans shortcircuited /(Fan triac short circuited). - Page 36 Indesit Company FAULT CODES FAULT SUBCODE DESCRIPTION CHECKS 1 Check the PTC probe in the top cavity is working No gradient for main oven probe. properly. Top oven probe short circuited. 2 Check connectors on the board and component F53** Top oven probe circuit open.
- Page 37 Indesit Company FAULT CODES FAULT SUBCODE DESCRIPTION CHECKS Communication- MAIN Communication - VISUAL C o m m u n i c a t i o n 1 Unplug, wait for 2 minutes, plug back in again and A L I G N M E N T W I T H M A I N test the appliance.
- Page 38 Indesit Company FAULT CODES FAULT SUBCODE DESCRIPTION CHECKS Tangential fan in diode mode. Tangential fan short circuited or disconnected. Tangential fan circuit open. Tangential fan FB failure. Tangential fan general failure. 1 Check that the tangential fan is working properly. Tangential fan in diode mode + 2 Check that the motor fan is working properly.
-
Page 39: Interface / Demo Mode / Auto Test
Indesit Company INTERFACE Function Keys ON/OFF Key SELECTION Key SET UP DISPLAY Icons FUNCTION Keys START/STOP Key DEMO MODE NOTE: - This appliance can be programmed by Indesit Engineers for permanent Demo. Always start with the appliance off. The appliance will not enter Demo mode if the language has not been set beforehand. - Page 40 Indesit Company AUTO TEST Start with the oven off and the oven door closed. Turn '+', turn '-', turn '+'. Press and hold the 'clock' key for 5 seconds (a beep will sound to confirm the selection). Press 'Start' (a beep will sound to confirm the selection. Load Activation Sequence: 1.
-
Page 41: Wiring Diagram
HEATER 4 TANG LIVE 2 MR 2 LAMP 1 INTERNAL NEUTRAL 2 LIVE 2 LIVE 1 CIRC HEATER2 LIVE1MR1 LIVE MR 3 GRILL HEATER 1 HEATER 3 NEUTRAL1 LIVE NEUTRAL 5413295wd.pdf SX1046LPX 16002641300 Service Manual UK English 41 of 49... -
Page 42: Dismantling Instructions
Indesit Company DISMANTLING INSTRUCTIONS Safety Notes 1. Before carrying out any work ensure that the appliance is disconnected from the mains supply 2. Carry out insulation resistance, continuity and functional tests on appliance after service. 3. Personal safety precautions must be taken to protect against accidents caused by sharp edges on metal, glass and plastic parts. - Page 43 Indesit Company E) Control Panel Remove the oven from the cabinet (A). Disconnect the wiring from the display board. Whilst supporting the control panel remove the 4 (T20) screws and locking washers, 2 each side of the control panel. See Fig. 4. Lift the panel clear.
- Page 44 Indesit Company H) Cooling Fan 1.) Remove the oven from the cabinet (A). Remove the top cover (6 screws) including the one securing the serial port cover. Note and disconnect the wires to the cooling fan. Fig. 7 At this stage, it may be necessary to remove the top 2 screws securing the rear panel for easier access.
- Page 45 Indesit Company K) Circular Oven Element Remove the oven furniture. Remove the 4 screws on the fan cover in the oven. Remove the 2 screws securing the oven element. Pull the element forward and draw the wires through into the oven cavity. Disconnect the wires from the oven element, ensuring that they do not slip back into the rear panel void.
- Page 46 Indesit Company O) Door Lock Remove the oven from the cabinet (A). Remove the top cover (6 screws). Note and remove the connections to the door lock. Remove the 2 screws securing the door lock and lift away. Reassemble in reverse order. P) Oven Door Complete Remove the oven from the cabinet (A).
- Page 47 Indesit Company The LEDs are secured by suction. To refit them, place in the grooves on the outer door moulding. See Figs. 14 - 17. Fig. 14 Fig. 15 Fig. 17 Fig. 16 R) Door Hinges and Door Handle Remove the inner and centre door glasses (Q). The screws securing the door hinges and door handles can now be accessed.
-
Page 48: Programming
Indesit Company PROGRAMMING PROGRAMMING (using Smart Card Reader / Card C00272306) Smart Card Reader and Smart Card in use If the Main Module has been replaced during a repair the board will require programming using the following method. Do NOT connect the machine to electrical supply. 2. - Page 49 Indesit Company PROGRAMMING (Using EMIT) This machine can be programmed via the Emit, using a USB lead (Part number C00222800), Hardware key (Part number C00115587) and the Memwriter software. Other types of Cable are available USB - Serial Cable Black Hardware Key Replacement pins for the Hardware Key are available as Part No.
Need help?
Do you have a question about the SX1046LPX and is the answer not in the manual?
Questions and answers