
Related Manuals for JVC KD-DB53


Summary of Contents for JVC KD-DB53
-
Page 1: Instruction Manual
ENGLISH KD‑DB53 / KD‑DB53AT CD RECEIVER Please read all instructions carefully before operation to obtain the INSTRUCTION MANUAL best possible performance from the unit. LVT2423-001A [B/E/EN]... -
Page 2: Table Of Contents
CONTENTS BEFORE USE BEFORE USE Warning BASICS Do not operate any function that takes your attention away from safe driving. GETTING STARTED Caution Volume setting: CD / USB / iPod • Adjust the volume so that you can hear sounds outside the car to prevent accident. • Lower the volume before playing digital sources to avoid damaging the speakers by the sudden increase of DIGITAL AUDIO BROADCASTING (DAB) the output level. General: RADIO • Avoid using the USB device or iPod/iPhone if it might hinder driving safety. • Make sure all important data has been backed up. We shall bear no responsibility for any loss of recorded data. • Never put or leave any metallic objects (such as coins or metal tools) inside the unit, to prevent a short circuit. • If a disc error occurs due to condensation on the laser lens, eject the disc and wait for the moisture to evaporate. AUDIO SETTINGS Remote control (RM-RK52): • Do not leave the remote control in hot places such as on the dashboard. ILLUMINATION • The Lithium battery is in danger of explosion if replaced incorrectly. Replace it only with the same or equivalent type. -
Page 3: Basics
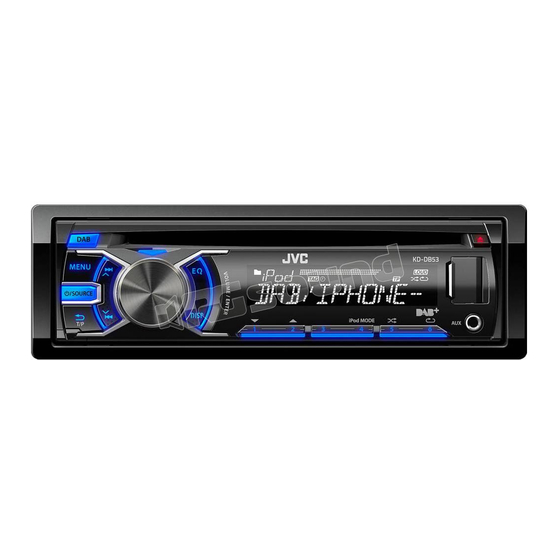
BASICS Faceplate Remote control (RM‑RK52) Volume knob Attach (turn/press) Loading slot Display window Remote sensor (Do not expose to bright sunlight.) Detach Pull out the insulation sheet Detach button when using for the first time. How to reset How to replace the battery Your setting data will be erased except FM, AM preset station data. Do this (on the faceplate) Do this (on the remote control) Press L SOURCE. -
Page 4: Getting Started
GETTING STARTED Default: XX CLOCK CLOCK ADJ AUTO: The clock time is automatically set using the Clock Time (CT) data in DAB signal. ; OFF: Cancels. DIMMER DIMMER SET Selects the display and button illumination adjusted in the [BRIGHTNESS] setting. AUTO: Changes between the day and night adjustments when you turn off or on the car Cancel the demonstration headlights. -
Page 5: Cd / Usb / Ipod
CD / USB / iPod Start playback Label side : Applicable — : Not applicable Do this CD USB iPod The source changes to CD and playback starts. Press E / F (or 2 / 3 on RM-RK52). Select a track/file • To eject a disc, press 0. Press 1 ∞ / 2 5 (or 5 / ∞ on RM-RK52). Select a folder —... -
Page 6: Digital Audio Broadcasting (Dab)
DIGITAL AUDIO BROADCASTING (DAB) Store a service You can store up to 18 services. While listening to a service..Press and hold one of the number buttons (1 to 6) to store. (or) Press and hold the volume knob until “PRESET MODE” flashes. Search for a service Turn the volume knob to select a preset number, then press the knob. The preset number flashes and “MEMORY” appears. Press DAB. (or) Select a stored service Press L SOURCE to select DAB. Press E / F (or 2 / 3 on RM-RK52) to search for an ensemble automatically. Press one of the number buttons (1 to 6). (or) (or) Press and hold E / F (or 2 / 3 on RM-RK52) until “M” flashes, then press Press MENU. Turn the volume knob to select a preset number, then press the knob. - Page 7 (music), ROCK M (music), EASY M (music), LIGHT M (music), CLASSICS, OTHER M (music), codes. WEATHER, FINANCE, CHILDREN, SOCIAL, RELIGION, PHONE IN, TRAVEL, LEISURE, JAZZ, DAB Vxxx Displays the version number of DAB software. COUNTRY, NATION M (music), OLDIES, FOLK M (music), DOCUMENT For updating DAB software, visit the following JVC website: <http://www3.jvckenwood.com/english/car/index.html> (English website only). ENGLISH...
-
Page 8: Radio
RADIO Activate TA Standby Reception “ST” lights up when Available only for FM Radio Data System stations. receiving an FM stereo Press G T/P. broadcast with sufficient The unit will temporarily switch to Traffic Announcement (TA) (if available) from any signal strength. source other than AM. • To deactivate, press G T/P again. Search for a station Other settings Press L SOURCE to select FM or AM. Press E / F (or 2 / 3 on RM-RK52) to search for a station automatically. Press and hold MENU. Turn the volume knob to select [TUNER], then press the knob. (or) Press and hold E / F (or 2 / 3 on RM-RK52) until “M” flashes, then press Turn the volume knob to make a selection (see the table below and on page 9), then press the knob. repeatedly to search for a station manually. Press MENU to exit. Store a station Default: XX You can store up to 18 stations for FM and 6 stations for AM. -
Page 9: Aux
RADIO Default: XX Use a portable audio player IF BAND AUTO: Increases the tuner selectivity to reduce interference noises from adjacent Connect a portable audio player (commercially available). stations. (Stereo effect may be lost.) ; WIDE: Subjects to interference noises from 3.5 mm stereo mini plug with “L” shaped adjacent stations, but sound quality will not be degraded and the stereo effect will connector (commercially available) remain. Portable audio player RADIO TIMER For details, refer to the DIGITAL AUDIO BROADCASTING (DAB) source. (➜... -
Page 10: Audio Settings
AUDIO SETTINGS Default: XX Do this AUDIO Select a preset Press EQ repeatedly. equalizer FADER * R06 — F06 (00): Adjusts the front and rear speaker output FLAT (default), NATURAL, DYNAMIC, VOCAL BOOST, BASS BOOST, USER balance. Store your own Press and hold EQ. BALANCE * L06 — R06 (00): Adjusts the left and right speaker output balance. sound settings Turn the volume knob to make a selection, then press the knob. -
Page 11: Illumination
MORE INFORMATION ILLUMINATION About USB devices About discs and audio files • This unit can only play the following CDs: • This unit can play MP3/WMA/AAC files stored on a USB mass storage class device. • You cannot connect a USB device via a USB hub and Multi Card Reader. • This unit can play back multi-session discs; • Connecting a cable whose total length is longer however, unclosed sessions will be skipped than 5 m may result in abnormal playback. during playback. -
Page 12: Troubleshooting
TROUBLESHOOTING MORE INFORMATION Display information Symptom Remedy FM or AM Non-Radio Data System station: Sound cannot be heard. • Adjust the volume to the optimum level. Frequency Day/Clock • Check the cords and connections. FM Radio Data System station: “MISWIRING CHK WIRING THEN RESET UNIT” / Check to be sure the terminals of the speaker wires are insulated properly, then Station name (PS) = Frequency = Program type “WARNING CHK WIRING THEN RESET UNIT”... -
Page 13: Specifications
SPECIFICATIONS Power Output 50 W per channel Signal Detection System Non-contact optical pickup (semiconductor laser) Continuous Power Output (RMS) Number of Channels 50 W per channel into 4 Ω, 40 Hz to 20 000 Hz at 2 channels (stereo) less than 1% total harmonic distortion Frequency Response 5 Hz to 20 000 Hz Load Impedance 4 Ω (4 Ω to 8 Ω allowance) Signal-to-Noise Ratio... -
Page 14: Installation / Connection
Installing the unit (in‑dash mounting) Warning • The unit can only be used with a 12 V DC power supply, negative ground. • Disconnect the battery’s negative terminal before wiring and mounting. • Do not connect Battery wire (yellow) and Ignition wire (red) to the car chassis or Ground wire (black) to prevent a short circuit. • Insulate unconnected wires with vinyl tape to prevent a short circuit. • Be sure to ground this unit to the car’s chassis again after installation. Caution • For safety’s sake, leave wiring and mounting to professionals. Consult Do the required wiring. the car audio dealer. (➜... -
Page 15: Wiring Connection
To Blue/white wire of (not supplied) (not supplied) the wiring harness D A Faceplate (When using a remote wire having Rear/subwoofer output JVC Amplifier ISO connectors, connect the ISO connectors to the corresponding Fuse (10 A) Aerial input (for FM/AM) sockets.) ( ×1 ) B Mounting sleeve... - Page 16 Notice: The sign “Pb” below the symbol for batteries indicates that this battery contains lead. Declaration of Conformity with regard to the EMC Directive 2004/108/EC Manufacturer: JVC KENWOOD Corporation 3‑12, Moriya‑cho, Kanagawa‑ku, Yokohama‑shi, Kanagawa, 221‑0022, Japan EU Representative’s: JVC Technical Services Europe GmbH Postfach 10 05 04, 61145 Friedberg, Germany • Microsoft and Windows Media are either registered trademarks or trademarks of Microsoft Corporation in the United States and/or other countries. • “Made for iPod,” and “Made for iPhone” mean that an electronic accessory has been designed to connect specifically to iPod, or iPhone, respectively, and has been certified by the developer to meet Apple performance standards. Apple is not responsible for the operation of this device or its compliance with safety and regulatory standards. Please note that the use of this accessory with iPod, or iPhone may affect wireless performance. • iPhone, iPod, iPod classic, iPod nano, and iPod touch are trademarks of Apple Inc., registered in the U.S. and other countries. © 2012 JVC KENWOOD Corporation 1212YIHHACJEIN...
Need help?
Do you have a question about the KD-DB53 and is the answer not in the manual?
Questions and answers