
Related Manuals for JVC KD-DB98BT


Summary of Contents for JVC KD-DB98BT
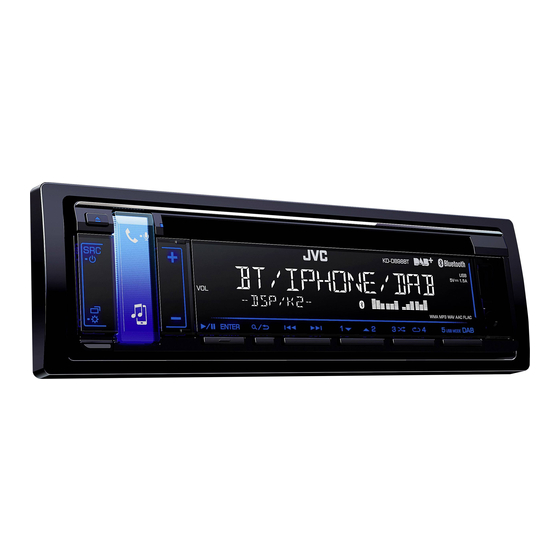
- Page 1 ENGLISH FRANÇAIS DEUTSCH KD-DB98BT CD RECEIVER INSTRUCTION MANUAL RÉCEPTEUR CD MANUEL D’INSTRUCTIONS CD-RECEIVER BEDIENUNGSANLEITUNG B5A-1376-00 [E]...
- Page 2 Entsorgung von gebrauchten elektrischen und elektronischen Geräten und Batterien (anzuwenden in Ländern mit einem separaten Sammelsystem für solche Geräte) Das Symbol (durchgestrichene Mülltonne) auf dem Produkt oder seiner Verpackung weist darauf hin, dass dieses Produkt nicht als normaler Haushaltsabfall behandelt werden darf, sondern an einer Annahmestelle für das Recycling von elektrischen und elektronischen Geräten und batterien abgegeben werden muss.
- Page 3 The marking of products using lasers The label is attached to the chassis/case and says that the component uses laser beams that have been classified as Class 1. It means that the unit is utilizing laser beams that are of a weaker class. There is no danger of hazardous radiation outside the unit.
- Page 4 Par la présente, JVCKENWOOD déclare que l’équipement Deste modo, a JVCKENWOOD declara que o equipamento de 3-12, Moriya-cho, Kanagawa-ku, Yokohama-shi, Kanagawa, 221-0022, JAPAN radio «KD-DB98BT» est conforme à la directive 2014/53/UE. rádio “KD-DB98BT” está em conformidade com a Diretiva EU Representative: L’intégralité...
- Page 5 Härmed försäkrar JVCKENWOOD att Herved erklærer JVCKENWOOD, at radioudstyret Šiuo JVCKENWOOD pažymi, kad radijo įranga С настоящото JVCKENWOOD декларира, че radioutrustningen “KD-DB98BT” är i enlighet med “KD-DB98BT” er i overensstemmelse med Direktiv „KD-DB98BT“ atitinka 2014/53/EB direktyvos радиооборудването на “KD-DB98BT” е в...
-
Page 6: Table Of Contents
CONTENTS BEFORE USE BEFORE USE IMPORTANT • To ensure proper use, please read through this manual before using this product. It is especially important BASICS that you read and observe Warning and Caution in this manual. • Please keep the manual in a safe and accessible place for future reference. GETTING STARTED 1 Cancel the demonstration Warning... -
Page 7: Basics
BASICS Faceplate Attach Loading slot Display window Detach How to reset Detach button On the faceplate Turn on the power Press • Press and hold to turn off the power. Adjust the volume Press • Press and hold to continuously increase the volume to 15. Press to mute the sound or pause playback. -
Page 8: Getting Started
F/W UP Vxxx For details on how to update the firmware, see: Hour Minute <http://www.jvc.net/cs/car/>. Press to select [CLOCK FORMAT], then press FACTORY RESET YES: Resets the settings to default (except the stored station). ; NO: Cancels. -
Page 9: Digital Radio
DIGITAL RADIO GETTING STARTED About DAB (Digital Audio Broadcasting) CLOCK DAB is one of the digital radio broadcasting systems available today. It can deliver digital TIME SYNC ON: The clock time is automatically set using the quality sound without any annoying interference or signal distortion. Furthermore, it can Clock Time (CT) data in DAB signal. ;... - Page 10 DIGITAL RADIO Settings in memory Other settings You can store up to 18 services. Press and hold Press to select an item (see the following table), then press Store a service Repeat step until the desired item is selected/activated or follow While listening to a service..
-
Page 11: Analog Radio
ANALOG RADIO DIGITAL RADIO ON: Allows the unit to temporarily switch to Traffic Information if available (“TI” lights up). ; OFF: Cancels. PTY SEARCH Select a PTY code (see below). If there is a station broadcasting a program of the same PTY code as you have selected, that station is tuned in. -
Page 12: Other Settings
ANALOG RADIO Select a stored station NEWS SET * ON: The unit will temporarily switch to News Programme if available. ; OFF: Cancels. Press one of the number buttons (1 to 5). (or) REGIONAL * ON: Switches to another station only in the specific region using the “AF” Press control. ;... -
Page 13: Cd/Usb/Ipod/Android
* When connecting an Android device, “Press [VIEW] to install JVC MUSIC PLAY APP” is shown. Follow the instructions to install the application. You can also install the latest version of JVC MUSIC PLAY application on your Android device before connecting. For more information, visit <http://www.jvc.net/cs/car/>. - Page 14 • To return to the previous setting item, press • To cancel, press and hold Preparation: Install the latest version of JVC Remote application on your device before connecting. For more information, visit <http://www.jvc.net/cs/car/>. You can make the settings in the same way as connection via Bluetooth.
-
Page 15: Bluetooth
BLUETOOTH® BLUETOOTH — Connection Pair and connect a Bluetooth device for the first time Press to turn on the unit. Supported Bluetooth profiles – Hands-Free Profile (HFP) Search and select “KD-DB9 BT” on the Bluetooth device. – Advanced Audio Distribution Profile (A2DP) “BT PAIRING”... -
Page 16: Android
• The symbolic button will blink in the color you have selected in [RING COLOR]. ( 13) – JVC MUSIC PLAY application is installed on the • The unit answers the call automatically if [AUTO ANSWER] is set to a selected time. ( 13) - Page 17 BLUETOOTH® Make the settings for receiving a call On the faceplate Press to enter Bluetooth mode. While having two active calls... Press to select an item (see the following table), End current call and activate Press and hold then press held call Repeat step until the desired item is selected or activated.
- Page 18 BLUETOOTH® Make a call using voice recognition Make a call Press and hold to activate the connected You can make a call from the call history, phonebook, or dialing the number. Call by phone. voice is also possible if your mobile phone has the feature. Speak the name of the contact you want to call or the Press to enter Bluetooth mode.
- Page 19 BLUETOOTH® Bluetooth mode settings Bluetooth compatibility check mode Press and hold You can check the connectivity of the supported profile Press to select an item (see the following table), then press between the Bluetooth device and the unit. Repeat step until the desired item is selected/activated or follow the instructions •...
-
Page 20: Reverse/Fast-Forward
BLUETOOTH® The connectivity result flashes on the display. BLUETOOTH — Audio “PAIRING OK” and/or “HANDS-FREE OK” * and/or While in BT AUDIO source, you “AUD.STREAM OK” * and/or “PBAP OK” * : Compatible can connect to five Bluetooth Compatible with Hands-Free Profile (HFP) audio devices and switch Compatible with Advanced Audio Distribution Profile (A2DP) between these five devices. - Page 21 ANDROID CONNECTED: You are able to use the application using the Android Preparation: smartphone connected via Bluetooth. Install the latest version of JVC Remote application on your device before ANDROID NOT CONNECTED: No Android device is connected to use the connecting. For more information, visit <http://www.jvc.net/cs/car/>.
-
Page 22: Aux
AUDIO SETTINGS Use a portable audio player Connect a portable audio player (commercially available). Auxiliary input jack Portable audio player Press and hold Press to select an item (see the following table), then press 3.5 mm stereo mini plug with “L” shaped Repeat step until the desired item is selected/activated or follow connector (commercially available) - Page 23 AUDIO SETTINGS BALANCE * PRO EQ Adjust your own sound settings. POSITION L15 to POSITION R15 (POSITION 00): Adjusts the left and • The settings are stored to [USER]. right speaker output balance. • The settings made may affect the current settings of [EASY EQ]. VOLUME ADJUST LEVEL –15 to LEVEL +06 (LEVEL 00): Preset the initial volume level 62.5HZ...
- Page 24 AUDIO SETTINGS Connection via speaker leads SOUND EFFECT For connections without using an external amplifier. However, with this SPACE ENHANCE (Not applicable for FM/AM source and DAB source.) settings you can also enjoy the subwoofer output. ( 30) SMALL/MEDIUM/LARGE: Virtually enhances the sound space. ; OFF: Cancels.
- Page 25 AUDIO SETTINGS 2-way crossover setting items Crossover settings Below are the available setting items for 2-way crossover and 3-way SPEAKER SIZE crossover. FRONT SIZE 8CM/10CM/12CM/13CM/16CM/17CM/18CM/4×6/ Caution 5×7/6×8/6×9/7×10 Select a crossover type according to how the speakers are connected. TWEETER SMALL/MIDDLE/LARGE/NONE (not connected) ( 30) REAR * 8CM/10CM/12CM/13CM/16CM/17CM/18CM/4×6/5×7/6×8/6×9/...
- Page 26 AUDIO SETTINGS 3-way crossover setting items Digital Time Alignment settings Digital Time Alignment sets the delay time of the speaker output to SPEAKER SIZE create a more suitable environment for your vehicle. TWEETER SMALL/MIDDLE/LARGE • For more information, 23, Determining the value for [DISTANCE] and [GAIN] MID RANGE 8CM/10CM/12CM/13CM/16CM/17CM/18CM/4×6/5×7/6×8/6×9 of [DTA SETTINGS].
-
Page 27: Display Settings
DISPLAY SETTINGS AUDIO SETTINGS Determining the value for [DISTANCE] and [GAIN] of [DTA SETTINGS] Symbolic button If you specify the distance from the center of the currently set listening position to every speaker, the delay time will be automatically computed and set. 1 Determine the center of the currently set listening position as the reference point. -
Page 28: References
• Preset color: CRYSTAL, FLOWER, FOREST, GRADATION, OCEAN, More information SUNSET, RELAX For: – Latest firmware updates and latest compatible item list – JVC original application DAY COLOR Store your own day and night illumination colors for the symbolic button. – Any other latest information Default color: [RED 31], [GREEN 31], [BLUE 23] Visit <http://www.jvc.net/cs/car/>. - Page 29 REFERENCES Playable files • Depending on the version of the operating system of the iPod/iPhone, some functions may • Playable audio file: not operate on this unit. For disc: MP3 (.mp3), WMA (.wma), AAC (.aac) For USB mass storage class device: MP3 (.mp3), WMA (.wma), AAC (.aac), WAV (.wav), About Android device FLAC (.flac)
-
Page 30: Troubleshooting
TROUBLESHOOTING REFERENCES Source name Display information Symptom Remedy CD or USB (For CD-DA) Sound cannot be heard. • Adjust the volume to the optimum level. Track title (Artist) Track title (Disc name) Track title (Date/Clock) • Check the cords and connections. Track title (Artist) with music synchronisation * Playing time (Date/Clock) “MISWIRING CHECK... - Page 31 “READING” keeps flashing. • Do not use too many hierarchical levels and folders. unit. ( 25) • Reload the disc or reattach the USB device. Cannot playback at • Make sure JVC MUSIC PLAY APP is installed on the “UNSUPPORTED DEVICE” • Check whether the connected device is compatible with [AUTO MODE].
-
Page 32: Installation/Connection
INSTALLATION/CONNECTION TROUBLESHOOTING Warning Symptom Remedy • The unit can only be used with a 12 V DC power supply, negative ground. Echo or noise occurs. • Adjust the microphone unit’s position. ( 11) • Disconnect the battery’s negative terminal before wiring and mounting. •... - Page 33 INSTALLATION/CONNECTION Installing the unit (in-dash mounting) Part list for installation (A) Faceplate Do the required wiring. ( 30) Hook on the top side (B) Trim plate Orientate the trim plate Dashboard of as illustrated before your car fitting. (C) Mounting sleeve Bend the appropriate tabs to hold the sleeve firmly in place.
-
Page 34: Iso Connectors
INSTALLATION/CONNECTION Wiring connection When connecting to an external amplifier, connect its ground wire to the Rear/Front/Subwoofer output car’s chassis to avoid damaging the unit. For 3-way crossover: Tweeter/Mid Range/Woofer output Antenna input terminal (for FM/AM) Microphone input jack ( 11) DAB antenna jack Fuse (10 A) (SMB connector) -
Page 35: Specifications
SPECIFICATIONS DAB Frequency Range L Band 1 452.960 MHz — 1 490.624 MHz Total Harmonic Distortion (1 kHz) 0.01 % Band III 174.928 MHz — 239.200 MHz Signal-to-Noise Ratio (1 kHz) 105 dB Sensitivity –100 dBm Dynamic Range 90 dB Signal-to-Noise Ratio 80 dB Channel Separation 85 dB Antenna Connector Type MP3 Decode Compliant with MPEG-1/2 Audio Layer-3 Antenna Output Voltage 14.4 V (11 V –... - Page 36 SPECIFICATIONS Version Bluetooth 3.0 Frequency Range 2.402 GHz — 2.480 GHz Output Power +4 dBm (MAX), 0 dBm (AVE) Power Class 2 Maximum Communication Range Line of sight approx. 10 m (32.8 ft) Pairing SSP (Secure Simple Pairing) Profile HFP1.6 (Hands-Free Profile) A2DP (Advanced Audio Distribution Profile) AVRCP1.5 (Audio/Video Remote Control Profile) PBAP (Phonebook Access Profile) SPP (Serial Port Profile)
- Page 38 TABLE DES MATIERES AVANT L’UTILISATION AVANT L’UTILISATION IMPORTANTES • Pour utiliser correctement l’appareil, veuillez ce manuel complément avant de l’utiliser. Il est particulièrement important que FONCTIONNEMENT DE BASE vous lisiez et acceptiez les avertissements et les précautions de ce manuel. •...
-
Page 39: Fonctionnement De Base
FONCTIONNEMENT DE BASE Façade Attachez Fente d’insertion Fenêtre d’affichage Détachez Comment réinitialiser Touche de détachement Pour Sur la façade Mettez l’appareil sous tension Appuyez sur • Maintenez la touche enfoncée pour mettre l’appareil hors tension. Ajustez le volume Appuyez sur •... - Page 40 : Annulation (la mise à niveau n’ e st pas activée). Appuyez sur pour faire les réglages, puis appuyez sur F/W UP Vxxx Pour en savoir plus sur la mise à niveau du micrologiciel, référez-vous à: <http://www.jvc.net/cs/car/>. Heure Minute Appuyez sur pour choisir [CLOCK FORMAT]...
- Page 41 RADIO NUMÉRIQUE PRISE EN MAIN À propos du DAB (Digital Audio Broadcasting) CLOCK DAB est l’un des systèmes de radio numérique disponibles aujourd’hui. Il peut offrir un son de qualité numérique sans toutes les interférences gênantes ni les distorsions des signaux. De plus, il peut transporter TIME SYNC : L’horloge est réglée automatiquement à...
- Page 42 RADIO NUMÉRIQUE Réglages en mémoire Autres paramètres Vous pouvez mémoriser un maximum de 18 services. Maintenez enfoncée Appuyez sur pour sélectionner un élément voir le tableau suivant , puis appuyez sur Mémorisez un service Répétez l’étape jusqu’à ce que l’élément souhaité soit sélectionné/ Pendant l’écoute d’un service..
- Page 43 RADIO ANALOGIQUE RADIO NUMÉRIQUE : Permet à l’appareil de commuter temporairement sur les informations routières si elles sont disponibles (“TI” s’allume). ; : Annulation. PTY SEARCH Sélectionnez un code PTY (voir ci-dessous). S’il y a une station diffusant un programme du code PTY que vous avez choisi, la station est accordée.
- Page 44 RADIO ANALOGIQUE Sélectionnez une station mémorisée NEWS SET * : L’appareil commute temporairement sur le programme d’information s’il est disponible. ; : Annulation. Appuyez sur l’une des touches numériques ( à (ou) REGIONAL * : Commute sur une autre station uniquement dans la région spécifiée, à l’aide de la Appuyez sur commande “AF”. ;...
- Page 45 Ne laissez pas le câble à l’intérieur de la voiture quand il n’ e st pas utilisé. Lors de la connexion d’un périphérique Android, “Press [VIEW] to install JVC MUSIC PLAY APP” apparaît. Suivez les instructions pour installer l’application. Vous pouvez aussi intaller la dernière version de l’application JVC MUSIC PLAY sur votre périphérique Android avant la connexion.
-
Page 46: Android
(via la prise d’entrée USB). Minuscules (a à z) Préparation: Nombres (0 à 9) Installez la dernière version de l’application JVC Remote sur votre périphérique avant la OTHERS Caractères autre que A à Z, 0 à 9 connexion. Pour plus d’informations, consultez <http://www.jvc.net/cs/car/>. - Page 47 BLUETOOTH® BLUETOOTH — Connexion Faites le pairage et connectez un périphérique Bluetooth pour la première fois Profiles Bluetooth pris en charge Appuyez sur pour mettre l’appareil sous tension. – Hands-Free Profile — Profile mains libres (HFP) Cherchez et sélectionnez “KD-DB9 BT” sur le périphérique Bluetooth. –...
- Page 48 • La touche symbolique clignote dans la couleur que vous avez sélectionnée dans [RING COLOR] ( 13) – L’application JVC MUSIC PLAY est installée sur le • L’appareil répond automatiquement à l’appel si [AUTO ANSWER] sur une heure sélectionnée. ( 13) périphérique Android...
- Page 49 BLUETOOTH® Réalise les réglages de réception d’un appel Pour Sur la façade Appuyez sur pour entrer en mode Bluetooth. Quand vous avez deux appels actifs... Appuyez sur pour sélectionner un élément voir le tableau suivant , puis appuyez sur Terminez l’appel actuel et activez Maintenez enfoncé...
-
Page 50: Faire Un Appel
BLUETOOTH® Faites au appel en utilisant la reconnaissance Faire un appel vocale Vous pouvez faire un appel à partir de l’historique, du répertoire d’adresses ou composer le numéro. Un Maintenez pressé pour activer le téléphone appel par commande vocale est possible si votre téléphone portable possède cette fonction. connecté. - Page 51 BLUETOOTH® Réglages du mode Bluetooth Mode de vérification de la compatibilité Bluetooth Maintenez enfoncée Appuyez sur pour sélectionner un élément voir le tableau suivant , puis Vous pouvez vérifier la connectivité du profile pris en charge entre le appuyez sur périphérique Bluetooth et l’appareil.
-
Page 52: Lecture Aléatoire
BLUETOOTH® Le résultat de la connectivité clignote sur l’affichage. BLUETOOTH — Audio “PAIRING OK” et/ou “HANDS-FREE OK” et/ou Quand la source est BT AUDIO, “AUD.STREAM OK” et/ou “PBAP OK” : Compatible vous pouvez vous connecter à cinq Compatible avec le Profile mains libres (HFP) périphériques audio Bluetooth Compatible avec le Profile de distribution audio avancé... - Page 53 : Vous pouvez utiliser l’application à l’aide du smartphone Android Préparation: connecté via Bluetooth. Installez la dernière version de l’application JVC Remote sur votre périphérique avant la ANDROID NOT CONNECTED : Aucun périphérique Android n’ e st connecté pour utiliser connexion.
- Page 54 RÉGLAGES AUDIO Utilisation d’un lecteur audio portable Connectez un lecteur audio portable (en vente dans le commerce). Prise d’ e ntrée auxiliaire Lecteur audio portable Maintenez enfoncée Appuyez sur pour sélectionner un élément (voir le tableau suivant), puis appuyez sur Répétez l’étape jusqu’à...
- Page 55 RÉGLAGES AUDIO BALANCE * PRO EQ Ajustez vos propres ajustements sonores. POSITION L15 POSITION R15 POSITION 00 à ( ): Règle la balance de sortie • [USER] Les réglages sont mémorisés dans des enceintes gauche et droite. • [EASY EQ] Les réglages réalisés peuvent affecter les réglages actuels de VOLUME ADJUST LEVEL –15 LEVEL +06...
- Page 56 RÉGLAGES AUDIO Connexion via les câbles d’enceinte SOUND EFFECT Pour les connexions sans utiliser un amplificateur extérieur. Cependant, avec ces SPACE ENHANCE (Ne s’applique pas à la source FM/AM et à la source DAB.) réglages vous pouvez aussi profiter de la sortie du caisson de grave. ( 30) SMALL/MEDIUM/LARGE : Améliore virtuellement l’...
- Page 57 RÉGLAGES AUDIO Options de réglage de la transition 2 voies Réglages de transition Voici les options de réglage disponibles pour la transition 2 voies et la transition SPEAKER SIZE 3 voies. FRONT SIZE 8CM/10CM/12CM/13CM/16CM/17CM/18CM 4×6 Précautions 5×7 6×8 6×9 7×10 Sélectionnez un type de transition en fonction de la connexion de vos enceintes.
- Page 58 RÉGLAGES AUDIO Options de réglage de la transition 3 voies Réglages de l’alignement temporel numérique L’alignement temporel numérique règle la temporisation de la sortie d’enceinte pour SPEAKER SIZE créer un environnement qui convient mieux à votre véhicule. TWEETER SMALL/MIDDLE/LARGE • Pour plus d’informations, 23, Déterminez la valeur pour [DISTANCE] et [GAIN] de [DTA SETTINGS]...
- Page 59 RÉGLAGES D’AFFICHAGE RÉGLAGES AUDIO Déterminez la valeur pour [DISTANCE] et [GAIN] de [DTA SETTINGS] Touche symbolique Si vous spécifiez la distance à partir du centre de la positon d’ é coute actuellement réglée sur n’importe quel réglage, la temporisation est calculée automatiquement et réglée. Détermine le centre de la position d’...
- Page 60 Pour: – Les dernières mise à jour du micrologiciel et la liste de compatibilité la plus récente DAY COLOR Mémorisez vos propres couleurs d’ é clairage du jour et de la nuit pour la touche symbolique. – Application originale JVC [RED 31] [GREEN 31] [BLUE 23] Couleur par défaut:...
- Page 61 RÉFÉRENCES Fichiers pouvant être lus À propos du périphérique Android • • Fichier audio reproductible: Cet appareil prend en charge Android OS 4.1 et ultérieur. • Pour les disques: MP3 (.mp3), WMA (.wma), AAC (.aac) Certains périphériques Android (avec OS 4.1 et ultérieur) peuvent ne pas prendre en charge complétement Android Pour les périphériques USB à...
-
Page 62: [Auto Mode] ( 10)
GUIDE DE DÉPANNAGE RÉFÉRENCES Nom de la Informations sur l’affichage Symptôme Remède source Le son ne peut pas être entendu. • Ajustez le volume sur le niveau optimum. (Pour CD-DA) • Vérifiez les cordons et les connexions. Titre de plage (Artiste) Titre de plage (Nom du disque) Titre de plage (Date/Horloge) “MISWIRING CHECK WIRING THEN... - Page 63 • N’utilisez pas trop de niveaux de hiérarchie et de dossiers. Lecture impossible en mode • Assurez-vous que JVC MUSIC PLAY APP est installé sur le périphérique • Remettez le disque en place ou reconnectez le périphérique USB. [AUTO MODE] ( 9) Android.
- Page 64 INSTALLATION/RACCORDEMENT GUIDE DE DÉPANNAGE Avertissement Symptôme Remède • L’appareil peut uniquement être utilisé avec une alimentation de 12 V CC, à masse négative. Il y a un écho ou du bruit. • ( 11) Ajustez la position du microphone. • Déconnectez la borne négative de la batterie avant le câblage et le montage.
- Page 65 INSTALLATION/RACCORDEMENT Installation de l’appareil (montage encastré) Liste des pièces pour l’installation Façade Réalisez les connexions nécessaires. ( 30) Plaque d’assemblage Crochet sur le côté supérieur Orientez la plaque de Tableau de bord de garniture de la façon votre voiture illustrée avant la fixation. Manchon de montage Tordez les languettes appropriées pour maintenir le manchon en place.
- Page 66 INSTALLATION/RACCORDEMENT Connexions Lors de la connexion à un amplificateur extérieur, connectez son fil de masse au châssis de la voiture pour éviter d’ e ndommager l’appareil. Sortie arrière/avant/caisson de grave Pour la transition 3 voies: Sortie de l’ e nceinte des aigus/ médiums/graves Prise d’...
- Page 67 SPÉCIFICATIONS Plage de fréquences L Band 1 452,960 MHz — 1 490,624 MHz Distorsion harmonique totale (1 kHz) 0,01 % Bande III 174,928 MHz — 239,200 MHz Taux de Signal/Bruit (1 kHz) 105 dB Sensibilité –100 dBm Gamme dynamique 90 dB Taux-de-Signal/Bruit 80 dB Séparation des canaux 85 dB Type de connecteur d’antenne Décodage MP3 Compatible avec le format MPEG-1/2 Audio Layer-3...
- Page 68 SPÉCIFICATIONS Version Bluetooth 3.0 Plage de fréquences 2,402 GHz — 2,480 GHz Puissance de sortie +4 dBm (MAX), 0 dBm (AVE) Power Class 2 Portée de communication maximale Ligne de vue approximative 10 m (32,8 ft) Pairage SSP (Profile simple sécurisé) Profile HFP1.6 (Hands-Free Profile — Profile mains libres) A2DP (Advanced Audio Distribution Profile —...
- Page 70 INHALT VOR DER INBETRIEBNAHME VOR DER INBETRIEBNAHME WICHTIG • Um richtige Verwendung sicherzustellen, lesen Sie die Bedienungsanleitung vor der Verwendung des Produkts sorgfältig durch. GRUNDLAGEN Es ist besonders wichtig, dass Sie die als Warnung und Vorsicht gekennzeichneten Hinweise in dieser Anleitung lesen und beachten.
-
Page 71: Grundlagen
GRUNDLAGEN Frontblende Anbringen Ladeschlitz Displayfenster Abnehmen Rücksetzen Abnehmen-Taste Auf der Frontblende Einschalten Drücken Sie • Zum Ausschalten halten Sie die Taste gedrückt. Einstellen der Lautstärke Drücken Sie • Halten Sie gedrückt, um die Lautstärke kontinuierlich auf 15 zu steigern. Drücken Sie zum Stummschalten des Tons oder zum Pausieren der Wiedergabe. -
Page 72: Erste Schritte
: Hebt auf (Aktualisierung wird nicht ausgeführt). Drücken Sie , um Auswahlen zu treffen, und drücken Sie F/W UP Vxxx Einzelheiten darüber, wie Sie die Firmware aktualisieren können, siehe: dann <http://www.jvc.net/cs/car/>. Stunde Minute Drücken Sie zum Wählen von [CLOCK FORMAT] , und drücken FACTORY RESET : Setzt die Einstellungen auf Standardwerte zurück (ausgenommen gespeicherte Sender). ;... -
Page 73: Digital Radio
DIGITAL RADIO ERSTE SCHRITTE Über DAB (Digital Audio Broadcasting) CLOCK DAB ist eines der heute verfügbaren digitalen Rundfunksendesysteme. Es kann Klang in Digitalqualität ohne störende Interferenzen oder Signalverzerrung liefern. Außerdem kann dieser Dienst Text, Bilder und TIME SYNC : Die Uhrzeit wird automatisch mit den Uhrzeitdaten (CT) im Daten übermitteln. - Page 74 DIGITAL RADIO Einstellungen im Speicher Andere Einstellungen Sie können bis zu 18 Dienste speichern. Halten Sie gedrückt. Drücken Sie um einen Gegenstand zu treffen siehe folgende Tabelle , und drücken Sie dann Speichern eines Dienstes Wiederholen Sie Schritt , bis der gewünschte Gegenstand gewählt/ Beim Hören eines Dienstes...
-
Page 75: Analog Radio
ANALOG RADIO DIGITAL RADIO : Erlaubt es, das Gerät kurzzeitig auf Verkehrsinformation schalten, wenn verfügbar (“TI” leuchtet auf). ; : Hebt auf. PTY SEARCH Wählen Sie einen PTY-Code (siehe unten). Wenn ein Sender eine Sendung mit dem PTY-Code ausstrahlt, den Sie gewählt haben, wird dieser Sender eingestellt. - Page 76 ANALOG RADIO Wählen Sie einen gespeicherten Sender aus NEWS SET * : Das Gerät schaltet kurzzeitig auf das Nachrichtenprogramm, falls verfügbar. ; : Hebt auf. Drücken Sie eine der Zifferntasten ( bis (oder) REGIONAL * : Schaltet auf einen anderen Sender in der spezifischen Region nur mit der “AF”- Drücken Sie Steuerung. ;...
-
Page 77: Cd/Usb/Ipod/Android
Lassen Sie bei Nichtgebrauch nicht das Kabel im Auto liegen. Wenn ein Android-Gerät angeschlossen wird, wird “Press [VIEW] to install JVC MUSIC PLAY APP” angezeigt. Gehen Sie zur Installation der Anwendung gemäß den Anweisungen vor. Sie können auch vor dem Verbinden die neueste Version der JVC MUSIC PLAY-Anwendung auf Ihrem Android-Gerät installieren. Für die neueste Information besuchen Sie <http://www.jvc.net/cs/car/>. - Page 78 Zum Abbrechen halten Sie gedrückt. Vorbereitung: Installieren Sie vor dem Verbinden die neueste Version der JVC Remote-Anwendung auf Ihrem Gerät. Für die neueste Information besuchen Sie <http://www.jvc.net/cs/car/>. Sie können die Einstellungen auf gleiche Weise vornehmen wie bei Verbindung über Bluetooth.
-
Page 79: Bluetooth
BLUETOOTH® BLUETOOTH — Verbindung Zum erstmaligen Registrieren und Anschließen eines Bluetooth-Geräts Unterstützte Bluetooth-Profile Drücken Sie , um die Einheit einzuschalten. – Hands-Free Profile (HFP) Suchen und wählen Sie “KD-DB9 BT” am Bluetooth-Gerät. – Advanced Audio Distribution Profile (A2DP) “BT PAIRING” blinkt im Display. –... - Page 80 – [AUTO PAIRING] [ON] ( 15) gestellt ist. Wenn ein Ruf empfangen wird: – Die JVC MUSIC PLAY-Anwendung wird auf dem Android- • Die Symbol-Taste blinkt in der Farbe, die Sie in [RING COLOR] gewählt haben. ( 13) Gerät...
- Page 81 BLUETOOTH® Nehmen Sie die Einstellungen zum Empfang eines Auf der Frontblende Anrufs vor Bei zwei aktiven Anrufen... Drücken Sie , um auf Bluetooth-Modus zu schalten. Aktuellen Anruf beenden und Drücken Sie um einen Gegenstand zu treffen siehe Halten Sie oder gehaltenen Anruf aktivieren folgende Tabelle , und drücken Sie dann...
- Page 82 BLUETOOTH® Einen Ruf mit Spracherkennung tätigen Tätigen Sie einen Ruf Halten Sie gedrückt, um das angeschlossene Sie können einen Ruf von der Ruf-Historie, dem Telefonbuch oder durch Wählen der Telefonnummer Telefon zu aktivieren. tätigen. Ruf durch Sprachbefehl ist auch möglich, wenn Ihr Handy dieses Merkmal hat. Sprechen Sie den Namen des anzurufenden Drücken Sie , um auf Bluetooth-Modus zu schalten.
- Page 83 BLUETOOTH® Bluetooth-Modus-Einstellungen Prüfmodus für Bluetooth-Kompatibilität Halten Sie gedrückt. Sie können die Konnektivität des unterstützten Profils zwischen dem Drücken Sie um einen Gegenstand zu treffen siehe folgende Tabelle , und Bluetooth-Gerät und der Einheit prüfen. drücken Sie dann • Stellen Sie sicher, dass kein Bluetooth-Gerät gekoppelt ist. Wiederholen Sie Schritt , bis der gewünschte Gegenstand gewählt/aktiviert ist, oder Halten Sie...
-
Page 84: Halten Sie Gedrückt
BLUETOOTH® Das Konnektivitätsergebnis blinkt im Display. BLUETOOTH — Audio “PAIRING OK” und/oder “HANDS-FREE OK” und/oder Während BT AUDIO als Quelle “AUD.STREAM OK” und/oder “PBAP OK” : Kompatibel eingestellt ist, können Sie die Kompatibel mit Hands-Free Profile (HFP) Verbindung zu fünf Bluetooth- Kompatibel mit Advanced Audio Distribution Profile (A2DP) Audiogeräten herstellen und Kompatibel mit Phonebook Access Profile (PBAP) -
Page 85: Drücken Sie Tabelle ) , Und Drücken Sie Dann 3 Wiederholen Sie Schritt
Zeigt den Status des gewählten Geräts. IOS CONNECTED : Sie können die Anwendung mit dem über Bluetooth oder USB-Eingang JVC Remote Anwendung ist darauf ausgelegt, die Bedienung des JVC Auto-Receivers angeschlossenen iPhone/iPod verwenden. vom iPhone/iPod (über Bluetooth oder über USB-Eingang) oder Android-Smartphone IOS NOT CONNECTED : Kein IOS-Gerät ist zur Verwendung der Anwendung angeschlossen. -
Page 86: Aux
AUDIOEINSTELLUNGEN Verwendung eines tragbaren Audioplayers Schließen Sie einen tragbaren Audioplayer (im Handel erhältlich) an. Auxiliary-Eingabebuchse Tragbarer Audioplayer Halten Sie gedrückt. Drücken Sie um einen Gegenstand zu treffen (siehe folgende Tabelle), und drücken Sie dann Wiederholen Sie Schritt , bis der gewünschte Gegenstand gewählt/ 3,5-mm-Stereo-Ministecker mit “L”-förmigem Anschluss aktiviert ist, oder folgen Sie den Anweisungen auf dem gewählten (im Handel erhältlich) -
Page 87: Level -10
AUDIOEINSTELLUNGEN BALANCE * PRO EQ Justieren Ihre eigenen Klangeinstellungen. POSITION L15 POSITION R15 POSITION 00 bis ( ): Stellen Sie die • [USER] Diese Einstellungen werden unter gespeichert. Ausgangsbalance zwischen linken und rechten Lautsprechern ein. • Die vorgenommenen Einstellungen können die aktuellen Einstellungen von VOLUME ADJUST LEVEL –15 LEVEL +06... - Page 88 AUDIOEINSTELLUNGEN Anschluss über Lautsprecherkabel SOUND EFFECT Für Verbindungen ohne externen Verstärker. Mit diesen Einstellungen können Sie aber SPACE ENHANCE (Gilt nicht für FM/AM-Quelle und DAB-Quelle.) auch den Subwoofer-Ausgang genießen. ( 30) SMALL/MEDIUM/LARGE : Erlaubt virtuelle Verbesserung des Klangraums. ; : Hebt auf. Audiosignal über hintere Lautsprecherleitung SND RESPONSE LEVEL1...
- Page 89 AUDIOEINSTELLUNGEN Einstellpunkte für 2-Wege-Übergang Übergangseinstellungen Im Folgenden werden die verfügbaren Einstellpunkte für 2-Wege-Übergang und SPEAKER SIZE 3-Wege-Übergang gezeigt. FRONT SIZE 8CM/10CM/12CM/13CM/16CM/17CM/18CM 4×6 Vorsicht 5×7 6×8 6×9 7×10 Wählen Sie einen Übergangstyp entsprechend der Art des Anschlusses der TWEETER SMALL MIDDLE LARGE NONE (nicht angeschlossen)
- Page 90 AUDIOEINSTELLUNGEN Einstellpunkte für 3-Wege-Übergang Einstellungen der digitalen Zeitanpassung Die digitale Zeitanpassung stellt die Verzögerungszeit des Lautsprecherausgangs ein, SPEAKER SIZE um eine geeignetere Umgebung für Ihr Fahrzeug zu erzeugen. TWEETER SMALL/MIDDLE/LARGE • Für die weitere Informationen, 23, Bestimmen des Werts für [DISTANCE] und [GAIN] unter [DTA SETTINGS].
-
Page 91: Display-Einstellungen
DISPLAY-EINSTELLUNGEN AUDIOEINSTELLUNGEN Bestimmen des Werts für [DISTANCE] und [GAIN] unter [DTA SETTINGS] Symbol-Taste Wenn Sie den Abstand von der Mitte der momentan eingestellten Hörposition zu jedem Lautsprecher festlegen, wird die Verzögerungszeit automatisch berechnet und eingestellt. Bestimmen Sie die Mitte der momentan eingestellten Hörposition als Bezugspunkt. -
Page 92: Zur Bezugnahme
[GREEN 31] [BLUE 23] Standardfarbe: – Jegliche neuesten Informationen 1 RED GREEN BLUE : Wählen Sie eine Primärfarbe. Besuchen Sie <http://www.jvc.net/cs/car/>. 2 00 : Wählen Sie den Pegel. Wiederholen Sie Schritt zur Einstellung aller Primärfarben. Allgemeines NIGHT COLOR • Ihre Einstellung wird unter... - Page 93 ZUR BEZUGNAHME Abspielbare Dateien Wissenswertes über Android-Geräte • • Wiederzugebende Audiodateien: Diese Einheit unterstützt Android OS 4.1 und höher. • Für Disc: MP3 (.mp3), WMA (.wma), AAC (.aac) Manche Android-Geräte (mit OS 4.1 und höher) unterstützen möglicherweise Android Open Accessory (AOA) 2.0 nicht Für USB-Massenspeichergerät: MP3 (.mp3), WMA (.wma), AAC (.aac), WAV (.wav), FLAC (.flac) vollständig.
-
Page 94: Fehlersuche
FEHLERSUCHE ZUR BEZUGNAHME Quellenname Display-Information Symptom Abhilfe (Für CD-DA) oder Es wird kein Ton gehört. • Die Lautstärke auf den optimalen Pegel einstellen. Tracktitel (Interpret) Tracktitel (Disc-Name) Tracktitel (Datum/Uhrzeit) Spielzeit (Datum/ • Prüfen Sie die Kabel und Verbindungen. Uhrzeit) Tracktitel (Interpret) mit Musiksynchronisation (zurück zum Anfang) “MISWIRING CHECK WIRING THEN Schalten Sie die Stromversorgung aus, und prüfen Sie, ob die... - Page 95 “UNSUPPORTED DEVICE” • Prüfen Sie, ob das angeschlossene Gerät kompatibel mit diesem Gerät [AUTO MODE] • Stellen Sie sicher, dass JVC MUSIC PLAY APP im Android-Gerät erscheint. ist, und stellen Sie sicher, dass die Dateisysteme die unterstützten Wiedergabe unmöglich. installiert ist.
-
Page 96: Einbau/Anschluss
EINBAU/ANSCHLUSS FEHLERSUCHE Warnung Symptom Abhilfe • Das Gerät kann nur bei 12 V DC-Versorgung mit negativer Masse eingebaut werden. Echo oder Rauschen tritt auf. • ( 11) Justieren Sie die Mikrofoneinheit-Position. • Trennen Sie den negativen Batterieanschluss vor der Verkabelung und Befestigung ab. •... - Page 97 EINBAU/ANSCHLUSS Einbau der Einheit (Einbau im Armaturenbrett) Teileliste für den Einbau Frontblende Führen Sie die erforderliche Verkabelung aus. ( 30) Frontrahmen Haken auf der Oberseite Richten Sie den Frontrahmen Armaturenbrett vor dem Anbringen aus, wie Ihres Autos in der Abbildung gezeigt. Einbauhalterung Die geeigneten Zapfen biegen, um die Manschette sicher festzuhalten.
- Page 98 EINBAU/ANSCHLUSS Verdrahtungsanschluss Bei Anschluss an einen externen Verstärker schließen Sie dessen Massedraht an der Autokarosserie an, um Beschädigung des Geräts Hinterer/Vorderer/Subwoofer-Ausgang zu vermeiden. Für 3-Wege-Übergang: Hochtöner/Mitteltöner/Tieftöner-Ausgang Antennen-Eingangsklemme (für FM/AM) ( 11) Mikrofoneingangsbuchse DAB-Antennenbuchse Sicherung (10 A) (SMB-Anschluss) Anschluss des ISO-Anschlusses an manche Gelb (Batteriekabel) Hellblau/Gelb VW/Audi oder Opel (Vauxhall) Automobile...
-
Page 99: Technische Daten
TECHNISCHE DATEN Frequenzbereich L-Band 1 452,960 MHz — 1 490,624 MHz Gesamtklirrfaktor (1 kHz) 0,01 % Band III 174,928 MHz — 239,200 MHz Signal-Rauschabstand (1 kHz) 105 dB Empfindlichkeit –100 dBm Dynamikbereich 90 dB Signal-Rauschabstand 80 dB Kanaltrennung 85 dB Antennenanschluss-Typ MP3-Decodierung Unterstützt MPEG-1/2 Audio Layer-3 Antennen-Ausgangsspannung 14,4 V (11 V – 16 V) WMA-Decodierung Unterstützt Windows Media Audio Antennen-Maximalstrom < 100 mA... - Page 100 TECHNISCHE DATEN Version Bluetooth 3.0 Frequenzbereich 2,402 GHz — 2,480 GHz Ausgangsleistung +4 dBm (MAX), 0 dBm (AVE) Leistungsklasse 2 Maximaler Kommunikationsbereich Sichtlinie ca. 10 m (32,8 ft) Pairing SSP (Secure Simple Pairing) Profil HFP1.6 (Hands-Free Profile) A2DP (Advanced Audio Distribution Profile) AVRCP1.5 (Audio/Video Remote Control Profile) PBAP (Phonebook Access Profile) SPP (Serial Port Profile) Maximale Ausgangsleistung...
- Page 104 • The Bluetooth® word mark and logos are registered trademarks owned by permission. Bluetooth SIG, Inc. and any use of such marks by JVC KENWOOD Corporation is under license. Other trademarks and trade names are those of their respective owners.
Need help?
Do you have a question about the KD-DB98BT and is the answer not in the manual?
Questions and answers