Table of Contents
Advertisement
Available languages
Available languages
Quick Links
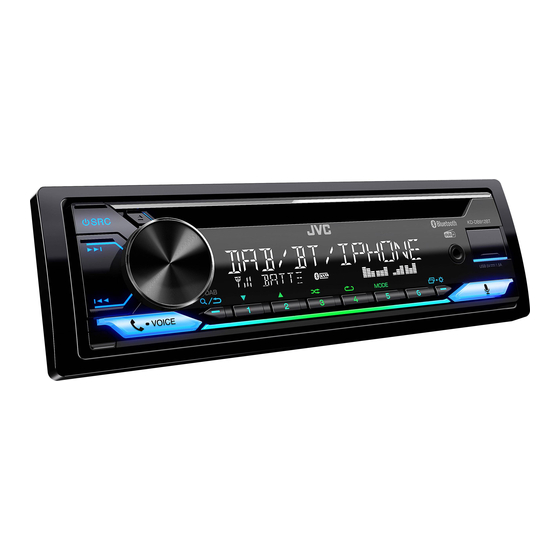
KD-DB912BT
CD RECEIVER
Quick Start Guide
RECEPTOR CON CD
Guía de inicio rápido
CD-RECEIVER
Snelstartgids
RECEPTOR CD
Guia de Início Rápido
CD-RECEIVER
Schnellstartanleitung
RÉCEPTEUR CD
Guide de démarrage rapide
SINTOAMPLIFICATORE CON RIPRODUTTORE DI CD
Guida di avvio rapido
For detailed operations and information, refer to the INSTRUCTION MANUAL on the following
website:
Para obtener más información y detalles sobre las operaciones, consulte el MANUAL DE
INSTRUCCIONES en el siguiente sitio web:
Raadpleeg de GEBRUIKSAANWIJZING op de volgende website voor gedetailleerde informatie over
de bediening:
Para as operações e informações detalhadas, consulte o MANUAL DE INSTRUÇÕES no website
abaixo:
Für detaillierte Bedienungen und Informationen siehe BEDIENUNGSANLEITUNG auf der folgenden
Website:
Pour les opérations et les informations détaillées, reportez-vous au MANUEL D'INSTRUCTIONS sur
le site web suivant.
Per le operazioni e le informazioni dettagliate, fare riferimento al ISTRUZIONI PER L'USO nel
seguente sito web:
<http://www.jvc.net/cs/car/>
ENGLISH
ESPAÑOL
NEDERLANDS
PORTUGUÊS
DEUTSCH
FRANÇAIS
ITALIANO
B5K-0661-00 [E]
Advertisement
Table of Contents

Related Manuals for JVC KD-DB912BT


Summary of Contents for JVC KD-DB912BT
- Page 1 ESPAÑOL NEDERLANDS PORTUGUÊS DEUTSCH FRANÇAIS ITALIANO KD-DB912BT CD RECEIVER For detailed operations and information, refer to the INSTRUCTION MANUAL on the following Quick Start Guide website: RECEPTOR CON CD Para obtener más información y detalles sobre las operaciones, consulte el MANUAL DE Guía de inicio rápido...
- Page 2 Informação sobre a forma de deitar fora Velho Equipamento Eléctrico, Electrónico e baterias (aplicável nos países que adotaram sistemas de recolha de lixos separados) Produtos e baterias com o símbolo (caixote do lixo com um X) não podem ser deitados fora junto com o lixo doméstico.
- Page 3 For Israel Declaração de conformidade relativa à Directiva RE 2014/53/EU Declaração de conformidade relativa à Directiva RoHS 2011/65/EU Fabricante: JVCKENWOOD Corporation 3-12, Moriya-cho, Kanagawa-ku, Yokohama-shi, Kanagawa, 221-0022, JAPAN Representante na UE: JVCKENWOOD Europe B.V. Amsterdamseweg 37, 1422 AC UITHOORN, THE NETHERLANDS Konformitätserklärung in Bezug auf die RE-Vorschrift 2014/53/EU Konformitätserklärung in Bezug auf die RoHS-Vorschrift 2011/65/EU Hersteller:...
- Page 4 Par la présente, JVCKENWOOD déclare que Por la presente, JVCKENWOOD declara que el JVCKENWOOD ezennel kijelenti, hogy a rádiové zariadenie „KD-DB912BT“ vyhovuje l’équipement radio « KD-DB912BT » est conforme equipo de radio “KD-DB912BT” cumple la Directiva „KD-DB912BT“ rádióberendezés megfelel a smernici 2014/53/EÚ.
- Page 5 JVCKENWOOD ovim izjavljuje da je radio oprema de classe 1. Cela signifie que l’appareil utilise des rayons laser d’une classe faible. Il n’y a pas de danger de “KD-DB912BT” u skladu s Direktivom 2014/53/EU. Українська radiation accidentelle hors de l’appareil.
-
Page 6: Software License Agreement
SOFTWARE LICENSE AGREEMENT Article 4 Right pertaining to the Licensed Software Any and all copyrights and other rights pertaining to the Licensed Software and related documents The software embedded in the Product (hereinafter the "Licensed Software") provided by Licensor is shall belong to the Licensor or the original holder of the right who granted to the Licensor the license or copyrighted to or sublicensable by the Licensor, and this Agreement provides for the terms and conditions sublicense for the Licensed Software (hereinafter the "Original Rightholder"), and the User shall not be... -
Page 7: Important Notice Concerning The Software
Important Notice concerning the Software Article 9 Destruction of the Licensed Software If this Agreement is terminated pursuant to the provision of Article 8, the User shall destroy the Licensed -jansson Software, any related documents and copies thereof within two (2) weeks from such date of termination. Copyright (c) 2009-2012 Petri Lehtinen <petri@digip.org>... - Page 8 -CMP sha2 AUTHOR: Aaron D. Gifford - http://www.aarongifford.com/ The MIT License (MIT) Copyright (c) 2014 Charles Gunyon Copyright (c) 2000-2001, Aaron D. Gifford All rights reserved. Permission is hereby granted, free of charge, to any person obtaining a copy of this software and associated documentation files (the "Software"), to deal in the Software without restriction, including without You may obtain a copy of the license at limitation the rights to use, copy, modify, merge, publish, distribute, sublicense, and/or sell copies of the...
- Page 9 T-Kernel 2.0 Copyright (c) 1995, 1996 Carnegie-Mellon University. All rights reserved. This product uses the source code of T-Kernel 2.0 under T-License 2.0 granted by T-Engine Forum Author: Chris G. Demetriou (www.tron.org) Permission to use, copy, modify and distribute this software and its documentation is hereby granted, BSD-3-Clause provided that both the copyright notice and this permission notice appear in all copies of the software, Copyright (c) 2000-2001, Aaron D.
-
Page 10: Basic Procedure
Installation/Connection Basic procedure Remove the key from the ignition switch, then disconnect the terminal of the car battery. This section is for the professional installer. Connect the wires properly. See “Wiring connection” on page 3. For safety’s sake, leave wiring and mounting to professionals. Consult the car audio dealer. Install the unit to your car. -
Page 11: Wiring Connection
Installing the unit (without mounting sleeve) Wiring connection Remove the mounting sleeve and trim plate from the unit. Align the holes in the unit (on both sides) with the vehicle DAB antenna jack (SMB connector) mounting bracket and secure the unit with screws (commercially available). -
Page 12: Before Use
Before Use Basics IMPORTANT Faceplate • To ensure proper use, please read through this Guide before using Volume knob Loading slot Auxiliary input jack this product. It is especially important that you read and observe Warnings and Cautions in this Guide. •... -
Page 13: Getting Started
Getting Started Set the basic settings Press and hold Cancel the demonstration Turn the volume knob to select an item (see the following table), then press the knob. When you turn on the power for the first time (or [FACTORY RESET] is set to Repeat step until the desired item is selected or activated. -
Page 14: Digital Radio
Digital Radio Settings in memory You can store up to 18 services. About DAB (Digital Audio Broadcasting) Store a service DAB is one of the digital radio broadcasting systems available today. It can While listening to a service..deliver digital quality sound without any annoying interference or signal Press and hold one of the number buttons (1 to 6). -
Page 15: Analog Radio
Analog Radio CD/USB/iPod Selectable source: Search for a station CD/USB/iPod USB or iPod BT Press B SRC repeatedly to select FM or AM. Press S / T to search for a station automatically. (or) Start playback Press and hold S / T until “M” flashes, then press repeatedly to search for a station manually. -
Page 16: Menu Settings
• Refer to the INSTRUCTION MANUAL on the following website for the detailed explanation of each item: <http://www.jvc.net/cs/car/> • The availability of each item vary depending on the model. Turn the volume knob clockwise to select [SUBWOOFER SET], then press the knob. -
Page 17: Other Information
Turn the volume knob clockwise to select [COLOR], then press the knob. For playback operations of AUX, Spotify, AMAZON ALEXA sources, refer to the INSTRUCTION MANUAL on the following website: <http://www.jvc.net/cs/car/> Press the volume knob if [PRESET] is shown on the display. Note for specifications Bluetooth Frequency Range: 2.402 GHz —... -
Page 18: Connect The Microphone
Press the volume knob. Press B SRC to turn on the unit. Select group or folder Press 2 J / 1 K. Search and select the name of your receiver (“KD-DB912BT”) on the Bluetooth device. Press S / T. Reverse skip/Forward skip Perform (A) or (B) depending on what appears on the display. -
Page 20: Procedimiento Básico
Instalación/Conexión Procedimiento básico Quite la llave del interruptor de encendido; después, desconecte el terminal de la batería del automóvil. Esta sección es para los instaladores profesionales. Conecte los cables correctamente. Consulte “Conexión del cableado” en la Para fines de seguridad, deje que un profesional realice el cableado y el montaje. Consulte con un página 3. - Page 21 Instalación de la unidad (sin manguito de montaje) Conexión del cableado Retire de la unidad, el manguito de montaje y la placa embellecedora. Alinee los orificios de la unidad (en ambos lados) con la ménsula de montaje del vehículo y asegure la unidad con los tornillos (disponibles Toma de antena DAB (conector SMB) en el mercado).
-
Page 22: Antes Del Uso
Antes del uso Puntos básicos IMPORTANTE Placa frontal • Antes de utilizar este producto y para asegurar su uso correcto, lea Rueda de volumen Ranura de carga Toma de entrada auxiliar esta guía por completo. En especial, lea y observe las Advertencias y Precauciones incluidas en esta guía. -
Page 23: Procedimientos Iniciales
Procedimientos iniciales Realice los ajustes básicos Pulse y mantenga pulsado Gire la rueda de volumen para seleccionar un elemento (consulte la Cancele la demostración siguiente tabla) y, a continuación, pulse la rueda. [FACTORY RESET] Cuando enciende la unidad por primera vez (o está... -
Page 24: Radio Digital
Radio digital Ajustes en la memoria Puede guardar hasta 18 servicios. Acerca de DAB (Radiodifusión de audio digital) Guardar un servicio DAB es unos de los sistemas de radiodifusión digital de radio disponibles en la Mientras escucha un servicio..actualidad. Puede proporcionar sonido de calidad digital sin ninguna interferencia Pulse y mantenga pulsado uno de los botones numéricos (1 a 6). -
Page 25: Radio Analógica
Radio analógica CD/USB/iPod Fuente seleccionable: Búsqueda de una emisora CD/USB/iPod USB o iPod BT Pulse SRC repetidamente para seleccionar FM o AM. Pulse para la búsqueda automática de emisoras. Inicie la reproducción Pulse y mantenga pulsado hasta que parpadee “M” y, a La fuente cambia automáticamente y la reproducción se inicia al cargar un disco continuación, pulse repetidamente para realizar la búsqueda manual de o al conectar un dispositivo (dispositivo USB/ iPod/iPhone) al terminal de entrada... -
Page 26: Ajustes Del Menú
• Para obtener más detalles sobre cada una de las opciones, consulte el MANUAL DE INSTRUCCIONES en el siguiente sitio web: <http://www.jvc.net/cs/car/> Gire la rueda de volumen en sentido horario para seleccionar • La disponibilidad de cada opción varía según el modelo. -
Page 27: Otras Informaciones
[COLOR] y, a AMAZON ALEXA , consulte el MANUAL DE INSTRUCCIONES en el siguiente sitio continuación, pulse la rueda. web: <http://www.jvc.net/cs/car/> Nota sobre las especificaciones Pulse la rueda de volumen si [PRESET] se muestra en la pantalla. Rango de frecuencia Bluetooth: 2,402 GHz — 2,480 GHz... -
Page 28: Contestar Una Llamada
Pulse SRC para encender la unidad. Seleccione un grupo o carpeta Pulse 2 Busque y seleccione el nombre de su receptor (“KD-DB912BT”) en el dispositivo Bluetooth. Omisión hacia atrás/omisión Pulse Realice (A) o (B) dependiendo de los datos mostrados en la pantalla. - Page 30 Installeren/Verbinden Basisprocedure Haal de sleutel uit het contactslot en ontkoppel vervolgens de aansluiting van de auto-accu. Dit gedeelte is voor de professionele installateur. Verbind de draden juist. Zie “Verbinden van draden” op pagina 3. Laat het monteren en verbinden voor de veiligheid door een vakman uitvoeren. Raadpleeg de Installeer het toestel in de auto.
- Page 31 Installeren van het toestel (zonder bevestigingshuls) Verbinden van draden Verwijder de bevestigingshuls en sierplaat van het toestel. Breng de gaten in het apparaat (beide kanten) in lijn met de bevestigingsbeugel van de auto en zet het apparaat met schroeven DAB-antenneaansluiting (SMB-stekker) (los verkrijgbaar) vast.
-
Page 32: Alvorens Gebruik
Alvorens gebruik Basispunten BELANGRIJK Voorpaneel • Lees alvorens dit product in gebruik te nemen deze handleiding door Volumeknop Lade Aux-ingangsaansluiting voor een juist gebruik. Het is vooral belangrijk dat u de Waarschuwingen en Voorzorgsmaatregelen in deze handleiding goed doorleest en opvolgt. - Page 33 Starten Instellen van de basisinstellingen Houd even ingedrukt. Draai de volumeknop om een onderdeel te kiezen (zie de volgende tabel), Annuleren van de demonstratie en druk vervolgens op de knop. [FACTORY RESET] Wanneer u de stroom voor het eerst inschakelt (of wanneer Herhaal stap totdat het gewenste onderdeel is gekozen of geactiveerd.
- Page 34 Digitale Radio Geheugeninstellingen U kunt maximaal 18 services opslaan. Meer over DAB (Digital Audio Broadcasting) Opslaan van een service DAB is een van de hedendaagse beschikbare digitale radio-uitzendsystemen. DAB Tijdens het luisteren naar een service..levert een digitale geluidskwaliteit, zonder interferentie en signaalvervorming. Houd een van de cijfertoetsen (1 tot 6) even ingedrukt.
-
Page 35: Analoge Radio
Analoge Radio CD/USB/iPod Kiesbare bron: Opzoeken van een zender CD/USB/iPod USB of iPod BT Druk herhaaldelijk op SRC om FM of AM te kiezen. Druk op om automatisch een zender op te zoeken. (of ) Starten van de weergave Houd even ingedrukt totdat “M”... -
Page 36: Menu-Instellingen
Druk op om naar het voorgaande instelonderdeel terug te keren. • Raadpleeg de GEBRUIKSAANWIJZING op de volgende website voor een gedetailleerde uitleg over elk item: <http://www.jvc.net/cs/car/> Draai de volumeknop met de klok mee om [SUBWOOFER SET] te kiezen en •... -
Page 37: Andere Informatie
Draai de volumeknop met de klok mee om [COLOR] te kiezen en druk Spotify AMAZON ALEXA -bronnen: vervolgens op de knop. <http://www.jvc.net/cs/car/> Opmerking voor specificaties Druk op de volumeknop als [PRESET] op het display wordt getoond. Bluetooth-frequentiebereik: 2,402 GHz — 2,480 GHz Bluetooth RF-uitgangsvermogen (E.I.R.P.):... - Page 38 Druk op SRC om het toestel in te schakelen. Kiezen van een groep of map Druk op 2 Zoek en selecteer de naam van uw receiver (“KD-DB912BT”) op het Bluetooth-apparaat. Achterwaarts verspringen/ Druk op Voer afhankelijk van wat op het display verschijnt (A) of (B) uit.
- Page 40 Instalação/Conexão Processo básico Retire a chave do interruptor de ignição e, em seguida, desconecte o terminal da bateria do automóvel. Esta secção é para o instalador profissional. Conecte os fios adequadamente. Consulte “Conexão da cablagem” na Para o propósito de segurança, encarregue as ligações e a montagem a profissionais. Consulte o página 3.
- Page 41 Instalação do aparelho (sem manga de montagem) Conexão da cablagem Retire a manga de montagem e a placa de guarnição do aparelho. Alinhe os orifícios no aparelho (em ambos lados) com o suporte de montagem do veículo e fixe o aparelho com parafusos (disponíveis Tomada de antena DAB (conector SMB) comercialmente).
-
Page 42: Antes De Utilizar
Antes de utilizar Fundamentos IMPORTANTE Painel frontal Abertura de • Para garantir a utilização adequada, leia atentamente este Guia antes Botão de volume carregamento Tomada de entrada auxiliar de utilizar o produto. É especialmente importante que leia e observe os Avisos e Cuidados neste Guia. - Page 43 Introdução Faça as definições básicas Mantenha premido. Rode o botão do volume para selecionar um item (consulte a seguinte Cancelar a demonstração tabela) e, em seguida, prima-o. [FACTORY RESET] [YES] Ao ligar a alimentação pela primeira vez (ou ao definir para Repita o passo até...
- Page 44 Rádio digital Definições na memória Pode armazenar até 18 serviços. Sobre DAB (Digital Audio Broadcasting) Armazene um serviço DAB é um dos sistemas de radiodifusão digital disponíveis atualmente. Pode Durante a escuta de um serviço..proporcionar um som de qualidade digital sem interferência desagradável ou Mantenha premido um dos botões numéricos (1 a 6).
- Page 45 Rádio analógico CD/USB/iPod Fonte selecionável: Procura de uma estação CD/USB/iPod USB ou iPod BT Prima SRC repetidamente para selecionar FM ou AM. Prima para procurar uma estação automaticamente. (ou) Inicie a reprodução Mantenha premido até que “M” comece a piscar e, em seguida, A fonte muda e a reprodução começa automaticamente ao carregar um disco ou prima repetidamente para procurar uma estação manualmente.
- Page 46 • Consulte o MANUAL DE INSTRUÇÕES no website abaixo para uma explicação detalhada de cada item: <http://www.jvc.net/cs/car/> • A disponibilidade de cada item varia dependendo do modelo. Rode o botão do volume no sentido horário para selecionar [SUBWOOFER SET] e, em seguida, prima-o.
-
Page 47: Outras Informações
Para as operações de reprodução de fontes consulte o MANUAL DE INSTRUÇÕES no website abaixo: Rode o botão do volume no sentido horário para selecionar [COLOR] e, em <http://www.jvc.net/cs/car/> seguida, prima-o. Nota para as especificações Intervalo de frequência de Bluetooth: Prima o botão do volume se [PRESET] aparecer no visor. - Page 48 Selecionar um grupo ou pasta Prima 2 Prima SRC para ligar a alimentação do aparelho. Busque e selecione o nome do seu recetor (“KD-DB912BT”) no dispositivo Saltar para trás/para a frente Prima Bluetooth. Realize (A) ou (B) dependendo do que aparecer no visor.
-
Page 50: Grundlegendes Verfahren
Einbau/Anschluss Grundlegendes Verfahren Ziehen Sie den Schlüssel aus dem Zündschloss, und trennen Sie dann den -Klemme der Autobatterie ab. Dieser Abschnitt ist für den professionellen Einbautechniker gedacht. Schließen Sie die Kabel richtig an. Siehe “Verdrahtungsanschluss” auf Überlassen Sie aus Sicherheitsgründen die Arbeiten zur Montage und Verkabelung ausgewiesenem Seite 3. - Page 51 Installieren der Einheit (ohne die Einbauhalterung) Verdrahtungsanschluss Nehmen Sie die Einbauhalterung und den Frontrahmen vom Gerät ab. Richten Sie die Öffnungen am Gerät (an beiden Seiten) mit der Befestigungskonsole am Fahrzeug aus und sichern Sie das Gerät mit DAB-Antennenbuchse (SMB-Anschluss) Schrauben (im Handel erhältlich).
-
Page 52: Vor Der Inbetriebnahme
Vor der Inbetriebnahme Grundlagen WICHTIG Frontblende • Um richtige Verwendung sicherzustellen, lesen Sie die Anleitung vor Lautstärke-Regler Ladeschlitz Auxiliary-Eingabebuchse der Verwendung des Produkts sorgfältig durch. Es ist besonders wichtig, dass Sie die Warnungen und Vorsichtshinweise in dieser Anleitung lesen und beachten. •... -
Page 53: Erste Schritte
Erste Schritte Einstellen der grundlegenden Einstellungen Halten Sie gedrückt. Drehen Sie den Lautstärke-Regler zum Wählen eines Gegenstands (siehe Brechen Sie die Demonstration ab folgende Tabelle), und drücken Sie dann den Regler. [FACTORY RESET] [YES] Beim ersten Einschalten des Geräts (oder wenn gestellt Wiederholen Sie Schritt , bis der gewünschte Gegenstand gewählt oder... - Page 54 Digitalradio Einstellungen im Speicher Sie können bis zu 18 Dienste speichern. Wissenwertes über DAB (Digital Audio Broadcasting) Speichern eines Dienstes DAB ist eines der heute verfügbaren digitalen Rundfunksendesysteme. Es kann Beim Hören eines Dienstes... Klang in Digitalqualität ohne störende Interferenzen oder Signalverzerrung liefern. Halten Sie eine der Zifferntasten (1 bis 6) gedrückt.
- Page 55 Analogradio CD/USB/iPod Wählbare Quelle: Suche nach einem Sender CD/USB/iPod USB oder iPod BT Drücken Sie SRC wiederholt, um FM (UKW) oder AM zu wählen. Drücken Sie , um einen Sender automatisch zu suchen. (oder) Starten Sie die Wiedergabe Halten Sie gedrückt, bis “M”...
- Page 56 Zum Zurückschalten zum vorherigen Einstellelement drücken Sie • Siehe BEDIENUNGSANLEITUNG auf der folgenden Seite für detaillierte Drehen Sie den Lautstärkeregler im Uhrzeigersinn zum Wählen von Erklärungen jedes Elements: <http://www.jvc.net/cs/car/> [SUBWOOFER SET] , und drücken Sie dann den Regler. • Die Verfügbarkeit jedes Elements ist nach dem Modell unterschiedlich.
-
Page 57: Andere Informationen
Für Wiedergabebedienungen von Spotify AMAZON ALEXA Quellen und drücken Sie dann den Regler. siehe BEDIENUNGSANLEITUNG auf der folgenden Website: <http://www.jvc.net/cs/car/> Drücken Sie den Lautstärkeregler, wenn [PRESET] im Display gezeigt wird. Hinweis zu technischen Daten Bluetooth-Frequenzbereich: 2,402 GHz — 2,480 GHz Bluetooth HF-Ausgangsleistung (E.I.R.P.):... - Page 58 Wählen Sie die Gruppe oder den Drücken Sie 2 Drücken Sie SRC, um die Einheit einzuschalten. Ordner Suchen und wählen Sie den Namen Ihres Receivers (“KD-DB912BT”) auf dem Bluetooth-Gerät. Rückwärts-Sprung/Vorwärts- Drücken Sie Führen Sie (A) oder (B) aus, je nachdem was im Display erscheint.
-
Page 60: Procédure De Base
Installation/Connexion Procédure de base Retirez la clé de contact, puis déconnectez la borne de la batterie de la voiture. Cette section est réservée aux installateurs professionnels. Connectez les fils correctement. Voir “Connexions” à la page 3. Pour des raison de sécurité, laissez le travail de câblage et de montage des professionnels. Consultez Installez l’appareil dans votre voiture. - Page 61 Installation de l’appareil (sans le manchon de montage) Connexions Retirez le manchon de montage et la plaque de garniture de l’appareil. Alignez les entailles de l’appareil (des deux côtés) avec le support de montage du véhicule et fixez l’appareil avec les vis (en vente dans le Prise d’antenne DAB (connecteur SMB) commerce).
-
Page 62: Avant L'utilisation
Avant l’utilisation Fonctionnement de base IMPORTANTES Façade • Pour utiliser correctement l’appareil, veuillez lire ce Guide complément Bouton de volume Fente d’insertion Prise d’entrée auxiliaire avant de l’utiliser. Il est particulièrement important que vous lisiez et acceptiez les avertissements et les précautions de ce Guide. •... -
Page 63: Prise En Main
Prise en main Faites les réglages de base Maintenez enfoncée Tournez le bouton de volume pour sélectionner un élément (voir le tableau Annulez la démonstration suivant), puis appuyez sur le bouton. Quand vous mettez l’appareil sous tension pour la première fois (ou que Répétez l’étape jusqu’à... -
Page 64: Radio Numérique
Radio Numérique Réglages en mémoire Vous pouvez mémoriser un maximum de 18 services. À propos du DAB (Digital Audio Broadcasting) Mémorisez un service DAB est l’un des systèmes de radio numérique disponibles aujourd’hui. Il peut Pendant l’écoute d’un service..offrir un son de qualité numérique sans toutes les interférences gênantes ni les Maintenez enfoncée une des touches numériques (1 à... -
Page 65: Radio Analogique
Radio Analogique CD/USB/iPod Source sélectionnable: Recherchez une station CD/USB/iPod USB ou iPod BT Appuyez répétitivemenent sur SRC pour sélectionner FM ou AM. Appuyez sur pour rechercher une station automatiquement. (ou) Démarrez la lecture Maintenez en enfoncé jusqu’à ce que “M” clignote, puis appuyez La source change automatiquement et la lecture démarre quand vous insérez un répétitivement dessus pour rechercher une station manuellement. -
Page 66: Réglages Du Menu
Pour retourner à l’option de réglage précédente, appuyez sur • Reportez-vous au MANUEL D’INSTRUCTIONS sur les sites web suivant pour une explication détaillée de chaque élément: <http://www.jvc.net/cs/car/> • La disponibilité de chaque élément varient en fonction du modèle. Tournez le bouton de volume dans le sens des aiguilles d’une montre pour... -
Page 67: Autres Informations
Tournez le bouton de volume dans le sens des aiguilles d’une montre pour reportez-vous au MANUEL D’INSTRUCTIONS sur le site web suivant: choisir [COLOR] , puis appuyez sur le bouton. <http://www.jvc.net/cs/car/> Remarque pour les spécifications Appuyez sur le bouton de volume si [PRESET] apparaît sur l’affichage. -
Page 68: Répondre À Un Appel
Appuyez sur SRC pour mettre l’appareil sous tension. ou un dossier Recherchez et sélectionnez le nom de votre récepteur (“KD-DB912BT”) sur le périphérique Bluetooth. Saut vers l’arrière/saut vers l’avant Appuyez sur Réalisez (A) ou (B) en fonction de ce qui apparait sur l’affichage. -
Page 70: Installazione E Collegamenti
Installazione e collegamenti Procedura di base Sfilare la chiave di accensione e scollegare la presa della batteria del veicolo. Questa sezione è destinata agli installatori. Collegare correttamente i cavi elettrici. Vedere la sezione “Collegamento Per motivi di sicurezza si raccomanda di affidare l’installazione e i collegamenti elettrici a un tecnico dei cavi”... - Page 71 Installazione dell’apparecchio (senza manicotto di montaggio) Collegamento dei cavi Rimuovere il supporto di montaggio e la piastrina di finitura dall’unità. Allineare i fori dell’unità (di entrambi i lati) con quelli della staffa di montaggio del veicolo e fissarvela usando comuni viti. Presa antenna DAB (connettore SMB) Fusibile (10 A) Presa d’antenna...
-
Page 72: Prima Dell'uso
Prima dell’uso Fondamenti IMPORTANTE Frontalino Vano di • Prima di usare l’apparecchio, e per usarlo in modo corretto, si Manopola del volume Presa d’ingresso ausiliario caricamento raccomanda di leggere a fondo questa Guida. È particolarmente importante leggere e osservare gli avvisi e le note di attenzione nella Guida. -
Page 73: Operazioni Preliminari
Operazioni preliminari Eseguire le impostazioni di base Premere a lungo Ruotare la manopola del volume sino a selezionare l’elemento desiderato Annullare il funzionamento dimostrativo (vedere la tabella che segue), e quindi premerla. [FACTORY RESET] [YES] Alla prima accensione dell’unità (o quando s’imposta ), il Ripetere il passo sino a selezionare o attivare l’elemento desiderato. -
Page 74: Radio Digitale
Radio digitale Impostazioni in memoria È possibile registrare sino a 18 servizi. Informazioni sulla funzione DAB (Digital Audio Broadcasting) Per salvare un servizio Il DAB è uno dei sistemi di diffusione radio digitale oggi disponibili. Esso offre Durante l’ascolto di un servizio... un suono di qualità... -
Page 75: Radio Analogica
Radio analogica CD/USB/iPod Sorgenti selezionabili: Ricercare una stazione CD/USB/iPod USB o iPod BT Premere SRC sino a selezionare FM o AM. Premere per ricercare automaticamente le stazioni. Avviare la riproduzione Premere a lungo sino a quando “M” inizia a lampeggiare, quindi La sorgente cambia automaticamente e la riproduzione inizia quando si carica premerlo quante volte necessario sino a individuare manualmente la un disco o si collega un dispositivo (dispositivo USB/ iPod/iPhone) al terminale di... - Page 76 Per ritornare all’impostazione precedente premere • Fare riferimento al ISTRUZIONI PER L’USO disponibile nel seguente sito web per la spiegazione dettagliata di ciascuna voce: <http://www.jvc.net/cs/car/> Ruotare la manopola del volume in senso orario per selezionare • La disponibilità di ciascuna voce varia a seconda del modello.
-
Page 77: Altre Informazioni
Ruotare la manopola del volume in senso orario per selezionare [COLOR] fare riferimento al ISTRUZIONI PER L’USO disponibile nel seguente sito web: quindi premerla. <http://www.jvc.net/cs/car/> Nota per le specifiche Premere la manopola del volume se [PRESET] viene visualizzato sul display. -
Page 78: Rispondere A Una Chiamata
Premere SRC per accendere l’apparecchio. Selezionare un gruppo o una Premere 2 Cercare e selezionare il nome del proprio ricevitore (“KD-DB912BT”) sul cartella dispositivo Bluetooth. Sulla base del testo che appare in scorrimento sul display dare luogo Saltare all’indietro o in avanti Premere all’operazione (A) o (B). - Page 80 • Microsoft and Windows Media are either registered trademarks or trademarks of Microsoft Corporation in the United States and/or other countries. • Use of the Made for Apple badge means that an accessory has been designed to connect specifically to the Apple product(s) identified in the badge and has been certified by the developer to meet Apple performance standards.
Need help?
Do you have a question about the KD-DB912BT and is the answer not in the manual?
Questions and answers