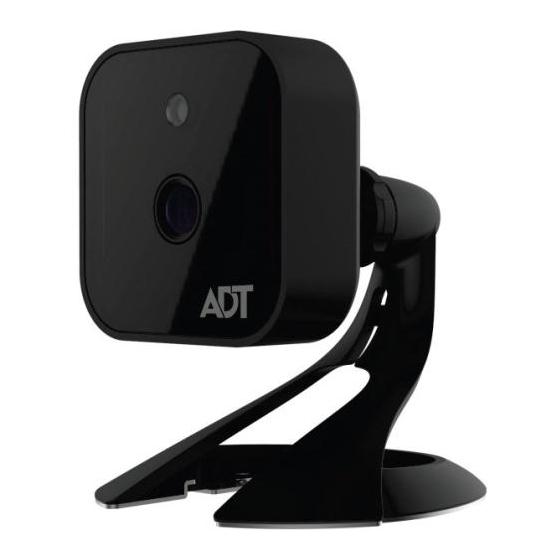
Summary of Contents for ADT Pulse RC8326
- Page 1 ADT Pulse Interactive Solutions ® RC8326 Wireless Indoor Day/Night HD Camera Quick Installation Guide...
-
Page 2: Table Of Contents
©2017 ADT LLC dba ADT Security Services. All rights reserved. ADT, the ADT logo, 800 ADT.ASAP and the product/service names listed in this document are marks and/or registered marks. Unauthorized use is strictly prohibited. RC8326-QIG-01 (03/17) RC8326 Wireless Indoor Day/Night HD Camera Installation Guide... -
Page 3: Chapter 1 Introduction
This section provides information about the RC8326 HD Camera's features, components and capabilities. Overview The RC8326 is a true day/night wireless camera with HD resolution, 802.11n Wi-Fi connectivity and Wi-Fi Protected Setup (WPS) support. This camera is intended for use with ADT Pulse ®... -
Page 4: Physical Details
The lens cannot be adjusted. Please ensure that the lens cover remains clean. The image quality is degraded if the lens cover is dirty or smudged. Rear Network/WPS LED WPS/Reset Button Power LED DC Power Jack Figure 2: Rear Panel RC8326 Wireless Indoor Day/Night HD Camera Installation Guide... - Page 5 5 seconds during the Pulse enrollment process, the camera creates an encryption- secured wireless connection. • Reset. When pressed and held over 15 seconds, the camera reboots and the settings are restored to default values. RC8326 Wireless Indoor Day/Night HD Camera Installation Guide...
-
Page 6: Package Contents
Chapter 1 Introduction Package Contents The following items are included in the package. Screws / Anchors (x2) Camera Stand Power Adapter Figure 3: What’s in the Box RC8326 Wireless Indoor Day/Night HD Camera Installation Guide... -
Page 7: Chapter 2 Basic Setup
Figure 4: Power Connection The Power LED lights up solid green during startup, which takes about one minute. After startup is completed, and prior to enrollment, the Power LED blinks green. RC8326 Wireless Indoor Day/Night HD Camera Installation Guide... - Page 8 5. Enroll the Camera in ADT Pulse This process is described in the next chapter, ADT Pulse Enrollment. 6. Mount the Camera Place the camera in its final permanent location near a power source.
-
Page 9: Chapter 3 Adt Pulse Enrollment
ADT Pulse Enrollment This section provides instructions for wirelessly enrolling the RC8326 HD Camera into the ADT Pulse network. This process uses the Wi-Fi Protected Setup (WPS) with PIN method to wirelessly enroll the camera to the gateway via the ADT Pulse Portal or TS Installer App. - Page 10 7. On the Add Camera Using WPS screen, enter the PIN number in the WPS PIN field. 8. Ensure that the camera is powered on and that the Power LED is flashing green. 9. Click the Continue button to initiate the WPS process. RC8326 Wireless Indoor Day/Night HD Camera Installation Guide...
- Page 11 The Network/WPS LED flashes amber as the gateway attempts to connect to the camera. The wireless connection is successful when the Network/WPS LED turns solid green. RC8326 Wireless Indoor Day/Night HD Camera Installation Guide...
- Page 12 The following screen is displayed while the camera is configured. 11. When the Camera Details screen appears, showing that the camera has been enrolled, assign the RC8326 a unique name (usually based on the location of the camera) in the Name field, and then click Save.
- Page 13 15. Wait until the Power LED and Network LED are both lit solid green, and then disconnect the camera from power. 16. Install the camera in its final location. For Wall Mounting, refer to Chapter 4. RC8326 Wireless Indoor Day/Night HD Camera Installation Guide...
-
Page 14: Smart Ir Function
Chapter 3 ADT Pulse Enrollment Smart IR Function The RC8326 uses a smart IR function for night viewing. This means that the camera automatically adjusts the IR light output and gain. As a result, if any objects are in the close foreground of the image, the camera lowers the IR light output to prevent overexposing those objects. -
Page 15: Chapter 4 Wall Mounting
Chapter 4 Wall Mounting This section provides details for final mounting of the RC8326 HD Camera. You should ensure that the camera is configured and enrolled in ADT Pulse before permanently mounting it. 1. Locate the mounting plate at the bottom of the camera stand and slide the mounting plate forward to release it from the stand. - Page 16 10. Verify that the camera is active on the wireless network and is recognized by ADT Pulse. Note: If the camera does not re-connect, use of the ADT Wi-Fi extender (part no. WN3000RPH-2ADPAS) may be recommended to improve wireless connectivity. RC8326 Wireless Indoor Day/Night HD Camera Installation Guide...
-
Page 17: Appendix A Specifications
1 RJ-45 LAN connection for Ethernet through Micro Network Interface USB to RJ-45 Adapter Cable IEEE 802.11n/802.11b/802.11g compatible, WEP Wireless Interface 64/128 bit, WPA/WPA2 personal security support LEDs 2, Power and Network/WPS Power Adapter 12V/1A, 100 to 240 VAC RC8326 Wireless Indoor Day/Night HD Camera Installation Guide... -
Page 18: Regulatory Approvals
IC établies pour un environnement non contrôlé. Cet équipement doit être installé et utilisé avec un minimum de 20 cm de distance entre la source de rayonnement et votre corps. RC8326 Wireless Indoor Day/Night HD Camera Installation Guide...


Need help?
Do you have a question about the RC8326 and is the answer not in the manual?
Questions and answers