Table of Contents
Advertisement
Issue 1
Original version
Dec 2014
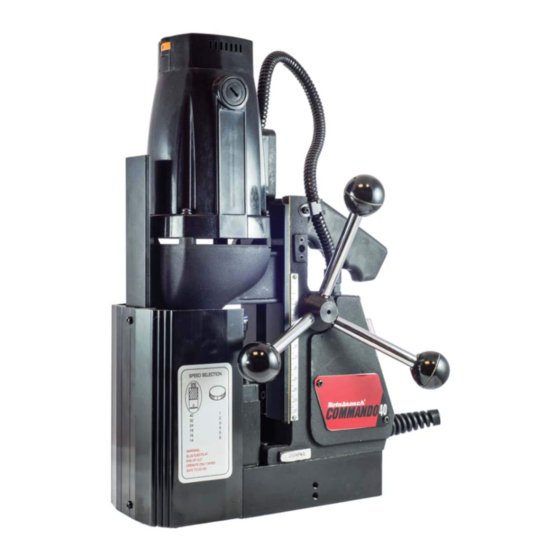
Magnetic drilling machine
Model Number COMMANDO40/1, COMMANDO40/3
This machine (Serial Number ...........................) is CE approved.
Rotabroach™ Ltd
Imperial Works, Sheffield Road
Sheffield, South Yorkshire
United Kingdom
S9 2YL
Tel: +44 (0) 114 2212 510
Fax: +44 (0) 114 2212 563
Email: sales@rotabroach.co.uk
Web site: www.rotabroach.co.uk
- 1 -
Advertisement
Table of Contents

Related Manuals for Rotabroach COMMANDO40/3


Summary of Contents for Rotabroach COMMANDO40/3
- Page 1 Issue 1 Original version Dec 2014 Magnetic drilling machine Model Number COMMANDO40/1, COMMANDO40/3 This machine (Serial Number ......) is CE approved. Rotabroach™ Ltd Imperial Works, Sheffield Road Sheffield, South Yorkshire United Kingdom S9 2YL Tel: +44 (0) 114 2212 510 Fax: +44 (0) 114 2212 563 Email: sales@rotabroach.co.uk...
-
Page 2: Issue 1 Original Version October
We would really like your feedback on the machine. Other Products by Rotabroach™: Thank you for your purchase of our product. For more information please visit our website at www.rotabroach.co.uk Or contact our sales department on +44 (0) 114 2212 510 - 2 -... -
Page 3: Table Of Contents
Issue 1 Original Version October 2014 CONTENTS OF THE MANUAL. 1) INTENDED USE ____________________________________________________________________ 4 2) GENERAL SAFETY RULES ____________________________________________________________ 4 3) OPERATIONAL SAFETY PROCEDURES __________________________________________________ 4 4) INFORMATION PLATE SYMBOLS ______________________________________________________ 6 5) SPECIFICATION ____________________________________________________________________ 7 6) MAGNET DETECTION _______________________________________________________________ 8 7) EXTENSION CABLE SELECTION ________________________________________________________ 9 8) MOUNTING OF CUTTERS ____________________________________________________________ 9 9) REMEDIES FOR HOLE MAKING PROBLEMS _____________________________________________ 10... -
Page 4: Intended Use
Remove the power supply before carrying out any adjustment, servicing or maintenance. Follow instructions for lubricating and changing accessories. All repairs to be carried out by an authorized Rotabroach service facility. 3) OPERATIONAL SAFETY PROCEDURES OPERATING INSTRUCTIONS READ BEFORE USING THE MACHINE 1. - Page 5 Issue 1 Original Version October 2014 Keep work area well lit (500 Lux recommended). Do not use tools in the presence of flammable liquid or gases Ensure there is adequate space to gain access to the plug, mains and motor on/off switches. ...
-
Page 6: Information Plate Symbols
33. Do not abuse the cord; never pull the cord to disconnect it from the socket. Keep the cord away from heat, oil and sharp edges. 34. Inspect tool cords periodically and if damaged have it repaired by an authorized Rotabroach service facility. -
Page 7: Specification
Maximum hole cutting capacity in .2/.3C steel = 40mm dia. x 50mm deep Arbor bore = 19.05mm (3/4”) dia. Motor Unit COMMANDO40/1 110V 50-60Hz 1100W (10A) (Nominal values) COMMANDO40/3 230V 50-60Hz 1100W Electro Magnet COMMANDO40/1 110V 50-60Hz COMMANDO40/3 230V 50-60Hz... -
Page 8: Magnet Detection
Issue 1 Original Version October 2014 6) MAGNET DETECTION It is advised that when working on thin material a packing piece should be used to increase the material thickness under the magnet. Working on thin material without a packing piece will reduce the magnet holding force. -
Page 9: Extension Cable Selection
Issue 1 Original Version October 2014 7) EXTENSION CABLE SELECTION The machines are factory fitted with a 3 meter length cable, having three conductors 1.5mm² LIVE, NEUTRAL and EARTH. If it becomes necessary to fit an extension cable from the power source, care must be taken in using a cable of adequate capacity. -
Page 10: Remedies For Hole Making Problems
Issue 1 Original Version October 2014 9) REMEDIES FOR HOLE MAKING PROBLEMS Problem Cause Remedy 1) Magnetic base Material being cut may be too thin for efficient Attach an additional piece of metal under work-piece where won’t hold holding. magnet will be located, or mechanically clamp magnetic base effectively to work-piece. -
Page 11: Wiring Diagram
Issue 1 Original Version October 2014 10) WIRING DIAGRAM - 11 -... -
Page 12: Exploded View Of Machine
Issue 1 Original Version October 2014 11) EXPLODED VIEW OF MACHINE - 12 -... -
Page 13: Exploded View Of Motor And Gearbox
Issue 1 Original Version October 2014 12) EXPLODED VIEW OF MOTOR AND GEARBOX - 13 -... -
Page 14: Parts List
Commando 40 Manual Original instructions June 2014 13) PARTS LIST Item Rotabroach P/N Description Qty/pcs Item Rotabroach P/N Description Qty/pcs RD4347 M5×16 Cross Sunk Screw RD33148 Spacer For Bearing Bracket RD45607 M5 Lock Washer RD23626/RD23625 Magnet Base Assembly 230v/110v RD4103 M3×6 Cross Panhead Screw... -
Page 15: Pipe Adaptor Kit Rd2311
Commando 40 Manual Original instructions June 2014 14) PIPE ADAPTOR KIT RD2311 FITTING INSTRUCTIONS Dependent upon the size of the pipe to be cut (see illustrations) attach adjustable angle plates RD3328 with cap screws RD4325 and washers RD4205 (4 off each) to the magnet sides. Do not tighten. ... -
Page 16: Fitting The Chuck
Replacing the chuck is the reverse sequence. 16) MAINTENANCE In order to ‘get the best life’ out of your Rotabroach machine always keep it in good working order. A number of items must always be checked on Rotabroach machines. Always before starting any job make sure the machine is in good working order and that there are no damaged or loose parts. - Page 17 Issue 1 Original Version October 2014 1. Place the machine in an upright position and, by means of the capstan, raise the slide to its highest position. Clean the brass Gib Strips and apply a small amount of light machine oil to the wear surfaces.
-
Page 18: Trouble Shooting
Issue 1 Original Version October 2014 17) TROUBLE SHOOTING Magnet and motor do not function Frame under voltage - The magnet switch is not connected to the power supply - Damaged / defective wiring - Damaged or defective wiring - Defective magnet - Defective fuse - Motor seriously dirty - Defective magnet switch... - Page 19 Issue 1 Original Version October 2014 Fuse blows when magnet switch is - Damaged or defective wiring turned on - Wrong value fuse - Defective magnet switch - Defective control unit - Defective magnet Fuse blows when motor is started up - Damaged or defective wiring - Wrong value fuse - Motor running roughly...
-
Page 20: Cutter Selection And Speeds
Issue 1 Original Version October 2014 18) CUTTER SELECTION AND SPEEDS Material Material Hardness Cutter Mild and free cutting steels <700N/mm² RAP or RAPL Mild and free cutting steels <850N/mm² SRCV or SRCVL Steel angle and joists <700N/mm² RAP or RAPL Steel angle and joists <850N/mm²... - Page 21 Issue 1 Original Version October 2014...
-
Page 22: Warranty Statement
(or online registration) has been completed and returned to Rotabroach™ or its designated distributor within a period of (30) days from the purchase date. Failure to do so will void the warranty. If the stated is adhered to, Rotabroach™ will repair or replace (at its option) without charge any faulty items returned.
Need help?
Do you have a question about the COMMANDO40/3 and is the answer not in the manual?
Questions and answers