Sign In
Upload
Download
Table of Contents
Contents
Add to my manuals
Delete from my manuals
Share
URL of this page:
HTML Link:
Bookmark this page
Add
Manual will be automatically added to "My Manuals"
Print this page
×
Bookmark added
×
Added to my manuals
Manuals
Brands
Thermoplan Manuals
Coffee Maker
BW4c-CTM
Operating manual
Thermoplan BW4c-CTM Operating Manual
Bw4c-ctm series
Hide thumbs
1
Table Of Contents
2
3
4
5
6
7
8
9
10
11
12
13
14
15
16
17
18
19
20
21
22
23
24
25
26
27
28
29
30
31
32
33
34
35
36
37
38
39
40
41
42
43
44
45
46
47
48
49
50
51
52
53
54
55
56
57
58
59
60
page
of
60
Go
/
60
Contents
Table of Contents
Troubleshooting
Bookmarks
Table of Contents
Table of Contents
1 Impressum
2 About this Document
Purpose
Navigation
Terms Used
Symbols and Emphasized Text
3 Introduction
Intended Use
Target Audience
Limitation of Liability
Warranty Conditions
4 Safety
General Safety Instructions
Safety Warnings
General Safety Instructions for this Coffee Machine
5 Overview
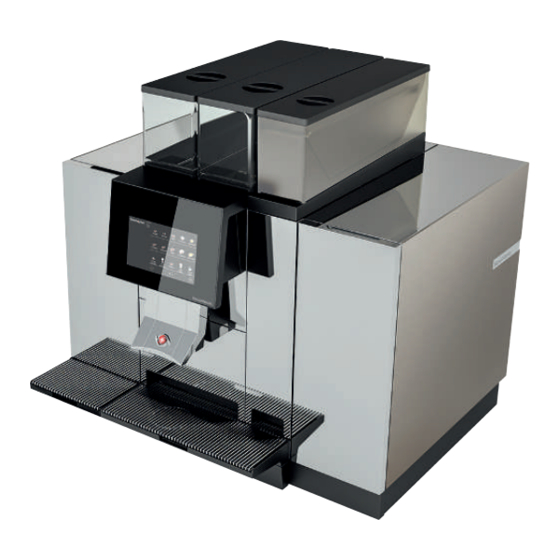
Coffee Machine CTM-P-F RS / CTM-P-F
Type Plate
Capacity Information
Connections
6 Scope of Delivery
7 Commissioning
Switch Coffee Machine on and off
Switch Refrigerator on and off
Still Being Container
Filling the Chocolate Container
Filling the Milk Container
Top up Syrup
Changing the Syrup Name
8 Operation
Dispensing the Product
Product Options
Pre-Selecting a Product
Operation - Refrigerator
9 Settings in the User Menu
Overview - User Menu
Calling up the User Menu
Calling up the User Menu in Self-Service Mode
User Login
User Logout
Menu Tab and Access Rights
General Settings
Product Settings
Statistics
System Information
Error Log
10 Cleaning
Cleaning Agents and Accessories
Cleaning Schedule
Cleaning Prompt
Execute Automatic Cleaning
Cleaning Key
Clean Exterior Components
Clean the Grounds Container and Drip Tray
Clean Product Outlet
Clean Bean Container
10.10 Clean the Refrigerator
10.11 Clean Chocolate System
10.12 Cleaning the Syrup System
11 Troubleshooting
Overview
Possible Indications and Errors and Their Rectification
12 Accessories and Consumables
Cleaning Agents
Milk Container
Chocolate Container
Cleaning Container
13 EU Declaration of Conformity
Advertisement
Quick Links
1
Switch Coffee Machine on and off
2
User Login
3
Possible Indications and Errors and Their Rectification
Download this manual
Operating Manual
CTM-P-F / CTM-P-F-RS
© Thermoplan AG | 29/03/2017
Table of
Contents
Previous
Page
Next
Page
1
2
3
4
5
Advertisement
Table of Contents
Need help?
Do you have a question about the BW4c-CTM and is the answer not in the manual?
Ask a question
Questions and answers
Related Manuals for Thermoplan BW4c-CTM
Coffee Maker Thermoplan Black & White BW3-CTMC Operating Instructions Manual
Automatic coffee machine + refrigerator bw3-rf (52 pages)
Coffee Maker Thermoplan Black&White3 Installation, Initial Start-Up, Safety
(10 pages)
Coffee Maker Thermoplan Black&White3 CT Technical Manual
Programming fox1 (41 pages)
Coffee Maker Thermoplan Black&Whute3 CT Troubleshooting Manual
Fox2 (54 pages)
Coffee Maker Thermoplan Black&White4 Operating Manual
Bw4c-ctm series (60 pages)
Coffee Maker Thermoplan BLACK&WHITE ONE BWone-CTM-RF Operator's Manual
(12 pages)
Coffee Maker Thermoplan BLACK&WHITE3 FOX1 Technical Manual
Reference and testing (28 pages)
Coffee Maker Thermoplan Black&White3 123.929 CTM Technical Manual
50k/12 months (49 pages)
Coffee Maker Thermoplan BLACK&WHITE ONE BWone-CTM Start-Up
(2 pages)
Coffee Maker Thermoplan BLACK&WHITE 3 Series User Manual
(34 pages)
Coffee Maker Thermoplan Aguila AG440 Technical Manual
(52 pages)
Coffee Maker Thermoplan Black&White 3 CTS Technical Manual
Automatic coffee machine (1 page)
Coffee Maker Thermoplan Black&White 3 CBT Technical Manual
Automatic coffee machine (1 page)
Coffee Maker Thermoplan NESPRESSO AGUILA 440 User Manual
(35 pages)
Coffee Maker Thermoplan AGUILA AG220 Service And Technical Manual
(81 pages)
Coffee Maker THERMOPLAN TIGER Technical Manual
(36 pages)
This manual is also suitable for:
Black&white4
Bw4c-ctm-rs
Bw4c-ctm-f
Bw4c-ctm-f-rs
Bw4c-ctm-p-f
Bw4c-ctm-p
...
Show all
Bw4c-ctm-p-f-rs
Bw4c-ctm-p-rs
Table of Contents
Save PDF
Print
Rename the bookmark
Delete bookmark?
Delete from my manuals?
Login
Sign In
OR
Sign in with Facebook
Sign in with Google
Upload manual
Upload from disk
Upload from URL


Need help?
Do you have a question about the BW4c-CTM and is the answer not in the manual?
Questions and answers