
Related Manuals for STOVES 900GDO


Summary of Contents for STOVES 900GDO
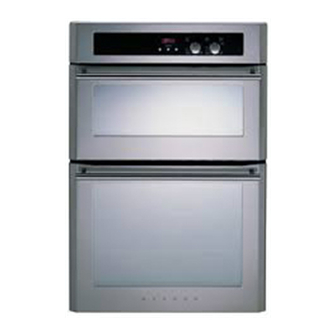
- Page 1 9 9 0 0 0 0 G G D D O O 900mm built-in gas double oven & grill For Natural Gas models User & Installation Handbook...
- Page 2 Stoves Customer Care Thank you for choosing this British built appliance from Stoves. We hope you enjoy many years of trouble free cooking with this oven. Should you need to contact us however, please call the number below and our Customer Care Centre staff will be pleased to help in any way they can.
- Page 3 If you smell gas: Do not try to light any appliance. Do not touch any electrical switch. 0800 111999 Call the Gas Emergency Helpline at TRANSCO on: IMPORTANT NOTICE Please note the cooling fan fitted to this appliance is an integral part of its safety and functionality.
-
Page 4: Table Of Contents
Technical Data ........35 Stoves Customer Care ........36 Please keep this handbook for future reference, or for anyone else who may use this appliance. -
Page 5: User Section
Introduction hope that following Gas & Electrical connection information will help you to familiarise Please refer to installation instructions yourself with the features of the for the Gas & Electrical Safety Regulations appliance, and to use it successfully and the Ventilation Requirements. and safely. - Page 6 Introduction The cooling fan If when a burner control is turned on, the fan does not operate in the normal The cooling fan helps to keep the way, then the appliance will require exterior cool during normal use. servicing. DO NOT USE THE When a burner is operated, you APPLIANCE UNTIL IT HAS BEEN should hear the cooling fan switch on...
- Page 7 Introduction Glass door panels To replace a light bulb (if fitted) To meet the relevant Standards of aution: Switch off the electricity Domestic cooking appliances, all the supply to the cooker at the socket, to glass panels on this appliance are avoid the risk of electric shock.
-
Page 8: Be Safe - Not Sorry
Be Safe - Not Sorry I Use oven gloves when removing When you are cooking, keep children away from the vicinity hot food / dishes from the oven or of the appliance. grill. The oven / grill and utensils will be very hot when in use. This product is designed as a domestic I When opening the appliance cooking appliance for the preparation... -
Page 9: Using The Grill
Using the Grill aution: Accessible parts may Detachable grill pan handle be hot when the grill is used, grid young children should be kept away. Grill ignition Important: The door must be fully open when the grill is used. Open the grill door. Push in and turn the grill control knob grill pan clockwise to the grill position. - Page 10 Using the Grill Using the grill Push the grill pan towards the back of the shelf, to position it under the grill. Variation in grilling can be achieved by moving the grill pan up or down. Important: Never operate the grill between the large flame and the off position.
-
Page 11: Using The Ovens
Using the Ovens When you are cooking, keep Oven shelves children away from the vicinity The oven shelf must be positioned with of the oven. the upstand at the rear of the oven and facing upwards. Notes Extra shelves may be ordered from the In the event of the flame being Customer Care Centre. -
Page 12: Using The Top Oven
Using the Ovens Using the top oven Preheating Most cooking times given in recipies, or on convenience foods are based on The top oven can be used in the same a preheated oven. way as the main oven to cook a full range of dishes, however it is a Always preheat the top oven for at secondary oven and there are some... -
Page 13: Top Oven Baking Guide
Using the Ovens Top oven baking guide Dish Recommended Suggested Approximate gas mark shelf cooking time position (preheated oven) Scones 10 - 15 mins Meringues “S” slow setting 2 - 3 hours Cakes Small cakes 15 - 25 mins Whisked sponge 20 - 30 mins Swiss roll 10 - 12 mins... -
Page 14: Using The Main Oven
Using the Ovens When you are cooking, keep If the oven is not preheated before use, children away from the vicinity cooking times will need to be of the oven. extended. Using the Main Oven Zones of heat - main oven The temperature at the centre of the oven corresponds with the selected Ignition main oven... -
Page 15: Main Oven Baking Guide
Using the Ovens Main oven baking guide Dish Recommended Shelf Approximate gas mark position cooking times Scones top to middle 8 - 15 mins Meringues “S” slow setting middle to bottom 2 - 3 hours Cakes Small cakes middle to top 15 - 25 mins Whisked sponge middle to top... -
Page 16: Roasting Guide
Using the Ovens Roasting guide Notes; I When cooking stuffed meat or The times given in the roasting guide are only approximate, because the poultry, calculate the cooking time size and age of the bird will influence from the total weight of the meat cooking times as will the shape of a plus the stuffing. -
Page 17: Roasting Turkey
Using the Ovens Roast turkey Traditional fruit cakes Roasting turkey perfectly involves It should be remembered that ovens cooking two different types of meat - can vary over time, therefore cooking the delicate light breast meat, which times can vary, making it difficult to be must not be allowed to dry out, and precise when baking fruit cakes. -
Page 18: Slow Cooking, Frozen & Chilled Food
Using the Ovens Cooking frozen & chilled foods Slow cooking I Preheat the oven. I Make sure that frozen foods are I When cooking frozen or chilled foods, thoroughly thawed before cooking. I Do not slow cook joints of meat please follow the manufacturer’s instructions. -
Page 19: Automatic Cooking
Using the Ovens Automatic cooking Do not: I Warm food should never be The automatic cooking facility is controlled by the programmer (see placed in the oven if there is a ‘Programmer/ Clock’ section) and delay period. Stews prepared by allows complete meals, or individual frying the meat and vegetables dishes to be cooked while you are out... - Page 20 Using the Ovens Important: Food is more susceptible Hints for automatic cooking I Food is placed in a cold oven so to the growth of food poisoning organisms in warm conditions. If the you will need to add about 10 - weather is hot, either take care to 15 minutes onto the cooking time ensure that food is not left standing in...
-
Page 21: Programmer / Clock
Programmer / Clock The programmer buttons minus plus The ‘function’ button in the centre is used for setting the minute minder and Minute Minder symbol setting up the automatic cooking. See This Bell symbol appears when the below for details. Minute Minder function has been selected. - Page 22 Programmer / Clock Programmer / Clock To set the time of day Setting the minute minder Press the Plus and Minus buttons To set the Minute Minder, press the together for a few seconds and Function button once. The bell symbol release.
- Page 23 Programmer / Clock Semi-automatic cooking For the instructions on how to use both of these functions, please see the There are two types of semi automatic following page. cooking available on this appliance. Fully automatic cooking The oven must be switched on, and in This function incorporates both a use to use either of these functions duration and an end time and is meant...
- Page 24 Programmer / Clock Programmer / Clock 1. The Duration method Semi-automatic cooking The Duration method Press the Function button twice,(1) which will skip past the Minute Minder. The LED display will flash the word ‘dur’, (2) and the ‘A’ will flash on the left hand side of the display.
- Page 25 Programmer / Clock Programmer / Clock Fully automatic cooking (example) This programming method is best suited for when a delayed start time is required. Unlike the semi automatic methods this requires both duration and the end time to be entered. The timer will work out the start time and begin cooking.
- Page 26 Automatic cooking - hints Automatic cooking Do not • Never place warm food in the These notes below are to help you with oven for delayed cooking - eg; using the automatic cooking facility. stews prepared by frying meat first Please make sure that you read them must be thoroughly cooled before carefully before you start using the...
-
Page 27: Cleaning
Cleaning aution: Any cleaning agent Chrome plated parts used incorrectly may damage & OVEN SHELVES OVEN SHELF RUNNERS the appliance. GRILL PAN TRIVET Always let the appliance cool Do not use abrasives or polishes. Use before cleaning. a moist soap pad. Some cooking operations generate a Shelf runners can be removed for considerable amount of grease. - Page 28 Cleaning Glass parts Important: if the inner door glass panel is removed for cleaning, it must & FACIA PANEL DOOR PANELS be replaced the right way up as Use a mild cream cleaner. shown, and pushed fully in to the Rinse thoroughly and dry with a soft stop position.
- Page 29 Cleaning Stainless steel surfaces (stainless steel finish models only) FACIA PANEL HANDLES Only use a clean cloth wrung out in hot soapy water, and dry with a soft cloth. Stubborn marks can be removed using stainless steel cleaner. recommend that you clean the whole of the stainless steel area to maintain a uniform finish.
-
Page 30: Installation Instructions
Installation Instructions Before start: Please read accordance with all local gas and electrical instructions. Planning your installation will regulations. In the Republic of Ireland, save you time and effort. Installers should refer to IS813 Domestic Gas Appliances. Prior to installation, ensure that the local distribution conditions (nature of the gas and Ventilation Requirements gas pressure) and the adjustment of the... -
Page 31: Step 1: Prepare Installation
INSTALLATION INSTRUCTIONS Step 1: Prepare installation When the false back is removed, it is normally the case that the support shelf Do not lift the appliance by the for the appliance leaves a gap door handle. between the back edge of the support Remove the fixing screws from the shelf rear... - Page 32 INSTALLATION INSTRUCTIONS Dimensions The appliance is designed to fit into a standard 600mm wide housing unit, with minimum internal dimensions as shown. Note: All sizes are nominal, some variation is to be expected. 560mm 547mm 550mm 20mm 885mm 30 - 80mm 595mm 550mm 12mm...
-
Page 33: Step 2: Connect To Electricity Supply
Installation Instructions Step 2: Connect to the electricity As the colours of the wires in the mains supply lead for the appliance may not correspond with the coloured markings This appliance must be connected by identifying the terminals in your spur a competent person, using fixed box, proceed as follows: wiring via a double pole switched... -
Page 34: Step 3: Connect To Gas Supply
Installation Instructions Step 3: Connect to gas supply 4. Flexible connections should be to BS 669. Parts of the appliance 1. The inlet to the appliance is ISO 7 likely to come into contact with - Rp ” internal thread situated ⁄... -
Page 35: Step 4: Check Edging Strip
Installation Instructions Step 4: Check edging strip Step 5: Secure appliance into housing unit The edging strip is factory fitted to the front side edges of the appliance Insert appliance into cabinet. front frame. This strip provides the Note: The unit housing the appliance cabinetry with extra protection from must be appropriately fixed. -
Page 36: Step 6: Commissioning
Installation Instructions Step 6: Commissioning Ovens (Top and Main) 1. Push in and turn the control knob to Gas Mark 9. The oven Pressure test point burner/ignition/light/cooling fan Use the oven burner. From inside the will come on automatically. oven remove the burner cowl. Remove 2. -
Page 37: Technical Data
Technical Data Data badge Grill Lower part of front frame and the rear Nominal Rate Qn 2.25kW panel of the appliance Injector 1.12mm Spark gap 3 - 4mm Pressure setting Natural Gas G20 @ 20 mbar (8”wg) Oven Bray type burner, sheet steel body, Gas category stainless steel flame strip Natural gas - I... -
Page 39: Stoves Customer Care
Model No 4 4 4 Serial No These numbers can be found on your appliances data badge. Outside the UK and Northern Ireland, refer to your local supplier. Stoves Stoney Lane, Prescot, Merseyside, L35 2XW 08 27371 00 © 03.2008...
Need help?
Do you have a question about the 900GDO and is the answer not in the manual?
Questions and answers