
Subscribe to Our Youtube Channel
Related Manuals for STOVES 61EHDO


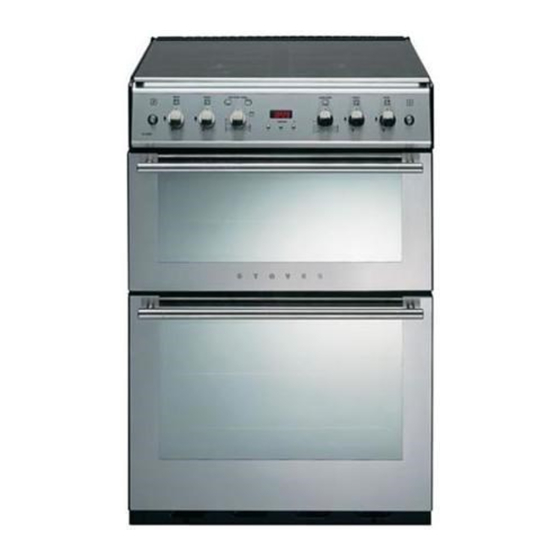
Summary of Contents for STOVES 61EHDO
- Page 1 61EHDO Electric Freestanding Double Oven and Grill with Ceramic/Halogen Hob User & Installation Instructions...
-
Page 2: Table Of Contents
Technical Data ........30 Stoves Customer Care ........31 Please keep this handbook for future reference, or for anyone else who may use the appliance. -
Page 3: Introduction
Introduction Thank you for choosing an Before using the appliance for appliance from Stoves. the first time, remove any protective polythene film and wash the oven We hope the following information shelves in hot soapy water, to remove will help you to quickly familiarise their protective coating of oil. - Page 4 Introduction Glass door panels To replace an oven light bulb To meet the relevant Standards of Caution: Switch off the electricity Domestic cooking appliances, all the supply to the appliance at the socket, glass panels on this appliance are to avoid the risk of electric shock. toughened to meet the fragmentation Wait until the oven is cool, then requirements of BS3193.
-
Page 5: Be Safe - Not Sorry
Be Safe - Not Sorry When you are cooking, keep n When opening the appliance children away from the vicinity door, take care to avoid skin of the appliance. contact with any steam which may escape from the cooking. This product is designed as a domestic n Do not use aluminium foil to cover cooking appliance for the preparation the grill pan, or put items wrapped... -
Page 6: Using The Hob
Using the Hob Caution: Do not use the hob if the Important: glass is cracked, as electrical parts are n Do not use the ceramic glass hob directly beneath. To avoid the possi- as a work surface or chopping bility of electric shock, turn off the elec- board, as it will damage it, and if tricity supply to the hob at the socket any plastic utensils come into... - Page 7 Using the Hob Using the hotplate Cast iron, stainless steel, or enamelled steel pans are all suitable for use on When cooking with fat or oil, never ceramic glass and solid plate hobs. leave unattended. Aluminium pans will give good cooking Turn pan handles to a safe position, results but care must be taken in their use.
-
Page 8: Using The Grill
Using the Grill Caution: Accessible parts may Detachable grill pan handle be hot when grill is used, young trivet children should be kept away. To switch on the grill Open the top oven / grill door. Turn the top oven control knob past the oven temperature markings to either the single grill symbol, or the dual... - Page 9 Using the Grill Grilling Aluminium foil The grill has two fixed heat settings. Using aluminium foil to cover the grill pan, or putting items wrapped in foil For grilling smaller quantities of food, under the grill creates a fire hazard, the (single element) economy grill can and the high reflectivity may damage be utilised.
-
Page 10: Using The Top Oven
Using the Top Oven Accessible parts may be hot When using the top oven when the oven is used. Young As part of the cooking process, hot air children should be kept away. is expelled through a vent at the top of the oven(s). -
Page 11: Top Oven Baking Guide
Using the Top Oven Top oven baking guide Cooking temperatures The temperature settings and time Cooking times given in the Baking Guides are based These times are based on cooking in a on dishes made with block margarine. preheated oven. If soft tub margarine is used, it may be necessary to reduce the temperature These cooking times are approximate,... -
Page 12: Conversion Guide
MAIN OVEN CONVERSION GUIDE Note: this is a high efficiency oven, therefore some adjustment will have to be made to conventional cooking temperatures. The table below shows convention- al cooking temperatures, ‘A’ efficiency temperatures and gas marks. For optimum results, conventional temperatures need to be converted to ‘A’ efficiency tempera- tures. -
Page 13: Using The Main Oven
Using the Main Oven Accessible parts may be hot Preheating when the oven is used. Young When cooking sensitive items such as children should be kept away. souffle’s and Yorkshire puddings or, when cooking bread, we recommend that the oven is pre-heated until the To switch on the oven neon switches off for the first time. -
Page 14: Oven Furniture
Using the Main Oven Oven furniture Slow cooking n Make sure that frozen foods are thoroughly before cooking. T H A W E D Oven shelves n Do not slow cook joints of meat or The oven shelf must be positioned with poultry weighing more than 2 ⁄... -
Page 15: Cooking With A Fanned Oven
Using the Main Oven Cooking with a fanned oven Notes: As this is a high efficiency oven, When 2 or more shelves are being you may notice the emission of used, it may be necessary to increase steam from the oven when the the cooking time slightly. - Page 16 Using the Main Oven Defrosting and cooling in the Be safe main oven Do not defrost stuffed poultry using this To defrost frozen foods, turn the method. main oven control to the defrost Do not defrost larger joints of meat position, place the food in the centre and poultry over 2kg / 4lb using this of the oven and close the door.
-
Page 17: Baking Guide
USING THE OVENS Baking guide Dish Recommended Approximate temperature ˚C cooking time (preheated oven) Scones 8 - 15 Meringues 2 - 3hrs Cakes Small cakes 15 - 25mins Whisked sponge 15 - 20 mins Swiss roll 10 - 12 mins Victoria sandwich 20 - 30 mins (2 x 180mm / 7”) -
Page 18: Traditional Fruit Cakes
Using the Ovens Traditional fruit cakes Roast turkey It should be remembered that ovens Roasting turkey involves cooking two can vary over time, therefore cooking different types of meat - the delicate times can vary, making it difficult to be light breast meat, which must not be precise when baking fruit cakes. -
Page 19: Roasting Guide
Using the Ovens Roasting guide Notes: The times given in the roasting guide n When cooking stuffed meat or are only approximate, because the poultry calculate the cooking time size and age of the bird will influence from the total weight of the meat cooking times as will the shape of a plus the stuffing. -
Page 20: Automatic Cooking
Using the Ovens Automatic cooking Do not The automatic cooking facility is • Warm food should n e v e r b e controlled by the programmer (see placed in the oven if there is a ‘Programmer / Clock’ section) and delay period. - Page 21 Using the Ovens Important: Hints for automatic cooking Food is more susceptible to the growth • Food is placed in a cold oven so of food poisoning organisms in warm you will need to add about 10 - 15 conditions. If the weather is hot, either minutes onto the cooking time to take care to ensure that food is not left allow for the oven to reach the...
-
Page 22: Programmer / Clock
PROGRAMMER / CLOCK The programmer buttons minus plus The ‘function’ button in the centre is used for setting the minute minder and Minute Minder symbol setting up the automatic cooking. See This Bell symbol appears when the below for details. Minute Minder function has been selected. - Page 23 PROGRAMMER / CLOCK To set the time of day Setting the minute minder Press the Plus and Minus buttons To set the Minute Minder, press the together for a few seconds, and Function button once. The bell symbol release. will appear and start flashing. The The ‘...
- Page 24 PROGRAMMER / CLOCK Semi-automatic cooking For the instructions on how to use both of these functions, please see the fol- There are two types of semi automatic lowing page. cooking available on this appliance. Fully automatic cooking The oven must be switched on, and in This function incorporates both a dura- use to use either of these functions tion and an end time and is meant to be...
- Page 25 PROGRAMMER / CLOCK 1. The Duration method Semi-automatic cooking The Duration method Press the Function button twice,(1) which will skip past the Minute Minder. The LED display will flash the word ‘dur’, (2) and the ‘A’ will flash on the left hand side of the display.
- Page 26 PROGRAMMER / CLOCK Fully automatic cooking (example) This programming method is best suit- ed for when a delayed start time is required. Unlike the semi automatic methods this requires both the dura- tion and the end time to be entered. The timer will work out the start time and begin cooking.
-
Page 27: Cleaning
Cleaning C a u t i o n : Any cleaning agent Enamel parts used incorrectly may damage OVEN CAVITIES GRILL PAN the appliance. We recommend that the appliance is Always let the appliance cool cleaned after open roasting, and also before cleaning. - Page 28 Cleaning Painted, plastic and metal finish Ceramic glass hotplate parts (if fitted) Do not use abrasive powder cleaners, “Brillo” pads, metal wire, detergents, & OVEN DOOR FRAME HANDLE GRILL PAN bleaches, bath stain removers, or chemical & HANDLE FACIA PANEL CONTROL KNOBS oven cleaners;...
- Page 29 Cleaning Stainless steel surfaces (If fitted) Care and maintenance Before using the hob for the first FASCIA PANEL DOOR HANDLE HOB SPILLAGE time, apply a thin coating of cleaner WELL OVEN DOOR SIDES conditioner to the ceramic glass, and Only use a clean cloth wrung out in hot polish the surface with a clean cloth.
-
Page 30: Installation Instructions
Installation Instructions Whilst every care is taken to eliminate Clearances burrs and raw edges from this product, This cooker may be fitted flush to please take care when handling - we base units. However, for models with recommend the use of protective side opening doors, we recommend a gloves during installation. -
Page 31: Connect To Electricity Supply
Installation Instructions Connect to the electricity supply Live Warning: This appliance must be (Red or Brown) earthed. Neutral The appliance must be installed by a (Black or Blue) competent electrician using a double pole control unit of 30 ampere Earth minimum capacity with 3mm minimum (Green / Yellow or sleeving) -
Page 32: Technical Data
Technical Data Data badge On the bottom of the front frame behind the oven door. Electrical supply 220 - 240V ~ 50Hz Warning: This appliance must be earthed. Electrical ratings @ 230V Main fanned oven 2300W Conventional top oven 1290W Dual Grill 1655/2575W Hotplate LHF... -
Page 33: Stoves Customer Care
Model No Serial No Please ensure you have the above details (Model No and Serial No) to hand when calling Stoves Customer Care. They are essential to booking your call. Outside the UK and Northern Ireland, refer to your local supplier. - Page 36 Stoney Lane, Prescot, Merseyside, L35 2XW 08 27125 00 © 05.2004...
Need help?
Do you have a question about the 61EHDO and is the answer not in the manual?
Questions and answers
My fan assisted oven is not heating up. The fan is working just no heat
The STOVES 61EHDO fan assisted oven may not be heating up due to a faulty fan oven element. The fan oven element is responsible for providing uniform heat, and if it fails, the oven will not reach the desired temperature. Another possible reason could be an electrical issue, such as a problem with the power supply or a blown fuse, since the oven requires a 220–240V supply and must be properly earthed.
This answer is automatically generated