Table of Contents
Advertisement
Advertisement
Table of Contents

Related Manuals for STOVES 907MF


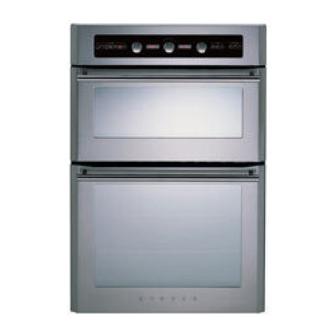
Summary of Contents for STOVES 907MF
- Page 2 Our Warranty Should you need it ..Inside the paperwork which has come with this appliance, there is a leaflet and card explaining the terms of our extended warranty and guarantee. In order to apply for our five year guarantee, simply fill in the details on the card and post it off, this will register your appliance.
-
Page 3: Table Of Contents
Technical Data ........39 Stoves Customer Care ......Back cover... -
Page 4: Introduction
Introduction Thank you for choosing a Stoves Disposal of packaging by Eurolec appliance! • All our packaging materials are We hope the following information will recyclable environmentally help you to quickly familiarise yourself friendly. with the features of the appliance, and •... -
Page 5: Manual Operation
Introduction When the power is turned on. function has been switched off, unless any oven or grill heating element has not As soon as the power is switched on, the operated for longer than 90 seconds. oven will run a brief self check. In this case the cooling fan will switch off Once this has been done, the timer dis- immediately. -
Page 6: Be Safe - Not Sorry
Be Safe - Not Sorry When you are cooking, keep • Do not drape tea towels over the children away from the vicinity handle as this creates a fire hazard. of the appliance. • When opening the appliance This product is designed as a domestic door, take care to avoid skin cooking appliance for the preparation contact with any steam which may... - Page 7 Be Safe - Not Sorry Important safety note: Child Lock This appliance has built in fail safe To activate the Child Lock Function, technology to prevent your appliance turn the central control knob anti- from overheating in the event of mis- clockwise (towards the minus (-) sym- use or certain component failures bol), and hold for 5 seconds.
-
Page 8: Functions
Functions Symbol Function / Feature Main Oven Oven Full Grill (conventional) Half Grill (economy - inner element only) Fanned oven Conventional oven Top heat only Base heat only Fanned oven Intensive bake Defrosting Fanned grill... -
Page 9: Using The Grills
Using the grills The 907MF has a grill in both oven cavities. If you have programmed the main grill pan oven for automatic cooking, you may handle position still use the grill in the top cavity. - Page 10 Using the Top Oven Grills Using the Grill functions Once you have chosen which function you wish to use, press the control knob The right hand controller is used for once, to confirm your choice. selecting the functions of the Top audible tone will sound.
- Page 11 Using the Top Oven Grills When using the grill You cannot use the automatic pro- grammer with the top oven functions, however the minute minder function can be used. (see Programmer/Clock section) Never leave the top oven grills unat- tended for long periods of time when they are in use, if you do leave the appliance - set the minute minder as a reminder.
-
Page 12: Grilling Guide
Grilling Guide Grilling guide - Top Oven The grilling times given in the grilling guide are only approximate as differences in thickness, size of portion, and personal preference will influence the timing. The times given in the grilling guide are based on a pre-heated full grill used on gr:10 energy level. -
Page 13: Using The Top Oven
Using the Top Oven Caution: Accessible parts may The oven temperature will be dis- be hot when the top oven is played on the right hand display. used, young children should be kept away. To switch off. The top oven is a fan assisted oven. Press the right hand control knob once cooking has finished. -
Page 14: Top Oven Guide
Using the Top Oven Dish Recommended Suggested Approximate Temperature ˚C Shelf Cooking Time Position Scones 10 - 15 mins Meringues 2 - 3 hours Cakes Small cakes 15 - 25 mins Whisked sponge 20 - 25 mins Swiss roll 10 - 12 mins Victoria sandwich 20 - 25 mins (2 x 180mm / 7”... - Page 15 Using the Top Oven / Grill Main Oven Function Pre-set Recommended Uses Temperature œC The half grill uses part of the element and is Half Grill gr:10 ideal for grilling smaller amounts of foods like (economy) - highest grill steaks, bacon and toast. Use with the door setting open The full grill allows you to cook foods such as...
-
Page 16: Using The Main Oven
Using the Main Oven Using the oven To help the air circulate freely Please read through these • Position the shelves evenly within instructions carefully before the oven and maintain a clearance using for the first time. from the oven roof and base. Never put items directly on the base of •... - Page 17 Using the Main Oven Caution: Accessible parts may The main oven will automatically be hot when the ovens are default onto the fan oven. used, young children should be kept away. To change the function turn the knob The main oven is a multi-function oven. until the icon for the function you It has a variety of functions which can require is illuminated.
-
Page 18: Automatic Operation
Using the Main Oven Step 2 - Set the main oven control Note: Once the main oven function has been selected and confirmed, you can If you accidentally knock the oven con- either use the temperature pre-set on trol, the Fanned oven icon will come your appliance or adjust it to suit your on flashing - however it will not acti- own taste or requirements. -
Page 19: Using The Main Oven
Using the Main Oven Defrosting and cooling Important notes: To defrost frozen foods, place food in the centre of the oven and close the door. To cool foods after cooking prior to refrigeration or freezing, place food in the centre of the oven with the door open. -
Page 20: Main Oven Grilling Guide
Grilling Guide Grilling guide - Main oven The grilling times given in the guide are only approximate, as the difference in thick- ness, size of portion and personal preference will influence cooking times. The times given in the grilling guide are based on the grill being preheated for 3 minutes. -
Page 21: Main Oven Baking Guide
Using the Main Oven Dish Recommended Temperature Shelf Cook Time Conv. Fanned Intensive (mins) Scones 8 - 15 mins Meringues 2 - 3 hrs Cakes Small cakes 15 - 25 mins Whisked sponge 20 - 25 mins Swiss roll 10 - 12 mins Victoria sandwich 20 - 30 mins (2 x 180mm / 7”... -
Page 22: Main Oven Baking Guide
Using the Main Oven Main oven baking guide Dish Recommended Temperature Shelf Cook Time Conv. Fanned Intensive (mins) Biscuits Shortbread rounds 10 - 20 mins Nut brownies 35 - 40 mins Brandy snaps 8 - 12 mins Flapjacks 25 - 40 mins Ginger nuts 15 - 20 mins Puddings... -
Page 23: Roasting Guide
Using the Main Oven Roasting guide Frozen meat should be thoroughly thawed before cooking. For large joints, it is advisable to thaw overnight. Frozen poultry should be thoroughly thawed before cooking (unless packaging advises otherwise), the time required depends on the size of the bird - eg; a large turkey may take up to 48 hours to thaw. -
Page 24: Traditional Fruit Cakes
Using the Main Oven Traditional fruit cakes Roasting turkey It should be remembered that ovens Roasting turkey involves cooking two can vary over time, therefore cooking different types of meat - the delicate times can vary, making it difficult to be light breast meat, which must not be precise when baking fruit cakes. - Page 25 Using the Main Oven Main Oven Function Temperature œC Recommended Uses Used to finish of the bases of foods following on from using the conventional or fanned modes. The Base Heat Only 200˙C base heat can be used to provide additional brown- ing to the bases of foods such as pizza, quiches and pies.
-
Page 26: Programmer/Clock
Programmer/Clock Introduction haps for several hours, especially when the weather is hot. This timer may differ from any timer you have used before. Please read Make sure that meat, poultry and through these instructions carefully, uncooked food are thoroughly and familiarise yourself with the timer, thawed before placing them in the before you start to use it, this will oven. - Page 27 Programmer/Clock Setting the time of day Once the hour has been set, the last two digits (minutes) will begin to flash Note: This is a 24 hour clock. indicating that they should be set. Ensure that the power is switched on to the appliance.
-
Page 28: Cancelling The Minute Minder
Programmer/Clock To adjust the time of day 00 minutes by turning the control knob clockwise - to increase the time, Should you need to adjust the time of or turning it anti-clockwise - to reduce day the procedure below should be the time. - Page 29 Programmer/Clock Semi Automatic Cooking Enter the hours by rotating the centre control knob clockwise (+) Definition: Semi Automatic, alarmed or anticlockwise (-) to the feature with automatic switch off for required hour setting, then the main oven functions only, has two confirm by pressing the different operating modes:- centre control knob again.
- Page 30 Programmer/Clock Semi Automatic Cooking the centre control knob clockwise (+) (Continued) or anticlockwise (-) to the required hour setting, then confirm by press- End Time method – allows you to ing the centre control knob once. set a specific time of day you want the oven to automatically switch off Always remember that this is a and sound the alarm e.g.
- Page 31 Programmer/Clock Fully Automatic Cooking The display will show 00:00 with the hours flashing “00”’:00. Definition: Fully automatic cooking allows you to use both end time and duration cooking together. The oven calculates a start time from the dura- tion and end times and automatically turns itself on and off.
- Page 32 Programmer/Clock Fully automatic cooking cont’d The timer set indicator on the bottom right hand side of the timer display The timer end time icon is now illuminates confirming timer function illuminated and the timer hours has been set correctly and will remain is flashing (‘00’:00).
-
Page 33: Cleaning
Cleaning Caution: Any cleaning agent Chrome plated parts used incorrectly may damage & OVEN SHELVES OVEN SHELF RUNNERS the appliance. GRILL PAN TRIVET Always let the oven cool before Do not use abrasives or polishes, use a cleaning. moist soap pad. These items may also Some cooking operations generate be cleaned in a dishwasher. - Page 34 Cleaning Glass parts Important: if the inner door glass panel is removed for cleaning, it must & FACIA PANEL DOOR PANELS be replaced the right way up as Use hot soapy water on stubborn shown, and pushed fully in to the marks.
-
Page 35: Cleaning
Cleaning Painted, plastic and metal finish Stainless Steel surfaces (stainless parts steel finish models only) & DOOR FRAME HANDLE CONTROL KNOB FACIA PANEL HANDLES DOOR PANELS Only use a clean cloth wrung out in Only use a clean cloth wrung out in hot hot soapy water. -
Page 36: Installation Instructions
Installation Instructions Step 1: Prepare installation (ii) When false back removed, it is normally the case Do not lift the oven by the door that the support shelf for the handle. appliance leaves a gap between Whilst every care is taken to eliminate the back edge and the wall of burrs and raw edges from this product, approximately 80mm. - Page 37 Installation Instructions 3. The appliance is designed to fit Please note that all sizes are nominal, into a standard 600mm wide some variation is to be expected. housing unit, with minimum internal dimensions as shown. 560mm 547 mm 550mm 20mm 30 - 80mm 595 mm 550mm...
- Page 38 Installation Instructions Step 2: Check edging strip Step 3: Secure appliance into housing unit The edging strip is factory fitted to the front side edges of the appliance Insert appliance into cabinet. front frame. This strip provides the Note: The unit housing the appliance cabinetry with extra protection from must be appropriately fixed.
-
Page 39: Technical Data
Technical data Electrical supply 220 - 240V ~ 50Hz - 5.0kW Cavity Lights: 4 x 25W Countries of destination (AUS) Australia Connect to the electricity supply The appliance must be installed by a competent electrician using a double pole control unit with 3mm minimum contact separation at all poles. - Page 40 STOVES 907 MF - AU ISSUE A FASCIA CONTROL BOARD Earth Earth 8 WAY RIBBON CABLE L100C TOP THERMAL CUTOUT POWER BOARD SWITCH L100C REAR THERMAL CUTOUT Earth Earth TOP OVEN T.O. RTD MAIN OVEN T.O. LAMPS GRILL ELEMENT GRILL ELEMENT M.O.
- Page 41 Service Record Please record your model number and serial number in the space below. Where are my model and serial numbers? Freestanding HL appliances: base of storage drawer Freestanding appliances: front frame near oven cavity Built in oven: front frame near oven cavity Hobs: base plate of the hob Having these numbers to hand will help us to help you, quickly and more efficiently.
- Page 42 Before you contact a service agent, make sure that you have the following information to hand: Model Number Serial Number Date or Purchase Postcode Proudly distributed by Eurolec. Head Office address: 27 Watland Street, Springwood, Queensland 4127 08 27315 00 © 07.2006 Built In Electric Oven Model Names: 907MF...
Need help?
Do you have a question about the 907MF and is the answer not in the manual?
Questions and answers
My stove oven Q900EM is around 25years old and still in very good order. However, I would like to get it serviced/maintained. Can you recommend an company/firm who would complete this work.
Is it possible to remove one of the four (black) control buttons. Are they a push fit ?.