Table of Contents
Advertisement
Quick Links
Advertisement
Table of Contents

Subscribe to Our Youtube Channel
Related Manuals for Axel OXYGEN 3000


Summary of Contents for Axel OXYGEN 3000
- Page 1 USER MANUAL (Rev. 1.2 - ENG) axeltechnology.com...
-
Page 2: Table Of Contents
9.1.3A SET BUTTON 9.1.9 TELEPHONE MODULE – CONNECTIONS WITH THE 9.1.3B CHB BUTTON INTERNAL HYBRID MODULE 9.1.3C GAIN 9.1.10 TELCO MODULE - EXTERNAL TELEPHONE HYBRID 9.1.3D F1 BUTTON CONNECTIONS 9.1.3E EQ BUTTON INTRODUCTION | OXYGEN 3000 · User Manaual · ENG... - Page 3 9.1.12.3 MIC5 INPUT: TELCO INPUT TYPE(SPEAKER/HEADPHONES)/(CONTROL 9.1.12.4 CONDENSER MIC MANAGEMENT, +48V ROOM/STUDIO/GUESTS)/CUT SOURCE PHANTOM SUPPLY AND SINGLE SECTIONING 10.5 AUDIO/SETTINGS 9.1.13 OXYGEN 3000 & MR. LIGHT – ONAIR LAMP 10.5.1 AUDIO/SEETINGS/VJPRO CONNECTION 10.6 GENERAL/COMMUNICATIONS 10 MENÙ MIXER 10.6.1 GENERAL/COMMUNICATIONS/TCP-IP 10.1 HOME PAGE 10.6.2 GENERAL SET./COMMUNICATIONS/TIME&DATE100...
- Page 4 OXYGEN 3000 User Manual · ENG 10.8.1 FIRMWARE/VERSION 13 WARRANTY DECLARATION OF CONFORMITY 10.8.2 FIRMWARE/REBOOT DICHIARAZIONE DI CONFORMITA' 11 MIXER FIRMWARE UPGRADE 12 WEEE DIRECTIVE – INFORMATIVA RAEE INTRODUCTION | OXYGEN 3000 · User Manaual · ENG...
-
Page 5: Introduction
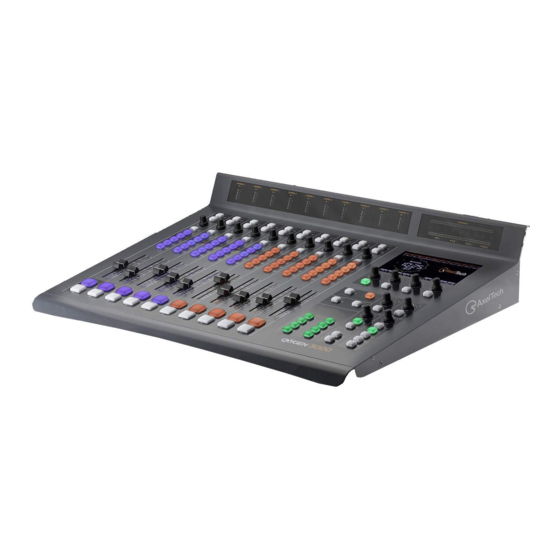
Easy and realiable as the analogue mixing consoles, Oxygen 3000 adds the value of the digital engine that grants a near 0 latency (< 0,7 ms I/O ) and plenty of advanced functions as the the internal routing signal, customizable preset and easy recall, user defined smart keys, analog and digital I/O. -
Page 6: General Description
OXYGEN 3000 User Manual · ENG 2 GENERAL DESCRIPTION MIXER DIMENSIONS GENERAL DESCRIPTION | OXYGEN 3000 · User Manaual · ENG... - Page 7 OXYGEN 3000 - User Manual · ENG TALK BOX DIMENSIONS GENERAL DESCRIPTION |OXYGEN 3000 · User Manual · ENG...
- Page 8 OXYGEN 3000 User Manual · ENG CUTTING TEMPLATE CONNECTORS HOLE 60mm MIXER HOLE 492mm 630mm GENERAL DESCRIPTION | OXYGEN 3000 · User Manaual · ENG...
- Page 9 Line-4, Line 5, Line-6, Line-7(this is the EXT input for TUNER) 4 Stereo Input - PIN RCA - Ubalanced Audio Connection 12. TBox-2, TBox-3, TBox-4, TBox-5 4 TalkBox Input - RJ45 (SFTP Cable) - Balanced Audio (Mic2/3/4/5 Input) GENERAL DESCRIPTION |OXYGEN 3000 · User Manual · ENG...
- Page 10 REC-1, REC-2, SPK C-ROOM, SPK STUDIO 10. HDP-STUDIO, HDP-GUEST 4 Stereo Output - PIN RCA - Unbalanced Audio Connection TalkBox Output - RJ45 (SFTP Cable)- Balanced Audio (Studio & Guest Headphone) GENERAL DESCRIPTION | OXYGEN 3000 · User Manaual · ENG...
- Page 11 2 RJ45 (SFTP Cable) - n° 1 GPO Connection GPIO-2 TBox-MIC-2, TBox-MIC-3, TBox-MIC-4, TBox-MIC-5 SUB-D 9p Female - 2 GPI + 2 GPO 4 RJ45 (SFTP Cable) - n° 2 GPI Connections + n° 1 GPO Connection GENERAL DESCRIPTION |OXYGEN 3000 · User Manual · ENG...
- Page 12 Jack 6.3mm Female Connector - (Min. Imp. 32Ω ) HDP Input HDP-2-TBox RJ45 Connectors (SFTP) Jack 6.3mm Female Connector - (Min. Imp. 32Ω ) TalkBox Connection RJ45 Connectors (SFTP) - (Passive Loop Output) GENERAL DESCRIPTION | OXYGEN 3000 · User Manaual · ENG...
-
Page 13: 3 Safety Warnings/Istruzioni Per La Sicurezza
OXYGEN 3000 - User Manual · ENG 3 SAFETY WARNINGS/ISTRUZIONI PER LA SICUREZZA SAFETY WARNINGS CONSIGNES DE SÉCURITÉ IMPORTANTES ISTRUZIONI IMPORTANTI PER LA SICUREZZA WICHTIGE SICHERHEITSHINWEISE INSTRUCCIONES IMPORTANTES DE SEGURIDAD (Rel. 1.6) SAFETY WARNINGS/ISTRUZIONI PER LA SICUREZZA |OXYGEN 3000 · User Manual · ENG... -
Page 14: Safety Warnings/Istruzioni Per La Sicurezza 13 3.1 Preface
It is recommended that any repair and maintenance of the product be carried out by the manufacturer or its authorized agents. The manufacturer assumes no responsibility for any loss or damage caused by service, maintenance, or repair by unauthorized personnel. SAFETY WARNINGS/ISTRUZIONI PER LA SICUREZZA | OXYGEN 3000 · User Manaual · ENG... -
Page 15: Safety Warnings
- Power Cord Protection. Power supply cords must be routed so that they are not likely to be walked on nor pinched by items placed upon or against them. Pay particular attention to the SAFETY WARNINGS/ISTRUZIONI PER LA SICUREZZA |OXYGEN 3000 · User Manual · ENG... - Page 16 - Installation. Configuration and installation should only be carried out by a competent installation engineer Cabling. Using high quality wires, well protected. Make sure the cable integrity. SAFETY WARNINGS/ISTRUZIONI PER LA SICUREZZA | OXYGEN 3000 · User Manaual · ENG...
- Page 17 To completely separate from mains power (f.i. in the event of danger) unplug mains power cord. As the MAINS plug is the disconnect device, the disconnect device shall remain readily operable. SAFETY WARNINGS/ISTRUZIONI PER LA SICUREZZA |OXYGEN 3000 · User Manual · ENG...
-
Page 18: Consignes De Sécurité Importantes
- Protéger le cordon d'alimentation afin que personne ne marche dessus et que rien ne le pince, en particulier aux fiches, aux prises de courant et au point de sortie de l’appareil SAFETY WARNINGS/ISTRUZIONI PER LA SICUREZZA | OXYGEN 3000 · User Manaual · ENG... - Page 19 - NE PAS exposer cet appareil aux égouttures et aux éclaboussements. Ne pas poser des objets contenant de l'eau, comme des vases, sur l'appareil SAFETY WARNINGS/ISTRUZIONI PER LA SICUREZZA |OXYGEN 3000 · User Manual · ENG...
- Page 20 En cas de danger, debrancher le cordon d'alimentation. Parce que la prise du réseau de alimentation est utilisée comme dispositif de déconnexion, ce dispositif doit demeuré aisément accessible SAFETY WARNINGS/ISTRUZIONI PER LA SICUREZZA | OXYGEN 3000 · User Manaual · ENG...
-
Page 21: Istruzioni Importanti Per La Sicurezza
- Evitare di calpestare il cavo di alimentazione o di comprimerlo, specialmente in corrispondenza della spina e del punto di inserzione sull’apparato. - Utilizzare solo dispositivi di collegamento e gli accessori specificati dal produttore. SAFETY WARNINGS/ISTRUZIONI PER LA SICUREZZA |OXYGEN 3000 · User Manual · ENG... - Page 22 è stato esposto alla pioggia o all’umidità, non funziona normalmente o è caduto. - Non esporre a sgocciolamenti o spruzzi. Non appoggiare sull'apparecchio oggetti pieni di liquidi, ad esempio vasi da fiori. SAFETY WARNINGS/ISTRUZIONI PER LA SICUREZZA | OXYGEN 3000 · User Manaual · ENG...
- Page 23 è pertanto completo. Per ottenere un isolamento totale (ad esempio in caso di pericolo), scollegare il cordone di alimentazione. Inoltre, poichè la spina di alimentazione è utilizzata come dispositivo di sezionamento, essa deve restare facilmente raggiungibile SAFETY WARNINGS/ISTRUZIONI PER LA SICUREZZA |OXYGEN 3000 · User Manual · ENG...
-
Page 24: Wichtige Sicherheitshinweise
- VERHINDERN, dass das Netzkabel gequetscht oder darauf getreten wird, insbesondere im Bereich der Stecker, Netzsteckdosen und an der Austrittsstelle vom Gerät - NUR das vom Hersteller angegebene Zubehör und entsprechende Zusatzgeräte verwenden. SAFETY WARNINGS/ISTRUZIONI PER LA SICUREZZA | OXYGEN 3000 · User Manaual · ENG... - Page 25 Regen oder Feuchtigkeit ausgesetzt war, nicht normal funktioniert oder fallen gelassen wurde. - Dieses Gerät vor Tropf- und Spritzwasser SCHÜTZEN. KEINE mit Wasser gefüllten Gegenstände wie zum Beispiel Vasen auf das Gerät STELLEN. SAFETY WARNINGS/ISTRUZIONI PER LA SICUREZZA |OXYGEN 3000 · User Manual · ENG...
- Page 26 Vor Einschalten Netzspannungseinstellung am Gerät überprüfen bzw. anpassen. Inpoliger Netzschalter. In Notfälle oder für Wartungsarbeiten Netzkabel trennen. Der Netzstecker fungiert auch als Trennelement muss deshalb zugänglich bleiben SAFETY WARNINGS/ISTRUZIONI PER LA SICUREZZA | OXYGEN 3000 · User Manaual · ENG...
-
Page 27: Instrucciones Importantes De Seguridad
- PROTEJA el cable eléctrico para evitar que personas lo pisen o estrujen, particularmente en sus enchufes, en los toma corrientes y en el punto en el cual sale del aparato SAFETY WARNINGS/ISTRUZIONI PER LA SICUREZZA |OXYGEN 3000 · User Manual · ENG... - Page 28 - NO exponga este aparato a chorros o salpicaduras de líquidos. NO coloque objetos llenos con líquido, tales como floreros, sobre el aparato . SAFETY WARNINGS/ISTRUZIONI PER LA SICUREZZA | OXYGEN 3000 · User Manaual · ENG...
- Page 29 El interruptor de alimentación es unipolar. En el caso de peligro, desconecte el cable de alimentación. Porque la clavija de conexion a red sirve por la desconection de la unidad, la clavija debe ser ubicada en proximidad de la unidad SAFETY WARNINGS/ISTRUZIONI PER LA SICUREZZA |OXYGEN 3000 · User Manual · ENG...
-
Page 30: Unpacking And Inspection
The actual equipment Serial Number is indicated on the silver label stuck on the rear panel of the equipment closure. Tools And Equipment Needed Only standard technician’s tools are required to install this equipment. UNPACKING AND INSPECTION | OXYGEN 3000 · User Manaual · ENG... -
Page 31: First Installation Recommendations
Alternatively you should disconnect all connectors from the device during a storm or when the device is going to be unsupervised or not used for a longer period of time. These measures will protect against damage by lightning or excess voltage. FIRST INSTALLATION RECOMMENDATIONS |OXYGEN 3000 · User Manual · ENG... -
Page 32: Oxygen 3000 Installation Note And First Step
Best setup location The Oxygen 3000 should be installed avoiding direct sunlight, close proximity to radiators and air conditioning, dust, water, and chemicals. Choose a console location that permits a clear view to the indicators on the device and ensure a sufficient heat dissipation of the device. - Page 33 Each time a NEW user, with administration rights is created, the user admin disappear and it is replaced by the new one just created. If all users are deleted, the standard admin – admin comes out again OXYGEN 3000 INSTALLATION NOTE AND FIRST STEP |OXYGEN 3000 · User Manual · ENG...
-
Page 34: Weee Directive - Informativa Raee
Deshágase de este producto devolviéndolo al punto de venta o a un punto de recogida municipal para su reciclaje. WEEE DIRECTIVE – INFORMATIVA RAEE | OXYGEN 3000 · User Manaual · ENG... - Page 35 V súlade so smernicou 2002/96/ES o odpade z elekrických a elektronických zariadení (OEEZ) sa toto elektrické zariadenie nesmie odstranovat‘ ako netriedený komunálny odpad. Výrobok odstránte jeho vrátením v mieste nákupu alebo odovzdaním v miestnom zbernom zariadení na recyklovanie. WEEE DIRECTIVE – INFORMATIVA RAEE |OXYGEN 3000 · User Manual · ENG...
-
Page 36: Warranty
The manufacturer offers a one year warranty ex works. Do not open the equipment. Any breaking of the seals will result in forfeiture of the same. The manufacturer is not liable for damages of any kind arising from, or in connection with, the use of the wrong product. WARRANTY | OXYGEN 3000 · User Manaual · ENG... -
Page 37: Surface
9 SURFACE 9.1.1 INPUT LED METER 9.1.5 SPECIAL FUNCTION BUTTONS 9.1.2 OUTPUT LED METER 9.1.6 MONITOR SECTION 9.1.3 CONTROL INPUT CHANNEL 9.1.7 SMART KEY / JINGLE BUTTONS 9.1.4 DISPLAY 7"TFT AND CONTROL BUTTONS SURFACE |OXYGEN 3000 · User Manual · ENG... -
Page 38: Input Led Meter
The lighting of the LED indicates a source level too high. This condition saturates the signal and creates audio distortions. ACTION TO BE TAKEN: turn down the input source level. Sources level meters and clip Leds of the 10 channels. SURFACE | OXYGEN 3000 · User Manaual · ENG... -
Page 39: Output Led Meter
The Led Meter has a resolution of 2dB, from -60 to +20dB. The level is POST-GAIN, the BUS GAIN has effects on the displayed level. In MENU/GLOBAL-SETTINGS/METER REF/OUTPUTS it is possible to change the displaying Reference. The default reference value is 0dB. SURFACE |OXYGEN 3000 · User Manual · ENG... - Page 40 BUS is forcedly displayed when the related LED (PFL/SUB/AUX-1/AUX-2) is on. The 4 LEDs are off In the MONITOR SELECTION position. The displayed signal is the source selected in HDP C-ROOM, as shown in the following picture. SURFACE | OXYGEN 3000 · User Manaual · ENG...
-
Page 41: Control Input Channel
9.1.3H. FADER LED BAR – IT INDICATES THE ATTENUATION AND THE SOURCE TYPE. 9.1.3L. ON/START – BUTTON TO SWITCH ON/OFF THE SELECTED SOURCE. 9.1.3M. PFL – BUTTON TO ENABLE THE PFL BUS. SURFACE |OXYGEN 3000 · User Manual · ENG... -
Page 42: Set Button
The pression of the SET button on another channel disables the previously screen. - SET Menu - CHANNEL A CHANNEL B EDIT 1° CODE 2° CODE 3° CODE 4° CODE EDIT SURFACE | OXYGEN 3000 · User Manaual · ENG... -
Page 43: Chb Button
ATTENTION : If the source is already aired on another channel it is aired to the last one too. The faders will be added accordingly with the BUS selection. If the Channel B is aired you can not assign to it the EMPTY source. SURFACE |OXYGEN 3000 · User Manual · ENG... -
Page 44: Gain
The GAIN value is associated to the input source ChA / ChB. By switching the source the gain is always suitable to the connected one. The GAIN value is always the last one set with the knob or with the setting menu. The GAIN affects the input level with +/- 20 dB. SURFACE | OXYGEN 3000 · User Manaual · ENG... -
Page 45: F1 Button
OXYGEN 3000 - User Manual · ENG 9.1.3D F1 BUTTON Telephone Channel / Telco (Default Setting). F1 blinks to report an incoming call. F1 pression enables the telephone line. F1 long pression disables the telephone line. SURFACE |OXYGEN 3000 · User Manual · ENG... -
Page 46: Eq Button
1)2) the pression of EQ for a time< 1 Sec enables or disables the equalizer; the status is indicated by the RGB Led under the key. 3) 4) the pression of EQ for a time > 1Sec enables the equalizer and the EQ editor on the display. SURFACE | OXYGEN 3000 · User Manaual · ENG... - Page 47 OXYGEN 3000 - User Manual · ENG A pression on EQ for a time < 1 Sec disables the Editing Mode, leaving the EQ enabled. In this Menu, it is possible to change BASS/MID/HIGH equalizations. SURFACE |OXYGEN 3000 · User Manual · ENG...
-
Page 48: Pgm/Sub/Aux-1/Aux-2 Buttons
When the channel switches from ON state to OFF state, the related LedS switches from ON Color to MUTE color, this function allows us to understand the channel and buss state. ON/OFF channel state could depend on: a) ON/OFF of ON/START button b) Fader position SURFACE | OXYGEN 3000 · User Manaual · ENG... -
Page 49: Fader
FADER position will not change. MOTORIZED FADER (Optional). ATTENTION: It is possible to set AUX-1 and AUX-2 to be POST-Fader or PRE-Fader. The FADER does not affect the signal in the PRE-FADER case. SURFACE |OXYGEN 3000 · User Manual · ENG... -
Page 50: Fader Led Bar
OXYGEN 3000 User Manual · ENG 9.1.3H FADER LED BAR The FADER LED BAR shows: 1) the channel level SURFACE | OXYGEN 3000 · User Manaual · ENG... -
Page 51: On/Start Button
The ON/OFF channel state could be changed by: A pression of ON/START button ON /START Ch OFF PRESS SE T (>1 Sec) Ch ON the passage of the fader through a previously set threshold value THRESHOLD THRESHOLD THRESHOLD SURFACE |OXYGEN 3000 · User Manual · ENG... - Page 52 OXYGEN 3000 User Manual · ENG In the case of ON BY FADER active it is possible to combine the FADER action with the ON/START button. SURFACE | OXYGEN 3000 · User Manaual · ENG...
-
Page 53: Pfl Button
If you press a second or more PFL buttons you will prelisten for all of them. By pressing an enabled PFL you will disable it from the MONITOR prelistening By pressing the last active PFL you disable the automatic PFL listening from the MONITOR. SURFACE |OXYGEN 3000 · User Manual · ENG... - Page 54 When a PFL Button is in ON position, the automatic prelistening is activated on the MONITOR. In this condition the source button previously set starts blinking. B LINK AUX1 AUX1 AUX2 AUX2 To disable the prelistening press the enabled PFL or the blinking button in Monitor section. B LINK AUX1 AUX1 AUX2 AUX2 SURFACE | OXYGEN 3000 · User Manaual · ENG...
-
Page 55: Display 7'' Tft And Control Buttons
OXYGEN 3000 - User Manual · ENG 9.1.4 DISPLAY 7’’ TFT AND CONTROL BUTTONS 9.1.4A COLOR DISPLAY 7’’ - 800X480 RESOLUTION The display is used for the mixer parameter monitoring and checking. SURFACE |OXYGEN 3000 · User Manual · ENG... - Page 56 It is possible to adjust the display brightness, allowing you to deal with any environmental situation. You can find the parameter in the following menu: GENERAL SETTINGS/LIGHT & DISPLAY/DISPLAY/DIMMER(low, mid, high). SURFACE | OXYGEN 3000 · User Manaual · ENG...
-
Page 57: Buttons For The Menu Navigation
>> and << (2) (3) Buttons allow you to move between parameters/functions on the same menu level. ESC (4) allows you to exit from the menu level going up in the menu. SURFACE |OXYGEN 3000 · User Manual · ENG... -
Page 58: Encoder For The Menu Navigation
Push the related encoder to confirm the parameter changes. Once you have confirmed the new value, the graphic will become yellow again. At the ESC pression or at the next screen change if the changes will not be confirmed, the value will be restored to the once previously saved. SURFACE | OXYGEN 3000 · User Manaual · ENG... -
Page 59: Special Function Buttons
OXYGEN 3000 - User Manual · ENG 9.1.5 SPECIAL FUNCTION BUTTONS 9.1.5A OUTPUT BUTTON The OUTPUT button recalls directly the OUTPUTS configuration menu. This button is a SHORTCUT to reach immediately the OUTPUT menu. SURFACE |OXYGEN 3000 · User Manual · ENG... -
Page 60: Meter Button
The repeated pression of METER button switches the 4 BUS and the MONITOR SELECTION, displaying them in a sequential way. PFL -> SUB -> AUX-1 -> AUX-2 -> MONITOR SELECTION -> PFL -> SUB SURFACE | OXYGEN 3000 · User Manaual · ENG... - Page 61 If one of the four LedS is on (PFL/SUB/AUX-1/AUX-2) the selected BUS is forcely displayed. The selected source in HDP C-ROOM is being displayed in the MONITOR SELECTION state. In this state all 4 LedS are OFF as explained in the following picture. SURFACE |OXYGEN 3000 · User Manual · ENG...
-
Page 62: Monitor Section
The step of the speaker adjustment is 1 dB and the level goes from -80 dB to the maximum of +19dB. By setting the level on 80 dB we will have a total output level of 0dB. SURFACE | OXYGEN 3000 · User Manaual · ENG... - Page 63 If the CUT function is recalled, the SPEAKER selection is disabled and only the Headphone state is displayed. It is possible to select the SPEAKER source only out of the CUT mode. SURFACE |OXYGEN 3000 · User Manual · ENG...
- Page 64 To set the MIC on which you want to apply the CUT mode go to CUT SOURCE of the GENERAL > AUDIO > OUTPUTS > MONITOR > SPEAKER > SPK-CRM. This option allows the MULTIPLE SELECTION, it is possible to select more than one source. SURFACE | OXYGEN 3000 · User Manaual · ENG...
-
Page 65: Control Room -Headphones Sources & Level
By pressing the Encoder is possible to put the OUTPUT on MUTE. By pressing the same encoder again is possible to restore the OUTPUT signal. A red cross on the HEADPHONES icon indicates MUTE-HDP state. SURFACE |OXYGEN 3000 · User Manual · ENG... - Page 66 Headphones and speakers receive the same selected source, except for the PFL selection. If Headphones receives a selected PFL, speakers no. They will be independent and they will listen always the selected source. The selected source will start blinking. SURFACE | OXYGEN 3000 · User Manaual · ENG...
- Page 67 OXYGEN 3000 - User Manual · ENG HEADPHONES (SEL or PFL) Normally Headphones listen the selected source like the speakers. If PFL is pressed, headphones can listen for it, speakers no. The selected source will start blinking. SURFACE |OXYGEN 3000 · User Manual · ENG...
-
Page 68: Studio - Speakers
By pressing the Encoder is possible to put the OUTPUT on MUTE. By pressing the same encoder again is possible to restore the OUTPUT signal. A red cross on the SPEAKER icon indicates MUTE-SPK state. SURFACE | OXYGEN 3000 · User Manaual · ENG... - Page 69 To set the MIC on which you want to apply the CUT mode go to CUT SOURCE of the GENERAL > AUDIO > OUTPUTS > MONITOR > SPEAKER > SPK-STUDIO This option allows the MULTIPLE SELECTION, it is possible to select more than one source. SURFACE |OXYGEN 3000 · User Manual · ENG...
-
Page 70: Studio - Headphones Sources & Levels
By pressing the Encoder is possible to put the OUTPUT on MUTE. By pressing the same encoder again is possible to restore the OUTPUT signal. A red cross on the HEADPHONES icon indicates MUTE-HDP state. SURFACE | OXYGEN 3000 · User Manaual · ENG... - Page 71 OXYGEN 3000 - User Manual · ENG 1SEL or PFL Normally Headphones listen the selected source like the speakers. If PFL is pressed, headphones can listen it, speakers no. The selected source will start blinking. SURFACE |OXYGEN 3000 · User Manual · ENG...
-
Page 72: Talk Back - From Control Room To The Studio
This section is useful for the management of the TALK BACK from the CONTROL ROOM to the studio. By pressing TB1 it’s possible to speak with the STUDIO anchorman from the CONTROL ROOM By pressing TB2 it’s possible to speak with the STUDIO anchorman and Guests SURFACE | OXYGEN 3000 · User Manaual · ENG... -
Page 73: Talk Box Connections And Functioning
OXYGEN 3000 - User Manual · ENG 9.1.7 TALK BOX CONNECTIONS AND FUNCTIONING SURFACE |OXYGEN 3000 · User Manual · ENG... - Page 74 OXYGEN 3000 User Manual · ENG On the Oxygen 3000 it is possible to connect a maximum of 4 Talk boxes. Every Talk Box is phisically connected with a Mixer MIC-source. MIC2-> TB2 MIC3-> TB3 MIC4-> TB4 MIC5-> TB5* *MIC 5 works as a LINE input. It is designed to be a Telco input. To use it as a normal MIC you have to amplify the signal of +16 dB.
-
Page 75: Gpio Connections
GPIO-2 GPI1 = TELCO RING GPI1 = Not Connected GPI2 = Not Connected GPI2 = Not Connected GPO1= TELCO HOOK GPO1= ONAIR LIGHT Control Room GPO2= Not Connected GPO2= ONAIR LIGHT Studio SURFACE |OXYGEN 3000 · User Manual · ENG... -
Page 76: Telephone Module - Connections With The Internal Hybrid Module
If the line is well connected, you have to associate the TELEPHONE IN source to a Mixer Channel. When you will receive a phone call press F1 of the selected Channel to hook the line. By pressing PFL you can speak in private to the caller with the MIC 1. SURFACE | OXYGEN 3000 · User Manaual · ENG... -
Page 77: Telco Module - External Telephone Hybrid Connections
9.1.10 TELCO MODULE - EXTERNAL TELEPHONE HYBRID CONNECTIONS If you want to connect the TELCO MODULE with one of the Axel Technology telephone hybrids (BOXTEL MKII, MACROTEL X1 X2, PHONEX D1 D2) Axel will give you a special DE9P cable. -
Page 78: Bluetooth
If you turn on again the Bluetooth in the device and if the device is still associated with the console, it will be automatically paired. You will see a fixed blue light SURFACE | OXYGEN 3000 · User Manaual · ENG... -
Page 79: Connectivity Features
9.1.12 CONNECTIVITY FEATURES 9.1.12.1 SELECTABLE SOURCES On Oxygen 3000 it is possible to assign simultaneously the same source with different channels. In example this function is useful to prelisten a source that was already assigned to a ChB of another Channel. - Page 80 MIC1 is the input dedicated to the communication with the caller. Like the Talkback it is not ruled by the ON/START button or by the fader level. The listener will always listen for the MIC1. When the channel PFL is disabled, the ONAIR MODE is ON (one of the two following condition): SURFACE | OXYGEN 3000 · User Manaual · ENG...
- Page 81 The signal sent to the caller will be the sum N-1 of the all selected BUSS in ON/START state (all channels in the following state): the Telephone Channel will not be sent back to the caller. SURFACE |OXYGEN 3000 · User Manual · ENG...
- Page 82 OXYGEN 3000 User Manual · ENG The N-1 signal is always sent to the listener also when the TELEPHONE CHANNEL is OFF or when its Fader is lowered (as explained by the following picture). SURFACE | OXYGEN 3000 · User Manaual · ENG...
-
Page 83: Mic5 Input: Telco Input
OXYGEN 3000 - User Manual · ENG 9.1.12.3 MIC5 INPUT: TELCO INPUT On the Oxygen 3000 The TELCO input is MIC5. MIC 5 input does not work with normal Microphones. If needed it can work only with preamplified microphones. 9.1.12.4 CONDENSER MIC MANAGEMENT, +48V PHANTOM SUPPLY AND SINGLE SECTIONING Only on Microphones it is possible to enable/disable the Phantom Power from the following menu: The Phantom is shown in the channel Set Panel. -
Page 84: Oxygen 3000 & Mr. Light - Onair Lamp Connection
OXYGEN 3000 User Manual · ENG 9.1.13 OXYGEN 3000 & MR. LIGHT – ONAIR LAMP CONNECTION SURFACE | OXYGEN 3000 · User Manaual · ENG... -
Page 85: Menù Mixer
The 4 Encoders (A) (B) (C) (D) allows to adjust and to confirm the menu parameters. Every encoder is featured of a PUSH BUTTON, used to confirme the parameter setting. Menus were appositely designed to have a phisical correspondance between graphics and the related encoder. MENÙ MIXER |OXYGEN 3000 · User Manual · ENG... -
Page 86: Audio/Inputs/Input Type/Selected Input
OXYGEN 3000 User Manual · ENG 10.2 AUDIO/INPUTS/INPUT TYPE/SELECTED INPUT You can set Input source parameters from the following menu AUDIO > INPUTS: MENÙ MIXER | OXYGEN 3000 · User Manaual · ENG... -
Page 87: Audio/Inputs/Input Type/Selected Input/Name
You can customize the Input name as you prefer by following the next procedure description. The description work the same for all the Inputs. (In the example we are going to give to MIC1 the customized name ST4MIC2) MENÙ MIXER |OXYGEN 3000 · User Manual · ENG... - Page 88 OXYGEN 3000 User Manual · ENG MENÙ MIXER | OXYGEN 3000 · User Manaual · ENG...
-
Page 89: Audio/Inputs/Input Type/Selected Input/Gain
N.B.: When you adjust the GAIN parameter, you have a real time change of the parameter value, and the real time perception of the GAIN change. The Graphics will become white to indicate the parameter change, and it will become yellow again after the confirmation. MENÙ MIXER |OXYGEN 3000 · User Manual · ENG... -
Page 90: Audio/Inputs/Input Type/Selected Input/Bal-Pan
N.B.: When you adjust the BAL/PAN parameter, you have a real time change of the parameter value, and the real time perception of the BAL/PAN change. The Graphics will become white to indicate the parameter change, and it will become yellow again after the confirmation. MENÙ MIXER | OXYGEN 3000 · User Manaual · ENG... -
Page 91: Audio/Outputs/Analog(Digital)/Selected Output
Precisely we are going to analyse the PGM Analogue output. It is possible to choose if in the output you want all the Channels in which is selected the PGM BUS, or if you want a TONE GENERATOR. MENÙ MIXER |OXYGEN 3000 · User Manual · ENG... -
Page 92: Audio/Outputs/Analog(Digital)/Selected Output/Source
TONE GENERATION. 10.3.2 AUDIO/OUTPUTS/ANALOG(DIGITAL)/SELECTED OUTPUT/GAIN From the following parameter you can set for the OUTPUT(in this case PGM) GAIN. By rotating the knob you can adjust the gain. MENÙ MIXER | OXYGEN 3000 · User Manaual · ENG... -
Page 93: Audio/Outputs/Analolg(Digital)/Selected Output/Mode
OXYGEN 3000 - User Manual · ENG 10.3.3 AUDIO/OUTPUTS/ANALOLG(DIGITAL)/SELECTED OUTPUT/MODE From the following parameter you can choose if you want your Output in STEREO MODE, MONO MODE, MONO-L MODE, MONO-R MODE. MENÙ MIXER |OXYGEN 3000 · User Manual · ENG... -
Page 94: Audio/Outputs/Monitor/Monitor Type(Speaker/Headphones)/(Control Room/Studio/Guests)
OXYGEN 3000 User Manual · ENG 10.4 AUDIO/OUTPUTS/MONITOR/MONITOR TYPE(SPEAKER/HEADPHONES)/(CONTROL ROOM/STUDIO/GUESTS) From the following menu you can set for all the parameters connected to MONITOR, speakers or headphones: MENÙ MIXER | OXYGEN 3000 · User Manaual · ENG... -
Page 95: Audio/Outputs/Monitor/Monitor Type(Speaker/Headphones)/(Control Room/Studio/Guests)/Cut Source
From this Menu you can assign the MIC source that has to be CUT with the SPEAKERS (CR ROOM or STUDIO). This option allows the MULTIPLE SELECTION, it is possible to select more than one source. MENÙ MIXER |OXYGEN 3000 · User Manual · ENG... -
Page 96: Audio/Settings
OXYGEN 3000 User Manual · ENG 10.5 AUDIO/SETTINGS From the following section you can set all the parameters related with the Axel Technology VJPRO (Visual Radio solution). PAGE 3/3 MENÙ MIXER | OXYGEN 3000 · User Manaual · ENG... -
Page 97: Audio/Seetings/Vjpro
OXYGEN 3000 - User Manual · ENG 10.5.1 AUDIO/SEETINGS/VJPRO If you have the Axel Technology VJPRO Console software we suggest you to configure parameters as shown in the following picture. CTRL-SOURCE - The DJPro (Radio side) audio source rooted automatically in the PGM. We suggest you to select USB AUDIO-1 SOURCE-1 First VjPro Console (TV side) audio source, in this channel you have a clip related with the DjPro song. -
Page 98: General/Communications
From the following pictures you can see how to set the parameters for all the menu: IP, MASK and GATEWAY. We will examinate only one of these cases: the IP settings. The other cases work in the same way. MENÙ MIXER | OXYGEN 3000 · User Manaual · ENG... - Page 99 OXYGEN 3000 - User Manual · ENG By rotating the 4 encoders you can set for a new IP Address. Every encoder goes from 0 to 255. By pressing the encoder you can confirm your choice. MENÙ MIXER |OXYGEN 3000 · User Manual · ENG...
-
Page 100: General Set./Communications/Time&Date100
OXYGEN 3000 User Manual · ENG 10.6.2 GENERAL SET./COMMUNICATIONS/TIME&DATE From the General > Communications > TIME&DATE you can configure all parameters related with time and date MENÙ MIXER | OXYGEN 3000 · User Manaual · ENG... -
Page 101: General Set./Communications/Time&Date/Date
OXYGEN 3000 - User Manual · ENG 10.6.2.1 GENERAL SET./COMMUNICATIONS/TIME&DATE/DATE From the following section you can set all the parameters related with the date settings. This data parameters is very important for device LOGS. MENÙ MIXER |OXYGEN 3000 · User Manual · ENG... -
Page 102: General Set./Communications/Time&Date/Time
This parameter allows to set the TIME. It is a very important parameter to synchronize the clock on the HOME PAGE and it is important also for the device LOGS. MENÙ MIXER | OXYGEN 3000 · User Manaual · ENG... -
Page 103: General Set./Communications/Time&Date/Time Zone
OXYGEN 3000 - User Manual · ENG 10.6.2.3 GENERAL SET./COMMUNICATIONS/TIME&DATE/TIME ZONE From this parameter you can set for the TIME ZONE. You can set for the right Offset to the UTC time. MENÙ MIXER |OXYGEN 3000 · User Manual · ENG... -
Page 104: General Set./Communicat./Time&Date/Ntp Server
From the following parameter is possible to set the NTP Server IP Address to automatically synchronize the mixer clock. NTP Server in the world: · europe.pool.ntp.org (217.147.223.78) / · asia.pool.ntp.org (140.130.175.9) · oceania.pool.ntp.org (203.23.237.200) / · north-america.pool.ntp.org (66.250.45.2) · south-america.pool.ntp.org (146.164.53.65) / · africa.pool.ntp.org (196.25.1.9) MENÙ MIXER | OXYGEN 3000 · User Manaual · ENG... -
Page 105: General/Light & Display
OXYGEN 3000 - User Manual · ENG 10.7 GENERAL/LIGHT & DISPLAY From the following menu you can set the display light and the led brightness. MENÙ MIXER |OXYGEN 3000 · User Manual · ENG... -
Page 106: General/Light & Display/Led Meter
Here you can set the LED METER Dimmer. Every LED METER will follow this setting of the brightness. (From -3, to +3) 10.7.2 GENERAL/LIGHT & DISPLAY/DISPLAY Here you can set the DISPLAY brightness (LOW, MID, HIGH) MENÙ MIXER | OXYGEN 3000 · User Manaual · ENG... -
Page 107: Firmware
OXYGEN 3000 - User Manual · ENG 10.8 FIRMWARE Fom the following section you can read for the parameters related with the firmware version. MENÙ MIXER |OXYGEN 3000 · User Manual · ENG... -
Page 108: Firmware/Version
10.8.1 FIRMWARE/VERSION 10.8.2 FIRMWARE/REBOOT From this section you can reboot the device. The device rebooting is also useful to upgrade the firmware. To upgrade the mixer firmware read the next pparagraph. MENÙ MIXER | OXYGEN 3000 · User Manaual · ENG... -
Page 109: Mixer Firmware Upgrade
ATTENTION: DO NOT PROCEED WHEN THE MIXER IS ONAIR. Plug the USB key inside one of the following USB ports Turn on the console press the Menu button from the Home Page, MIXER FIRMWARE UPGRADE |OXYGEN 3000 · User Manual · ENG... - Page 110 OXYGEN 3000 User Manual · ENG by pressing the right knob select Firmware MIXER FIRMWARE UPGRADE | OXYGEN 3000 · User Manaual · ENG...
- Page 111 OXYGEN 3000 - User Manual · ENG Select Reboot by pressing the third knob while the system is restarting, keep the right knob pressed FOR A LONG TIME to enter the RECOVERY MODE MIXER FIRMWARE UPGRADE |OXYGEN 3000 · User Manual · ENG...
- Page 112 ATTENTION: You have to wait until the system will finish the Upgrade. The system requires more or less 5 minutes. At the end of the upgrade the System will reboot automatically. Oxygen 3000 firmware is upgraded. MIXER FIRMWARE UPGRADE | OXYGEN 3000 · User Manaual · ENG...
-
Page 113: Weee Directive – Informativa Raee
Deshágase de este producto devolviéndolo al punto de venta o a un punto de recogida municipal para su reciclaje. WEEE DIRECTIVE – INFORMATIVA RAEE |OXYGEN 3000 · User Manual · ENG... - Page 114 V súlade so smernicou 2012/19/UE o odpade z elekrických a elektronických zariadení (OEEZ) sa toto elektrické zariadenie nesmie odstranovat‘ ako netriedený komunálny odpad. Výrobok odstránte jeho vrátením v mieste nákupu alebo odovzdaním v miestnom zbernom zariadení na recyklovanie WEEE DIRECTIVE – INFORMATIVA RAEE | OXYGEN 3000 · User Manaual · ENG...
-
Page 115: Warranty
The manufacturer offers a one year warranty ex works. Do not open the equipment. Any breaking of the seals will result in forfeiture of the same. The manufacturer is not liable for damages of any kind arising from, or in connection with, the use of the wrong product. WARRANTY |OXYGEN 3000 · User Manual · ENG... -
Page 116: Declaration Of Conformity
DECLARATION OF CONFORMITY Manufacturer: AXEL TECHNOLOGY S.r.l. Company title: VIA C. DI SABBIUNO 6/F - 40011 ANZOLA EMILIA - BOLOGNA ITALY DECLARES UNDER ITS OWN RESPONSIBILITY THAT THE FOLLOWING EQUIPMENT MODEL: OXIGEN 3000D DESCRIPTION: Broadcast digital Console. IS COMPLIANT To the requirements and all characteristics enacted from Community Directive: 2014/30/UE “EMC”... -
Page 117: Dichiarazione Di Conformita
DICHIARAZIONE DI CONFORMITA’ Nome Fabbricante: AXEL TECHNOLOGY S.r.l. Ragione Sociale: VIA C. DI SABBIUNO 6/F - 40011 ANZOLA EMILIA - BOLOGNA ITALY DICHIARA SOTTO LA PROPRIA RESPONSABILITÀ CHE IL PRODOTTO MODELLO: OXIGEN 3000D DESCRIZIONE: Console Broadcast digitale. RISPETTA i requisiti essenziali e tutte le caratteristiche richiamate dalla Direttiva comunitaria: 2014/30/UE “EMC”...
Need help?
Do you have a question about the OXYGEN 3000 and is the answer not in the manual?
Questions and answers