
Related Manuals for Magnetek inteleSmart2


Summary of Contents for Magnetek inteleSmart2
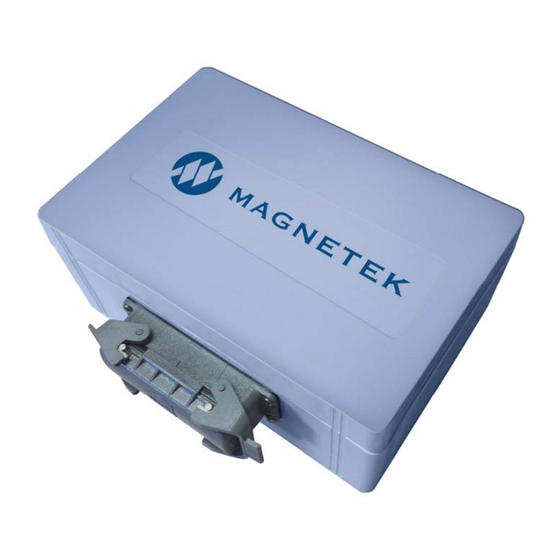
- Page 1 RECEIVER Engineered AC/DC Relay Receiver Part Number: 198-80102-0002 R1 June 2016 © 2016 Magnetek...
- Page 2 Your New Radio Receiver Thank you for your purchase of Magnetek’s inteleSmart2 Receiver Radio Remote Equipment Control. Magnetek has set a whole new standard in radio-remote performance, dependability, and value with this line of modular receivers. If your product ever needs modification or service, please contact one of our representatives at the following locations: U.S.
-
Page 3: Table Of Contents
PROGRAMMING WITH RCP ......................26 ACCESS CODES ........................26 CHANGING ACCESS CODES ....................26 CONNECTING THE INTELESMART2 TO A COMPUTER ............27 PROGRAMMING WITH RCP ..................... 27 7.4.1 inteleSmart2 Configuration Page ..................30 ... - Page 4 433 MHz Telemotive Legacy Channel Set .................. 40 900MHz CHANNEL SET ......................41 419MHz CHANNEL SET ......................42 2.4 GHz: FHSS ..........................43 TROUBLESHOOTING ........................44 TROUBLESHOOTING TABLE ....................45 ...
-
Page 5: Product Manual Safety Information
Magnetek Products to know, understand and follow all of these requirements. It is the responsibility of the owner of the Magnetek Products to make its employees aware of all of the above listed requirements and to make certain that all operators are properly trained. No one should use Magnetek Products prior to becoming familiar with and being trained in these requirements. - Page 6 The following information is intended to be used in conjunction with other rules or regulations already in existence. It is important to read all of the safety information contained in this section before installing or operating the Radio Control System. inteleSmart2 Instruction Manual June 2016 Page 6 of 49...
-
Page 7: Critical Installation Considerations
Anyone being trained to operate radio controlled equipment should possess as a minimum the following knowledge and skills before using the radio controlled equipment. The operator should: have knowledge of hazards pertaining to equipment operation have knowledge of safety rules for radio controlled equipment inteleSmart2 Instruction Manual June 2016 Page 7 of 49... - Page 8 PERFORMANCE OR SAFETY CONCERNS ARE OBSERVED, THE EQUIPMENT SHOULD IMMEDIATELY BE TAKEN OUT OF SERVICE AND BE REPORTED TO THE SUPERVISOR. DAMAGED AND INOPERABLE RADIO CONTROLLER EQUIPMENT SHOULD BE RETURNED TO MAGNETEK FOR EVALUATION AND REPAIR. FAILURE TO FOLLOW THIS WARNING COULD RESULT IN SERIOUS INJURY OR DEATH AND DAMAGE TO EQUIPMENT.
-
Page 9: Pre-Operation Test
operate a crane, hoist or lifting device when the device is not centered over the load inteleSmart2 Instruction Manual June 2016 Page 9 of 49... - Page 10 operate a crane, hoist or lifting device if the chain or wire rope is not seated properly in the sprockets, drum or sheave leave any load unattended while lifted inteleSmart2 Instruction Manual June 2016 Page 10 of 49...
-
Page 11: Intelesmart2 Installation
“dead” spot directly under the antenna. The antenna should be mounted at a 45 degree angle perpendicular to the operator. Always try to avoid power sources, motors, drives, brakes, etc., when installing the antenna. If necessary, Magnetek offers an external antenna kit. inteleSmart2 Instruction Manual... -
Page 12: Line Input Considerations
8. Remove excess metal screws, metal filings, and wire clippings from inside of unit. 9. Inspect to make sure no exposed wire has contact with any other wiring or terminals. 10. RC type suppressors are strongly recommended on all contactors. inteleSmart2 Instruction Manual June 2016 Page 12 of 49... -
Page 13: Receiver/Equipment Interface Considerations
Consult the factory for more information regarding your application. 7. The supply power to the inteleSmart2 system must have a master disconnect and should be fused. 8. It should not be necessary to set the Access Code or channel, as they are preset. If special field programming is needed, power the unit up on the bench and program the unit for any special configurations or other parameters (see Section 7 for details). -
Page 14: Mechanical Drawings
M5 (#10-24) hex nuts to mount. Lock washers should be used in front of hex nuts. 7,87" 200mm 7.09" 180mm .30" DIA. 7.5 mm Hole 4 places Figure 1: Housing Mounting NOTE: Figure 1 is not to scale. inteleSmart2 Instruction Manual June 2016 Page 14 of 49... - Page 15 Figure 2 shows the placement of the major components used within the receiver. Figure 2: Main Board Component Placement inteleSmart2 Instruction Manual June 2016 Page 15 of 49...
-
Page 16: Wiring
Make sure that the installation includes the proper alarms, horns, indicator lights, and their associated controls as required by local and governmental regulations. POWER The inteleSmart2 can be powered from 24/42/48VAC, 48/115/230VAC, or 6-36VDC. The unit needs to be configured based upon the type of input power that is being used. 4.2.1 DC Power To power the unit with 6-36VDC, the input power needs to be connected to J29. -
Page 17: Commons
WIRING DIAGRAMS The CPU board of the inteleSmart2 contains sixteen relays. Two of these relays (K15 and K16) are used for machine stop (MC) as described in Section 4.5, and two other relays (K13 and K14) are Form C “flip- flop”... - Page 18 J12‐6 J14‐5 J12‐5 J14‐9 J12‐4 J14‐10 J12‐3 J14‐8 J12‐2 J15‐1 J12‐1 J15‐2 J13‐1 J15‐3 Machine Stop #1 J13‐2 J13‐3 J15‐4 J13‐4 J15‐5 J13‐5 J15‐6 Machine Stop #2 J13‐6 Figure 3: CPU Board Relay Wiring Diagram inteleSmart2 Instruction Manual June 2016 Page 18 of 49...
-
Page 19: Wiring Isolation Options
ANALOG INPUT The inteleSmart2 contains one analog input that can be used to interface with an analog device such as a load cell. Figure 4 shows the terminals that the analog input needs to be wired to. The analog input can support a variety of different types of analog input, including 0-5VDC, 0-10VDC, 4-20mA, and 0-20mA. -
Page 20: Digital Inputs
DIGITAL INPUTS The inteleSmart2 contains five digital inputs that can be used to interface with a digital device, such as a limit switch. There is also a reference input for each of the digital inputs. Typically the reference input is the ground reference from the device that the digital signal is coming from. -
Page 21: Normal Operation
5. NORMAL OPERATION During operation LED indicators provide status information for the inteleSmart2. See Figure 2 for location of the following LEDs: +5 V Power LED (D26) – This LED will turn on when +5 volts of power is applied to the unit. - Page 22 HEX file programmed at the factory which does not utilize the RCP mapping (d shown). If the receiver is loading the default values from the factory HEX file, then an L is shown on the display. inteleSmart2 Instruction Manual June 2016...
-
Page 23: Intelesmart2 Expansion Module Types
6. INTELESMART2 EXPANSION MODULE TYPES The inteleSmart2 system consists of a CPU board that contains fourteen base relays, two machine stop relays, power supply, RF, one analog input, five digital inputs, IR, CAN, and USB. There is support to add up to two different expansion modules. - Page 24 Expansion Slot 1 Expansion Slot 2 Figure 5: Relay Expansion Module Wiring inteleSmart2 Instruction Manual June 2016 Page 24 of 49...
- Page 25 Figure 6: Relay Module Component Placement inteleSmart2 Instruction Manual June 2016 Page 25 of 49...
-
Page 26: Programming With Rcp
7. PROGRAMMING WITH RCP Using the optional RCP software makes programming of the inteleSmart2 easier and allows for settings to be saved for future reference. WARNING THE USE OF RCP (RADIO CONTROL PROGRAMMER) IS INTENDED FOR USE BY AUTHORIZED PERSONS ONLY. -
Page 27: Connecting The Intelesmart2 To A Computer
Magnetek RCP software makes the programming of the inteleSmart2 easier and allows the programmer to store all of the inteleSmart2 settings in files for later use or reference. The RCP software also allows the programmer to customize the inteleSmart2 display with language descriptions that are project or machine specific. - Page 28 A list of recent projects will appear under Open Project. Clicking on one of these will open that project. It is recommended that you create a folder in which to save all programming files. inteleSmart2 Instruction Manual June 2016 Page 28 of 49...
- Page 29 SETTING VALUES ON THE DEVICE WITH DEFAULT VALUES AND ANY SETTINGS CHANGED BY THE OPERATOR UPON SENDING THE PROGRAM TO THE DEVICE. ALL STORED VALUE SETTINGS WITHIN THE DEVICE WILL BE REPLACED, INCLUDING ANY PROJECT-SPECIFIC VALUES. MAGNETEK STRONGLY RECOMMENDS THAT THE “RECEIVE DEVICE DATA” CHECK BOX BE LEFT CHECKED.
-
Page 30: Intelesmart2 Configuration Page
RF antennas. This page may also be used by the user to synchronize the internal clock on the receiver with the connected PC or manually set the clock/date. NOTE: Changing any of these details will require a reboot of the inteleSmart2 after the new information has been sent to the device. - Page 31 The RF channel is user selectable through the pull down menu. This function is used to prevent interference with other radio devices. Refer to Section 8 for the user selectable channels for each of the frequency ranges. inteleSmart2 Instruction Manual June 2016 Page 31 of 49...
- Page 32 This property displays the status of expansion board #1. This is a read only field. Expansion 2 This property displays the status of expansion board #2. This is a read only field. inteleSmart2 Instruction Manual June 2016 Page 32 of 49...
- Page 33 Connections The middle section of the Unit Info page will display how the inteleSmart2 Receiver has been configured for this project, showing the connections for all the outputs and inputs. inteleSmart2 Instruction Manual June 2016 Page 33 of 49...
-
Page 34: Programming Page
This allows the user to modify the CAN Settings. Source Address This is the address that the inteleSmart2 will use as the source address when transmitting messages on the CAN-bus network. Baud Rate This pull-down menu allows the user to modify the communication speed of the CAN-bus network. The user selectable options are 50k, 125k, 250k and 500k. -
Page 35: Fdp Page
The FDP page is used to download firmware to the board via the bootloader. When connected during normal operation of the inteleSmart2, click on ResetDevice. This will initiate the bootloader mode, where the new software can be downloaded. Click on Open Hex File, put in the file you want to load, then click on Program Device. -
Page 36: Saving, Downloading, And Reading The Programs And Other Rcp Software Functions
Click on ResetDevice again to start the inteleSmart2 in normal operation mode. 7.4.4 Saving, Downloading, And Reading The Programs And Other RCP Software Functions CAUTION INTELESMART2 TO PROGRAM OR READ DATA FROM THE , THE RECEIVER MUST BE TURNED ON. - Page 37 To read a program file from the inteleSmart2: 1. Plug in the USB programming cable. 2. Click “Receive” and follow on-screen prompts. 3. RCP will confirm reception and automatically display current programming in the inteleSmart2 unit. Reading the RCP Software Version 1. Select “Help.”...
-
Page 38: Receiver Channel Configuration Settings
This portable transmitter with its antenna complies with FCC’s RF exposure limits for general population/uncontrolled exposure. inteleSmart2 Instruction Manual June 2016 Page 38 of 49... -
Page 39: 433Mhz Channel Set
433.800 MHz 433.850 MHz 433.900 MHz 433.950 MHz 434.000 MHz 434.050 MHz 434.100 MHz 434.150 MHz 434.200 MHz 434.250 MHz 434.300 MHz 434.350 MHz 434.400 MHz 434.450 MHz 434.500 MHz 434.550 MHz inteleSmart2 Instruction Manual June 2016 Page 39 of 49... -
Page 40: 433 Mhz Telemotive Legacy Channel Set
433.125 MHz AKA01 433.325 MHz AKA02 433.525 MHz AKA03 433.725 MHz AKA04 433.925 MHz AKA05 434.125 MHz AKA06 434.325 MHz AKA07 434.525 MHz AKA08 434.725 MHz AK38 432.4 MHz AK50 430.0 MHz inteleSmart2 Instruction Manual June 2016 Page 40 of 49... -
Page 41: 900Mhz Channel Set
908.926 MHz 909.125 MHz 910.123 MHz 910.673 MHz 911.027 MHz 911.222 MHz 912.020 MHz 914.261 MHz 914.428 MHz 914.626 MHz 914.817 MHz 915.818 MHz 917.378 MHz 923.228 MHz 927.025 MHz 927.324 MHz inteleSmart2 Instruction Manual June 2016 Page 41 of 49... -
Page 42: 419Mhz Channel Set
419.500 417.000 419.550 417.050 419.600 417.100 419.650 417.150 419.700 417.200 419.750 417.250 419.800 417.300 419.850 417.350 419.900 417.400 419.950 417.450 NOTE: Channels marked with * are approved for use in China inteleSmart2 Instruction Manual June 2016 Page 42 of 49... -
Page 43: Ghz: Fhss
This receiver is available with optional licensed frequencies per customer request. If utilizing a licensed frequency, please refer to the factory application documentation that was shipped with the receiver or contact the factory for licensed frequency details. inteleSmart2 Instruction Manual June 2016 Page 43 of 49... -
Page 44: Troubleshooting
PERFORMANCE OR SAFETY CONCERNS ARE OBSERVED, THE EQUIPMENT SHOULD IMMEDIATELY BE TAKEN OUT OF SERVICE AND BE REPORTED TO THE SUPERVISOR. DAMAGED AND INOPERABLE RADIO CONTROLLER EQUIPMENT SHOULD BE RETURNED TO MAGNETEK FOR EVALUATION AND REPAIR. FAILURE TO FOLLOW THIS WARNING COULD RESULT IN SERIOUS INJURY OR DEATH AND DAMAGE TO EQUIPMENT. -
Page 45: Troubleshooting Table
(the receiver and transmitter do receiver and transmitter have the same receiver seven not match access code. segment LED is displaying 6 after initialization, communication LED3 not lighting up) inteleSmart2 Instruction Manual June 2016 Page 45 of 49... - Page 46 Check to make sure receiver antenna is communication with missing or connection is attached and connected properly. receiver loose (communication LED3 Reference Section 3.3 in the inteleSmart2 Receiver antenna is not lighting up) manual regarding proper receiver antenna incorrectly mounted mounting Receiver is powered...
- Page 47 Tethered never connects Verify that jumper J2 has pins 1 and 2 No terminating resistor connected to have terminating resistor. Tethered command Bus contention Too many devices on the CAN bus. timeouts inteleSmart2 Instruction Manual June 2016 Page 47 of 49...
-
Page 48: Receiver Specifications
Typical Operating Range: 400 feet (125 meters). Relays are rated for 10 Amps 277VAC/30VDC, 1 HP 240VAC for maximum life and surge protection; they are protected with MOVs. ASSEMBLY AND REPLACEMENT PARTS inteleSmart2 Instruction Manual June 2016 Page 48 of 49... -
Page 49: Notes
10. NOTES inteleSmart2 Instruction Manual June 2016 Page 49 of 49...
Need help?
Do you have a question about the inteleSmart2 and is the answer not in the manual?
Questions and answers