
Related Manuals for Westinghouse QL065


Summary of Contents for Westinghouse QL065
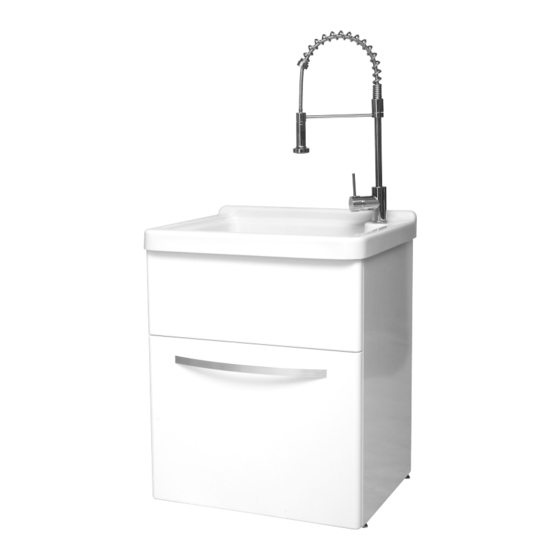
- Page 1 ALL-IN-ONE UTILITY SINK, STORAGE CABINET AND FAUCET TODO EN UNO LAVABO, ARMARIO Y GRIFO OWNER’S MANUAL QL065 MANUAL DEL USUARIO # 721001...
-
Page 2: Table Of Contents
. 4 . Protect the entire surface during installation . 5 . All holes drilled into the unit must be done from the finished surface side with extreme care and caulked very carefully to form a watertight barrier . QL065... -
Page 3: Warranty
Warranty ONE YEAR LIMITED WARRANTY A thorough inspection must be made before installation and any damage must be promptly reported . We will not be liable for failures or damage that could have been discovered or avoided by proper inspection and testing prior to installation . Conglom Kitchen &... -
Page 4: Pre-Installation
Pre-Installation TOOLS/MATERIALS REQUIRED (NOT SUPPLIED) Adjustable Needle nose Phillips wrench pliers screwdriver Utility knife Pipe wrench Sealant Hacksaw Carpenter’s level Allen wrench Safety gloves Safety goggles PARTS REQUIRED (NOT SUPPLIED) Tail Pipe P-Trap Supply Lines QL065... -
Page 5: Package Contents
Pre-Installation (continued) PACKAGE CONTENTS Part Description Quantity Cabinet Faucet Drawer Handle Utility sink Strainer assembly Strainer basket Leveling legs Caster (pre-installed on cabinet) Handle screws CONGLOMKB .COM Please contact cs@conglomkb.com or 1-877-333-0098 for further assistance . -
Page 6: Installation
(Fig . 2) . - Gently right the cabinet . - Using a carpenter’s level, turn the base of each leg until the cabinet is level . NOTE: The caster (H) is pre-installed. Fig . 2 QL065... -
Page 7: Installing The Handles
Installation (continued) INSTALLING THE HANDLE - Insert two handle screws (AA) into the pre-drilled holes . - Attach the handle (C) and tighten the handle screws (AA) . INSTALLING THE FAUCET - Unscrew the retaining ring (16) from the bottom of the body base (11), ensuring that the gasket (14) and washer (15) are removed with the retaining ring . -
Page 8: Installing The Strainer
4 . Hand tighten the locknut . Do not overtighten the locknut as it Rubber gasket may split or deform the strainer body . Friction washer 5 . The strainer basket can be placed in the strainer body once Locknut the utility sink is installed . QL065... -
Page 9: Mounting The Utility Sink
Installation (continued) MOUNTING THE UTILITY SINK 1 . Carefully place a bead of sealant all around the top of the cabinet (A) . 2 . Ease the utility sink (D) into the cabinet (A) . Ensure that it is placed evenly and is centered on the cabinet . Wipe off any excess sealant . -
Page 10: Placement
. Hand tighten the screw back into the handle body, then Faucet body tighten it with the Allen wrench . Do not over tighten . Tighten the body faucet lever back on . 6 . Slowly open the water feed to the faucet to test . QL065... -
Page 11: Drawer Removal
Maintenance (continued) DRAWER REMOVAL AND REPLACEMENT Right drawer slide To remove the drawer, pull it out to its fullest extension . On each of the drawer Black lever slides there is a black lever . Push the lever on the left slide up and the lever on the right slide down . -
Page 12: Service Parts
English and French, Monday - Friday from 8:30 am - 5:00 pm EST) . Identify the required part(s) and have the part number(s) ready . Part Description Code Quantity Sprayer head QHL115 Ceramic cartridge QHS121 Faucet lever QHL116 Strainer body QHS102 Rubber gasket and friction washer QHS103 Locknut QHS104 Strainer basket QHS101 Handle QHL151 Leveling legs QHL121 Handle screws QHL120 QL065... -
Page 13: Owner's Manual (Spanish)
Índice Índice . . . . . . . . . . . . . . . . . . . . . . . . . . . . . . . . . . . . . . . . . . . 13 Cómo instalar el grifo . -
Page 14: Garantía
Antes de llamar para presentar una reclamación, asegúrese de tener a la mano: - El número o la descripción del modelo . - El comprobante de compra . - Los detalles del defecto y/o el número de pieza. - Nombre(s) y domicilio(s) del propietario o el instalador . QL065... -
Page 15: Preinstalación
Preinstalación HERRAMIENTAS/MATERIALES NECESARIOS (NO INCLUIDOS) Destornillador de Pinzas de punta Llave inglesa estrella (Phillips) Navaja Llave grifa Sellador Nivel de Segueta Llave Allen carpintero Guantes de Gafas de seguridad seguridad PIEZAS NECESARIAS (NO INCLUIDAS) Tubo de Líneas de Sifón desagüe abastecimiento CONGLOMKB .COM Escriba a cs@conglomkb.com o llame al 1-877-333-0098 para obtener mayor asistencia . -
Page 16: Contenido Del Paquete
Preinstalación (continuación) CONTENIDO DEL PAQUETE Pieza Descripción Cantidad Armario Grifo Manija del cajón Lavabo Ensamblaje del escurridor Escurridor Patas niveladoras Ruedita (preinstalada en el armario) Tornillos de la manija QL065... -
Page 17: Instalación
Instalación CÓMO INSTALAR LAS PATAS NIVELADORAS Verifique cuidadosamente que el lavabo no tenga daños y que no ADVERTENCIA: Siempre use gafas y guantes de falten partes antes de la instalación . Si hay algún daño o faltan seguridad durante la instalación . partes, no prosiga con la instalación . -
Page 18: Cómo Instalar Las Manijas
(17 pulg .) (17 in .) - Conecte la palanca (13) a la base de la manija (12) . NOTA: Asegúrese de que las tuberías ascendentes flexibles que incluye el grifo no se tuerzan ni fuercen durante la instalación. QL065... -
Page 19: Cómo Instalar El Escurridor
Instalación (continuación) CÓMO INSTALAR EL ESCURRIDOR Sellador 1 . Aplique un anillo de masilla de plomería en la parte inferior de la brida del escurridor . 2 . Inserte el cuerpo del escurridor en el lavabo . 3 . Una la junta de caucho, la arandela de fricción y la contratuerca en el cuerpo del escurridor por debajo Basket Escurridor... -
Page 20: Cómo Ensamblar El Lavabo
Asegúrese de que no esté inclinado y de que se encuentre en el centro del mueble . Elimine el exceso de sellador . Use cinta adhesiva para mantener el lavabo en su lugar hasta que se seque el sellador . QL065... -
Page 21: Colocación
Instalación (continuación) COLOCACIÓN Mueva la unidad ya armada a su ubicación final. Si hace falta, nivélela ajustando las patas niveladoras. Asegúrese de que quede firmemente colocada. LÍNEAS DE ABASTECIMIENTO (NO INCLUIDAS) Las líneas de abastecimiento, que conectan el grifo al suministro de agua de la casa, no vienen incluidas en esta unidad . -
Page 22: Retiro Del Cajón
). Siempre talle las superficies en la dirección de la veta del acero. Al terminar, enjuague el lavabo con agua y séquelo con una toalla, para (p . ej ., Barkeeper’s Friend ® permitir que se forme en él una capa protectora exterior. El mismo procedimiento puede usarse para renovar todas las superficies del lavabo. QL065... -
Page 23: Piezas De Refacción
Refacciones Si le faltan piezas o necesita repuestos, comuníquese con nuestro equipo de servicio al cliente vía cs@conglomkb.com o llamando al teléfono 1-877-333-0098 (de lunes a viernes, de 8:30 a. m. a 5:00 p.m., hora del Este; servicio disponible en inglés y francés). Identifique la(s) pieza(s) requerida(s) y tenga listo el número correspondiente. - Page 24 Imported by / Importado por: St-Laurent, Québec, H4S 2C3 1-877-333-0098 | cs@conglomkb.com (service available in English and French, Monday - Friday from 8:30 am - 5:00 pm EST) (De lunes a viernes, de 8:30 a. m. a 5:00 p. m., hora del Este; servicio disponible en inglés y francés). www.conglomkb.com Made in China / Hecho en China...
Need help?
Do you have a question about the QL065 and is the answer not in the manual?
Questions and answers
Where can I get a replacement Ceramic Cartridge QHS121 for my Westinghouse all in one laundry tub.
You can find a replacement Ceramic Cartridge QHS121 by contacting the customer service team at cs@conglomkb.com or calling 1-877-333-0098. Service is available in English and French, Monday to Friday from 8:30 AM to 5:00 PM EST.
This answer is automatically generated