
Related Manuals for Westinghouse QL067


Summary of Contents for Westinghouse QL067
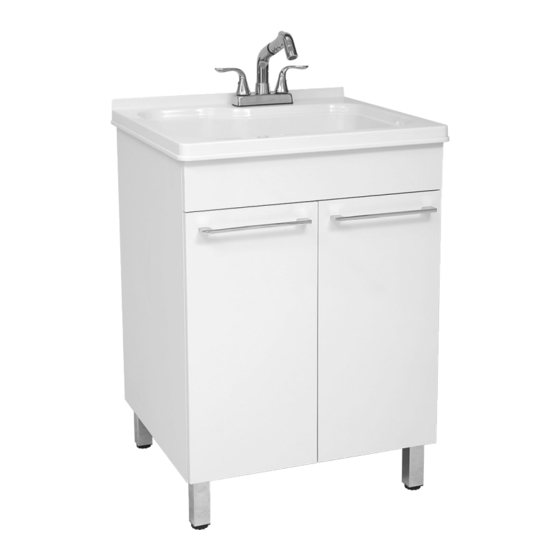
- Page 1 ALL-IN-ONE UTILITY SINK, STORAGE CABINET AND FAUCET TOUT-EN-UN ÉVIER UTILITAIRE, ARMOIRE DE RANGEMENT ET ROBINET OWNER’S MANUAL MANUEL DE L’UTILISATEUR # QL067 / 12345023...
-
Page 2: Table Of Contents
. 4 . Protect the entire surface during installation . 5 . All holes drilled into the unit must be done from the finished surface side with extreme care and caulked very carefully to form a watertight barrier . QL067... -
Page 3: Warranty
Warranty ONE YEAR LIMITED WARRANTY A thorough inspection must be made before installation and any damage must be promptly reported . We will not be liable for failures or damage that could have been discovered or avoided by proper inspection and testing prior to installation . Conglom Kitchen &... -
Page 4: Pre-Installation
Pre-Installation TOOLS/MATERIALS REQUIRED (NOT SUPPLIED) Adjustable Needle nose Phillips wrench pliers screwdriver Utility knife Pipe wrench Sealant Carpenter’s level Hacksaw Safety gloves Safety goggles Allen Key PARTS REQUIRED (NOT SUPPLIED) P-Trap Tail Pipe Supply Lines QL067... -
Page 5: Package Contents
Pre-Installation (continued) PACKAGE CONTENTS Part Description Quantity Door Handles Utility Sink Cabinet Leveling Legs Strainer Basket Strainer Assembly Faucet Assembly Allen Key Door Handle Screws Leveling Leg Screws CONGLOMKB .COM Please contact cs@conglomkb.com or 1-877-333-0098 for further assistance . -
Page 6: Installation
4 . The lateral adjustment screw adjusts the door left or right . 5 . The horizontal adjustment screw adjusts the door forward or backward . 6 . The vertical adjustment screw adjusts the door up or down . QL067... -
Page 7: Faucet And Sprayer Installation
Installation (continued) FAUCET AND SPRAYER INSTALLATION STRAINER INSTALLATION Before installing, carefully unpack the faucet and ensure no parts Apply a ring of sealant to the underside of the strainer flange. are missing . Insert the strainer body into the sink . Feed the hose through the neck of the faucet if not pre- assembled . -
Page 8: Mounting The Utility Sink
8 . Place the gasket (5) back in its original position . 9 . Screw on the cartridge cover (6) . Do not over tighten . 10 . Place the handle (9) over top and secure the screw (8) with an Allen key, replace the water indicator (7) . QL067... -
Page 9: Care And Cleaning
Care and Cleaning UTILITY SINK This utility sink is manufactured with premium ABS . With the proper care and maintenance it will provide you with many years of enjoyment . Do not Use common household cleaners (non- Do not allow your ABS surface to come into abrasive) or a mild liquid dish washing contact with products such as acetone (nail detergent . -
Page 10: Service Parts
1-877-333-0098, 8:30 am – 5 pm, EST, Monday–Friday . Identify the required part(s) and have the part number(s) ready . Part Description Code Quantity Door Handles QHL162 Strainer Basket QHS101 Strainer Assembly QHS149 Cabinet Feet QHL139 Hose QHL164 Sprayer QHL163 Cartridge QHS137 Cabinet Hinges QHL111 Door Handle Screws QHL104 Leveling Leg Screws QHL106 QL067... -
Page 11: Consignes De Sécurité
Table des matières OWNER’S MANUAL . . . . . . . . . . . . . . . . . . . . . . . . . . . . . . . . . . 2 Installation du robinet et de la douchette . -
Page 12: Garantie
Avant d’appeler, veuillez-vous assurer d’avoir en main : - Le numéro de modèle ou une description; - La preuve d’achat; - Les détails concernant le défaut et/ou le numéro de la pièce de rechange; - Le nom et l’adresse du propriétaire et/ou de l’installateur . QL067... -
Page 13: Préinstallation
Préinstallation OUTILS / MATÉRIAUX REQUIS (NON INCLUS) Tournevis Clé Pinces Phillips Couteau tout Clé à tuyau Mastic usage Gants de Niveau Scie à métaux sécurité Lunettes de Clé Allen sécurité PIÈCES REQUISES (NON INCLUSES) Tuyaux Siphon-P Tuyaux de vidange d’alimentation CONGLOMKB .COM Veuillez contacter cs@conglomkb.com ou 1-877-333-0098 pour toute assistance supplémentaire . -
Page 14: Contenu De L'emballage
Préinstallation (suite) CONTENU DE L’EMBALLAGE Pièce Description Quantité Poignées de porte Évier Armoire Pattes de nivellement Panier de crépine Assemblage de la crépine Assemblage du robinet Clé Allen Vis des poignées de porte Vis des pattes de nivellement QL067... -
Page 15: Installation
Installation INSTALLATION DES PATTES DE NIVELLEMENT INSTALLATION DES POIGNÉES DE PORTE Vérifier soigneusement que l’unité ne comporte aucun 1 . Insérer les vis de poignées de porte (AA) dans les trous dommage ou pièces manquantes. Si vous constatez des prépercés sur la porte . dommages ou des pièces manquantes, veuillez communiquer 2 . -
Page 16: Installation Du Robinet Et De La Douchette
Douille de robinet Sortie du robinet Plaque de la base Joint en Évier caoutchouc Panier Écrou de douille de robinet Extrémité Poids du boyau Corps de la crépine Tuyaux d’alimentation Joint en caoutchouc en eau Rondelle de friction Contre-écrou QL067... -
Page 17: Installation De L'évier
Installation (suite) INSTALLATION DE L’ÉVIER 1 . Appliquer un joint de mastic sur le pourtour de la partie supérieure de l’armoire . 2 . Introduire l’évier sur l’armoire en vous assurant que celui- ci soit de niveau et centré sur le meuble. Essuyer l’excès de mastic . -
Page 18: Évier Utilitaire
à solvant à laque, la gazoline, l’huile de pin, etc. friction. Après avoir enlevé la tache, rincer immédiatement avec de l’eau . Éviter d’utiliser une lame de rasoir ou tout autre instrument coupant qui pourrait égratigner la surface . QL067... -
Page 19: Pièces De Rechange
Pièces de rechange Si des pièces sont manquantes ou vous avez besoin de pièces de rechange, veuillez nous contacter au cs@conglomkb.com ou 1-877-333-0098 (de lundi au vendredi, 8h30 à 17h, H.N.E.). Veuillez identifier les pièces nécessaires et ayez les codes à portée de la main. Pièce Description Code Quantité... - Page 20 Made in China / Fabriqué en Chine and WESTINGHOUSE are trademarks of Westinghouse Electric Corporation. Used under license by Conglom Inc. All Rights Reserved. et WESTINGHOUSE sont des marques appartenant à Westinghouse Electric Corporation. Utilisées par Conglom Inc. Tous droits réservés.
Need help?
Do you have a question about the QL067 and is the answer not in the manual?
Questions and answers